Tuesday, 11:47 AM. The lunchbox sat open on the counter, and I just stared at it. The usual drill—sandwich, chips, fruit—felt like a chore I couldn’t muster the energy for. My youngest had been asking for those store-bought lunch kits again, the ones with the little round crackers and the processed meat that barely qualifies as food. I kept saying no, but honestly? I was running out of better ideas. Then I remembered the leftover roast turkey from Sunday dinner, the block of sharp cheddar in the cheese drawer, and a box of whole wheat crackers I’d bought on a whim. I grabbed a silicone muffin cup and started layering. Turkey slice, folded. Cheese slice, cut into a square. Crackers, nestled in the corner. A handful of grapes on the side. It took maybe four minutes. When I handed it over at lunchtime, my kid looked at me like I’d just pulled off a magic trick. And that’s how these Homemade Lunchable Plates with Turkey and Cheddar became our new normal—not because they’re fancy, but because they’re the kind of simple that actually works.
This isn’t about being a Pinterest-perfect parent. It’s about finding a way to pack a lunch that feels like a treat without the plastic wrapping and the weird ingredients. These plates are customizable, budget-friendly, and honestly, they taste better than anything that comes out of a box. The turkey is real turkey. The cheese is real cheese. And you get to decide exactly what goes in there. No preservatives, no hidden sugars, no questions. Just a lunch that makes everyone happy—including the person packing it.
Why You’ll Love This Recipe
Look, I’ve tested a lot of lunchbox solutions over the years. Some were too complicated (homemade sushi rolls, I’m looking at you). Some were too sad (plain crackers and a string cheese, we’ve all been there). These Homemade Lunchable Plates with Turkey and Cheddar hit that sweet spot between effort and payoff. Here’s why they’ve earned a permanent spot in our weekly rotation:
- Quick & Easy: These come together in under 5 minutes. No cooking, no heating, no fuss. Just assembly.
- Simple Ingredients: You probably already have everything you need in your fridge and pantry right now.
- Perfect for Lunchboxes: Great for school, work, picnics, road trips, or even a lazy lunch at home.
- Crowd-Pleaser: Kids love the DIY feel, and adults love the grown-up version with fancier cheese and crackers.
- Unbelievably Customizable: This is a template, not a rigid recipe. Swap, add, remove—make it yours.
What makes this different from the store-bought version? Everything. The turkey is actual roasted turkey (or deli-sliced, your call), not that rubbery, pressed stuff. The cheddar is sharp and real, not some orange-colored cheese product. And you control the portions, the sides, and the quality. It’s lunchbox liberation, my friend.
There’s something about opening a lunchbox and seeing those little compartments. It feels like a gift, not just a meal. And when you make it yourself, it comes with a side of peace of mind. No mystery ingredients. No guilt. Just good food, packed with love.
What Ingredients You Will Need
This recipe uses simple, everyday ingredients to create a lunch that feels special without any fuss. The beauty of these Homemade Lunchable Plates with Turkey and Cheddar is that you can mix and match based on what you have on hand. Here’s what you’ll need for the classic version:
- Turkey: 4-6 slices of roasted turkey breast (deli-sliced or leftover homemade). I prefer oven-roasted turkey from the deli counter for the best flavor. Look for low-sodium options if you’re watching salt intake. (Pro tip: leftover Thanksgiving turkey works beautifully here.)
- Cheddar Cheese: 2-3 ounces of sharp cheddar cheese, cut into small cubes or thin slices. I recommend a block of Cabot or Tillamook sharp cheddar for that perfect tangy flavor. Pre-shredded cheese won’t work as well—it dries out too fast.
- Crackers: About 10-12 whole wheat crackers or your favorite variety. I love using Ritz-style crackers for that buttery crunch, but whole grain crackers add more fiber. Gluten-free crackers work perfectly too.
- Fruit: A handful of red grapes, apple slices, or berries. Grapes are my go-to because they don’t brown and add a pop of sweetness. (Toss apple slices in a little lemon juice to prevent browning if you’re prepping ahead.)
- Crunchy Side (optional): A small handful of baby carrots, cucumber rounds, or snap peas. This adds texture and makes the plate feel more complete.
- Treat (optional): A couple of dark chocolate chips, a small cookie, or a few pretzels. Just enough to make it feel like a lunchable.
For the dipping situation (because let’s face it, kids love to dip):
- Dipping Sauce (optional): A tablespoon of honey mustard, ranch dressing, or hummus. I’ve found that a tiny container of honey mustard takes these plates to the next level.
Substitution Guidance: Use smoked turkey or ham instead of roasted turkey. Swap cheddar for Colby Jack, provolone, or even brie for a fancier version. For a dairy-free option, use your favorite plant-based cheese slices. Almond flour crackers work for a lower-carb option. The template is flexible—that’s the whole point.
Equipment Needed
You don’t need much to pull these together. Here’s the short list:
- Lunchbox or Bento Box: A divided container with compartments works best. I love the PlanetBox or a simple Bentgo box, but a regular lunchbox with silicone muffin cups works just fine.
- Silicone Muffin Cups: These are lifesavers for keeping wet and dry ingredients separate. They come in fun colors and are reusable.
- Small Cookie Cutters: Totally optional, but using a star or dinosaur-shaped cutter on the cheese slices makes it extra fun for little ones.
- Knife and Cutting Board: For slicing the cheese and any fruit or veggies.
- Small Dipping Containers: Little leak-proof containers for sauces. I’ve collected a few from takeout orders that work perfectly.
Honestly, you can get by with just a knife, a cutting board, and a lunchbox. I’ve packed these in a plain old Tupperware with the ingredients separated by a piece of parchment paper. It’s not fancy, but it works.
Preparation Method
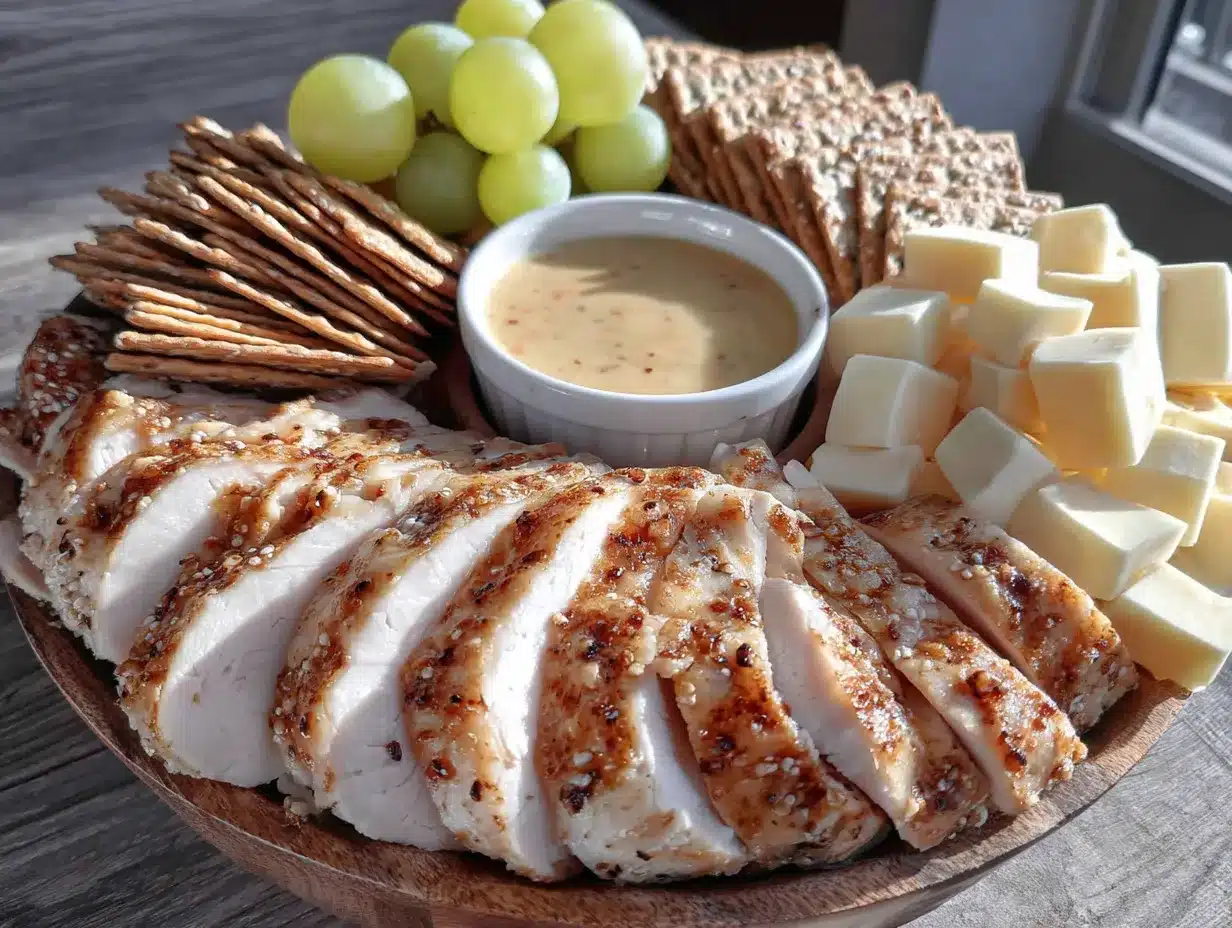
These Homemade Lunchable Plates with Turkey and Cheddar come together in minutes. Here’s how I do it:
- Prep the turkey: If you’re using deli turkey, lay the slices flat on the cutting board. Roll each slice into a tight log, then slice it into bite-sized pinwheels. This makes them easy for little fingers to pick up and looks way more appealing than a flat slice. If you’re using leftover roasted turkey, just tear it into bite-sized pieces.
- Cut the cheese: Slice the cheddar into small cubes (about ½ inch each) or use a small cookie cutter to make fun shapes. I like to cut mine into squares because it reminds me of the store-bought version—but better. You’ll want about 8-10 cubes per serving.
- Prep the fruit and veggies: Wash and dry the grapes thoroughly. If you’re using apple slices, toss them in a little lemon juice to keep them from browning. Slice cucumber rounds or baby carrots into sticks. Pat everything dry with a paper towel—excess moisture will make the crackers soggy.
- Assemble the plate: Arrange everything in your lunchbox or bento box. I like to put the crackers in one compartment, the turkey pinwheels in another, the cheese cubes in a third, and the fruit and veggies in the remaining spaces. Keep the crackers away from anything wet—this is where silicone cups come in handy.
- Add the dip (optional): Spoon a tablespoon of honey mustard, ranch, or hummus into a small leak-proof container. Nestle it into the lunchbox wherever it fits.
- Finish with a treat: If you’re adding a small treat—a few dark chocolate chips, a mini cookie, or a handful of pretzels—tuck it into a corner. It’s the little surprise that makes opening the lunchbox exciting.
- Chill until ready: If you’re packing these the night before, store the assembled lunchbox in the refrigerator. The crackers might soften slightly, so I sometimes pack them separately and add them in the morning. But honestly, even when I’ve forgotten, they’re still perfectly fine.
Time estimate: Total assembly time is about 3-5 minutes per plate. If you’re making multiple, line up all the containers and do one ingredient at a time. I can knock out four of these in under ten minutes now.
Cooking Tips & Techniques
After packing dozens of these Homemade Lunchable Plates with Turkey and Cheddar, I’ve learned a few things the hard way. Here’s what I wish I’d known from the start:
Keep things dry. Wet ingredients are the enemy of crunchy crackers. Always pat your fruit and veggies dry before packing. If you’re adding something like sliced tomatoes or cucumber, put them in a separate container with a paper towel to absorb excess moisture. I learned this after opening a lunchbox full of soggy crackers. Not cute.
Roll the turkey tight. Loose turkey slices fall apart and look messy. Roll them as tightly as you can before slicing into pinwheels. If the slices are particularly thin, double them up before rolling. The pinwheels hold their shape better and are easier for little hands to grab.
Use a variety of textures. The best lunchables have a mix of soft (cheese, fruit), crunchy (crackers, veggies), and chewy (turkey). This keeps things interesting and makes the meal feel more satisfying. I once packed just crackers, cheese, and turkey, and my kid complained it was boring. The addition of grapes and snap peas made all the difference.
Prevent browning on apples. If you’re adding apple slices, toss them in a mixture of one tablespoon lemon juice and one cup of water. Let them sit for two minutes, then drain and pat dry. They’ll stay fresh and white for hours. A friend swears by using Sprite instead of lemon water, but that feels like cheating.
Make it a game. For picky eaters, I sometimes arrange the ingredients in a pattern or use cookie cutters to make shapes. A star-shaped cheese cube or a turkey pinwheel arranged like a flower can turn lunch into play. It sounds silly, but it works.
Batch prep ingredients. On Sunday evenings, I slice all the cheese for the week, wash and dry the grapes, and portion out the crackers into little bags. Then in the morning, assembly takes about 90 seconds. This is the kind of meal prep that actually makes a difference.
Variations & Adaptations
The beauty of this recipe is that it’s more of a formula than a fixed list. Here are some of my favorite variations:
- The Italian Job: Swap turkey for salami or prosciutto, use mozzarella pearls instead of cheddar, and add a few Kalamata olives and cherry tomatoes. Serve with rosemary crackers. This is my go-to for adult lunchboxes.
- The Veggie Lover: Replace turkey with hummus or a hard-boiled egg (sliced). Use your favorite veggie cheese or skip it entirely. Load up on cucumber rounds, bell pepper strips, and snap peas. Serve with whole grain crackers.
- The Breakfast Version: Use mini pancakes or waffles instead of crackers, add turkey sausage links (cooked and cooled), and include cheese cubes. Add a small container of maple syrup for dipping. This is a huge hit for breakfast-for-lunch days.
- The Low-Carb Option: Skip the crackers entirely and use cucumber rounds or bell pepper slices as the base. Load up on turkey, cheese, and veggies. Add a side of guacamole or ranch for dipping.
- The Sweet & Savory: Add a few dried cranberries or raisins alongside the turkey and cheddar. The sweet-tangy pop against the salty cheese is unexpectedly perfect. I discovered this combo by accident when I ran out of grapes, and now it’s a staple.
For dietary restrictions: Use gluten-free crackers for celiac or gluten sensitivity. Swap turkey for plant-based deli slices for a vegetarian version. Use dairy-free cheese for lactose intolerance. The template works with almost any filling—get creative.
Serving & Storage Suggestions
These Homemade Lunchable Plates with Turkey and Cheddar are best served cold or at room temperature. I typically pack them in the morning and let them sit in the fridge until lunchtime. If you’re packing for a picnic or road trip, use an insulated lunchbox with an ice pack to keep everything fresh.
Storage: Assemble the plates up to 24 hours in advance. Store them covered in the refrigerator. If you’re making them for the week, I recommend prepping all the ingredients separately and assembling each morning. The crackers will stay crunchier that way. I’ve found that fully assembled plates are fine for about 12 hours before the crackers start to soften.
Reheating: These are meant to be eaten cold or at room temperature. No reheating needed. If you’re using leftover roasted turkey, make sure it’s fully cooled before assembling.
Flavor development: Honestly, these taste best fresh. The cheese and turkey are at their peak right after assembly. That said, the flavors do meld together slightly after a few hours in the fridge, and some people prefer that. My husband says the turkey absorbs a little bit of the cheese flavor overnight, which he loves. I’m team fresh, but to each their own.
Presentation tip: For a fun lunch, arrange the ingredients in a rainbow pattern—red grapes, orange cheddar, yellow crackers, green cucumber, purple grapes. It looks gorgeous and somehow makes everything taste better. Kids eat with their eyes first, right?
Nutritional Information & Benefits
Here’s an approximate nutritional breakdown for one serving (based on 4 oz turkey, 2 oz cheddar, 10 crackers, and a handful of grapes):
- Calories: ~380-420
- Protein: 28g
- Fat: 18g
- Carbohydrates: 28g
- Fiber: 3g
- Sugar: 12g (mostly from grapes)
Health benefits: Turkey is a lean source of protein that keeps you full and focused. Cheddar provides calcium for strong bones and teeth. Whole wheat crackers add fiber for digestive health. Grapes offer antioxidants and hydration. This is a balanced meal that hits all the major food groups without any of the preservatives found in store-bought versions.
Dietary considerations: This recipe can easily be made gluten-free (use gluten-free crackers), dairy-free (swap cheese for plant-based), or low-carb (skip the crackers and add extra veggies). It’s naturally nut-free if you avoid cross-contamination, making it a great option for school lunchboxes with allergy restrictions.
Personal wellness perspective: I love that this recipe puts me in control. I know exactly what my family is eating—no hidden sugars, no artificial colors, no weird preservatives. It’s real food, packed in a way that feels like a treat. And that peace of mind? That’s worth more than any convenience.
Conclusion
These Homemade Lunchable Plates with Turkey and Cheddar have genuinely changed how I think about packed lunches. They’re proof that you don’t need to spend a lot of time or money to make something that feels special. A few simple ingredients, a little bit of thought, and you’ve got a lunch that beats anything from a box. Honestly, I don’t think I’ll ever buy a store-bought lunchable again. Why would I, when this is so much better?
I’d love to hear how you customize yours. Do you add pickles? Swap the turkey for ham? Use a different cheese? Drop a comment below and tell me your favorite combination. And if you make these for your family, tag me on social media—I love seeing your creations. Here’s to lunches that are simple, delicious, and made with love.
Frequently Asked Questions
Can I make these Homemade Lunchable Plates with Turkey and Cheddar the night before?
Yes, you can assemble them up to 24 hours in advance. Store them covered in the refrigerator. For best results, keep the crackers separate and add them in the morning to prevent sogginess. I’ve also prepped all the ingredients individually and done a quick assembly each morning—that’s my preferred method for the week.
What are the best crackers to use for these lunchable plates?
I recommend sturdy crackers that won’t break easily. Ritz-style butter crackers, whole wheat crackers, or even pretzel thins work great. For a gluten-free option, try rice crackers or almond flour crackers. Avoid thin, delicate crackers that crumble at the slightest touch—they won’t hold up well in a lunchbox.
How do I keep the cheese from getting sweaty in the lunchbox?
Pat the cheese cubes dry with a paper towel before packing. If you’re using pre-sliced cheese, it tends to release less moisture than freshly cut blocks. You can also store the cheese in a separate compartment or a small silicone cup to keep it away from other ingredients. A dry paper towel at the bottom of the cheese compartment helps absorb any excess moisture.
Can I use other meats besides turkey?
Absolutely! Ham, roast beef, salami, prosciutto, or even leftover grilled chicken all work beautifully. Just make sure the meat is fully cooked and cooled before assembling. For a vegetarian option, use hummus, hard-boiled eggs, or plant-based deli slices. The template is completely flexible.
How long will these stay fresh in a lunchbox without refrigeration?
If you’re using an insulated lunchbox with an ice pack, these will stay fresh for about 4-5 hours. Without an ice pack, I’d recommend consuming within 2 hours, especially if you’re including cheese and meat. For picnics or road trips, pack everything in a cooler until you’re ready to eat. Safety first—nobody wants a sad, warm lunch.
Pin This Recipe!
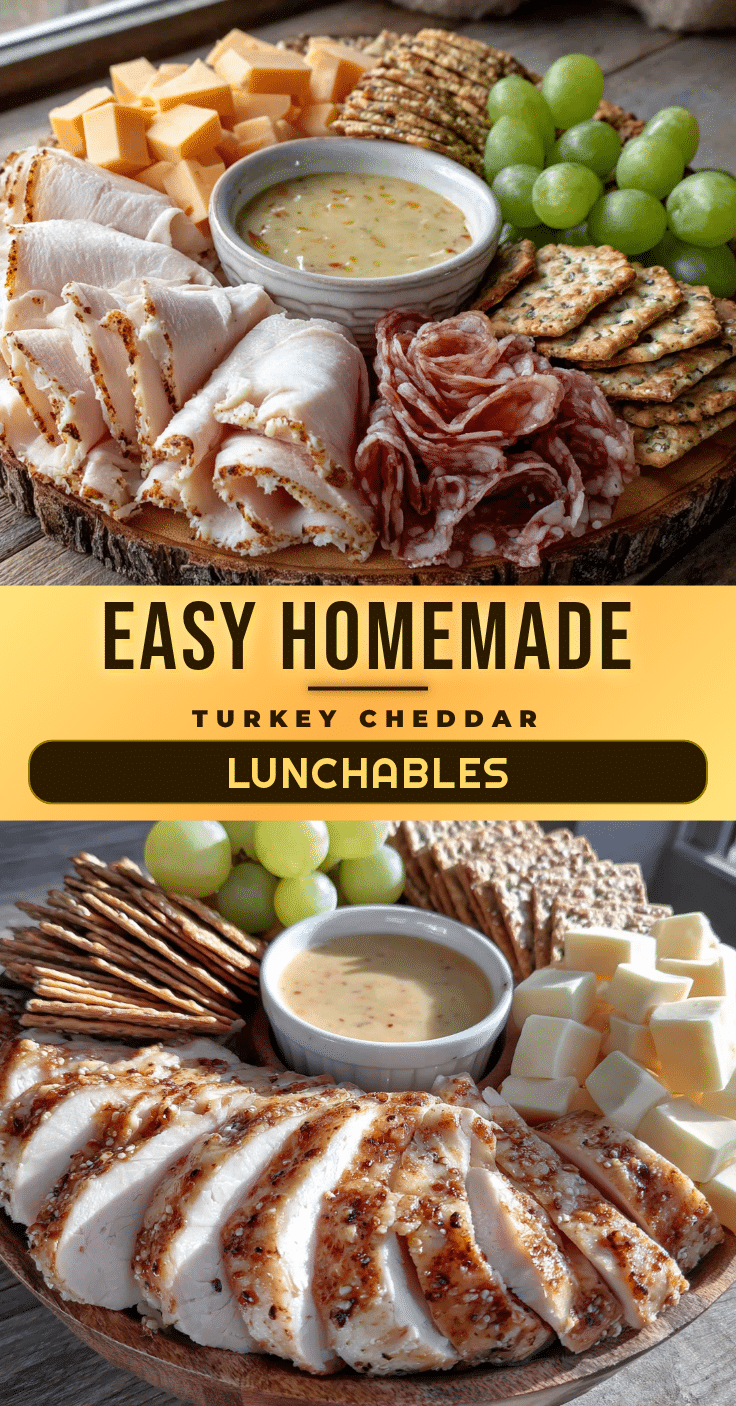
Best Homemade Lunchable Turkey & Cheddar Plates

These Homemade Lunchable Plates with Turkey and Cheddar are a quick, customizable, and budget-friendly alternative to store-bought lunch kits. Made with real turkey, sharp cheddar, and your favorite crackers, they come together in under 5 minutes and are perfect for school, work, or picnics.
- Prep Time: 5 minutes
- Cook Time: 0 minutes
- Total Time: 5 minutes
- Yield: 1 serving 1x
- Category: Lunch
- Cuisine: American
Ingredients
- 4–6 slices roasted turkey breast (deli-sliced or leftover homemade)
- 2–3 ounces sharp cheddar cheese, cut into small cubes or thin slices
- 10–12 whole wheat crackers or your favorite variety
- A handful of red grapes, apple slices, or berries
- A small handful of baby carrots, cucumber rounds, or snap peas (optional)
- A couple of dark chocolate chips, a small cookie, or a few pretzels (optional)
- 1 tablespoon honey mustard, ranch dressing, or hummus (optional)
Instructions
- Prep the turkey: If using deli turkey, lay slices flat on a cutting board. Roll each slice into a tight log, then slice into bite-sized pinwheels. If using leftover roasted turkey, tear into bite-sized pieces.
- Cut the cheese: Slice cheddar into small cubes (about ½ inch each) or use a small cookie cutter to make fun shapes. Aim for 8-10 cubes per serving.
- Prep the fruit and veggies: Wash and dry grapes thoroughly. If using apple slices, toss in a little lemon juice to prevent browning. Slice cucumber rounds or baby carrots into sticks. Pat everything dry with a paper towel.
- Assemble the plate: Arrange everything in a lunchbox or bento box. Place crackers in one compartment, turkey pinwheels in another, cheese cubes in a third, and fruit/veggies in remaining spaces. Keep crackers away from anything wet using silicone cups.
- Add the dip (optional): Spoon a tablespoon of honey mustard, ranch, or hummus into a small leak-proof container and nestle it into the lunchbox.
- Finish with a treat (optional): Tuck a few dark chocolate chips, a mini cookie, or a handful of pretzels into a corner.
- Chill until ready: If packing the night before, store the assembled lunchbox in the refrigerator. For crunchier crackers, pack them separately and add in the morning.
Notes
Keep ingredients dry to prevent soggy crackers. Roll turkey tightly for better pinwheels. Batch prep ingredients on Sunday for quick assembly during the week. For picky eaters, use cookie cutters to make fun shapes. The recipe is highly customizable—swap turkey for ham or salami, use different cheeses, or add various fruits and veggies.
Nutrition
- Serving Size: 1 plate
- Calories: 400
- Sugar: 12
- Sodium: 800
- Fat: 18
- Saturated Fat: 9
- Carbohydrates: 28
- Fiber: 3
- Protein: 28
Keywords: homemade lunchable, turkey and cheddar lunch, bento box lunch, easy lunch ideas, kid-friendly lunch, no-cook lunch, school lunch, picnic lunch


