I had refused to make Halloween treats for years. The whole thing felt like a sugar bomb wrapped in food coloring, honestly, and I couldn’t get behind it. Then last October, my friend Marco showed up at my door with a picture on his phone. It was a photo of his six-year-old daughter, Lily, holding a meringue ghost on a stick, grinning with white crumbs all over her chin. “She made these at a class,” he said, “and now she won’t stop asking for them.” I looked at that picture, at the pure joy on her face, and felt my resolve crack. That weekend, I found myself in my kitchen, whisk in hand, attempting to prove that a Halloween treat could be both adorable and something you wouldn’t feel terrible about serving.
Let me tell you, I was skeptical. Meringue is fussy, right? It’s all about humidity and egg whites and that perfect stiff peak. But these Wholesome Ghost Meringue Cookie Pops are different. They are light, airy, and naturally sweetened with just a touch of maple syrup. I mean, we are talking about a treat that feels like a cloud and looks like a tiny ghost. Maybe you’ve been there, standing in the grocery store aisle, staring at bags of neon-colored candy corn and feeling a little defeated. This recipe is your way out. It is the Halloween hack you didn’t know you needed—a wholesome, fun, and genuinely delicious project that makes everyone smile.
That first batch I made with Lily’s picture in my mind was a little lopsided, if I’m being honest. I piped the ghosts too fast, and they all looked like they were melting. But the taste? That was a revelation. The light crunch gives way to a melt-in-your-mouth sweetness that isn’t cloying. I knew right then this recipe was a keeper. It is the one I pull out every year now, and it never fails to turn a spooky afternoon into a sweet, simple memory.
Why You’ll Love This Recipe
These Wholesome Ghost Meringue Cookie Pops are more than just a cute face. They are a smart, satisfying treat that checks all the boxes for a health-minded Halloween. I have tested this recipe more times than I can count, tweaking the temperature and the sweetener until it was absolutely perfect. Here is why you will fall in love with them:
- Naturally Sweet & Light: We use a touch of maple syrup instead of a mountain of refined sugar. Each pop is a guilt-free indulgence that won’t send anyone on a sugar crash.
- Simple, Whole Ingredients: You only need egg whites, maple syrup, vanilla, and a pinch of cream of tartar. No weird additives or artificial colors.
- Fun for the Whole Family: This is a perfect kitchen project for kids. Piping the ghosts and adding the chocolate chip eyes is an activity, not just a recipe.
- Perfect for Halloween Parties: They look incredible on a dessert table, and because they are on sticks, they are mess-free and easy for little hands to grab.
- Gluten-Free & Low-Fat: These are naturally gluten-free and have almost no fat. A win for anyone with dietary restrictions.
What makes these ghost pops different from every other meringue recipe out there? It is the texture. By using a lower oven temperature and a longer drying time, we get a meringue that is crisp on the outside and chewy on the inside, not just dry and airy. It is the kind of treat that makes you close your eyes after the first bite. Honestly, it is comfort food for the Halloween season—healthier, faster, and with the same soul-soothing satisfaction as a store-bought candy bar, but without the regret.
What Ingredients You Will Need
This recipe uses a short list of simple, wholesome ingredients to deliver that perfect ghostly pop. You likely have most of these in your pantry right now. Here is what you need and why each one matters:
- 3 large egg whites (at room temperature): The foundation of the meringue. Room temperature egg whites whip up to a greater volume than cold ones, giving you a lighter, fluffier ghost. Separate them carefully—any trace of yolk will prevent them from whipping properly.
- 1/4 cup pure maple syrup: This is our natural sweetener. It adds a subtle, warm sweetness that pairs beautifully with vanilla. I prefer Grade A dark amber for a richer flavor, but any pure maple syrup works. Do not use pancake syrup, as it has added corn syrup and artificial flavors.
- 1/2 teaspoon vanilla extract: A must for flavor. It rounds out the sweetness and adds a classic bakery note. Use pure vanilla extract, not imitation, for the best taste.
- 1/4 teaspoon cream of tartar: This is the secret weapon. It stabilizes the egg whites, helping them hold their shape and preventing them from deflating. You can substitute with 1/2 teaspoon of lemon juice or white vinegar in a pinch.
- Pinch of sea salt: Just a tiny pinch enhances all the flavors and balances the sweetness. Do not skip it.
- Mini chocolate chips (for the eyes): You will need about 24 chips for the ghost faces. I like to use dark chocolate chips for a slightly healthier option, but milk chocolate works beautifully too. Place them gently on the piped ghosts before baking.
- 6-8 lollipop sticks: These turn the meringues into pops. You can find them at any craft store or online. Make sure they are food-safe.
Ingredient Selection Tip: For the fluffiest meringue, use fresh egg whites. Older eggs are actually better for hard-boiling, but fresh whites whip up more reliably. If you are unsure about your eggs, you can use pasteurized egg whites from a carton, but the volume will be slightly less. I recommend using fresh eggs from a local farm if you can—the flavor is noticeably cleaner.
Equipment Needed
You do not need a fancy kitchen to make these ghost pops. A few basic tools will get the job done perfectly. Here is what you will need:
- Electric hand mixer or stand mixer: Whipping egg whites by hand is possible, but it will take a very long time and your arm will get tired. A mixer makes the process quick and ensures you get stiff peaks. I prefer a stand mixer with the whisk attachment for hands-free convenience.
- Large mixing bowl: Glass, stainless steel, or ceramic works best. Avoid plastic bowls, as they can hold onto grease residue, which will prevent your egg whites from whipping. Make sure the bowl is completely clean and dry.
- Piping bag with a round tip: A piping bag gives you control over the shape. I use a Wilton #12 round tip, but you can also just snip the corner off a zip-top bag. If you do not have a piping bag, a sturdy plastic bag works in a pinch.
- Baking sheet lined with parchment paper: Parchment paper is non-stick and makes cleanup a breeze. Do not use wax paper, as it will melt in the oven.
- Small offset spatula: This is helpful for smoothing the meringue into the piping bag, but a spoon works just fine.
- Lollipop sticks: As mentioned, these are essential for the pop factor. You can find them at most craft stores or online.
Budget-Friendly Tip: If you do not own a piping bag, you can use a sturdy zip-top bag. Fill it with the meringue, seal it, and snip a small corner off. It is not as precise, but it works. I have done it many times when my piping bag was in the dishwasher!
Preparation Method
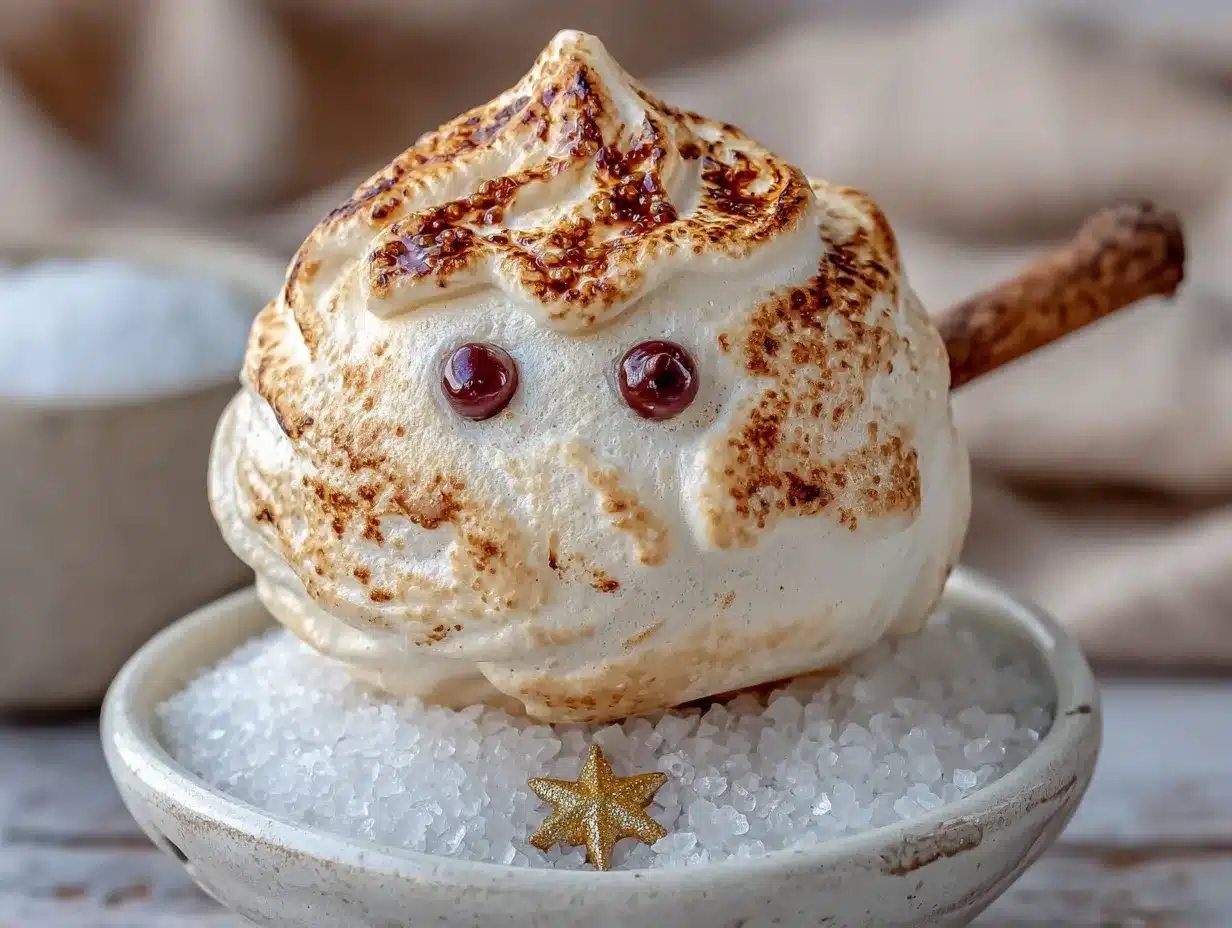
Follow these steps carefully, and you will have perfect ghost pops every time. Take your time with the whipping—it is the most important step.
- Preheat and Prep: Preheat your oven to 200°F (93°C). Line a large baking sheet with parchment paper. Have your lollipop sticks and mini chocolate chips ready nearby.
- Whip the Egg Whites: Place the room-temperature egg whites and cream of tartar in your clean, dry mixing bowl. Beat on medium speed until frothy, about 1 minute. The mixture will look like soapy bubbles.
- Add the Sweetener: With the mixer running on low, slowly drizzle in the maple syrup. Then, add the vanilla extract and the pinch of salt. Increase the speed to high and beat until stiff, glossy peaks form. This will take 5-7 minutes. You know it is ready when you lift the whisk and the meringue holds a firm peak that does not droop. The mixture should look thick, shiny, and white. Warning: Do not over-whip, or the meringue will become grainy and dry.
- Pipe the Ghosts: Spoon the meringue into your piping bag fitted with the round tip. Hold the bag vertically about 1/2 inch above the parchment paper. Pipe a round blob for the body, then lift the bag straight up to create a small peak for the head. Gently place a lollipop stick into the bottom of each ghost, pushing it in about halfway. Smooth any meringue over the stick with your finger if needed.
- Add the Faces: Before the meringue starts to set, gently press two mini chocolate chips into each ghost for eyes. You can also add a tiny dot for a mouth if you like, but the eyes are enough to make them look adorable.
- Bake Low and Slow: Place the baking sheet in the preheated oven. Bake for 60-75 minutes. The meringues are done when they are firm to the touch and easily peel off the parchment paper. They should not be brown at all—just a pale, creamy white. If they start to brown, your oven is too hot.
- Cool Completely: Turn off the oven and leave the door slightly ajar. Let the meringues cool completely inside the oven for at least 1 hour. This gradual cooling prevents them from cracking. They will harden as they cool.
Personal Tip: I once forgot to add the cream of tartar, and my meringues deflated into flat, sad pancakes. Do not skip it! It really is the key to a stable, puffy ghost.
Cooking Tips & Techniques
Making meringue can feel a little intimidating, but with a few pro tips, you will be a ghost-piping expert in no time. I have made every mistake in the book, so you do not have to.
- Humidity is the Enemy: Meringue hates humidity. Do not make these on a rainy or very humid day. The sugar in the maple syrup will absorb moisture from the air, and your ghosts will turn out sticky and soft instead of crisp. Wait for a dry day.
- Perfect Stiff Peaks: The biggest mistake people make is under-whipping the egg whites. You need them to be stiff enough that you can turn the bowl upside down without the mixture sliding out. That is the test. If the peaks are still droopy, keep whipping. Do not rush this step.
- Low Heat is Crucial: You are not baking the meringue; you are drying it out. That is why the temperature is so low. If your oven runs hot, it will brown the ghosts and create a tough, chewy texture. I recommend using an oven thermometer to be sure.
- Piping Consistency: If your meringue is too soft to hold its shape, you may have under-whipped it. If it is too stiff to pipe smoothly, it may have been over-whipped. The perfect texture is thick, glossy, and holds a peak but is still soft enough to squeeze through a piping tip.
- Multitasking Strategy: While the meringue is baking, you can prepare your other Halloween treats or clean up the kitchen. The long bake time gives you a great window to get ahead.
One time, I tried to speed up the process by baking them at 250°F. They turned brown and tasted like toasted sugar. Not the vibe for a ghost. Patience is your friend here.
Variations & Adaptations
These ghost pops are wonderfully adaptable. Once you have the basic technique down, you can play around with flavors and decorations. Here are some of my favorite variations:
- Chocolate Ghosts: Replace 1 tablespoon of the maple syrup with 1 tablespoon of unsweetened cocoa powder. Sift the cocoa powder into the egg whites before whipping. You will get a beautiful, dark chocolate ghost that tastes like a light, airy brownie.
- Peppermint Ghosts: Add 1/4 teaspoon of peppermint extract along with the vanilla. These are perfect for a wintery twist, and they look amazing with a few crushed candy cane sprinkles on top (just make sure the sprinkles are natural-dye).
- Vegan Option: You can use aquafaba (the liquid from a can of chickpeas) instead of egg whites. Use 1/2 cup of aquafaba and whip it with the cream of tartar just like you would egg whites. The texture is slightly different, but it works surprisingly well. Make sure your aquafaba is at room temperature.
- Different Shapes: If ghosts are not your thing, you can pipe the meringue into simple rounds or kisses. They are just as delicious and make great cookie pops for any occasion. You can also add a drop of natural food coloring to make them festive for other holidays.
I once tried a lavender-infused version by adding a few drops of culinary lavender oil. It was a little too floral for me, but my friend Sarah loved it. The beauty of this recipe is that it is a blank canvas for your imagination.
Serving & Storage Suggestions
These ghost pops are best enjoyed the day they are made, but they store surprisingly well. Here is how to serve and keep them at their best.
- Serving Temperature: Serve them at room temperature. They are crisp and light, perfect for a Halloween party or a cozy afternoon treat. Arrange them on a platter standing up in a small jar or a block of floral foam covered in tissue paper for a spooky display.
- Complementary Dishes: These pair beautifully with a warm cup of apple cider or a mug of hot chocolate. For a full Halloween spread, serve them alongside some healthy pumpkin muffins or a bowl of fresh fruit. They are also a great palate cleanser after a rich meal.
- Storage: Store any leftover ghost pops in an airtight container at room temperature. Do not refrigerate them, as the moisture in the fridge will make them sticky. They will stay crisp for up to 3 days if stored properly.
- Freezer Instructions: You can freeze the baked meringues for up to 1 month. Place them in a single layer in a freezer-safe container with parchment paper between the layers. Thaw them at room temperature for about 30 minutes before serving. They will lose a bit of their crunch but will still taste great.
- Flavor Development: Honestly, these are best fresh. The texture is at its peak right after cooling. If you store them, they may soften slightly, but the flavor remains delicious.
Nutritional Information & Benefits
For a Halloween treat, these ghost pops are surprisingly light. Here is a rough estimate per pop (based on 8 pops):
- Calories: ~45
- Fat: <1g
- Carbohydrates: 9g
- Sugar: 7g (from maple syrup)
- Protein: 2g
Health Benefits: The star ingredient here is the egg white, which is pure protein with almost no fat. Maple syrup contains antioxidants and minerals like zinc and manganese, though it is still a sugar and should be used in moderation. This treat is also naturally gluten-free and low in calories, making it a smart choice for anyone watching their intake. It is a far cry from a candy bar, and it feels good to serve something that is both fun and wholesome.
Dietary Considerations: This recipe is naturally gluten-free, nut-free, and soy-free. For a vegan option, use aquafaba as mentioned above. The only potential allergen is eggs, so be mindful of that when serving to guests.
Conclusion
These Wholesome Ghost Meringue Cookie Pops are proof that Halloween treats can be both adorable and good for you. They are light, naturally sweet, and incredibly fun to make. I love how they bring a little bit of magic to the kitchen without all the artificial stuff. Whether you are making them for a party, a classroom treat, or just a quiet afternoon with your kids, they never fail to bring a smile.
I encourage you to make them your own. Play with the flavors, experiment with the decorations, and do not stress if your first ghost looks a little wonky. That is part of the charm. Honestly, the imperfect ones are the most lovable. I would love to hear how yours turn out! Leave a comment below and share your ghostly creations. And if you snap a picture, tag me on social media—I love seeing your kitchen adventures. Happy Halloween, and happy baking!
Frequently Asked Questions
Can I use a different sweetener instead of maple syrup?
You can, but the texture will change. Honey or agave nectar can work, but they have a different water content, which may make the meringue softer. I recommend sticking with maple syrup for the best results.
Why did my meringue turn out sticky?
Sticky meringue is usually a sign of humidity or under-baking. Make sure you are baking on a dry day and that the meringues are fully dried out in the oven. They should be firm and peel off the parchment easily.
Can I make these without a piping bag?
Absolutely. You can use a sturdy zip-top bag with a corner snipped off. It is not as precise, but it works well for a rustic ghost shape. You can also use a spoon to drop dollops of meringue onto the baking sheet.
How do I know when the meringues are done baking?
They are done when they are firm to the touch and lift off the parchment paper without sticking. They should be a pale, creamy white with no browning. If they crack, they may have been baked too long or at too high a temperature.
Can I add food coloring to these?
Yes, but use gel or powder food coloring, not liquid. Liquid coloring will add too much moisture and ruin the meringue. A few drops of natural color will give you a fun, festive ghost without affecting the texture.
Pin This Recipe!
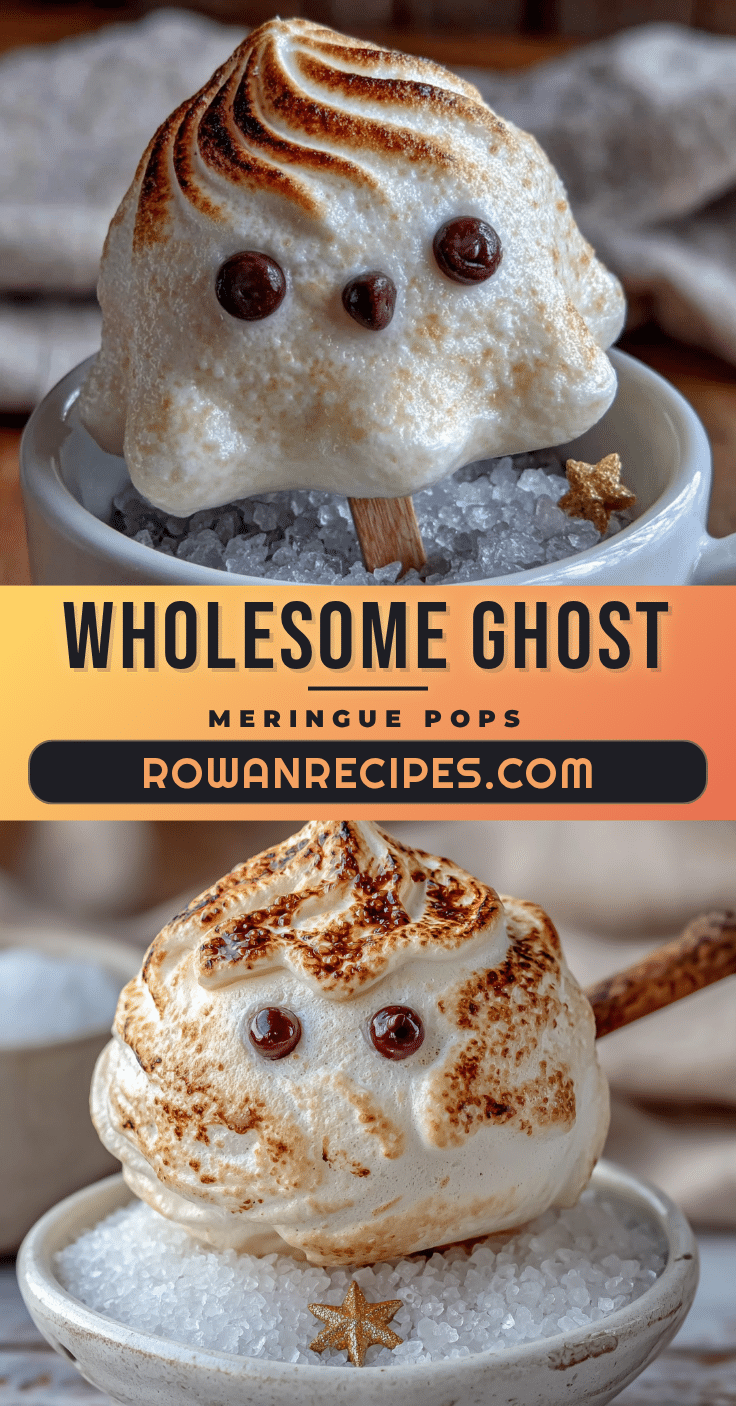
Wholesome Ghost Meringue Cookie Pops: Best Easy Halloween Treat
Light, airy, and naturally sweetened with maple syrup, these ghost meringue pops are a wholesome and fun Halloween treat that kids and adults will love. They are gluten-free, low-fat, and perfect for parties.
- Prep Time: 15 minutes
- Cook Time: 60-75 minutes
- Total Time: 1 hour 30 minutes
- Yield: 6-8 pops 1x
- Category: Dessert
- Cuisine: American
Ingredients
- 3 large egg whites (at room temperature)
- 1/4 cup pure maple syrup
- 1/2 teaspoon vanilla extract
- 1/4 teaspoon cream of tartar
- Pinch of sea salt
- Mini chocolate chips (for the eyes, about 24 chips)
- 6–8 lollipop sticks
Instructions
- Preheat your oven to 200°F (93°C). Line a large baking sheet with parchment paper. Have your lollipop sticks and mini chocolate chips ready nearby.
- Place the room-temperature egg whites and cream of tartar in your clean, dry mixing bowl. Beat on medium speed until frothy, about 1 minute.
- With the mixer running on low, slowly drizzle in the maple syrup. Then, add the vanilla extract and the pinch of salt. Increase the speed to high and beat until stiff, glossy peaks form, about 5-7 minutes. The mixture should hold a firm peak that does not droop.
- Spoon the meringue into a piping bag fitted with a round tip. Hold the bag vertically about 1/2 inch above the parchment paper. Pipe a round blob for the body, then lift the bag straight up to create a small peak for the head. Gently place a lollipop stick into the bottom of each ghost, pushing it in about halfway. Smooth any meringue over the stick with your finger if needed.
- Before the meringue starts to set, gently press two mini chocolate chips into each ghost for eyes.
- Place the baking sheet in the preheated oven. Bake for 60-75 minutes. The meringues are done when they are firm to the touch and easily peel off the parchment paper. They should not be brown at all.
- Turn off the oven and leave the door slightly ajar. Let the meringues cool completely inside the oven for at least 1 hour.
Notes
Do not make on a humid day. Ensure egg whites are at room temperature and bowl is completely clean and grease-free. Do not over-whip the meringue. Use an oven thermometer to ensure accurate temperature. For vegan option, use 1/2 cup aquafaba instead of egg whites.
Nutrition
- Serving Size: 1 pop
- Calories: 45
- Sugar: 7
- Sodium: 25
- Fat: 1
- Carbohydrates: 9
- Protein: 2
Keywords: Halloween treats, meringue cookies, ghost pops, healthy Halloween, gluten-free dessert, low-fat dessert, kid-friendly recipe


