I need a Halloween treat that looks genuinely gross but tastes absolutely incredible. That’s the whole thought. Not “what’s a cute seasonal snack” or “let me browse Pinterest for an hour.” Just—I want something that makes people do a double-take before they grab one, and then immediately reach for another. These Spooky Witch Finger Pretzel Rods with White Chocolate hit that exact spot. They’re creepy in the best way, with that pale white chocolate coating and those almond fingernails that look just a little too real. But underneath all that spooky exterior? Salty, crunchy pretzel rods and sweet, creamy white chocolate. It’s the kind of treat that disappears fast at parties, and honestly, that’s the whole point.
The first time I made these, I got a little carried away shaping the “knuckles” and ended up with fingers that looked like they belonged to a witch who’d been gardening for a century. My kids refused to touch them for a solid ten minutes. Then my youngest took one bite, and suddenly they were all fighting over the last “pinky finger.” That’s when I knew this recipe was a keeper. It’s not just about the shock value—though that’s definitely part of the fun. It’s about creating something that tastes as good as it looks scary. And let’s face it, anything that involves dipping pretzels in melted white chocolate is already heading in a delicious direction.
Why You’ll Love This Recipe
Let me tell you why these witch fingers have become my go-to Halloween recipe year after year. First off, they’re ridiculously easy. We’re talking about melting chocolate, dipping pretzels, and sticking on some almonds. That’s it. No complicated baking, no finicky temperatures, no special skills required. I’ve made these with kids, with friends who claim they can’t cook, and even during a power outage (thank you, gas stove). They always turn out perfectly.
Here’s what makes them stand out from every other Halloween treat out there:
- Quick & Easy: From start to finish, you’re looking at about 20 minutes of active work. The hardest part is waiting for the chocolate to set.
- Simple Ingredients: Three main ingredients. That’s it. Pretzel rods, white chocolate, and sliced almonds. You probably already have everything except maybe the almonds.
- Perfect for Parties: These are the star of any Halloween gathering, potluck, or classroom celebration. They’re portable, they don’t need refrigeration, and they spark instant conversation.
- Crowd-Pleaser: Kids love the creepiness, adults love the salty-sweet combo, and everyone loves how easy they are to grab and go.
- Unbelievably Delicious: The contrast between the crunchy, salty pretzel and the sweet, creamy white chocolate is absolutely addictive. Add that almond “fingernail” on top, and you’ve got texture heaven.
What makes this recipe different from other Halloween treats is the attention to detail. I’ve experimented with different chocolates, different ways to shape the “knuckles,” and different techniques for getting those almond nails to stay put. This version is the result of trial and error—my best attempt at creating something that looks genuinely spooky without sacrificing an ounce of flavor. It’s the kind of treat that makes people say, “Wait, those are just pretzels?” and then grab three more.
Honestly, this recipe is for anyone who wants to impress without stress. Whether you’re hosting a Halloween party, bringing treats to a school event, or just want to make something fun with your kids on a cozy October afternoon, these witch fingers deliver. They’re comfort food with a creepy twist, and they always, always get a reaction.
What Ingredients You Will Need
This recipe uses just three main ingredients, plus a tiny bit of optional decoration. That’s the beauty of it—simple, accessible, and probably already in your pantry. Here’s what you need and why each ingredient matters.
- Pretzel Rods (12-15 rods): These are the backbone of the recipe. You want thick, sturdy pretzel rods—not the thin, fragile ones that snap when you look at them. I prefer the standard-size rods you find in the snack aisle. They’re long enough to look like witch fingers, thick enough to hold up to the chocolate coating, and salty enough to balance all that sweetness. Look for brands like Snyder’s of Hanover or Utz—they’re consistently good quality. If you can only find the thin ones, just be extra gentle when dipping and coating.
- White Chocolate (12 ounces, or about 2 cups of white chocolate chips or melting wafers): This is where the magic happens. White chocolate gives you that pale, slightly translucent “witch skin” look that’s perfect for this recipe. I recommend using white chocolate melting wafers (like Ghirardelli or Wilton) because they melt smoothly and set with a nice, even finish. White chocolate chips work too, but they sometimes contain stabilizers that make them harder to melt smoothly. If you’re using chips, add a teaspoon of coconut oil or shortening to help them melt into a dip-able consistency. Real white chocolate (made with cocoa butter) tastes better, but compound chocolate (almond bark or candy melts) is more forgiving and sets faster.
- Sliced Almonds (about 30-40 slices): These become the fingernails. You want raw or lightly toasted sliced almonds—not slivered, not whole. The slices are flat and wide, which makes them perfect for sticking onto the tip of each pretzel rod to look like a witch’s long, pointy nail. Toasting them lightly (just a few minutes in a dry pan or oven) brings out their nutty flavor and makes them look more realistic. But honestly, raw works just fine too.
- Optional Decorations: A few drops of green or purple food coloring can be added to the white chocolate for a more “witchy” skin tone. I’ve tried it both ways—plain white looks creepier, but green is definitely more fun for a Halloween party. You can also add a tiny dab of red gel food coloring at the base of each “nail” for a bloody effect. Sprinkles, edible glitter, or a dusting of cocoa powder can add extra spookiness, but they’re totally optional.
One thing I’ve learned the hard way—don’t skip the almond slices. I tried using slivered almonds once, thinking they’d look close enough, and they just didn’t have the right shape. They looked more like weird teeth than fingernails. Stick with the sliced almonds. They’re worth the extra effort to find.
For the white chocolate, I’ve had the best luck with Ghirardelli’s white melting wafers. They melt like a dream, they don’t seize up, and they set with a beautiful, glossy finish. Wilton’s candy melts are a close second, especially if you want to color them. Just avoid the cheap white chocolate chips from the baking aisle—they tend to be grainy and don’t coat the pretzels evenly.
Equipment Needed
You don’t need a lot of fancy equipment for this recipe, which is part of why I love it. Here’s what you’ll need:
- Microwave-Safe Bowl: For melting the white chocolate. Glass or ceramic works best. Avoid metal bowls if you’re using a microwave—they can cause uneven heating.
- Spatula or Spoon: For stirring the chocolate and helping to coat the pretzels evenly. A small offset spatula is great for smoothing, but a regular spoon works fine.
- Baking Sheet: Lined with parchment paper or a silicone baking mat. This is where your witch fingers will set. The parchment prevents sticking and makes cleanup a breeze.
- Tweezers or Small Pliers: This is my secret weapon. Using tweezers to place the almond “fingernails” keeps your fingers clean and gives you precise control. You can use your fingers, but the chocolate gets messy fast.
- Piping Bag or Small Zip-Top Bag: For drizzling extra chocolate or adding “knuckle” details. A zip-top bag with the corner snipped off works perfectly.
- Toothpicks: For adding small details like “wrinkles” or “blood” effects. They’re also useful for moving the almond slices into place.
If you don’t have a microwave, you can melt the white chocolate in a double boiler on the stove. Just be careful not to overheat it—white chocolate burns easily. I’ve ruined more than one batch by getting distracted and letting the chocolate scorch. Trust me, the microwave is easier and more forgiving.
For the baking sheet, any standard half-sheet pan works. I’ve used cookie sheets, jelly roll pans, even a cutting board in a pinch. Just make sure it’s flat and fits in your fridge or freezer for setting.
Preparation Method
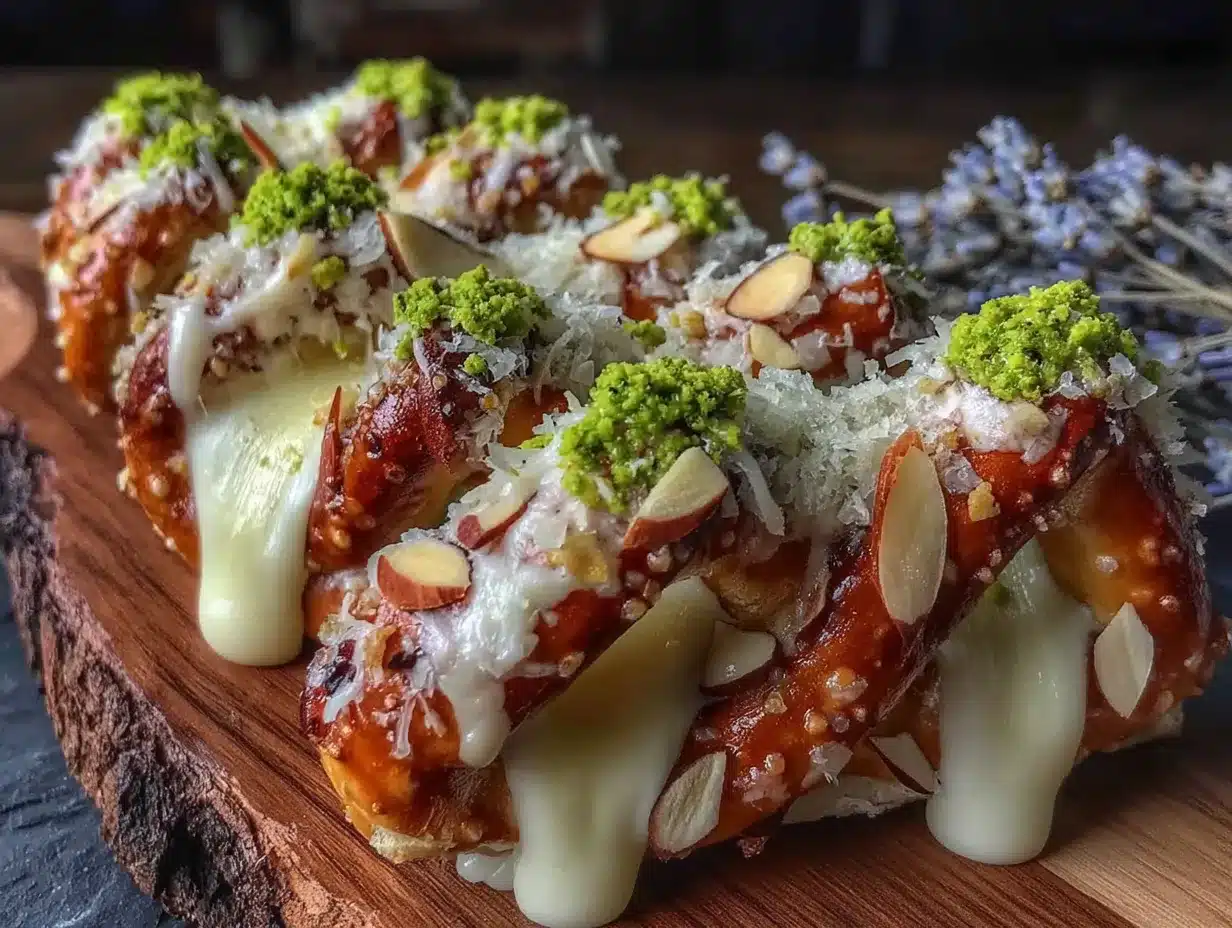
Alright, let’s get into the nitty-gritty. Here’s how to make these spooky witch fingers step by step. Take your time, especially with the almond placement—that’s what makes them look so realistic.
- Prepare your workspace. Line a baking sheet with parchment paper or a silicone mat. Make sure it’s clean and dry. Set out your pretzel rods, sliced almonds, and any decorations you’re planning to use. Having everything within reach makes the process go much faster.
- Melt the white chocolate. Place your white chocolate chips or melting wafers in a microwave-safe bowl. Microwave in 30-second intervals, stirring well after each interval. White chocolate can go from melted to scorched in seconds, so don’t walk away. It usually takes about 1.5 to 2 minutes total, depending on your microwave. Stir until the chocolate is completely smooth and glossy. If it looks thick or clumpy, add a teaspoon of coconut oil or shortening and stir again. (I’ve learned this the hard way—patience is key here.)
- Dip the pretzel rods. Hold one pretzel rod by the end and dip it into the melted white chocolate. Rotate it gently to coat about two-thirds to three-quarters of the rod. You want enough chocolate to cover the pretzel completely but not so much that it drips excessively. Let any excess chocolate drip back into the bowl. A little pooling at the tip is fine—it actually helps the almond stick better.
- Place the “fingernail”. Immediately after dipping, place the chocolate-coated pretzel on the prepared baking sheet. While the chocolate is still wet, take a sliced almond and gently press it onto the tip of the pretzel rod. The almond should overlap the tip slightly, with the pointed end extending beyond the pretzel to look like a long fingernail. Use tweezers or a toothpick to position it perfectly. Press down gently so it adheres.
- Create the “knuckles”. While the chocolate is still soft, use a toothpick or the tip of a small knife to create horizontal indentations along the pretzel rod. These will look like knuckles. I usually make two or three “knuckles” per finger, spaced about an inch apart. Don’t press too hard—you just want to create a slight indentation in the chocolate. If the chocolate starts to set too quickly, pop the pretzel in the fridge for a minute to firm up, then add the knuckle marks before it hardens completely.
- Add extra details (optional). If you want to get really creative, you can add a tiny dab of red gel food coloring at the base of each almond “nail” to look like blood. Or use a toothpick to drag a little bit of melted dark chocolate across the “knuckles” for a dirtier, more weathered look. I’ve also added a few drops of green food coloring to the white chocolate before dipping to create a greenish “witch skin” tone. It’s all up to you.
- Let them set. Place the completed witch fingers on the parchment-lined baking sheet. Repeat the dipping and decorating process with the remaining pretzel rods. Once all the fingers are on the sheet, place the baking sheet in the refrigerator for about 15-20 minutes, or until the chocolate is completely firm and set. If you’re in a hurry, you can pop them in the freezer for 5-10 minutes, but watch them carefully—white chocolate can get too hard and crack if frozen too long.
- Add final touches. Once the chocolate is set, you can drizzle a little extra melted white chocolate over the top for a more textured look, or dust them with a tiny bit of cocoa powder for a “dirty” effect. I’ve also added a few drops of orange or purple sprinkles for a festive touch. Let any additional decorations set for another 5-10 minutes before serving.
- Serve and enjoy. Arrange the witch fingers on a platter with the “fingernails” pointing outward for maximum creepiness. They’re best served at room temperature, but they’ll hold up well for several hours at a party.
A few things I’ve learned from making these multiple times: Don’t over-dip the pretzels. You want a nice, even coating, but too much chocolate will drip and create a mess. And don’t rush the almond placement—it’s the most important step for making them look realistic. If the chocolate starts to set before you get the almond on, just dip the almond in a little melted chocolate first and press it onto the pretzel. It’ll stick just fine.
Cooking Tips & Techniques
Over the years, I’ve made plenty of mistakes with this recipe so you don’t have to. Here are my best tips for getting perfect witch fingers every time.
Temperature matters. White chocolate is finicky. If it gets too hot, it’ll seize up into a grainy, clumpy mess. If it’s not hot enough, it won’t coat the pretzels evenly. The sweet spot is around 90-95°F—warm enough to be liquid but not hot enough to burn. I always use a thermometer when I’m melting chocolate, but if you don’t have one, just go by feel. The chocolate should be warm to the touch but not hot. If it feels hot on your wrist (like you’re testing baby formula), it’s too hot.
Work in batches. Don’t try to dip all the pretzels at once. The chocolate will start to set, and you’ll end up with uneven coating and messy fingernails. I usually work in batches of 3-4 pretzels at a time, reheating the chocolate in the microwave for 10-15 seconds if it starts to thicken. It takes a little longer, but the results are worth it.
Use the right almond placement. The almond slice should be positioned so that the pointed end extends beyond the tip of the pretzel rod. Think of it like a witch’s long, curved fingernail. If the almond is too flat against the pretzel, it won’t look like a nail. Angle it slightly upward so it looks like it’s growing out from the “finger.” This is where the tweezers come in handy—they give you the precision you need to get the angle right.
Don’t skip the knuckles. I know it seems like a small detail, but the knuckle indentations are what sell the illusion. Without them, the pretzel rods just look like chocolate-covered pretzels with almonds stuck on the end. With the knuckles, they look like actual witch fingers. Take the extra 30 seconds to add them. You’ll be glad you did.
Let them set completely. I’ve made the mistake of serving these too early, and the chocolate was still soft and messy. Give them a full 15-20 minutes in the fridge to set properly. If you’re making them ahead of time, store them in an airtight container at room temperature—they’ll stay fresh for up to a week. (Not that they’ll last that long.)
One more thing: If you’re making these for a party, consider making a double batch. They disappear fast. I’ve seen grown adults grab three or four at a time, and kids will literally fight over the last one. They’re that good.
Variations & Adaptations
One of the best things about this recipe is how easy it is to customize. Here are some variations I’ve tried and loved.
Dark Chocolate Witch Fingers: Swap the white chocolate for dark or milk chocolate for a completely different look. Dark chocolate gives the fingers a more “earthy,” muddy appearance that’s perfect for zombie or swamp witch themes. The bitterness of dark chocolate also balances the saltiness of the pretzels beautifully. I’ve made these for a friend’s zombie-themed party, and they were a huge hit.
Green Witch Skin: Add a few drops of green gel food coloring to the melted white chocolate for a classic witchy green skin tone. Start with just a drop or two and mix well—you can always add more. I’ve found that a pale, sickly green looks creepier than a bright, neon green. If you’re using candy melts, you can buy pre-colored green melts to save time.
Gluten-Free Version: Use gluten-free pretzel rods instead of regular ones. Most major brands now offer gluten-free pretzel options, and they work just as well. Just make sure to check the labels on your white chocolate and almonds too—some brands may have cross-contamination risks.
Bloody Nails: For an extra-gory effect, add a tiny dab of red gel food coloring at the base of each almond “nail.” You can also use a toothpick to draw a thin line of red from the nail base down the “finger” for a dripping blood effect. This is my kids’ favorite variation—they think it’s hilarious.
Spider Web Drizzle: After the white chocolate sets, melt a small amount of dark chocolate and drizzle it over the fingers in a spider web pattern. Use a piping bag or a zip-top bag with a tiny corner snipped off. Start with a small circle in the center and spiral outward, then drag a toothpick through the lines to create the web effect. It’s a little extra work, but the result is stunning.
Monster Mash-Up: Instead of witch fingers, shape the pretzels into other Halloween creatures. Add two almond slices for “eyes” and a sliver of almond for a “mouth” to create a monster face. Or use multiple almonds to create a “claw” effect at the tip. The possibilities are endless.
Serving & Storage Suggestions
These witch fingers are best served at room temperature, arranged on a platter with the “fingernails” pointing outward for maximum creepiness. I like to arrange them in a fan pattern, like a hand reaching out from the platter. You can also stand them upright in a jar or cup for a more dramatic presentation—just make sure they’re fully set first so they don’t fall over.
For a Halloween party, I like to serve them alongside other spooky treats like peanut butter cup rice krispie treats or mini corn dog muffins for a complete savory-sweet spread. They also pair beautifully with a warm mug of apple cider or a hot chocolate bar.
For storage, place the witch fingers in an airtight container at room temperature. They’ll stay fresh for up to a week—if they last that long. I’ve kept them for up to two weeks in a cool, dry place, and they were still delicious. Just make sure they’re fully set before stacking them, or the chocolate might smudge.
If you’re making them ahead of time for a party, I recommend making them no more than two days in advance. The pretzels can start to soften if they’re stored for too long, especially in humid weather. If you’re worried about humidity, you can store them in the refrigerator, but let them come to room temperature before serving for the best texture.
For reheating (not that you’d need to), these are best enjoyed as-is. The chocolate doesn’t need to be melted again—just serve them at room temperature for that perfect crunchy, creamy texture.
Nutritional Information & Benefits
Let’s be real—these are a treat, not a health food. But here’s a rough estimate of what you’re looking at per witch finger (based on 12 servings):
- Calories: Approximately 180-220 per finger
- Fat: 10-12g (mostly from the white chocolate and almonds)
- Carbohydrates: 20-25g
- Protein: 3-4g
- Sugar: 15-18g
- Sodium: 200-300mg (from the pretzels)
While these aren’t exactly a health food, they do have a few redeeming qualities. The almonds provide healthy fats, vitamin E, and a bit of protein. The pretzels offer some carbs for quick energy. And white chocolate, while sugary, does contain calcium and a small amount of cocoa butter (if you’re using real white chocolate).
For those with dietary restrictions, note that this recipe contains dairy (white chocolate), gluten (pretzels), and tree nuts (almonds). For a dairy-free version, use dairy-free white chocolate or coconut-based white chocolate alternatives. For a nut-free version, skip the almonds and use a small piece of dried fruit or a candy corn for the “nail” instead.
Honestly, these are a Halloween treat meant for enjoyment, not nutrition. But if you’re looking for a slightly healthier option, you can use dark chocolate (which has more antioxidants) and reduce the amount of chocolate coating. Or just enjoy them in moderation—that’s what I do!
Conclusion
These Spooky Witch Finger Pretzel Rods with White Chocolate are everything I want in a Halloween treat—creepy, delicious, and ridiculously easy to make. They’re the kind of recipe that makes people stop and stare, then grab one (or three) and come back for more. The combination of salty pretzel, sweet white chocolate, and crunchy almond is absolutely addictive, and the visual effect is pure Halloween magic.
I love that this recipe is so versatile. You can make them as simple or as elaborate as you want, and they always turn out great. Whether you’re hosting a big Halloween party or just want to make something fun with your kids on a rainy October afternoon, these witch fingers deliver. They’re the kind of treat that creates memories—the look on your kids’ faces when they see the “fingernails,” the laughter when someone pretends to be scared, the satisfied crunch when everyone takes that first bite.
So go ahead and give these a try. Customize them, make them your own, and don’t be afraid to get a little creative with the decorations. And when you make them, I’d love to hear about it. Leave a comment below and let me know how they turned out—did your kids love them? Did they freak out your coworkers? Did you come up with a new variation I haven’t tried? Share your stories, your photos, and your tips. Happy Halloween, and happy snacking!
Frequently Asked Questions
Can I use milk chocolate instead of white chocolate?
Absolutely! Milk chocolate or dark chocolate both work great. Dark chocolate gives the fingers a more “muddy” or earthy look, while milk chocolate is sweeter and more kid-friendly. Just keep in mind that darker chocolates may show the knuckle indentations less clearly than white chocolate.
How far in advance can I make these?
You can make them up to a week in advance if stored properly in an airtight container at room temperature. For best results, I recommend making them no more than 2-3 days ahead of your event. The pretzels can start to soften over time, especially in humid weather.
Can I freeze these witch fingers?
Yes, you can freeze them! Place them in a single layer on a baking sheet and freeze until solid (about 30 minutes), then transfer to an airtight container or freezer bag. They’ll keep for up to 3 months. Thaw at room temperature for about 15-20 minutes before serving. The texture of the pretzel might soften slightly, but they’ll still be delicious.
My white chocolate seized up. What did I do wrong?
White chocolate is notorious for seizing—it happens when even a tiny amount of water gets into the chocolate, or when it’s overheated. To fix it, try stirring in a teaspoon of vegetable oil, coconut oil, or shortening. If that doesn’t work, you may need to start over with fresh chocolate. Always make sure your bowl and utensils are completely dry, and microwave in short intervals to prevent overheating.
Can I make these without almonds for a nut-free version?
Yes! For a nut-free alternative, you can use a small piece of dried fruit (like a dried apricot or banana chip) for the “nail,” or even a candy corn or a small sliver of white chocolate. They won’t look exactly the same, but they’ll still be fun and delicious. Just make sure to check all your ingredients for nut cross-contamination if you’re serving someone with a severe allergy.
Pin This Recipe!
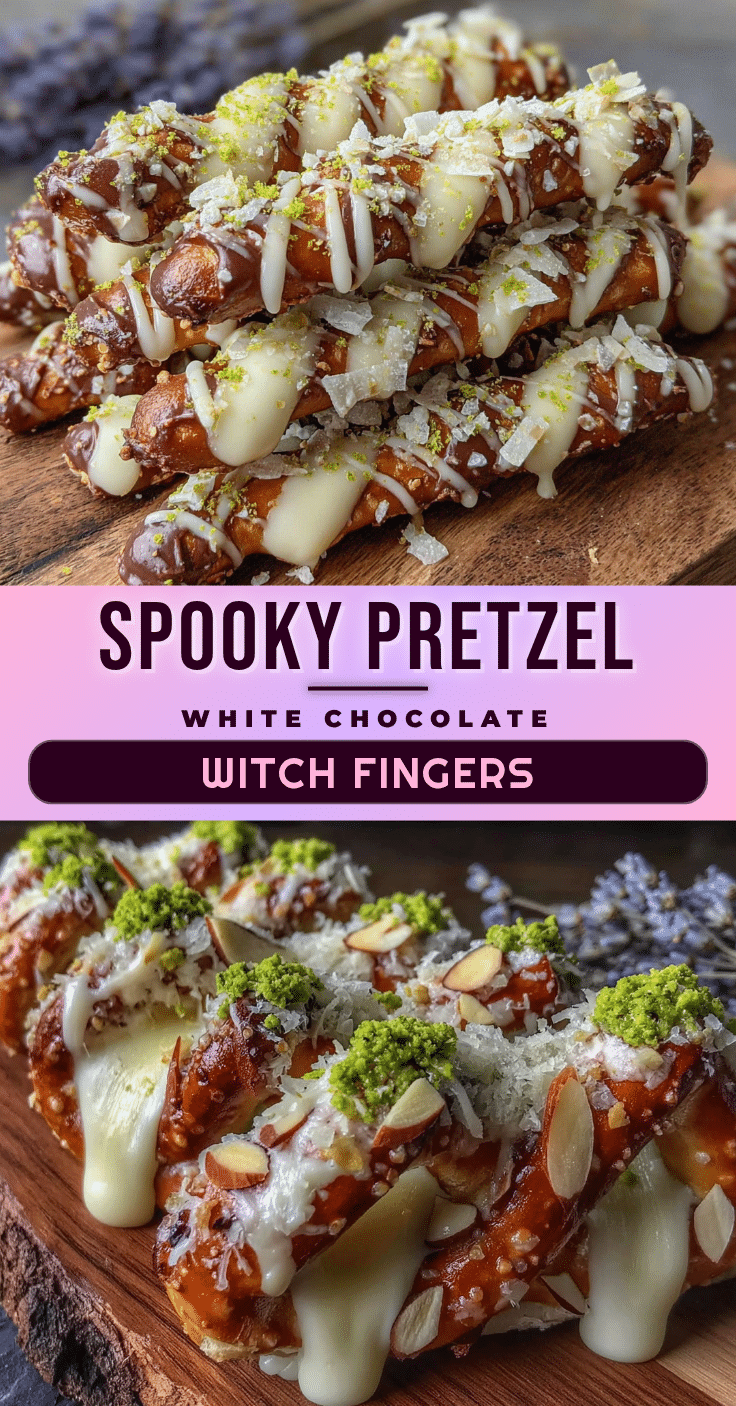
Spooky Witch Finger Pretzel Rods Best Easy White Chocolate Treat

These Spooky Witch Finger Pretzel Rods with White Chocolate are creepy in the best way, with pale white chocolate coating and almond fingernails that look just a little too real. Underneath all that spooky exterior? Salty, crunchy pretzel rods and sweet, creamy white chocolate.
- Prep Time: 20 minutes
- Cook Time: 0 minutes
- Total Time: 40 minutes (including setting time)
- Yield: 12-15 servings 1x
- Category: Dessert
- Cuisine: American
Ingredients
- 12–15 pretzel rods
- 12 ounces white chocolate chips or melting wafers (about 2 cups)
- 30–40 sliced almonds
- Optional: green or purple food coloring
- Optional: red gel food coloring for bloody effect
- Optional: sprinkles, edible glitter, or cocoa powder for decoration
Instructions
- Prepare your workspace. Line a baking sheet with parchment paper or a silicone mat. Set out pretzel rods, sliced almonds, and any decorations.
- Melt the white chocolate. Place white chocolate chips or melting wafers in a microwave-safe bowl. Microwave in 30-second intervals, stirring well after each, until completely smooth and glossy (about 1.5 to 2 minutes total). If thick, add 1 teaspoon coconut oil or shortening and stir.
- Dip the pretzel rods. Hold one pretzel rod by the end and dip into melted white chocolate, rotating to coat about two-thirds to three-quarters of the rod. Let excess drip back into the bowl.
- Place the ‘fingernail’. Immediately after dipping, place the coated pretzel on the prepared baking sheet. While chocolate is still wet, press a sliced almond onto the tip, pointed end extending beyond the pretzel. Use tweezers or a toothpick for precise placement.
- Create the ‘knuckles’. While chocolate is still soft, use a toothpick or small knife to create 2-3 horizontal indentations along the pretzel rod, spaced about an inch apart, to look like knuckles.
- Add extra details (optional). Add a tiny dab of red gel food coloring at the base of each almond ‘nail’ for blood effect, or add green food coloring to the white chocolate before dipping for witchy skin tone.
- Let them set. Place the baking sheet in the refrigerator for 15-20 minutes, or until chocolate is completely firm. For faster setting, freeze for 5-10 minutes but watch carefully.
- Add final touches (optional). Drizzle extra melted white chocolate for texture, dust with cocoa powder, or add sprinkles. Let set another 5-10 minutes before serving.
- Serve and enjoy. Arrange witch fingers on a platter with ‘fingernails’ pointing outward. Best served at room temperature.
Notes
White chocolate is finicky; avoid overheating. Work in batches of 3-4 pretzels at a time. For best results, use sliced almonds (not slivered) for realistic fingernails. Store in an airtight container at room temperature for up to a week. For a nut-free version, use dried fruit or candy corn instead of almonds.
Nutrition
- Serving Size: 1 witch finger
- Calories: 200
- Sugar: 17
- Sodium: 250
- Fat: 11
- Saturated Fat: 6
- Carbohydrates: 23
- Fiber: 1
- Protein: 4
Keywords: Halloween treats, witch fingers, pretzel rods, white chocolate, easy Halloween recipe, spooky snacks, party food


