My neighbor, Jen, wasn’t trying to impress anyone. I’d stopped by to borrow a cup of sugar—a cliché, I know, but my baking stash was running low—and the smell of paprika and something tangy hit me before I even made it past her front door. It was late October, and her kitchen counters were covered in little bowls of black olives and what looked like tiny, perfectly halved hard-boiled eggs. She was just standing there, casually arranging them on a platter, while her kid was watching cartoons in the next room. “Oh, these?” she said when I asked, barely looking up. “Just some spider deviled eggs for the school party tomorrow.” She said it like it was nothing, like she was just making a sandwich. But let me tell you, I stood there for a solid five minutes, watching her turn those simple ingredients into something that looked both terrifying and completely delicious. Honestly, I had to force myself to stop staring and remember why I’d come over in the first place. That moment stuck with me—the casualness of it all. It wasn’t about perfection; it was about having fun with food on a busy Tuesday night. And that’s exactly the energy I wanted to bring to my own kitchen. Maybe you’ve been there, too, staring down a weeknight and thinking you have no time for anything fancy. Well, these spider deviled eggs are the answer. They’re the kind of recipe that makes you look like a Halloween hero without breaking a sweat.
Why You’ll Love This Recipe
Let’s be real—when you’re juggling work, kids, and a costume that needs last-minute safety pins, the last thing you need is a complicated appetizer. These Quick Spooky Spider Deviled Eggs are here to save your Halloween. They come together in under 20 minutes, and I’ve tested them on a crowd of skeptical adults and sugar-crazed kids. The verdict? Pure, unadulterated joy. Here’s why this recipe is a keeper:
- Quick & Easy: From start to finish, you can have these on the table in about 20 minutes. That’s faster than ordering takeout, and way cuter.
- Simple Ingredients: You probably have everything on hand already. Eggs, mayo, mustard, paprika, and black olives. No special trips to a fancy grocery store.
- Perfect for Halloween Parties: Whether it’s a school event, a work potluck, or a spooky movie night, these eggs are the star of the show. They look impressive, but they’re secretly the easiest thing on the table.
- Crowd-Pleaser: I’ve seen picky eaters who “don’t like eggs” go back for seconds. The creamy filling and the fun spider design are irresistible.
- Unbelievably Delicious: The classic deviled egg filling is already perfect—creamy, tangy, with a hint of smokiness from the paprika. Adding the olive “spiders” doesn’t mess with the flavor; it just makes it more fun.
What makes this recipe different from the rest? It’s the balance of simplicity and visual impact. I’ve seen versions that use pretzel sticks for legs or googly eyes made of cream cheese, but those take forever and fall apart. My version uses just two ingredients for the spider—a black olive half for the body and slivered olives for the legs—so it stays sturdy and looks genuinely spooky. It’s not just another deviled egg recipe; it’s your best version for a busy Halloween night.
What Ingredients You Will Need
This recipe uses simple, pantry-friendly ingredients to deliver that classic deviled egg taste with a creepy-crawly twist. You don’t need anything fancy, and most of these are probably in your fridge or cupboard right now.
- Large Eggs (6-12): The foundation of everything. I prefer using eggs that are at least a week old for easier peeling. Fresh eggs are a nightmare to peel, trust me on this one.
- Mayonnaise (3 tablespoons): This gives the filling its creamy, luscious texture. I like using a full-fat mayo like Hellmann’s or Duke’s for the best flavor. If you’re in a pinch, a light mayo works, but the filling won’t be as rich.
- Yellow Mustard (1 teaspoon): Adds a gentle tang and that classic deviled egg zing. You can use Dijon for a sharper kick, but yellow mustard is what my grandma always used, so it’s my go-to.
- White Vinegar (1/2 teaspoon): A tiny splash brightens up the filling and cuts through the richness of the yolks. Don’t skip it—it makes a difference.
- Paprika (for garnish): Smoked paprika is my secret weapon here. It adds a subtle, smoky depth that regular paprika just can’t match. Sprinkle it over the finished eggs for color and flavor.
- Salt and Black Pepper (to taste): Simple seasonings that bring everything together. I usually add a pinch of salt and a few cracks of pepper.
- Black Olives (1 can, large pitted): These are your spiders. You’ll need whole, pitted black olives. I’ve tried using sliced olives, but they’re too thin. You need the whole ones to cut into bodies and legs.
- Optional Garnish: A sprinkle of chives or a tiny dollop of sriracha on top for a little heat. I sometimes add a dash of pickle relish to the filling for extra crunch.
Ingredient Selection Tips: Look for large, firm black olives that are pitted. The brand doesn’t matter much, but I’ve found that the California ripe olives are the easiest to slice into legs without them crumbling. For the eggs, if you can, buy them a week ahead. Older eggs peel like a dream.
Substitution Guidance: Need a dairy-free option? Use a vegan mayonnaise. Want a lower-fat version? Swap half the mayo with plain Greek yogurt. The filling will be a bit tangier, but it still works beautifully. For a gluten-free Halloween, you’re already in the clear—eggs and olives are naturally gluten-free.
Equipment Needed
You don’t need a fancy kitchen to pull these off. Here’s what you’ll need, along with a few tips I’ve picked up from my own mishaps.
- Medium Saucepan: For boiling the eggs. Any pot works, but make sure it’s big enough to hold your eggs in a single layer.
- Mixing Bowls: One for the yolks and one for the filling. I use a small glass bowl, but anything works.
- Fork or Potato Masher: For mashing the yolks. A fork is fine, but a potato masher makes it even quicker and smoother.
- Piping Bag or Zip-Top Bag: For filling the eggs with a neat, pretty swirl. A zip-top bag with the corner snipped off works perfectly if you don’t have a piping bag. I’ve done it both ways, and honestly, the bag is easier to clean.
- Sharp Knife and Cutting Board: For halving the eggs and slicing the olives. A paring knife is best for the detail work on the spiders.
- Serving Platter: A flat plate or a deviled egg tray. I’ve used a simple white platter, and the contrast with the black spiders is striking.
Budget-Friendly Tip: If you don’t have a piping bag, don’t buy one. A sturdy sandwich bag works just as well. Just fill it, twist the top, and snip a tiny corner off. It’s a trick I learned from a caterer friend, and it saves you a few bucks and a trip to the store.
Preparation Method
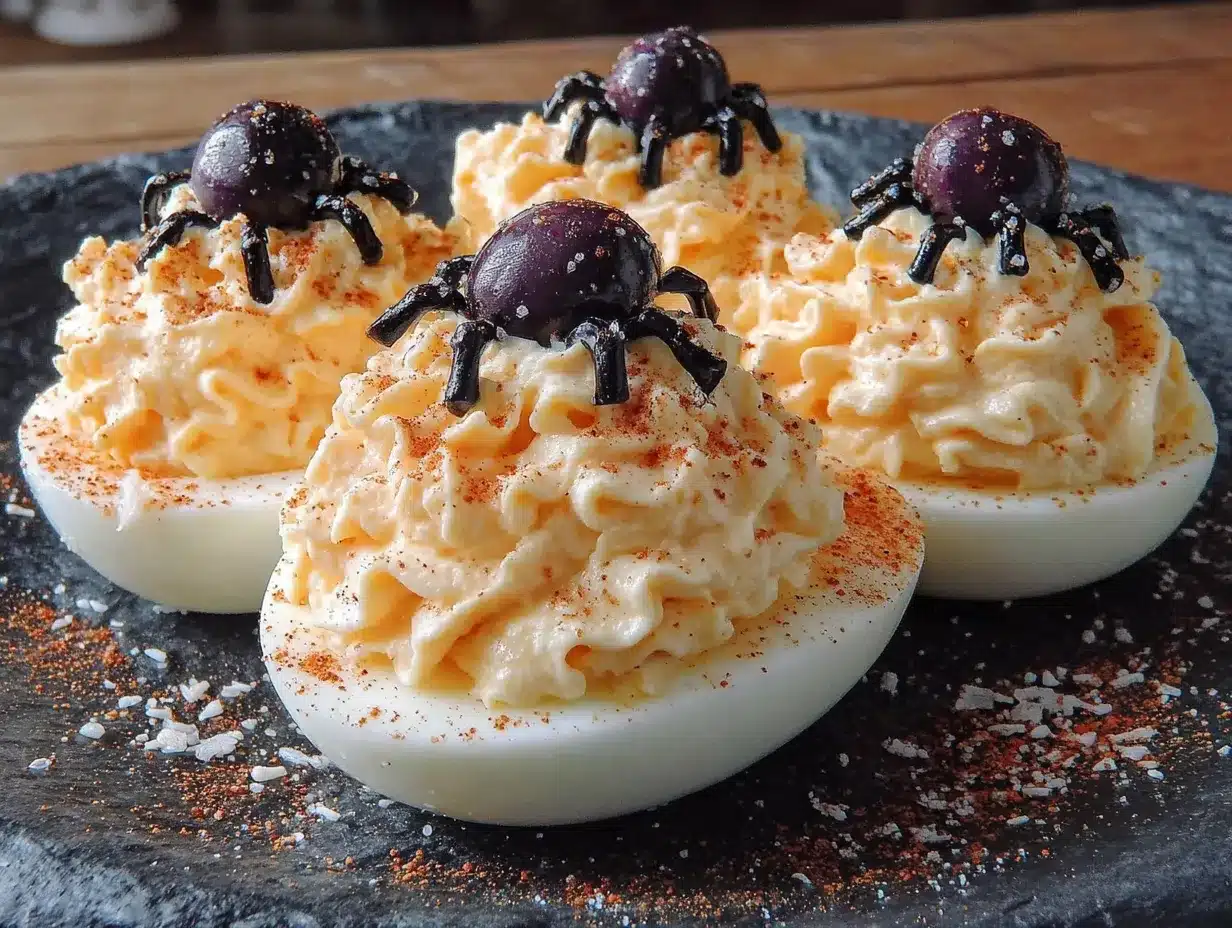
Alright, let’s get into the nitty-gritty. I’ve made these eggs at least a dozen times now, and I’ve learned a few things the hard way. Follow these steps, and you’ll have a platter of spooky spiders in no time.
- Boil the Eggs: Place your eggs in a single layer in a saucepan. Cover them with cold water by about an inch. Bring the water to a rolling boil over high heat. Once it’s boiling, cover the pot, turn off the heat, and let it sit for exactly 12 minutes. This gives you perfectly hard-boiled yolks without that weird green ring. While they sit, fill a bowl with ice water.
- Shock the Eggs: After 12 minutes, transfer the eggs to the ice water bath using a slotted spoon. Let them chill for at least 5 minutes. This stops the cooking process and makes peeling a million times easier. I once skipped this step because I was in a hurry, and I ended up with eggs that looked like they’d been in a fight. Don’t be me.
- Peel and Halve: Gently tap each egg on the counter to crack the shell, then roll it between your palms to loosen it. Peel under running cold water for the best results. Once peeled, slice each egg in half lengthwise with a sharp knife. Wipe the knife clean between cuts for neat edges.
- Make the Filling: Pop the yolks into a mixing bowl. Add the mayonnaise, yellow mustard, white vinegar, a pinch of salt, and a few cracks of black pepper. Mash everything together with a fork until it’s smooth and creamy. Taste it—this is your moment. Adjust the salt or mustard if you think it needs a little more zing.
- Prepare the Spiders: While the filling rests, grab your black olives. For each spider, you’ll need one whole olive for the body and a second olive for the legs. Slice the second olive lengthwise into 4 or 5 thin strips. These are your spider legs. You should have 8 legs per spider, but honestly, 6 works fine and is easier to arrange. I’ve done both, and nobody has ever counted.
- Fill the Eggs: Spoon the yolk mixture into a piping bag or a zip-top bag with a snipped corner. Pipe the filling into the hollow of each egg white, mounding it slightly. You want it to look generous, not skimpy. If you’re in a rush, you can just spoon it in, but piping looks so much nicer.
- Assemble the Spiders: Gently press 4 olive strips into the filling on each side of the egg to create the legs. They should curve slightly, like a spider crawling. Place a whole olive half (cut side down) in the center of the filling to form the body. Press it in just enough so it stays put. Repeat for all the eggs.
- Garnish and Serve: Lightly dust the eggs with paprika using a fine-mesh sieve. This adds color and a little smoky flavor. Arrange them on a platter and serve immediately, or refrigerate until you’re ready.
Pro Tip from My Kitchen: If your olive legs keep sliding off, try dipping the cut side of the olive strip into a tiny bit of the yolk filling before placing it. It acts like glue. I figured this out after my third batch of spiders that looked like they were doing the splits.
Cooking Tips & Techniques
I’ve made plenty of mistakes in the kitchen, and these deviled eggs have seen their fair share. Here are the lessons I’ve learned so you don’t have to repeat them.
The Perfect Boil is Everything. Overcooked eggs have that sulfur smell and a gray ring around the yolk. The 12-minute off-heat method is foolproof. I’ve tried steaming them, baking them, and even using an Instant Pot, but this stovetop method is the most reliable for a weeknight. Set a timer—don’t trust your memory.
Peeling Without the Pain. The number one rule? Use older eggs. If you buy them fresh, they’re a nightmare to peel. The ice bath is non-negotiable. I also find that cracking the egg all over before peeling helps the shell come off in bigger pieces. Start peeling from the wider end—there’s usually an air pocket there that makes it easier to get under the membrane.
Filling Consistency Matters. You want the filling to be creamy but stiff enough to hold its shape. If it’s too runny, add a little more yolk or a pinch of breadcrumbs. If it’s too thick, a tiny splash of milk or pickle juice will loosen it up. I once added too much mayo, and the filling turned into a puddle. Lesson learned: start with less and add more as you go.
Multitasking Like a Pro. While the eggs are boiling and cooling, prep your olives. Slice them all at once and store them in a small bowl. This saves you from stopping mid-assembly to cut more legs. I also like to set up my piping bag before I start filling. It keeps the process moving smoothly.
Consistency is Key. For a uniform look, use a melon baller or a small cookie scoop to portion the filling. It’s a small step, but it makes the eggs look professional. And when you’re placing the olive bodies, make sure they’re all facing the same direction. It’s a tiny detail that makes the whole platter look intentional.
Variations & Adaptations
One of the best things about this recipe is how flexible it is. You can change it up based on what you have, who you’re feeding, or just your mood. Here are a few ways I’ve adapted it over the years.
- Spicy Southwest Spider Eggs: Add 1/2 teaspoon of smoked paprika and a pinch of cayenne to the filling. Top each spider with a tiny slice of pickled jalapeño. The heat pairs surprisingly well with the creamy yolk and briny olive. I made these for a Halloween potluck, and they were gone in ten minutes.
- Herby Garden Spider Eggs: Fold in 1 tablespoon of finely chopped fresh dill or chives into the yolk mixture. It gives the filling a fresh, bright flavor that cuts through the richness. I love these in the spring, but they work for Halloween, too. The green flecks look almost like moss, which is kind of spooky in a different way.
- Bacon-Wrapped Webs: For a heartier version, crumble a few slices of crispy bacon into the filling. The smoky, salty crunch is incredible. I’ve also wrapped a tiny strip of bacon around the olive body before placing it on the egg. It’s extra work, but it’s a showstopper for a Halloween party where you want to go all out.
- Dairy-Free Adaptation: Swap the mayonnaise for a vegan mayo and use a dairy-free yogurt in the filling. The texture will be a little different, but the flavor is still spot-on. I’ve served these to a vegan friend, and she didn’t even notice the swap.
- Kid-Friendly Mini Spiders: Use quail eggs instead of chicken eggs for bite-sized versions. They’re adorable and perfect for little hands. The boiling time is shorter—about 4 minutes—so keep an eye on them. I made these for my niece’s Halloween party, and the kids went wild.
Serving & Storage Suggestions
These spider deviled eggs are best served cold or at room temperature, which makes them perfect for parties. Here’s how to make them look and taste their best.
Serving Temperature: Pull them out of the fridge about 15 minutes before serving. This takes the chill off and lets the flavors shine. I’ve served them straight from the fridge, and they’re still good, but the texture is a little firmer. Room temperature is where the magic happens.
Presentation Ideas: Arrange the eggs on a black or dark-colored platter to make the spiders pop. I’ve used a slate board before, and it looked like a scene from a horror movie—in the best way. You can also arrange them on a bed of shredded lettuce or kale for a “spider in the grass” effect. Add a few plastic spiders around the platter for extra creepiness.
Complementary Dishes: These eggs pair beautifully with other finger foods. Think mini hot dogs wrapped in crescent rolls (mummy dogs), a bowl of chili, or a charcuterie board with cheese and crackers. For drinks, a crisp apple cider or a dark beer works well. I once served them alongside a batch of pumpkin soup shooters, and it was a hit.
Storage Instructions: If you have leftovers (which is rare, but possible), store them in an airtight container in the refrigerator. They’ll keep for up to 2 days, but the olive legs might soften a bit. To prevent them from getting squished, arrange them in a single layer with a piece of parchment paper between layers if you’re stacking.
Reheating: Don’t. These are served cold. If you’ve stored them, just let them sit at room temperature for a few minutes before serving again. The flavors actually meld together a bit more overnight, so they might taste even better the next day.
Nutritional Information & Benefits
Let’s talk numbers. While these are a treat, they’re not a nutritional disaster. Here’s a rough breakdown for one spider deviled egg (based on a large egg and the standard filling).
- Calories: ~70-80 calories per egg
- Protein: 6 grams
- Fat: 5 grams (mostly from the yolk and mayo)
- Carbohydrates: Less than 1 gram
Health Benefits: Eggs are a powerhouse of protein and contain essential nutrients like vitamin B12, choline, and selenium. The yolks are rich in healthy fats and antioxidants like lutein, which is good for your eyes. Black olives provide healthy monounsaturated fats and a dose of iron. So while you’re having fun with the spooky presentation, you’re also getting a decent little snack.
Dietary Considerations: This recipe is naturally gluten-free, low-carb, and keto-friendly. If you’re watching your cholesterol, you can use just the egg whites and make the filling with a low-fat mayo, but honestly, the yolk is where the flavor is. For a lower-calorie version, use half the mayo and replace the rest with plain Greek yogurt.
Potential Allergens: Eggs and olives are the main ingredients. If you have an egg allergy, this recipe isn’t for you. But if you’re serving a crowd, it’s always a good idea to label the platter so guests with allergies know what’s in it. I usually put a little sign next to mine at parties.
Conclusion
So there you have it—Quick Spooky Spider Deviled Eggs that are as fun to make as they are to eat. This recipe is a testament to the fact that you don’t need hours in the kitchen or a culinary degree to create something memorable. It’s about taking a simple, classic dish and giving it a little personality. Whether you’re making them for a Halloween party, a school event, or just because you want to surprise your family on a random Tuesday, these eggs deliver. They’re the kind of recipe that makes people say, “Wait, you made these?” and you get to shrug and say, “Yeah, it was nothing.” And honestly, it kind of is nothing—in the best way possible.
I love this recipe because it reminds me of that afternoon at Jen’s house. It’s not about perfection; it’s about showing up and having fun. So go ahead, customize them, make them your own. Swap the olives for something else if you want, or add a little heat. The beauty of this recipe is that it’s a starting point, not a rulebook. I’d love to hear how yours turn out. Drop a comment below and tell me about your Halloween spread. Did the kids love them? Did your coworkers devour them? Share your photos and tag me—I want to see your spooky creations. Until next time, happy cooking, and may your spiders always have eight legs (or six, I won’t tell).
Frequently Asked Questions
Can I make these spider deviled eggs a day ahead?
Absolutely! You can boil and peel the eggs up to 2 days in advance. Store the peeled eggs in a bowl of cold water in the fridge. The filling can also be made a day ahead and stored in a piping bag in the refrigerator. Just assemble the spiders on the day you plan to serve them for the best presentation.
My olive legs keep breaking. What am I doing wrong?
This happens when the olives are too dry or you’re slicing them too thin. Use large, plump black olives and slice them into strips that are about 1/8 inch thick. If they’re still breaking, try using pitted Kalamata olives instead—they’re softer and easier to cut. Also, make sure your knife is sharp.
Can I use a different type of olive for the spiders?
Yes, but the visual effect changes. Green olives with pimentos can work, but they look less like a spider. Kalamata olives give a deeper, darker color but are softer and harder to slice into legs. For the classic “black spider” look, stick with large, pitted black olives.
How do I get my deviled eggs to look like the ones in the photos?
The secret is in the piping. Use a piping bag with a star tip for a ruffled, professional look. If you don’t have one, a zip-top bag with a corner snipped off works, but you’ll get a smoother swirl. Also, make sure your filling is thick enough to hold its shape. If it’s too runny, it will flatten out.
Are these safe to leave out at a party?
Deviled eggs contain mayonnaise and eggs, so they should not be left at room temperature for more than 2 hours. If you’re serving them at a party, keep the platter on ice or in a cooler. I like to serve them in small batches and replenish from the fridge as needed. Better safe than sorry!
Pin This Recipe!
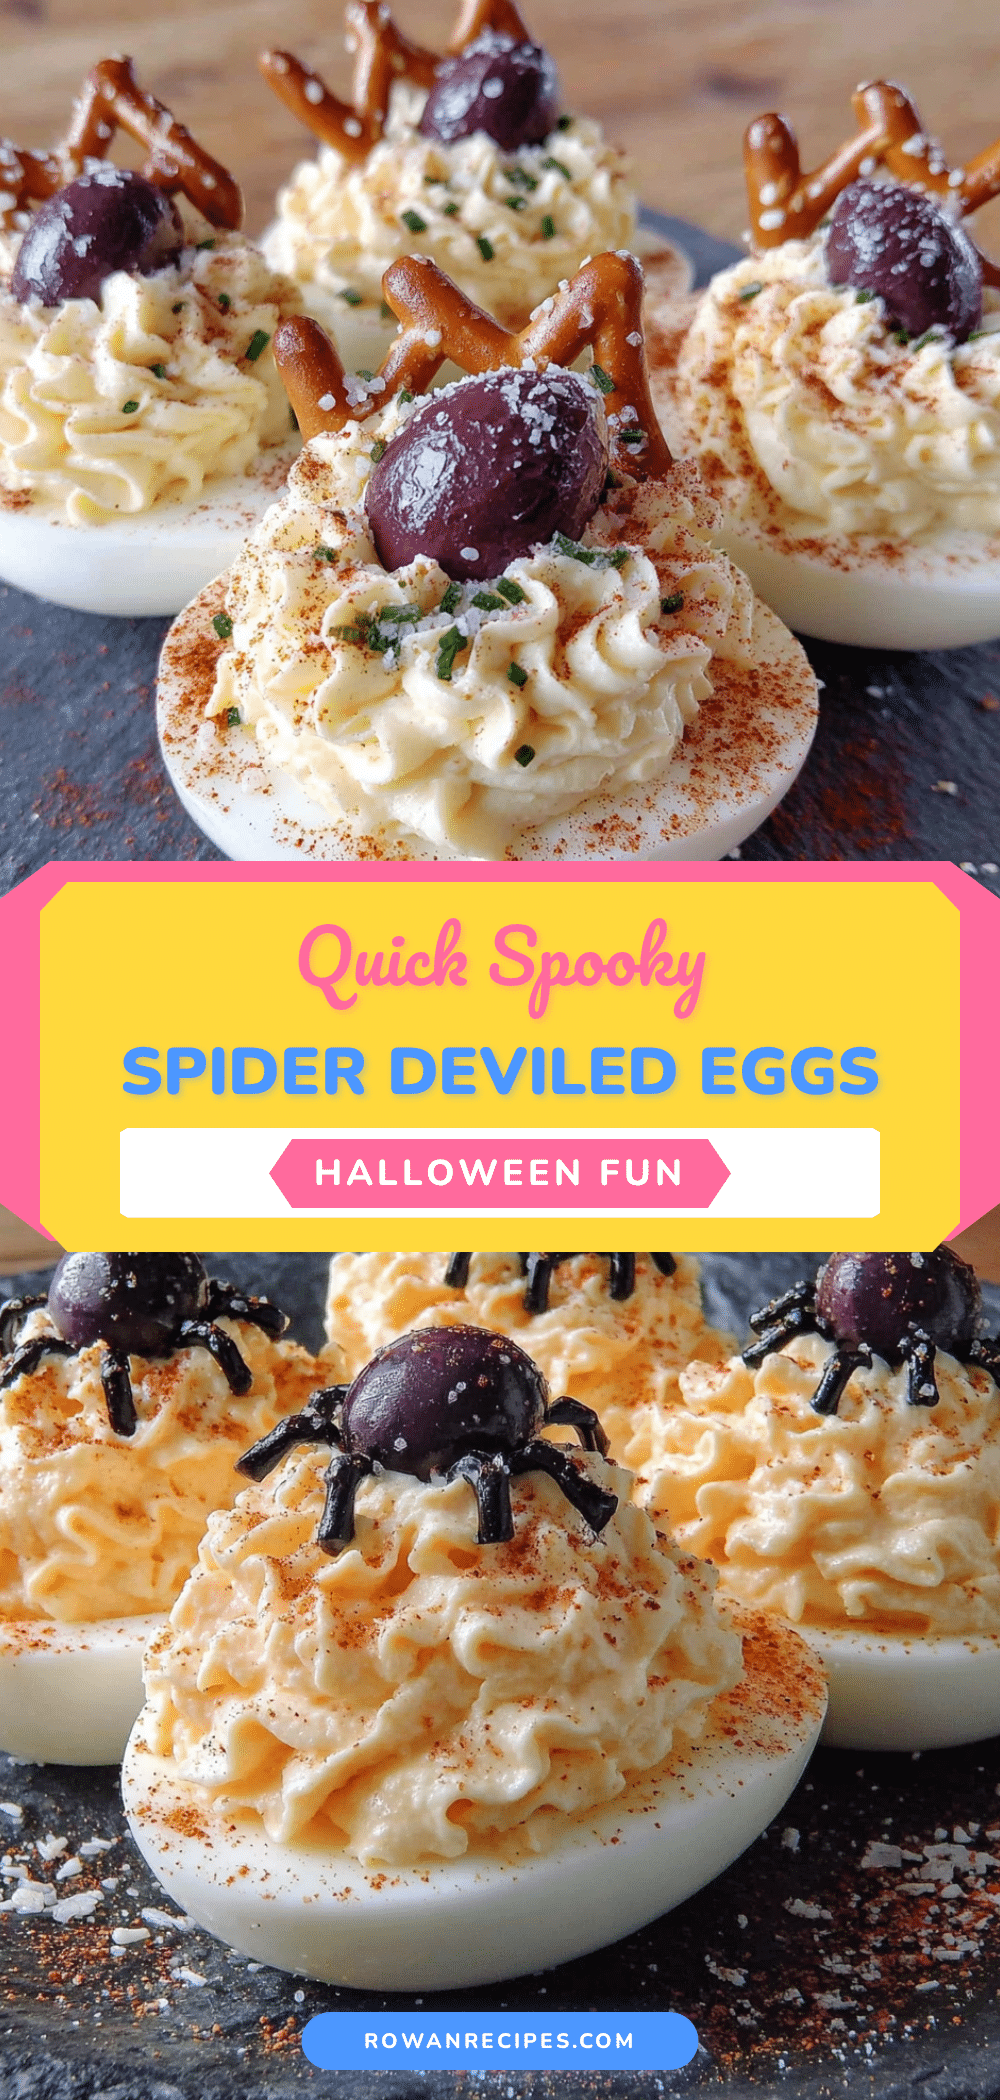
Quick Spooky Spider Deviled Eggs: Best Easy Halloween Appetizer

These Quick Spooky Spider Deviled Eggs are the perfect Halloween appetizer, combining classic deviled egg flavor with a fun, creepy-crawly design made from black olives. Ready in under 20 minutes, they’re a crowd-pleaser that looks impressive but is secretly easy to make.
- Prep Time: 10 minutes
- Cook Time: 12 minutes
- Total Time: 22 minutes
- Yield: 12-24 servings (depending on number of eggs) 1x
- Category: Appetizer
- Cuisine: American
Ingredients
- 6–12 large eggs (at least a week old for easier peeling)
- 3 tablespoons mayonnaise (full-fat recommended, like Hellmann’s or Duke’s)
- 1 teaspoon yellow mustard (or Dijon for a sharper kick)
- 1/2 teaspoon white vinegar
- Paprika for garnish (smoked paprika preferred)
- Salt and black pepper to taste
- 1 can large pitted black olives (for spiders)
- Optional: chives, sriracha, or pickle relish for garnish
Instructions
- Boil the Eggs: Place eggs in a single layer in a saucepan. Cover with cold water by about an inch. Bring to a rolling boil over high heat. Cover, turn off heat, and let sit for exactly 12 minutes. Meanwhile, prepare a bowl of ice water.
- Shock the Eggs: Transfer eggs to ice water bath using a slotted spoon. Let chill for at least 5 minutes to stop cooking and make peeling easier.
- Peel and Halve: Gently tap each egg to crack the shell, roll between palms to loosen, and peel under running cold water. Slice each egg in half lengthwise with a sharp knife, wiping the knife clean between cuts.
- Make the Filling: Place yolks in a mixing bowl. Add mayonnaise, yellow mustard, white vinegar, a pinch of salt, and black pepper. Mash with a fork until smooth and creamy. Taste and adjust seasoning if needed.
- Prepare the Spiders: For each spider, use one whole olive for the body and a second olive for the legs. Slice the second olive lengthwise into 4-5 thin strips (these are the legs). You should have 8 legs per spider, but 6 works fine.
- Fill the Eggs: Spoon yolk mixture into a piping bag or zip-top bag with a snipped corner. Pipe filling into the hollow of each egg white, mounding it slightly.
- Assemble the Spiders: Gently press 4 olive strips into the filling on each side of the egg to create legs. Place a whole olive half (cut side down) in the center of the filling to form the body. Press lightly to secure. Repeat for all eggs.
- Garnish and Serve: Lightly dust eggs with paprika using a fine-mesh sieve. Arrange on a platter and serve immediately, or refrigerate until ready.
Notes
Use older eggs for easier peeling. If olive legs keep sliding off, dip the cut side into a bit of yolk filling to act as glue. For a professional look, use a piping bag with a star tip. Deviled eggs should not be left at room temperature for more than 2 hours.
Nutrition
- Serving Size: 1 spider deviled egg
- Calories: 7080
- Sodium: 150
- Fat: 5
- Saturated Fat: 1.5
- Carbohydrates: 1
- Protein: 6
Keywords: Halloween appetizer, spider deviled eggs, easy deviled eggs, spooky deviled eggs, quick Halloween recipe, deviled eggs with olives


