By the third time I made this pumpkin dump cake in a single week, I started wondering if I had a problem. Not the kind that requires intervention, exactly—more like the kind where you find yourself staring at a can of pumpkin puree at 9 PM on a Tuesday and thinking, well, I guess we’re doing this again. The first time was an accident. I had a half-empty can of pumpkin in the fridge from a cozy stuffed pepper soup I’d made earlier, and I needed something—anything—to use it up before it turned fuzzy. The second time was curiosity. Was it really that easy, or did I just get lucky? The third time was pure, unapologetic craving. There was something about the way the buttery topping crisped up into golden shards, the way the pumpkin layer stayed soft and almost pudding-like underneath, that I couldn’t stop thinking about. It’s not fancy. It’s not complicated. But honestly? That’s exactly why it works.
Why You’ll Love This Recipe
Let’s be real for a second. Most desserts that taste this good require a stand mixer, a pastry cutter, and at least three bowls you’ll have to wash by hand. This easy pumpkin dump cake? It laughs in the face of all that. You dump, you spread, you bake. That’s it. And I say that as someone who has tested this recipe more times than I care to admit—trust me when I tell you it works every single time.
- Quick & Easy: From start to oven in under 10 minutes. No kidding. If you can open a can and sprinkle a box of cake mix, you’ve got this.
- Simple Ingredients: You probably have most of these in your pantry right now. No weird specialty items, no trips to three different stores.
- Perfect for Fall Gatherings: Thanksgiving, Friendsgiving, potlucks, or just a random Wednesday when you need something warm and sweet.
- Crowd-Pleaser: I’ve brought this to four different gatherings and watched it disappear every single time. People literally fight over the crispy edges.
- Unbelievably Delicious: The contrast between the soft, spiced pumpkin layer and the crunchy, buttery topping is next-level comfort food.
What makes this different from every other pumpkin dump cake out there? It’s the technique. Most versions just dump everything in a pan and hope for the best. I figured out that layering the butter between the cake mix and letting it melt slowly creates these incredible pockets of crispy, caramelized crunch that make every bite interesting. Plus, I’ve tested this with five different pumpkin pie spice blends, and I can tell you exactly which one gives the best flavor (more on that below). This isn’t just another version—it’s the version I’d make for my own family, and I do, constantly.
What Ingredients You Will Need
This recipe uses simple, pantry-friendly ingredients to deliver that classic pumpkin flavor with a buttery, crunchy topping. No fancy grocery runs required—just the basics, done right.
- 1 can (15 oz) pumpkin puree — Not pumpkin pie filling. Make sure you grab pure pumpkin puree. I prefer Libby’s for consistent texture, but store brands work fine too.
- 1 can (12 oz) evaporated milk — This adds richness without making the filling too heavy. Full-fat works best, but low-fat is okay in a pinch.
- 1 cup granulated sugar — Regular white sugar. You can reduce it to ¾ cup if you prefer a less sweet dessert, but I wouldn’t go lower than that.
- 2 large eggs — Room temperature if you remember, straight from the fridge if you don’t. It really doesn’t matter much here.
- 2 teaspoons pumpkin pie spice — I’ve tested this with store-bought blends and homemade versions. My favorite is McCormick’s pumpkin pie spice, but if you want to make your own, mix 1 teaspoon cinnamon, ½ teaspoon ginger, ¼ teaspoon nutmeg, ¼ teaspoon allspice, and a pinch of cloves.
- 1 box (15.25 oz) yellow cake mix — Duncan Hines or Betty Crocker both work. Do not use a butter recipe cake mix—it changes the texture. Just regular yellow cake mix.
- ¾ cup unsalted butter — Cold, cut into thin pats. Salted butter works if that’s what you have, just reduce the salt in the topping if you’re adding any.
- Optional: ½ cup chopped pecans — Adds a lovely crunch. I’ve made it with and without, and honestly, both versions are excellent.
Equipment Needed
You don’t need much for this one, which is kind of the whole point. Here’s what you’ll need:
- 9×13-inch baking dish — Glass or metal both work. I prefer glass because I can see the bottom layer browning, but metal conducts heat more evenly. Your call.
- Large mixing bowl — For whisking the pumpkin filling. Any medium-to-large bowl will do.
- Whisk or wooden spoon — A whisk works faster, but a spoon gets the job done.
- Measuring cups and spoons — Standard set. Nothing fancy.
- Can opener — Because canned pumpkin doesn’t open itself.
- Butter knife or small spatula — For spreading the cake mix evenly.
If you don’t have a 9×13 dish, you can use two 8×8 dishes instead—just check them a few minutes early since they’ll bake faster. And if you’re really in a bind, a cast iron skillet works beautifully (though you’ll get a thicker layer). I’ve done it in a 10-inch skillet and it was honestly fantastic, just needed about 5 extra minutes in the oven.
Preparation Method
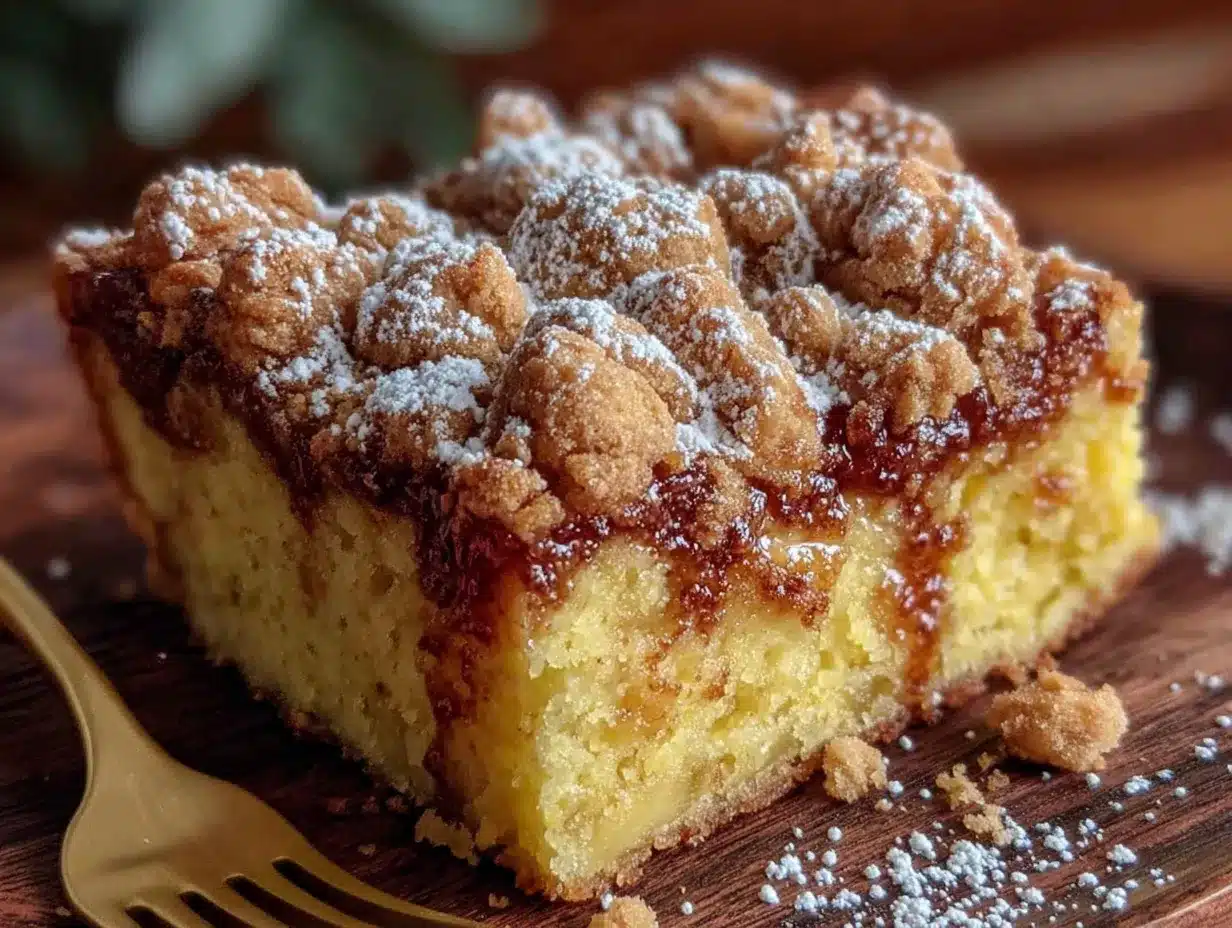
Alright, let’s get to it. This is about as straightforward as it gets, but I’ll walk you through every step so there’s no guessing.
- Preheat your oven to 350°F (175°C). While it’s heating, lightly grease your 9×13 baking dish with butter or non-stick spray. Don’t skip this—even with all that butter on top, the pumpkin layer can stick.
- Make the pumpkin filling. In your large mixing bowl, combine the pumpkin puree, evaporated milk, sugar, eggs, and pumpkin pie spice. Whisk until smooth. It should look like a thick, creamy orange custard. If you see any lumps of spice, keep whisking—they’ll dissolve eventually.
- Pour the filling into the prepared dish. Spread it evenly with your spatula. Give the dish a gentle tap on the counter to release any air bubbles. At this point, the filling should be about ½ to ¾ inch deep.
- Sprinkle the cake mix evenly over the top. Here’s the trick: don’t just dump it all in one spot and try to spread it. Sprinkle it slowly, covering the entire surface. You want an even layer, not clumps. If you see bare spots, that’s fine—the butter will fill them in.
- Add the butter. Take your cold butter pats and scatter them evenly over the cake mix layer. Don’t worry if they don’t cover every inch—they’ll melt and spread as the cake bakes. If you’re using pecans, sprinkle them over the butter now.
- Bake for 45-50 minutes. The top should be golden brown and crispy, and the edges should be bubbling. The center might still jiggle slightly—that’s okay. It will set as it cools. You’ll know it’s done when the butter has completely melted and the cake mix has formed a crispy, crackly crust.
- Cool for at least 15 minutes before serving. I know it’s hard to wait, but this step is crucial. The filling needs time to set, and the topping needs to crisp up. If you cut into it too soon, you’ll get a soupy mess. Trust me—I’ve made that mistake.
A few things to watch for: If the top is browning too quickly (around the 35-minute mark), tent it loosely with foil. If the center is still very jiggly at 50 minutes, give it another 5-10 minutes. Every oven runs a little differently, so trust your eyes more than the timer.
Cooking Tips & Techniques
I’ve made this easy pumpkin dump cake at least a dozen times, and I’ve learned a few things the hard way. Here’s what I wish someone had told me:
Use cold butter. I know it’s tempting to soften it, but cold butter melts more slowly, which gives the cake mix time to absorb it evenly. If you use melted butter, it just pools on top and you lose that beautiful crispy texture.
Don’t stir the layers. This is a dump cake, not a layered cake. The magic happens when the cake mix stays on top and the pumpkin filling stays underneath. If you stir them together, you’ll get a dense, soggy mess. Let them do their own thing.
Let it rest. I cannot stress this enough. The first time I made this, I cut into it after 10 minutes and watched the filling run all over the plate. Give it at least 15-20 minutes. The texture improves dramatically as it cools.
Watch your oven. My oven runs hot, so I check mine at 40 minutes. If yours runs cool, you might need the full 50. Get to know your oven’s quirks—it makes a difference.
Use a serrated knife to cut. The crispy topping can shatter if you use a straight blade. A serrated knife saws through cleanly without crushing the crust. Game changer, honestly.
Variations & Adaptations
One of the best things about this recipe is how flexible it is. Here are a few ways I’ve tweaked it over the years:
- Gluten-Free Version: Use a gluten-free yellow cake mix. King Arthur’s is my go-to—it bakes up almost identical to the regular stuff. Everything else stays the same.
- Dairy-Free Adaptation: Swap the evaporated milk for full-fat coconut milk (the canned kind, not the carton). Use vegan butter or coconut oil for the topping. It’s not quite as rich, but it’s still delicious.
- Spice It Up: Add ¼ teaspoon of cayenne pepper or chipotle powder to the pumpkin filling. The heat plays beautifully with the sweet, buttery topping. I tried this once on a whim and now I can’t go back.
- Nutty Crunch: Swap the pecans for chopped walnuts, sliced almonds, or even crushed pretzels for a salty-sweet twist. The pretzel version is dangerously addictive.
- Chocolate Lover’s Version: Use a chocolate cake mix instead of yellow. The chocolate-pumpkin combo sounds weird, but it works. Trust me on this one.
I’ve also made this in a slow cooker on low for 3 hours (with a paper towel under the lid to catch condensation), and it turned out surprisingly well. The topping doesn’t get quite as crispy, but the texture is almost like a pumpkin pudding cake. Worth trying if you’ve got the time.
Serving & Storage Suggestions
This pumpkin dump cake is best served warm, straight from the dish, with a generous scoop of vanilla ice cream or a drizzle of heavy cream. The contrast between the hot, soft pumpkin and the cold, melty ice cream is honestly one of life’s simple pleasures.
For presentation, I like to scoop it into shallow bowls and sprinkle a little extra cinnamon on top. If I’m feeling fancy, I’ll add a dollop of whipped cream and a few candied pecans. But honestly, it’s just as good eaten straight from the dish with a fork—no judgment here.
Leftovers (if you have any) keep well in the refrigerator for up to 5 days. Cover the dish tightly with foil or plastic wrap. The topping will soften slightly as it sits, but it’s still delicious. To reheat, pop individual portions in the microwave for 20-30 seconds, or warm the whole dish in a 300°F oven for 10-15 minutes.
You can also freeze this dessert. Let it cool completely, then wrap the entire dish in plastic wrap and foil. Freeze for up to 3 months. Thaw overnight in the fridge and reheat as above. The texture won’t be quite as crisp as fresh, but it’s still a solid 9 out of 10.
One thing I’ve noticed: the flavors actually get better after a day in the fridge. The spices meld together and the pumpkin flavor deepens. So if you can resist eating it all on day one, day two is even better.
Nutritional Information & Benefits
Let’s be honest—this is a dessert, not a health food. But it’s made with real ingredients, and there are a few nutritional bright spots worth mentioning.
Per serving (based on 12 servings): approximately 320 calories, 14g fat, 46g carbs, 4g protein, and 2g fiber. The pumpkin puree is packed with vitamin A (over 200% of your daily needs per serving), plus a good dose of fiber and antioxidants. The eggs add protein, and the butter—well, the butter adds happiness.
If you’re watching your sugar intake, you can reduce the sugar in the filling to ¾ cup without sacrificing texture. The cake mix already has plenty of sweetness. For a lower-calorie version, use a sugar-free cake mix and a sugar substitute in the filling (though I haven’t tested this personally).
This recipe is vegetarian-friendly and can easily be made gluten-free or dairy-free with the substitutions mentioned above. It does contain gluten, dairy, and eggs in its standard form, so keep that in mind if you’re cooking for someone with allergies.
Conclusion
Look, I’m not going to tell you this easy pumpkin dump cake will change your life. But I will tell you this: it’s the kind of dessert that makes people close their eyes when they take the first bite. It’s the kind of recipe you’ll make on a random Tuesday and then find yourself making again two days later because you can’t stop thinking about it. It’s simple, it’s forgiving, and it’s absolutely delicious.
I’d love to hear how yours turns out. Did you try the chocolate version? Add pecans? Make it for a crowd? Drop a comment below and let me know—I read every single one. And if you’re looking for more easy, crowd-pleasing desserts, be sure to check out my cozy pecan pie bars or these peanut butter cup rice krispie treats for more no-fuss sweet treats. Happy baking, friends!
Frequently Asked Questions
Can I use fresh pumpkin instead of canned?
Yes, but you’ll need to cook and puree it first, then drain off any excess liquid. Fresh pumpkin has more water than canned, so your filling might be slightly looser. I’d recommend roasting the pumpkin rather than boiling it to keep the flavor concentrated.
Why is my dump cake soupy in the middle?
This usually happens for one of two reasons: either it wasn’t baked long enough, or it was cut too soon. Give it the full 45-50 minutes, and let it cool for at least 15-20 minutes before serving. The filling sets as it cools, so patience is key here.
Can I make this ahead of time?
Absolutely. You can assemble the entire dish (without baking) up to 24 hours in advance. Just cover it and refrigerate. When you’re ready to bake, add about 5-10 minutes to the baking time since you’re starting from cold. You can also bake it fully and reheat—it’s almost as good the next day.
What’s the best cake mix to use?
Regular yellow cake mix is my go-to. Duncan Hines and Betty Crocker both work perfectly. Don’t use butter recipe cake mix—it changes the texture and makes the topping too dense. And while I haven’t tested it, a spice cake mix would probably be incredible here.
Can I double this recipe?
Yes, but use two separate 9×13 dishes rather than one larger pan. The layers need to be the right thickness for the texture to work. If you try to cram it all into one pan, you’ll end up with a thick, undercooked middle and burnt edges. Two pans, same baking time—easy peasy.
Pin This Recipe!
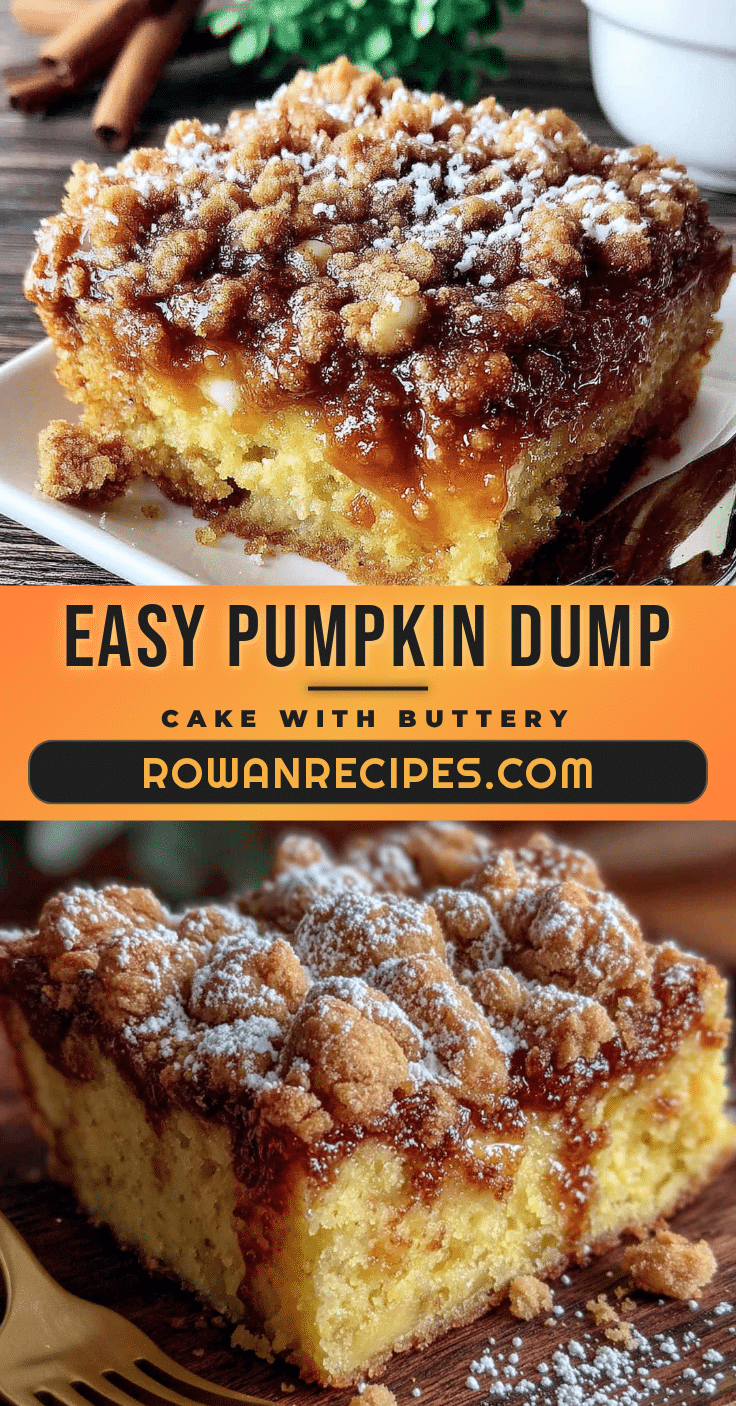
Easy Pumpkin Dump Cake: Best 5-Ingredient Dessert
This easy pumpkin dump cake is a simple, 5-ingredient dessert with a soft, spiced pumpkin layer and a buttery, crispy topping. Perfect for fall gatherings, it comes together in under 10 minutes and is always a crowd-pleaser.
- Prep Time: 10 minutes
- Cook Time: 45-50 minutes
- Total Time: 55-60 minutes
- Yield: 12 servings 1x
- Category: Dessert
- Cuisine: American
Ingredients
- 1 can (15 oz) pumpkin puree
- 1 can (12 oz) evaporated milk
- 1 cup granulated sugar
- 2 large eggs
- 2 teaspoons pumpkin pie spice
- 1 box (15.25 oz) yellow cake mix
- ¾ cup unsalted butter, cold and cut into thin pats
- ½ cup chopped pecans (optional)
Instructions
- Preheat your oven to 350°F (175°C). Lightly grease a 9×13-inch baking dish with butter or non-stick spray.
- In a large mixing bowl, combine the pumpkin puree, evaporated milk, sugar, eggs, and pumpkin pie spice. Whisk until smooth.
- Pour the filling into the prepared dish and spread evenly. Tap the dish gently on the counter to release air bubbles.
- Sprinkle the cake mix evenly over the pumpkin filling, covering the entire surface.
- Scatter the cold butter pats evenly over the cake mix layer. If using pecans, sprinkle them over the butter.
- Bake for 45-50 minutes, until the top is golden brown and crispy and the edges are bubbling. If the top browns too quickly, tent loosely with foil.
- Cool for at least 15-20 minutes before serving. The filling will set as it cools.
Notes
Use cold butter for a crispier topping. Do not stir the layers. Let the cake rest for at least 15-20 minutes before cutting. For a gluten-free version, use a gluten-free yellow cake mix. For a dairy-free version, use full-fat coconut milk and vegan butter. Leftovers keep in the refrigerator for up to 5 days and can be frozen for up to 3 months.
Nutrition
- Serving Size: 1 serving
- Calories: 320
- Sugar: 30
- Sodium: 320
- Fat: 14
- Saturated Fat: 8
- Carbohydrates: 46
- Fiber: 2
- Protein: 4
Keywords: pumpkin dump cake, easy pumpkin dessert, 5-ingredient dessert, fall dessert, pumpkin cake, dump cake


