I burned three batches of pumpkin crisp before I figured out the oat topping was the problem, not the filling. The first one came out with a topping that looked beautiful—golden, crispy, exactly what you want—but the pumpkin layer underneath was still cold and soupy. The second batch I overcompensated, baked it so long the topping turned into charcoal, and the filling tasted like pumpkin jerky. The third time, I actually cried a little. Not because it burned, but because I was so sure I had it figured out, and then the topping just sank into the filling like a sad little oat raft going under.
Here’s what I learned after all that trial and error: the texture of an Easy Pumpkin Crisp with Crunchy Oat Topping is all about how you treat that topping before it ever hits the oven. You can’t just toss oats and butter together and hope for the best. That was my mistake for way too long. I was treating it like a crumble, but a crisp needs that distinct, snappy layer on top that stays crunchy even after it sits overnight.
The funny thing is, I wasn’t even trying to make pumpkin crisp at first. I had a can of pumpkin puree sitting in my pantry for weeks, leftover from a cozy pecan pie bars experiment that went sideways. And honestly, I’m not even a huge pumpkin dessert person. Give me chocolate or caramel any day. But this crisp? It changed my mind.
Why You’ll Love This Recipe
This isn’t just another pumpkin dessert that disappears into the sea of fall recipes. This Easy Pumpkin Crisp with Crunchy Oat Topping is the one that actually delivers on texture, flavor, and simplicity. Here’s what makes it stand out:
- Quick & Easy: From start to oven in about 15 minutes. No complicated steps, no stand mixer needed, no chilling time. Just mix, layer, and bake.
- Simple Ingredients: You probably have most of these in your kitchen right now. Canned pumpkin, oats, butter, brown sugar, basic spices. No weird specialty items.
- Perfect for Fall Gatherings: This is the dessert that shows up at Thanksgiving, Friendsgiving, potlucks, and cozy Sunday dinners. It feeds a crowd without any fuss.
- Crowd-Pleaser: I’ve served this to pumpkin lovers and pumpkin skeptics alike. The crunchy oat topping wins everyone over. It’s the texture that does it.
- Unbelievably Delicious: The contrast between the silky, spiced pumpkin filling and that buttery, crunchy oat crust is honestly addictive. You’ll find yourself picking at the topping straight out of the pan.
What makes this recipe different from the dozens of pumpkin crisps you’ll find online is the technique. Most recipes just dump oats and butter together and call it done. I figured out that toasting the oats first and using the right fat-to-dry ratio makes all the difference. This topping stays crunchy for days. No sad, soggy oats here.
This is comfort food at its best—warm, spiced, and satisfying. It’s the kind of dessert that makes you close your eyes after the first bite. And honestly, it’s easier than pumpkin pie with none of the crust drama.
What Ingredients You Will Need
This recipe uses simple, wholesome ingredients that come together to create something truly special. Most of these are pantry staples, which makes this Easy Pumpkin Crisp with Crunchy Oat Topping perfect for spontaneous baking cravings.
For the Pumpkin Filling
- Canned pumpkin puree (15 oz can) – Make sure you get pure pumpkin, not pumpkin pie filling. They’re different and the pie filling has added sugar and spices that will throw off the balance. I prefer Libby’s for consistent texture.
- Granulated sugar (½ cup) – Just regular white sugar. You could use coconut sugar but it changes the color a bit.
- Brown sugar, packed (¼ cup) – Light or dark works. Dark gives a deeper molasses flavor that I personally love with pumpkin.
- Large eggs (2, room temperature) – Room temperature eggs blend more smoothly into the filling. If you forget to take them out, just place them in warm water for 5 minutes.
- Evaporated milk (12 oz can) – This gives the filling that silky, almost custard-like texture. You can use heavy cream if that’s what you have, but evaporated milk is lighter and lets the pumpkin shine.
- Vanilla extract (1 teaspoon) – Pure vanilla if you’ve got it. Imitation works fine too.
- Pumpkin pie spice (2 teaspoons) – Store-bought is fine, but I make my own with cinnamon, nutmeg, ginger, and a tiny pinch of cloves. You can also just use cinnamon if that’s all you have.
- Salt (¼ teaspoon) – Don’t skip this. Salt makes the sweetness pop and balances the spices.
For the Crunchy Oat Topping
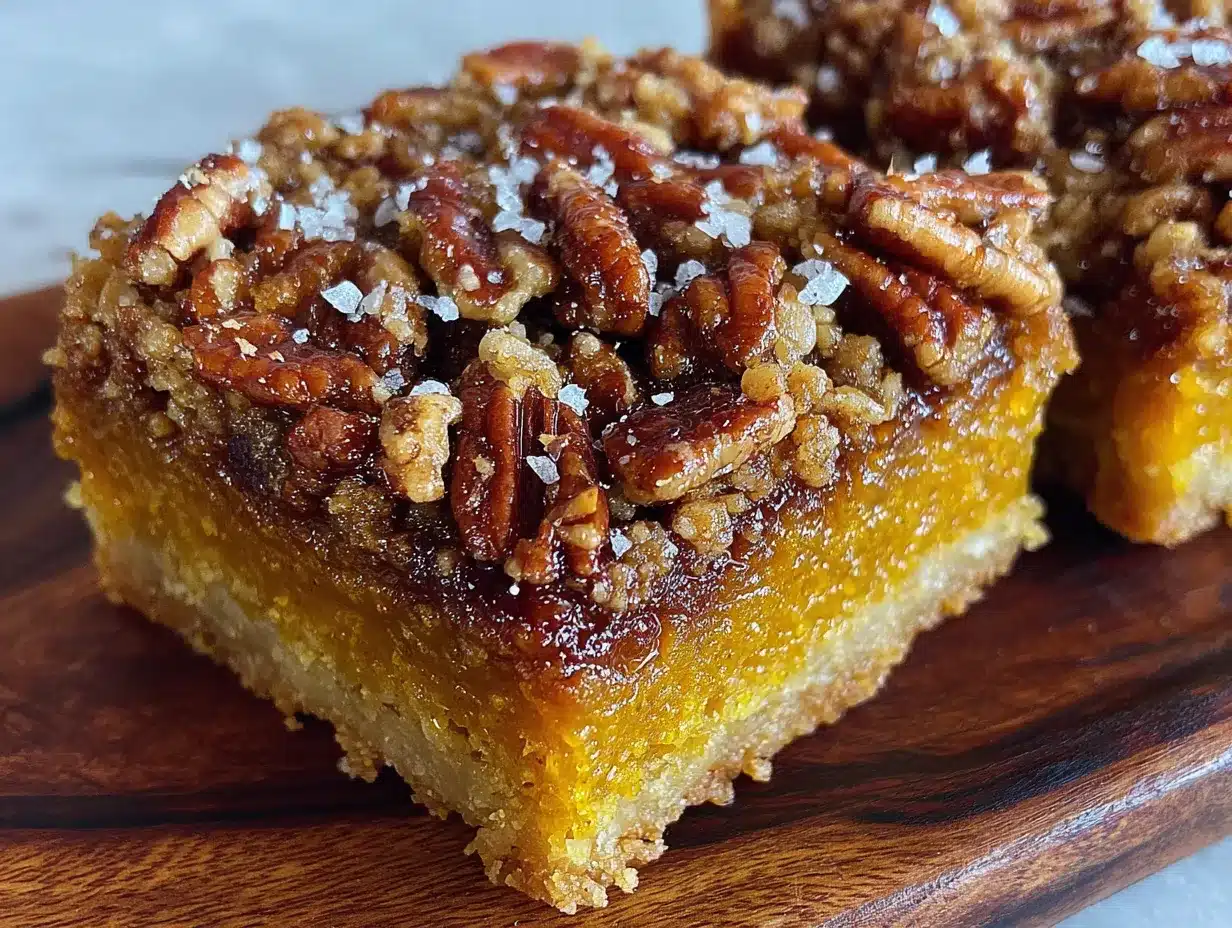
- Rolled oats (1 cup) – Not quick oats. Rolled oats give that chewy-crunchy texture that makes a crisp a crisp. Quick oats turn into mush.
- All-purpose flour (¾ cup) – Spoon and level your flour. Scooping directly from the bag packs it down and you’ll end up with a dry, crumbly topping.
- Brown sugar, packed (¾ cup) – This is where the sweetness and that caramel-like flavor comes from in the topping.
- Unsalted butter, melted (½ cup, 1 stick) – Salted butter works too, just reduce the added salt in the topping to ⅛ teaspoon.
- Cinnamon (1 teaspoon) – Adds warmth to the topping that complements the spiced filling.
- Salt (¼ teaspoon) – Balances the sweetness.
- Chopped pecans or walnuts (½ cup, optional) – I add these about half the time. They add extra crunch and a nutty flavor that’s incredible with pumpkin.
Equipment Needed
Nothing fancy here. You probably already own everything you need to make this Easy Pumpkin Crisp with Crunchy Oat Topping.
- 9×13 inch baking dish – Glass or ceramic works best. Metal can work but you’ll need to watch the baking time closely.
- Mixing bowls – One large bowl for the filling, one medium bowl for the topping.
- Whisk – For smoothing out the pumpkin filling without lumps.
- Spatula or wooden spoon – For mixing the topping together.
- Measuring cups and spoons – Accurate measurements matter here, especially for the filling.
- Knife and cutting board – Only if you’re adding nuts and need to chop them.
- Skillet (optional) – If you decide to toast the oats first, which I highly recommend.
I’ve made this in a disposable aluminum pan before for a potluck and it worked fine. Just keep an eye on the edges because metal conducts heat differently. And honestly, you don’t need a stand mixer or hand mixer for this. A whisk and some elbow grease does the job perfectly.
Preparation Method
Step 1: Preheat and Prep
Preheat your oven to 350°F (175°C). Grease your 9×13 baking dish with butter or non-stick spray. Don’t skip this step—the filling can stick something fierce if you do.
Step 2: Make the Pumpkin Filling
In a large bowl, whisk together the canned pumpkin, granulated sugar, and brown sugar until smooth. Add the eggs one at a time, whisking well after each addition. Pour in the evaporated milk and vanilla extract, then whisk until everything is completely combined. Add the pumpkin pie spice and salt, and whisk one more time. The mixture should be smooth, glossy, and slightly thick—like a thin pudding. Set it aside while you make the topping.
Step 3: Toast the Oats (This is the Secret)
Here’s where I messed up all those times. If you want a truly crunchy topping that stays crunchy, toast the oats first. Heat a dry skillet over medium heat, add the rolled oats, and stir constantly for 3-4 minutes until they smell nutty and turn slightly golden. Watch them carefully—they can burn fast. Pour them into a bowl to cool while you prepare the rest of the topping.
Step 4: Make the Crunchy Oat Topping
In a medium bowl, combine the toasted oats, flour, brown sugar, cinnamon, and salt. Stir with a fork or your fingers to break up any brown sugar clumps. Pour the melted butter over the dry ingredients and mix with a spatula until everything is moistened and forms small clumps. If you’re using nuts, fold them in now. The mixture should look like wet sand with some bigger chunks—that’s what gives you those crispy bits.
Step 5: Assemble the Crisp
Pour the pumpkin filling into your prepared baking dish and spread it evenly. Sprinkle the oat topping evenly over the filling. Don’t press it down—let it sit loosely on top. Pressing it will make it sink into the filling as it bakes, and you’ll lose that crunchy layer.
Step 6: Bake to Perfection
Bake at 350°F (175°C) for 40-45 minutes. The filling should be set around the edges but still have a slight jiggle in the center. The topping should be deep golden brown and crispy. If the topping is browning too fast but the filling isn’t set yet, tent the dish loosely with foil for the last 10 minutes. Let the crisp cool on a wire rack for at least 15-20 minutes before serving. This is important—the filling needs time to set up. If you scoop it too soon, it’ll be runny.
Cooking Tips & Techniques
After all those burned batches, I’ve collected some hard-won wisdom about this Easy Pumpkin Crisp with Crunchy Oat Topping. Here’s what I wish someone had told me from the start.
Toast your oats. I already said this, but it’s worth repeating. Raw oats in a crisp topping steam as they bake, and that steam makes them soft. Toasting them first drives off moisture and locks in that crunch. It’s a 4-minute step that changes everything.
Don’t overmix the filling. Whisk just until everything is combined. Overmixing incorporates too much air, which can cause the filling to puff up and then collapse, leaving you with a weird texture. You want it smooth, not frothy.
Room temperature ingredients matter. Cold eggs and cold milk can make the filling seize up or take longer to bake evenly. Set everything out 30 minutes before you start. I’ve forgotten to do this and the filling turned out fine, just took an extra 10 minutes in the oven.
Check for doneness with a knife. Insert a knife about 2 inches from the center. If it comes out clean, the crisp is done. The center will still look slightly jiggly, but that’s okay—it continues to set as it cools.
Let it rest. I know it’s hard to wait, especially when your kitchen smells like fall heaven. But cutting into this too soon is the number one mistake people make. Give it 20 minutes minimum. The filling firms up, the flavors meld, and the topping stays crunchy instead of getting soggy from the steam.
Variations & Adaptations
One of the best things about this Easy Pumpkin Crisp with Crunchy Oat Topping is how easy it is to change up. Here are some variations I’ve tried and loved.
Gluten-Free Version: Swap the all-purpose flour for a 1:1 gluten-free flour blend. Bob’s Red Mill works great. Also make sure your oats are certified gluten-free if you’re sensitive. The texture stays almost identical, which surprised me the first time I tried it.
Dairy-Free Version: Use melted coconut oil or vegan butter instead of regular butter. For the filling, substitute the evaporated milk with full-fat coconut milk. The coconut flavor is subtle and actually works really well with pumpkin and spices.
Spice It Up: Add ¼ teaspoon of cardamom or allspice to the filling for a more complex flavor profile. I once added a pinch of cayenne pepper to the topping and it was weirdly amazing—just a tiny hint of heat that made the sweetness pop.
Apple-Pumpkin Hybrid: Layer thin slices of peeled apple (Granny Smith works best) at the bottom of the dish before pouring in the pumpkin filling. The apples soften and add a tart contrast to the sweet, spiced pumpkin. This is my personal favorite variation for Thanksgiving.
Individual Servings: Divide the filling and topping among 6-8 ramekins and bake for 20-25 minutes instead. Perfect for dinner parties or when you want portion control (though I’ve never met anyone who ate just one).
Serving & Storage Suggestions
This crisp is incredibly versatile when it comes to serving. I’ve eaten it for breakfast the next day and I’m not ashamed to admit it.
Serving Temperature: Serve warm, not hot. That 20-minute rest period brings it to the perfect temperature. You can also serve it at room temperature, especially if you’re bringing it to a potluck.
What to Serve With It: Vanilla ice cream is the classic choice and for good reason—the cold, creamy contrast against the warm, crunchy crisp is perfect. Whipped cream works too. For something different, try a dollop of Greek yogurt or a drizzle of caramel sauce. I’ve even served it with a scoop of creamy no-bake strawberry cheesecake delight on the side for a dessert board situation that was a huge hit.
Storage: Cover the baking dish with foil or plastic wrap and store in the refrigerator for up to 5 days. The topping will lose some of its crunch over time, but it’s still delicious. To restore some crispness, reheat individual portions in the oven or toaster oven at 350°F for 5-7 minutes. The microwave works in a pinch but the topping will definitely soften.
Freezing: You can freeze the baked and cooled crisp for up to 3 months. Wrap the entire dish tightly in plastic wrap, then foil. Thaw overnight in the refrigerator and reheat at 350°F until warmed through. The texture won’t be quite as good as fresh, but it’s still a solid dessert option when you need something quick.
Nutritional Information & Benefits
While this is definitely a treat, it does have some redeeming qualities. Here’s the approximate nutritional breakdown per serving (based on 12 servings):
- Calories: 285
- Fat: 12g
- Carbohydrates: 41g
- Fiber: 3g
- Sugar: 26g
- Protein: 5g
Pumpkin is packed with vitamin A, which is great for eye health and immune function. It’s also a good source of fiber, which helps with digestion and keeps you feeling full. The oats provide complex carbohydrates and more fiber, plus they’re heart-healthy. So while this isn’t health food by any stretch, it’s not empty calories either. You’re getting some actual nutrition in every bite.
For those watching their sugar intake, you can reduce the sugar in the filling by a third without sacrificing too much flavor. The sweetness from the pumpkin and the brown sugar in the topping carry the dessert. If you’re diabetic or on a low-carb diet, this might not be the best choice, but a small serving with a big dollop of unsweetened whipped cream can work as an occasional treat.
Conclusion
This Easy Pumpkin Crisp with Crunchy Oat Topping has become my go-to fall dessert for a reason. It’s forgiving, adaptable, and delivers that cozy, spiced comfort that makes autumn baking so special. After all those burned batches and soggy toppings, I finally landed on a version that works every single time. And now it’s yours.
I’d love to hear how yours turns out. Did you add nuts? Try a different spice blend? Serve it with something unexpected? Drop a comment below and let me know. And if you’re looking for more cozy dessert inspiration, check out this easy sweet strawberry rhubarb crisp for when summer cravings hit.
Go ahead, preheat that oven. Your kitchen is about to smell incredible.
Frequently Asked Questions
Can I use fresh pumpkin instead of canned?
Yes, but you’ll need to roast and puree it first. Fresh pumpkin has more water content than canned, so you’ll want to drain it in a cheesecloth-lined strainer for about an hour after pureeing. Otherwise, the filling can turn out watery. Canned pumpkin is actually more consistent for baking, which is why most recipes call for it.
Why did my topping sink into the filling?
This usually happens for two reasons. Either you pressed the topping down when you sprinkled it on, or your filling was too thin. Make sure you’re not over-mixing the filling and that you’re using the right amount of evaporated milk. Also, let the topping sit loosely on top—don’t pat it down.
Can I make this ahead of time?
Absolutely. You can assemble the entire crisp (without baking) up to 24 hours in advance. Cover and refrigerate, then add about 10 minutes to the baking time since you’re starting from cold. You can also bake it fully, let it cool, and reheat individual portions as needed.
How do I make the topping extra crunchy?
Toast the oats first, use melted butter instead of softened, and don’t skip the nuts if you want maximum crunch. You can also add a tablespoon of cornstarch to the topping mixture—it helps absorb moisture and keeps things crispy. And whatever you do, don’t cover the crisp while it’s still warm, or the steam will soften the topping.
Can I use quick oats instead of rolled oats?
I don’t recommend it. Quick oats are cut smaller and processed more, so they absorb liquid faster and turn mushy. Rolled oats hold their shape and give you that chewy-crunchy texture that makes a crisp a crisp. If rolled oats are all you have, they’ll work in a pinch, just expect a softer topping.
Pin This Recipe!
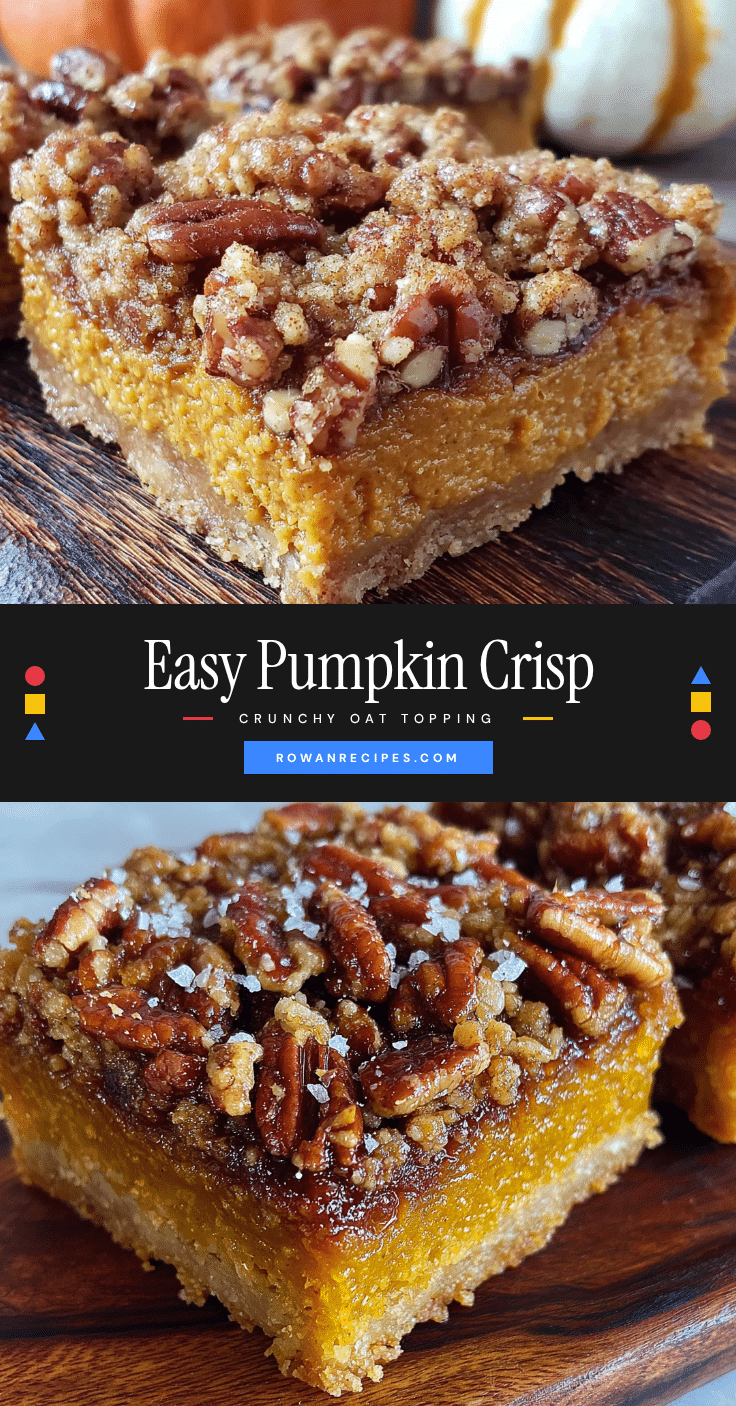
Easy Pumpkin Crisp with Crunchy Oat Topping
This Easy Pumpkin Crisp with Crunchy Oat Topping features a silky, spiced pumpkin filling and a buttery, crunchy oat topping that stays crispy for days. It’s a quick and simple fall dessert that’s perfect for gatherings and guaranteed to please pumpkin lovers and skeptics alike.
- Prep Time: 15 minutes
- Cook Time: 45 minutes
- Total Time: 1 hour
- Yield: 12 servings 1x
- Category: Dessert
- Cuisine: American
Ingredients
- 15 oz canned pumpkin puree (not pumpkin pie filling)
- ½ cup granulated sugar
- ¼ cup packed brown sugar
- 2 large eggs, room temperature
- 12 oz evaporated milk
- 1 teaspoon vanilla extract
- 2 teaspoons pumpkin pie spice
- ¼ teaspoon salt
- 1 cup rolled oats (not quick oats)
- ¾ cup all-purpose flour
- ¾ cup packed brown sugar
- ½ cup unsalted butter, melted (1 stick)
- 1 teaspoon cinnamon
- ¼ teaspoon salt
- ½ cup chopped pecans or walnuts (optional)
Instructions
- Preheat oven to 350°F (175°C). Grease a 9×13 inch baking dish with butter or non-stick spray.
- In a large bowl, whisk together canned pumpkin, granulated sugar, and brown sugar until smooth. Add eggs one at a time, whisking well after each. Pour in evaporated milk and vanilla extract, whisk until combined. Add pumpkin pie spice and salt, whisk until smooth and slightly thick like thin pudding. Set aside.
- Toast the oats: Heat a dry skillet over medium heat. Add rolled oats and stir constantly for 3-4 minutes until fragrant and slightly golden. Pour into a bowl to cool.
- In a medium bowl, combine toasted oats, flour, brown sugar, cinnamon, and salt. Stir with a fork to break up clumps. Pour melted butter over dry ingredients and mix with a spatula until moistened and small clumps form. Fold in nuts if using. Mixture should look like wet sand with some bigger chunks.
- Pour pumpkin filling into prepared baking dish and spread evenly. Sprinkle oat topping evenly over filling; do not press down.
- Bake at 350°F (175°C) for 40-45 minutes. Filling should be set around edges with slight jiggle in center; topping should be deep golden brown and crispy. If topping browns too fast, tent loosely with foil for last 10 minutes.
- Let cool on a wire rack for at least 15-20 minutes before serving. Filling needs time to set.
Notes
Toast oats first for maximum crunch. Do not press topping down. Let crisp rest 20 minutes before serving. For gluten-free, use 1:1 gluten-free flour blend and certified gluten-free oats. For dairy-free, use melted coconut oil or vegan butter and full-fat coconut milk instead of evaporated milk. Store covered in refrigerator up to 5 days; reheat in oven at 350°F for 5-7 minutes to restore crispness.
Nutrition
- Serving Size: 1 serving
- Calories: 285
- Sugar: 26
- Sodium: 180
- Fat: 12
- Saturated Fat: 6
- Carbohydrates: 41
- Fiber: 3
- Protein: 5
Keywords: pumpkin crisp, easy pumpkin dessert, oat topping, fall dessert, pumpkin recipe, crunchy topping, Thanksgiving dessert


