My husband took one bite, stopped chewing, and just looked at me. Then he scraped the last of the garlic butter sauce off his plate with his fork and asked if we could have this every week. That was three weeks ago, and I’ve made it twice since then—not because he asked again, but because I kept craving it myself.
This easy one-pan garlic butter chicken and rice came together on a Tuesday when I had thirty minutes and zero patience for a sink full of dishes. I had chicken thighs in the fridge, a head of garlic that was starting to sprout (you know how that goes), and a half-empty box of rice staring at me from the pantry. I figured I’d just throw it all in one skillet and hope for the best.
Honestly? It turned out better than half the recipes I’ve spent hours testing. The rice soaks up all that garlicky, buttery goodness as it cooks, and the chicken gets this golden crust that makes you wonder why you ever bothered with complicated marinades. It’s one of those meals where everything just works together without you having to try too hard.
I’ve made enough kitchen mistakes to know when something is actually special, and this one earned a permanent spot in our dinner rotation. No fuss, no fancy techniques—just real food that tastes like you spent way more effort than you actually did.
Why You’ll Love This Recipe
Let me tell you why this easy one-pan garlic butter chicken and rice has become my go-to answer for “what’s for dinner?”
- One Pan, Minimal Mess : Everything cooks in a single skillet, which means you’re not staring at a mountain of dishes after dinner. That alone is worth celebrating on a busy weeknight.
- Simple Pantry Ingredients : You probably already have most of what you need. Chicken, rice, garlic, butter, broth—nothing fancy required.
- Ready in Under 45 Minutes : From start to finish, this comes together faster than takeout delivery. The rice cooks right alongside the chicken, so you’re not waiting on separate components.
- Family-Approved : My kids cleaned their plates without prompting, and my husband actually asked for leftovers the next day. That never happens.
- Comfort Food That Delivers : The garlic butter sauce seeps into every grain of rice, and the chicken stays juicy with that perfect golden crust. It’s the kind of meal that makes you close your eyes after the first bite.
What sets this recipe apart is the technique. Instead of cooking the chicken separately and making rice in another pot, everything happens in that same skillet. The rice absorbs the chicken drippings and garlic butter as it simmers, creating layers of flavor you just can’t get from separate cooking methods. It’s not just another one-pan dinner—it’s the one you’ll actually want to make again.
What Ingredients You Will Need
This recipe keeps things simple with ingredients that work together beautifully. Here’s what you’ll need to grab:
- 4 bone-in, skin-on chicken thighs (about 1.5 pounds) — The skin gets beautifully crispy while the meat stays tender and juicy. You can use boneless thighs if you prefer, just reduce the cooking time by about 10 minutes.
- 2 tablespoons unsalted butter — I use salted butter in a pinch, just cut back on the added salt later. Kerrygold is my go-to for that rich, creamy flavor.
- 6 cloves garlic, minced — Fresh garlic makes a huge difference here. Don’t use the jarred stuff; it won’t give you that same punchy, aromatic flavor.
- 1 cup long-grain white rice — Basmati or jasmine work beautifully. Avoid short-grain rice as it gets too sticky for this dish.
- 2 cups low-sodium chicken broth — Swanson’s is my usual pick. Low-sodium lets you control the salt level yourself.
- 1/2 teaspoon salt — Plus more for seasoning the chicken. I use fine sea salt for even distribution.
- 1/4 teaspoon black pepper — Freshly ground if you can manage it.
- 1/4 teaspoon paprika — Adds a subtle warmth and helps the chicken get that gorgeous golden color.
- 1/4 teaspoon onion powder — Rounds out the savory notes without overpowering the garlic.
- 1/2 cup frozen peas — Optional, but I love the pop of color and sweetness they add at the end.
- Fresh parsley, chopped — For garnish and that fresh finish.
Ingredient Tips: Look for chicken thighs with the skin still attached and intact—that’s where all the crispy magic happens. If you’re using fresh garlic (please do), give it a rough chop rather than mincing it too fine; you want little pieces that will soften and melt into the butter without burning.
For the rice, I’ve tested this with both jasmine and basmati, and both work great. Jasmine gives a slightly more floral aroma, while basmati stays a bit more separate. Honestly, whatever long-grain rice you have in your pantry will work just fine.
Equipment Needed
You don’t need a fancy kitchen to pull this off. Here’s what you’ll actually use:
- Large skillet or braiser (10-12 inches with a tight-fitting lid) — A cast iron skillet works beautifully, but any heavy-bottomed pan with a lid will do. I use my trusty Lodge cast iron for that even heat distribution.
- Sharp knife — For mincing garlic and chopping parsley. A decent chef’s knife makes this job take thirty seconds instead of five minutes.
- Cutting board — Preferably one that won’t slide around on you.
- Measuring cups and spoons — Rice and liquid ratios matter here, so be precise.
- Tongs — For flipping the chicken without tearing the skin.
- Wooden spoon or spatula — For stirring the rice and scraping up any browned bits from the bottom of the pan.
If you don’t have a lid that fits your skillet, a sheet of aluminum foil crimped tightly around the edges works as a perfect substitute. I’ve done it more times than I care to admit.
Preparation Method
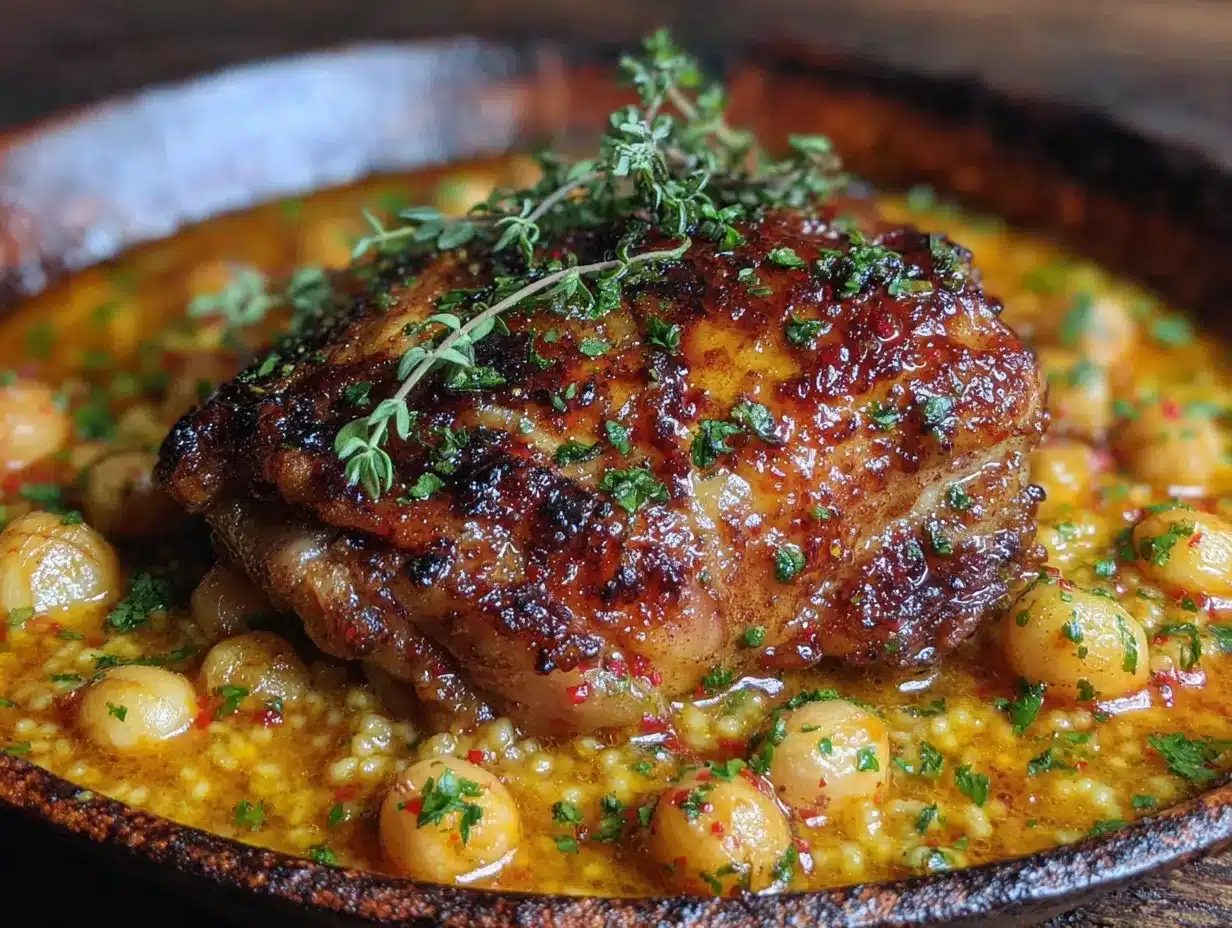
Let me walk you through this step by step. Trust the process—it’s simpler than it looks.
- Pat the chicken thighs dry with paper towels. This is non-negotiable if you want crispy skin. Season both sides generously with salt, pepper, paprika, and onion powder. Let them sit at room temperature for about 10 minutes while you prep everything else.
- Heat your skillet over medium-high heat and add 1 tablespoon of the butter. Once it’s melted and sizzling (but not browning), place the chicken thighs skin-side down. Listen for that satisfying sizzle—if it’s too quiet, your pan isn’t hot enough.
- Cook the chicken undisturbed for 6-7 minutes until the skin is deep golden brown and crispy. Don’t peek or move them around; let that crust develop. Flip using tongs and cook for another 4-5 minutes on the second side. The chicken should reach 165°F internally, but we’ll finish cooking it with the rice later.
- Remove the chicken to a plate and leave the rendered fat in the pan. Reduce the heat to medium. Add the remaining 1 tablespoon of butter and let it melt, then toss in the minced garlic. Stir constantly for about 30 seconds until it’s fragrant but not brown. Burnt garlic turns bitter fast, so keep moving it.
- Add the rice to the pan and stir it around for about a minute, coating each grain in that garlic butter mixture. You’ll hear it start to crackle slightly. This toasting step adds so much depth to the final dish.
- Pour in the chicken broth and stir to combine, scraping up any browned bits from the bottom of the pan. Those bits are pure flavor gold—don’t leave them behind. Bring everything to a gentle simmer.
- Nestle the chicken thighs back into the pan, skin-side up, on top of the rice. They’ll sit partially above the liquid, which keeps the skin crispy while the rice cooks below. Cover the pan with a tight-fitting lid and reduce the heat to low.
- Let it simmer gently for 18-20 minutes. Don’t lift the lid during this time—you’ll let all the steam escape and mess with the rice cooking process. Set a timer and walk away if you have to.
- After 18 minutes, check the rice. It should be tender and have absorbed most of the liquid. If it’s still a bit firm, add 2-3 tablespoons of water, replace the lid, and cook for another 3-5 minutes. If using frozen peas, scatter them over the top during the last 5 minutes of cooking.
- Remove from heat and let it rest, covered, for 5 minutes. This lets the rice finish steaming and the flavors meld together. Fluff the rice gently with a fork, taste for seasoning, and add more salt or pepper if needed. Garnish with fresh parsley and serve straight from the pan.
A note on timing: The first time I made this, I got impatient and lifted the lid after 12 minutes to check on things. The rice turned out uneven and slightly crunchy in spots. Learn from my mistake—trust the covered cooking time and have a little patience.
Sensory cues to watch for: When you first add the rice to the garlic butter, you should hear a gentle crackling sound. When you pour in the broth, it should sizzle and steam immediately. And when you lift the lid after cooking, the aroma should hit you with that warm, garlicky, buttery smell that makes your stomach growl.
Cooking Tips & Techniques
After making this easy one-pan garlic butter chicken and rice more times than I can count, I’ve picked up a few tricks that make a real difference.
Don’t skip drying the chicken skin. This is the number one mistake I see people make. Wet skin won’t crisp up—it’ll steam and turn rubbery. Take those extra thirty seconds with the paper towels. Your future self will thank you.
Let the pan get properly hot. I know it’s tempting to rush, but if you add the chicken to a pan that’s not hot enough, the skin will stick and you’ll lose that gorgeous crust. You want the butter to sizzle immediately when it hits the pan. If it just melts quietly, wait another minute.
Watch your garlic like a hawk. Garlic goes from fragrant to burnt in about fifteen seconds. Once it starts smelling amazing and turns just barely golden, add the rice immediately. I learned this the hard way when I ruined a batch by getting distracted by my phone.
Use the right rice-to-liquid ratio. For long-grain white rice, 1 cup of rice to 2 cups of liquid is your sweet spot. Too much liquid and you’ll end up with mushy rice. Too little and it’ll be crunchy. Measure carefully—this isn’t the time to eyeball it.
Resist the urge to stir once covered. Stirring releases starch and can make the rice gummy. Just let it do its thing under that lid. I promise it’ll be fine.
Let it rest before serving. Those five minutes off the heat are crucial. The rice finishes absorbing any remaining liquid and the chicken relaxes, making it more tender. Plus, it gives you time to set the table and pour yourself a glass of something nice.
One more thing—if you’re doubling this recipe, use a larger pan rather than piling everything into the same size skillet. Crowding the pan means the chicken won’t brown properly and the rice might cook unevenly. I’ve made that mistake exactly once.
Variations & Adaptations
This recipe is forgiving enough to adapt to whatever you have on hand. Here are some variations I’ve tried and loved:
Swap the protein. Boneless, skinless chicken thighs work great if you’re watching calories—just reduce the initial searing time to 4 minutes per side. Chicken breasts work too, but they can dry out more easily, so check them at the 15-minute mark. For a completely different vibe, try this with Italian sausage links, just like in my crispy sheet pan Italian sausage and peppers recipe.
Make it vegetarian. Swap the chicken for thick slices of portobello mushrooms or firm tofu (pressed and seared first). Use vegetable broth instead of chicken broth and add a tablespoon of nutritional yeast for that savory, almost-buttery flavor. It won’t be exactly the same, but it’ll still be delicious in its own right.
Add vegetables. Besides the peas I mentioned, you can stir in chopped asparagus, green beans, or diced bell peppers during the last 10 minutes of cooking. Mushrooms are fantastic too—slice them and sauté them with the garlic before adding the rice.
Spice it up. Add 1/2 teaspoon of red pepper flakes along with the garlic for a gentle heat. Or stir in a tablespoon of harissa paste with the broth for a North African twist. I tried this last month and it was honestly incredible—the smoky heat paired beautifully with the garlic butter.
Go low-carb. Swap the rice for cauliflower rice, but reduce the broth to 1 cup and cook for only 10 minutes covered. The cauliflower won’t absorb liquid the same way, so you need less. It’s not quite the same comfort-food experience, but it scratches the itch when you’re watching carbs.
Try a different grain. Brown rice works but needs more liquid (2.5 cups) and a longer cooking time (about 40 minutes). Quinoa is a faster option—use 1 cup quinoa to 1.75 cups broth and cook for 15 minutes.
For a completely different but equally comforting one-pan meal, you might enjoy my easy one-pot lemon chicken and rice recipe. It uses the same technique but with a bright, citrusy twist that’s perfect for spring.
Serving & Storage Suggestions
This dish is honestly perfect served straight from the pan. I like to bring the skillet right to the table (with a trivet underneath, obviously) and let everyone serve themselves. It keeps the rice warm and makes for a cozy, casual dinner vibe.
Serving temperature: Serve hot, right after the resting period. The rice should be steamy and the chicken skin should still have some crunch. If it sits too long, the skin will soften from the steam—still delicious, just less crispy.
What to serve alongside: A simple green salad with lemon vinaigrette cuts through the richness beautifully. Steamed green beans or roasted asparagus also work great. If you’re feeling extra hungry, a slice of crusty bread is perfect for sopping up any garlic butter sauce left in the pan.
For drinks: A crisp white wine like Sauvignon Blanc or a light Pinot Grigio pairs wonderfully. If you’re a beer person, a pilsner or light lager cuts through the butter nicely. For non-alcoholic options, sparkling water with lemon is my go-to.
Storage: Let any leftovers cool completely, then transfer to an airtight container. It’ll keep in the refrigerator for up to 4 days. The rice might absorb more liquid and soften slightly, but the flavors actually meld together even more overnight.
Reheating: The best method is in a skillet over medium-low heat with a splash of chicken broth or water. Cover and heat for 5-7 minutes, stirring occasionally. The microwave works in a pinch, but it tends to dry out the chicken and make the rice uneven. If you’re using the microwave, cover the bowl with a damp paper towel to add moisture.
Freezing: This freezes surprisingly well. Portion into freezer-safe containers and freeze for up to 3 months. Thaw overnight in the refrigerator and reheat as directed above. The rice texture won’t be quite as perfect as fresh, but it’s still a solid weeknight meal when you’re in a pinch.
I’ve noticed that the flavors deepen after a day in the fridge. The garlic mellows out and the rice absorbs all those savory notes even more. Honestly, leftovers might be even better than the first serving—don’t tell anyone I said that.
Nutritional Information & Benefits
Here’s a rough estimate per serving (based on 4 servings, using chicken thighs with skin and long-grain white rice):
- Calories: Approximately 520
- Protein: 32g
- Fat: 22g
- Carbohydrates: 45g
- Fiber: 2g
- Sodium: 680mg (varies based on broth and added salt)
Health highlights: Chicken thighs are a great source of protein, iron, and B vitamins, especially B6 and B12 which support energy metabolism. Garlic is packed with allicin, a compound known for its anti-inflammatory and immune-supporting properties. And while white rice isn’t a superfood, it provides quick-digesting carbohydrates that fuel your body—perfect after a long day.
Dietary considerations: This recipe is naturally gluten-free (just double-check your chicken broth label). For a lower-fat option, remove the chicken skin before eating—you’ll save about 50-80 calories per serving. For lower sodium, use no-salt-added broth and skip the added salt during cooking.
Potential allergens: This recipe contains dairy (butter). For a dairy-free version, substitute the butter with olive oil or a high-quality vegan butter. It won’t have quite the same richness, but it’ll still be delicious.
I’m not a nutritionist, and these numbers are estimates. If you have specific dietary needs, I recommend running the ingredients through your preferred nutrition calculator. But honestly? This is real food made with real ingredients, and it’s balanced enough for a regular weeknight dinner without overthinking it.
Conclusion
This easy one-pan garlic butter chicken and rice has become my secret weapon for busy weeknights when I want something that feels special without the effort. It’s the kind of meal that makes you look like a hero in the kitchen with minimal work—and honestly, isn’t that what we all want?
The best part is how customizable it is. Swap in whatever vegetables you have, adjust the spices to your taste, or try it with different proteins. The technique is solid, and once you’ve made it once, you’ll know exactly how to tweak it for next time.
I’d love to hear how yours turns out. Did you add any fun twists? Did your family love it as much as mine did? Drop a comment below and let me know—I read every single one and I’m always looking for new ideas to try. And if you’re craving more one-pan comfort, don’t miss my creamy one-pot beef pasta for another quick and cozy dinner option.
Until next time, happy cooking—and remember, the garlic butter makes everything better.
Frequently Asked Questions
Can I use chicken breasts instead of thighs?
Yes, but watch them carefully. Boneless, skinless chicken breasts cook faster and can dry out. Check for doneness at the 15-minute mark and remove them from the pan as soon as they reach 165°F. You might need to let the rice cook a few extra minutes on its own.
Why is my rice still crunchy after 20 minutes?
This usually happens for one of three reasons: your lid wasn’t tight enough and steam escaped, your heat was too low, or you lifted the lid during cooking. Next time, make sure your lid fits snugly and keep the heat at a gentle simmer—not too low. If the rice is still crunchy, add a few tablespoons of water, cover, and cook for another 5 minutes.
Can I make this in a Dutch oven?
Absolutely. A Dutch oven works perfectly for this recipe. The heavy bottom distributes heat evenly and the tight lid traps steam beautifully. Just make sure it’s large enough to hold everything without crowding.
How do I prevent the garlic from burning?
Keep the heat at medium and stir constantly once the garlic hits the pan. It should only take about 30 seconds to become fragrant. If your pan is too hot, the garlic will burn before you can add the rice. When in doubt, take the pan off the heat while you add the garlic, then return it to the stove.
Can I double this recipe?
Yes, but use a larger pan. A 12-inch skillet can handle about 6 chicken thighs and 1.5 cups of rice comfortably. If you try to double everything in the same pan, the chicken won’t brown properly and the rice might cook unevenly. Use a large braiser or Dutch oven for bigger batches.
Pin This Recipe!
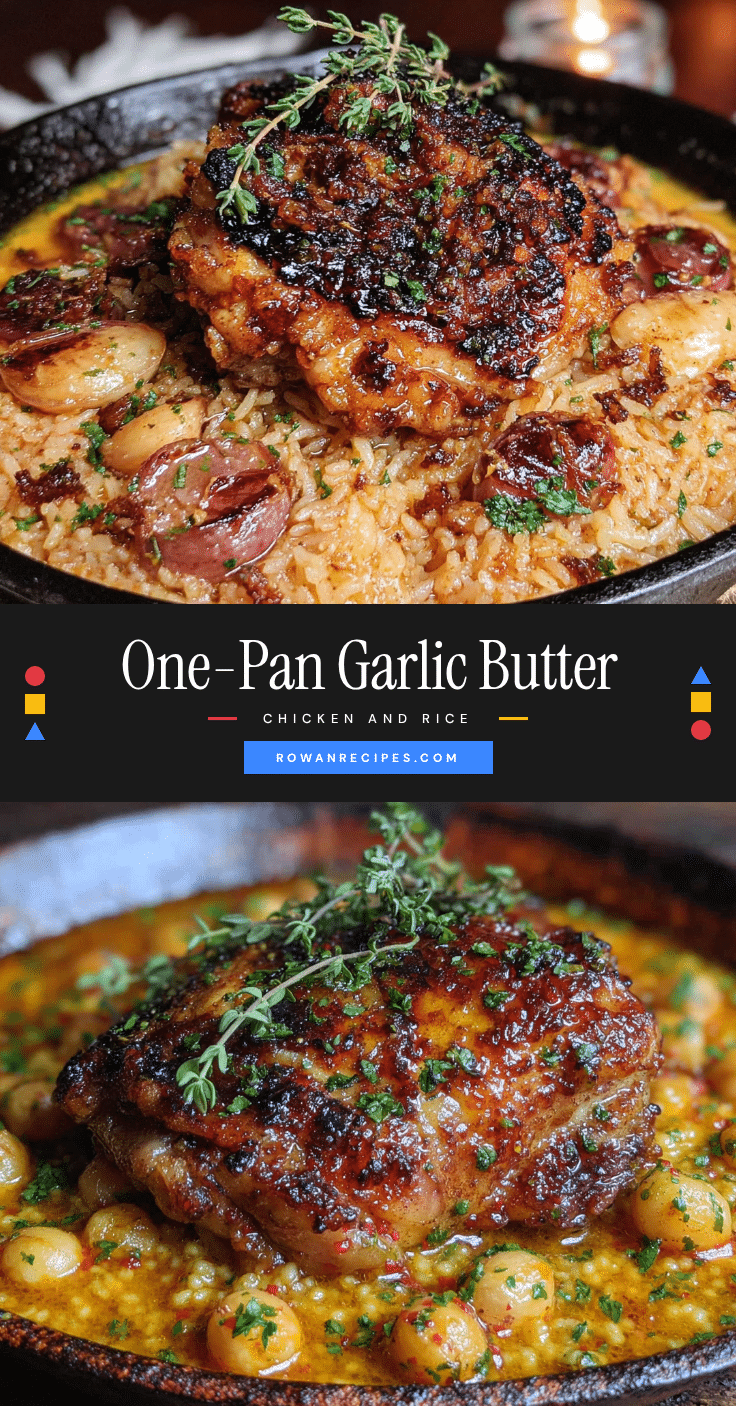
Easy One-Pan Garlic Butter Chicken and Rice: Best Weeknight Dinner

This easy one-pan garlic butter chicken and rice is a quick, comforting weeknight dinner with crispy chicken thighs and flavorful rice cooked in a single skillet. Ready in under 45 minutes, it’s a family-approved meal that minimizes cleanup.
- Prep Time: 10 minutes
- Cook Time: 30 minutes
- Total Time: 40 minutes
- Yield: 4 servings 1x
- Category: Main Course
- Cuisine: American
Ingredients
- 4 bone-in, skin-on chicken thighs (about 1.5 pounds)
- 2 tablespoons unsalted butter
- 6 cloves garlic, minced
- 1 cup long-grain white rice (basmati or jasmine)
- 2 cups low-sodium chicken broth
- 1/2 teaspoon salt (plus more for seasoning chicken)
- 1/4 teaspoon black pepper (freshly ground)
- 1/4 teaspoon paprika
- 1/4 teaspoon onion powder
- 1/2 cup frozen peas (optional)
- Fresh parsley, chopped (for garnish)
Instructions
- Pat the chicken thighs dry with paper towels. Season both sides generously with salt, pepper, paprika, and onion powder. Let them sit at room temperature for about 10 minutes.
- Heat your skillet over medium-high heat and add 1 tablespoon of the butter. Once melted and sizzling, place the chicken thighs skin-side down. Cook undisturbed for 6-7 minutes until the skin is deep golden brown and crispy.
- Flip the chicken using tongs and cook for another 4-5 minutes on the second side. Remove the chicken to a plate and leave the rendered fat in the pan.
- Reduce the heat to medium. Add the remaining 1 tablespoon of butter and let it melt, then toss in the minced garlic. Stir constantly for about 30 seconds until fragrant but not brown.
- Add the rice to the pan and stir for about a minute, coating each grain in the garlic butter mixture.
- Pour in the chicken broth and stir to combine, scraping up any browned bits from the bottom of the pan. Bring everything to a gentle simmer.
- Nestle the chicken thighs back into the pan, skin-side up, on top of the rice. Cover the pan with a tight-fitting lid and reduce the heat to low.
- Let it simmer gently for 18-20 minutes. Do not lift the lid during this time.
- After 18 minutes, check the rice. It should be tender and have absorbed most of the liquid. If still firm, add 2-3 tablespoons of water, replace the lid, and cook for another 3-5 minutes. If using frozen peas, scatter them over the top during the last 5 minutes of cooking.
- Remove from heat and let it rest, covered, for 5 minutes. Fluff the rice gently with a fork, taste for seasoning, and add more salt or pepper if needed. Garnish with fresh parsley and serve straight from the pan.
Notes
Pat chicken skin dry for crispy skin. Don’t lift the lid during cooking. Let rest 5 minutes before serving. For best results, use fresh garlic and a heavy-bottomed pan.
Nutrition
- Serving Size: 1 serving (about 1 c
- Calories: 520
- Sugar: 2
- Sodium: 680
- Fat: 22
- Saturated Fat: 8
- Carbohydrates: 45
- Fiber: 2
- Protein: 32
Keywords: one-pan chicken and rice, garlic butter chicken, easy weeknight dinner, skillet chicken, one pot meal


