I figured a game day nacho bake would be just another pile of chips under some melted cheese. It took about one bite of this one-pan version for that assumption to fall apart completely.
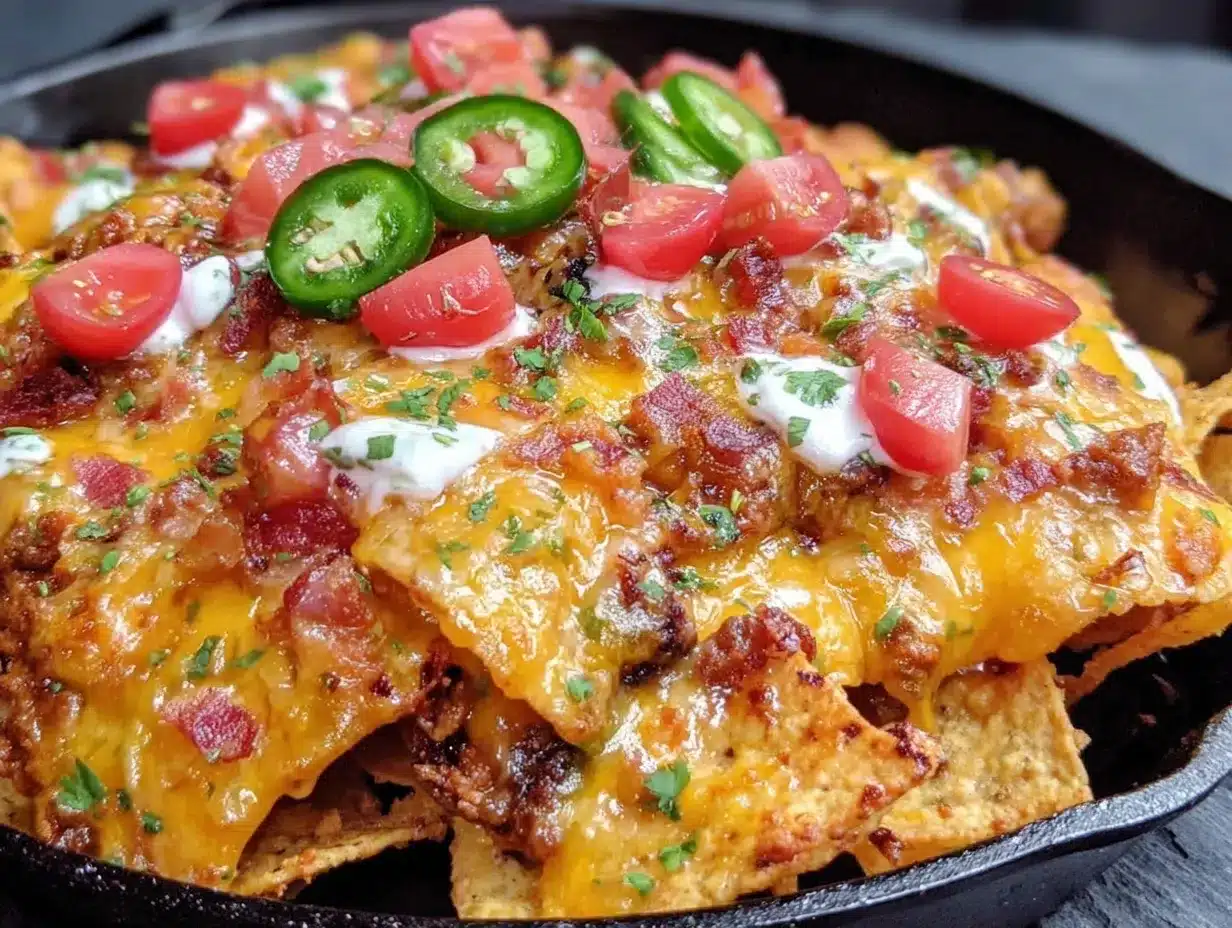
Honestly, I was skeptical. We’ve all had those nachos that turn into a sad, soggy mess before the first commercial break. The chips get soft, the toppings slide off, and you’re left digging through a bowl of disappointment. This Easy One-Pan Game Day Nacho Bake is the exact opposite of that tragedy. It’s a layered, loaded, and gloriously crispy sheet pan situation that stays crunchy from the first chip to the last.
The secret isn’t some complicated technique or a secret ingredient. It’s about how you build the layers and, more importantly, how you treat the chips. I learned this the hard way after a few failed attempts (and a lot of grumpy guests). But once I figured it out, this nacho bake became my go-to for every game day, movie night, or any gathering where I want to impress without breaking a sweat. It’s the kind of recipe that makes you look like a hero, even though it takes about 20 minutes of actual work.
Why You’ll Love This Recipe
This isn’t just another nacho recipe. It’s the one that solves every problem you’ve ever had with homemade nachos. Here’s why you’ll be making it on repeat:
- One-Pan Wonder: Everything comes together on a single sheet pan. Less cleanup means more time watching the game—or just relaxing.
- Perfectly Crispy Every Time: No more soggy chips! This method ensures every single chip stays crunchy and holds up to the generous toppings.
- Completely Customizable: It’s a blank canvas for your favorite game day flavors. Use beef, chicken, or go vegetarian—the method stays the same.
- Ready in 30 Minutes: From fridge to table in under half an hour. It’s fast enough for a weeknight craving but impressive enough for a party.
- Crowd-Pleasing Champion: This is the first thing to disappear at any gathering. Kids, adults, picky eaters—everyone goes back for seconds (and thirds).
I’ve tested this recipe more times than I care to admit, tweaking the chip layering, the cheese distribution, and the baking time. This version nails it. It’s the kind of dish that makes you close your eyes after the first crunchy, cheesy, spicy bite. It’s game day comfort food reimagined—way faster, way easier, but with all the soul-soothing satisfaction you crave.
What Ingredients You Will Need
This recipe uses simple, mostly pantry-staple ingredients to deliver a flavor explosion. Don’t overthink it—just grab what you love.
- 1 (13-ounce) bag of restaurant-style tortilla chips: These are sturdier than thin chips and hold up much better to the toppings. I prefer the scoop-style chips for maximum topping retention.
- 1 pound ground beef (80/20): The fat adds flavor and keeps the meat juicy. You can also use ground turkey or chicken, just add a tablespoon of oil.
- 1 packet (1 ounce) taco seasoning: Use your favorite brand. I’m partial to the classic Ortega or McCormick mix, but homemade works great too.
- 1 (15-ounce) can black beans, drained and rinsed: They add fiber, texture, and make the dish more substantial. No need to cook them further.
- 2 cups shredded Mexican blend cheese: This is the melty, gooey heart of the dish. Pre-shredded works fine, but shredding your own from a block melts even smoother.
- 1 cup shredded sharp cheddar cheese: Adds a deeper, tangier flavor that cuts through the richness.
- 1/2 cup pickled jalapeños: For that essential vinegary, spicy kick. Adjust the amount to your heat tolerance.
- 1/2 cup diced red onion: Adds a fresh, sharp bite and a pop of color.
- 1/4 cup chopped fresh cilantro: For brightness and a fresh finish. Don’t skip it—it makes a difference.
- 1/2 cup sour cream: For drizzling after baking. It cools everything down beautifully.
- 1/2 cup pico de gallo or salsa: Adds freshness and acidity. Use your favorite jarred salsa or make a quick homemade version.
- Optional toppings: Sliced black olives, diced avocado, a squeeze of lime juice, or a drizzle of hot sauce.
I always recommend using a good quality Mexican blend cheese—it melts like a dream. And don’t skip the cilantro and red onion; they add that fresh contrast that makes the whole thing sing.
Equipment Needed
You don’t need any fancy gadgets for this one. Here’s what you’ll need:
- Large rimmed baking sheet (half-sheet pan): This is crucial. A rimmed sheet pan keeps everything contained, especially the grease from the beef. I use a standard 18×13-inch pan.
- Large skillet: For browning the ground beef. A 12-inch skillet works perfectly.
- Wooden spoon or spatula: For breaking up the meat as it cooks.
- Measuring cups and spoons: For accurate ingredient portions.
- Chef’s knife and cutting board: For dicing the onion and chopping the cilantro.
If you don’t have a rimmed baking sheet, a large oven-safe skillet or a 9×13-inch baking dish will work in a pinch. Just keep an eye on the chips—they might cook a little faster or slower depending on the pan.
Preparation Method
This comes together fast, so have all your ingredients prepped and ready to go before you start. Trust me on this one—it makes the whole process so much smoother.
- Preheat your oven to 400°F (200°C). Get it nice and hot while you work on the other steps. A hot oven is key for crispy chips.
- Cook the ground beef. Place your large skillet over medium-high heat. Add the ground beef and cook, breaking it up with your spoon, until it’s browned and no longer pink—about 6-8 minutes. Don’t drain all the fat; leave a little in the pan for flavor. Stir in the taco seasoning and 1/4 cup of water. Let it simmer for 2 minutes until thickened. Remove from heat.
- Layer the chips. Spread the tortilla chips in an even layer on your rimmed baking sheet. Don’t pile them too high—you want a single, slightly overlapping layer so every chip gets some love. I like to arrange them with the curved sides facing up to catch all the good stuff.
- Add the first layer of toppings. Sprinkle the seasoned ground beef evenly over the chips. Then, scatter the drained black beans over the meat. The beans add a nice creamy texture that contrasts with the crunchy chips.
- Pile on the cheese. This is the most important step. Sprinkle the Mexican blend cheese and the sharp cheddar evenly over everything. Don’t be shy—the cheese is what holds everything together and creates that irresistible, gooey pull. Make sure every chip has a little cheese on it.
- Add the jalapeños. Scatter the pickled jalapeños over the cheese. If you’re serving a crowd that’s not big on heat, you can place them on just one half of the pan.
- Bake to perfection. Place the sheet pan in the preheated oven and bake for 10-12 minutes, or until the cheese is fully melted and bubbly and the edges of the chips are just starting to turn golden brown. Keep a close eye on it after 10 minutes—you want the cheese melted, not the chips burnt.
- Add the fresh toppings. Remove the pan from the oven and immediately sprinkle the diced red onion and chopped cilantro over the hot nachos. The heat will slightly wilt the cilantro and soften the onion, which is exactly what you want.
- Finish and serve. Drizzle the sour cream and pico de gallo (or salsa) over the top. Add any other optional toppings you like, such as sliced black olives or diced avocado. Serve immediately while the cheese is still stretchy and the chips are at their crispiest.
Here’s a little tip I learned from a particularly disastrous batch: don’t overload the chips with wet toppings before baking. Things like sour cream and salsa should always go on after baking. If you put them on before, the steam from the oven will turn your crispy chips into a sad, soggy mess. You want that contrast of hot, melty cheese and cool, fresh toppings.
Cooking Tips & Techniques
I’ve made this recipe more times than I can count, and I’ve definitely learned a few things the hard way. Here are my best tips for nacho perfection:
- Don’t skimp on the chips. Use a full 13-ounce bag. It might look like a lot, but they shrink as they bake. You want a generous layer that fills the whole pan.
- Layer strategically. Think of it like a lasagna. You want toppings on every chip, not just the top layer. That’s why you add the meat and beans first, then the cheese. The cheese melts down and kind of glues everything together.
- Watch the oven like a hawk. Ovens vary wildly. Your nachos might be perfect at 10 minutes, or they might need 12. The second they start looking golden at the edges, pull them out. Burnt chips are a tragedy.
- Use room temperature sour cream. Cold sour cream straight from the fridge can seize up and feel clumpy. Let it sit on the counter for 10 minutes before drizzling for a smoother, more luxurious finish.
- Prep everything before you start. This is a fast recipe. If you’re chopping onions while the beef is browning, you’re going to feel rushed. Chop, measure, and have everything ready to go. It makes the whole experience so much more relaxed.
I once tried to speed things up by using pre-cooked, frozen beef crumbles. Don’t do it. The texture is weird and they don’t absorb the taco seasoning the same way. Freshly browned beef is non-negotiable for the best flavor.
Variations & Adaptations
This recipe is a total chameleon. Here are a few ways I’ve adapted it for different cravings and dietary needs:
- Chicken Nachos: Swap the ground beef for 2 cups of shredded rotisserie chicken. Toss it with the taco seasoning and a splash of chicken broth before layering. It’s a lighter option that’s still incredibly satisfying.
- Vegetarian Nachos: Skip the meat entirely and double up on the black beans. Add a cup of corn kernels (fresh, frozen, or canned) and a diced bell pepper for extra texture and sweetness. It’s hearty enough that no one will miss the meat.
- Spicy Chorizo Nachos: Replace the ground beef with Mexican chorizo. Cook it in the skillet until it’s browned and crumbly. The smoky, spicy flavor is next-level and pairs perfectly with the cool sour cream. This is my personal favorite variation.
- Breakfast Nachos: Yes, this is a thing. Use the same base but top the baked nachos with a couple of fried eggs, some crumbled bacon, and a drizzle of hot sauce. It’s the best breakfast-for-dinner hack I’ve ever discovered.
- Low-Carb Option: Swap the tortilla chips for crispy, roasted bell pepper strips or large pork rinds. The texture is different, but the flavor is still amazing. Just reduce the baking time to 5-7 minutes since the “chips” don’t need as long to heat through.
I’ve tried all of these, and honestly, the chorizo version is the one I keep coming back to. There’s something about that smoky, spicy sausage that just works with the melty cheese and crunchy chips.
Serving & Storage Suggestions
These nachos are best served immediately, right off the sheet pan. That’s when the chips are at their crispiest and the cheese is at its most gloriously stretchy. I like to put the pan right in the middle of the table with a stack of small plates and let everyone dig in family-style. It’s casual, it’s fun, and it feels perfectly right for game day.
For a full spread, I love serving this alongside a batch of easy crispy sheet pan honey mustard chicken for a protein-packed feast, or with crispy cheeseburger quesadillas for the ultimate comfort food combo. A cold beer or a tangy margarita is the perfect drink pairing.
Storage: Leftover nachos are a bit of a gamble. The chips will soften overnight, but the flavor is still great. Store any leftovers in an airtight container in the refrigerator for up to 2 days.
Reheating: The best way to bring them back to life is in the oven. Spread the leftovers on a baking sheet and reheat at 350°F (175°C) for 5-7 minutes. The microwave will turn them into a sad, soggy mess, so avoid it if you can. The texture won’t be quite the same as fresh, but the flavor will still be amazing.
The flavors actually meld together beautifully overnight. The next day, the chips soak up all that seasoned beef and cheese goodness, creating a kind of nacho casserole situation. It’s different, but honestly, it’s still delicious.
Nutritional Information & Benefits
Let’s be real: this is indulgent food. But it’s not without its redeeming qualities. Here’s a rough breakdown per serving (about 1/6 of the recipe):
| Nutrient | Amount |
|---|---|
| Calories | ~480 |
| Protein | 28g |
| Fat | 28g |
| Carbohydrates | 32g |
| Fiber | 6g |
| Sodium | ~900mg |
The black beans are the unsung hero here. They’re packed with fiber and plant-based protein, which helps keep you full and satisfied. The beef provides iron and B vitamins, and the cheese offers a good dose of calcium. Plus, the jalapeños contain capsaicin, which has anti-inflammatory properties. So, while it’s not health food, it’s not total junk either. It’s a balanced, satisfying meal that just happens to taste incredible.
If you’re watching your sodium, use low-sodium taco seasoning and drain and rinse the black beans thoroughly. You can also reduce the cheese slightly, but honestly, where’s the fun in that?
Conclusion
This Easy One-Pan Game Day Nacho Bake is the recipe you’ll turn to again and again. It’s fast, it’s foolproof, and it delivers that perfect combination of crunchy, cheesy, and spicy every single time. Whether you’re hosting a Super Bowl party, having a cozy movie night, or just need a quick and satisfying dinner, this dish has your back.
I love this recipe because it’s so forgiving. You can swap in whatever you have in the fridge, adjust the spice level to your liking, and it always, always works. It’s the kind of food that brings people together, encourages sharing, and makes everyone at the table happy.
So go ahead—give it a try. Load it up with your favorite toppings, make it your own, and don’t forget to grab an extra napkin. You’re going to need it. And when you do make it, I’d love to hear about it. Drop a comment below and tell me your favorite variation, or tag me in your nacho photos. Let’s make every game day a little more delicious!
Frequently Asked Questions
Can I make this nacho bake ahead of time?
You can prep the toppings ahead of time, but I don’t recommend assembling the whole dish before baking. The chips will start to soften from the moisture in the meat and beans. Cook the beef, chop the veggies, and shred the cheese up to a day in advance, then assemble and bake right before serving.
What’s the best way to keep the chips from getting soggy?
The key is to avoid adding wet toppings before baking. Sour cream, salsa, and pico de gallo should all go on after the nachos come out of the oven. Also, make sure your beef is well-drained and not too saucy before layering it on the chips.
Can I use a different type of meat?
Absolutely. Ground turkey, chicken, or pork all work great. You can also use shredded rotisserie chicken or even thinly sliced steak. Just adjust the cooking time as needed for your chosen protein.
How do I make this recipe vegetarian or vegan?
For a vegetarian version, simply skip the meat and double up on the black beans. Add corn and bell peppers for extra texture. For a vegan version, use a plant-based ground meat substitute and a dairy-free shredded cheese that melts well. The method stays exactly the same.
Can I freeze the leftovers?
I don’t recommend freezing this dish. The texture of the chips and the dairy-based cheese don’t hold up well to freezing and thawing. It’s best enjoyed fresh, or stored in the fridge for up to 2 days and reheated in the oven.
Pin This Recipe!
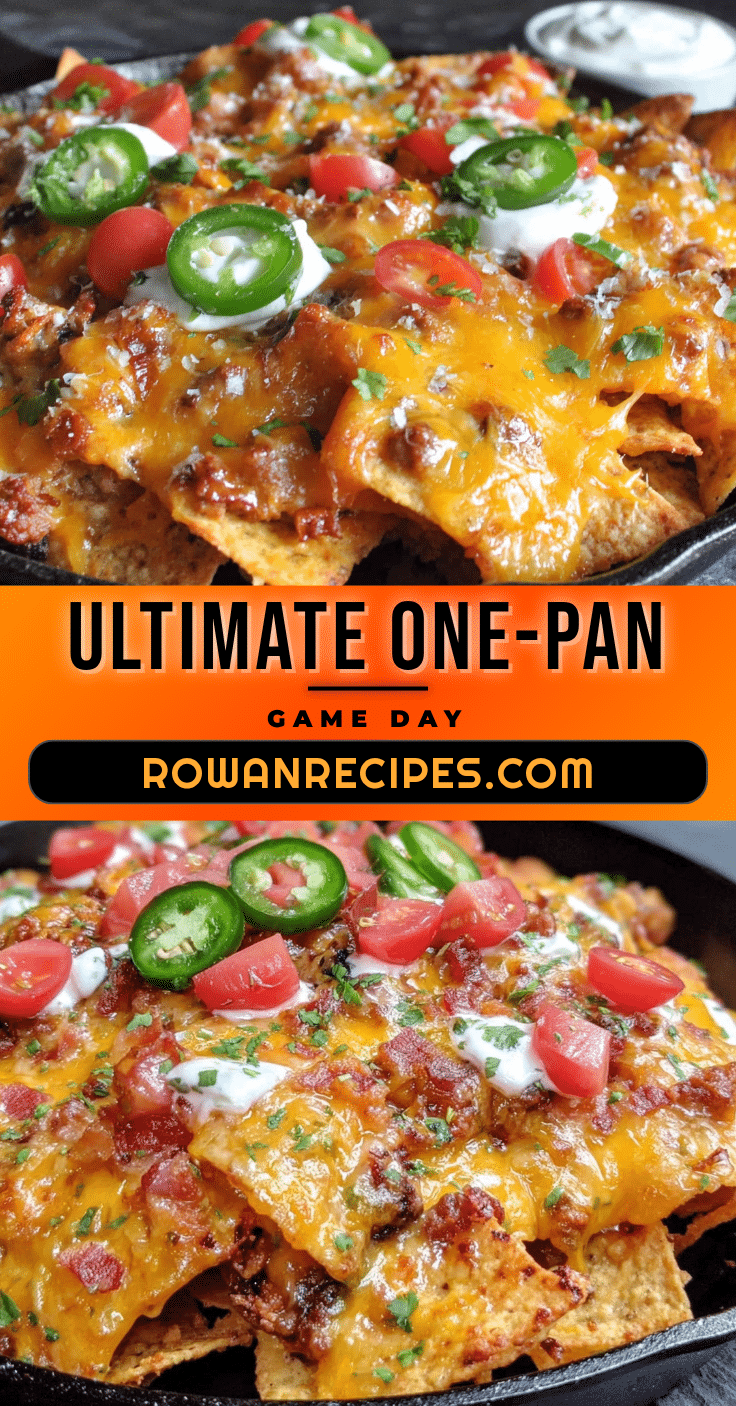
Easy One-Pan Game Day Nacho Bake
A layered, loaded, and gloriously crispy sheet pan nacho bake that stays crunchy from the first chip to the last. Ready in 30 minutes, this one-pan wonder is perfect for game day, movie night, or any gathering.
- Prep Time: 15 minutes
- Cook Time: 12 minutes
- Total Time: 27 minutes
- Yield: 6 servings 1x
- Category: Main Course
- Cuisine: Mexican-American
Ingredients
- 1 (13-ounce) bag restaurant-style tortilla chips
- 1 pound ground beef (80/20)
- 1 packet (1 ounce) taco seasoning
- 1 (15-ounce) can black beans, drained and rinsed
- 2 cups shredded Mexican blend cheese
- 1 cup shredded sharp cheddar cheese
- 1/2 cup pickled jalapeños
- 1/2 cup diced red onion
- 1/4 cup chopped fresh cilantro
- 1/2 cup sour cream
- 1/2 cup pico de gallo or salsa
- Optional toppings: sliced black olives, diced avocado, lime juice, hot sauce
Instructions
- Preheat your oven to 400°F (200°C).
- Cook the ground beef in a large skillet over medium-high heat, breaking it up, until browned and no longer pink (6-8 minutes). Stir in taco seasoning and 1/4 cup water; simmer 2 minutes until thickened. Remove from heat.
- Spread tortilla chips in an even, slightly overlapping layer on a rimmed baking sheet.
- Sprinkle the seasoned ground beef evenly over the chips, then scatter the drained black beans over the meat.
- Sprinkle Mexican blend cheese and sharp cheddar evenly over everything, ensuring each chip has some cheese.
- Scatter pickled jalapeños over the cheese.
- Bake for 10-12 minutes, until cheese is fully melted and bubbly and chip edges are golden brown.
- Remove from oven and immediately sprinkle diced red onion and chopped cilantro over the hot nachos.
- Drizzle sour cream and pico de gallo (or salsa) over the top. Add any optional toppings. Serve immediately.
Notes
Don’t overload chips with wet toppings before baking (sour cream, salsa go on after). Use sturdy restaurant-style chips. Watch oven closely after 10 minutes to prevent burning. For best results, prep all ingredients before starting.
Nutrition
- Serving Size: 1/6 of recipe
- Calories: 480
- Sugar: 3
- Sodium: 900
- Fat: 28
- Saturated Fat: 12
- Carbohydrates: 32
- Fiber: 6
- Protein: 28
Keywords: nachos, game day, one-pan, sheet pan, ground beef, easy, quick, party food, comfort food


