I want pumpkin banana bread right now. Like, the kind where you don’t have to dig out the stand mixer or wash a million bowls. The kind where you look at the spotty bananas on the counter, then at the can of pumpkin in the pantry, and your brain just says—do it. One bowl. That’s the rule I made for myself this morning, and honestly? It worked.
This isn’t one of those overly complicated fall recipes that takes over your whole afternoon. It’s the opposite. It’s the baking equivalent of throwing on a cozy sweater and calling it a day. The pumpkin keeps it ridiculously moist, the banana adds that natural sweetness you crave, and the spices—cinnamon, nutmeg, a little clove—make your kitchen smell like October decided to move in permanently.
I’ve made this easy one-bowl pumpkin banana bread about six times in the last three weeks. Not because I’m testing it for perfection (though I am), but because I keep eating the entire loaf before anyone else gets a slice. There’s something about that combo—pumpkin and banana—that just works. The banana softens the pumpkin’s earthiness, and the pumpkin keeps the banana from turning the bread into a dense brick. It’s a balance I didn’t know I needed until I took that first warm bite.
So here it is. No fuss, no complicated techniques, just a bowl, a spoon, and about ten minutes of active effort. You’re going to love how simple this feels.
Why You’ll Love This Recipe
Let me tell you why this one-bowl pumpkin banana bread has earned a permanent spot in my fall baking rotation. It’s not just about the flavor—though that’s a huge part of it.
- One Bowl, Zero Drama: You mix everything in a single bowl. No separate wet and dry ingredients. No sifting. Just dump, stir, and bake. I’ve tested this method repeatedly, and it works every single time. The texture stays tender and moist without any extra effort.
- Pantry-Friendly Ingredients: You probably already have everything you need. Canned pumpkin, overripe bananas, flour, sugar, eggs, oil, and basic spices. No fancy extracts or hard-to-find items. This is the kind of recipe you can make on a whim without a grocery trip.
- Perfect for Fall Mornings or Cozy Afternoons: Slice it for breakfast with a smear of butter, or serve it as an afternoon snack with a hot cup of coffee. It fits every cozy moment. I’ve even packed it for road trips—it travels surprisingly well.
- Crowd-Pleaser Every Time: I brought this to a family gathering last weekend, and it disappeared within twenty minutes. Kids loved it. Adults loved it. Even my aunt who claims she doesn’t like pumpkin asked for the recipe. That’s a win.
- Unbelievably Moist and Flavorful: The combination of pumpkin puree and mashed banana creates a texture that’s almost pudding-like in its softness. Each bite has that warm, spiced sweetness that makes you close your eyes for a second. It’s comfort food in loaf form.
What makes this recipe different from every other pumpkin banana bread out there? It’s the ratio. I spent three batches tweaking the flour-to-pumpkin balance until I got that perfect crumb—not too dense, not too airy. Plus, I use a trick of letting the bananas get super spotty (almost black) for maximum natural sweetness, which means you can cut back on the sugar without losing flavor. It’s a small thing, but it makes a big difference.
This isn’t just another fall recipe. It’s the one you’ll come back to again and again because it’s simple, reliable, and genuinely delicious. The kind of bread that makes you feel like you’ve got your act together, even if the rest of your day is chaos.
What Ingredients You Will Need
This recipe uses simple, wholesome ingredients that work together to create that perfect fall flavor. Most of these are pantry staples, so you can whip this up whenever the craving hits.
- Ripe Bananas (about 3 medium, mashed): The spottier, the better. Seriously—let them get almost black. That’s where the sweetness comes from. I usually toss my overripe bananas in the freezer, then thaw them when I’m ready to bake. They release extra liquid, which adds even more moisture to the bread.
- Pumpkin Puree (1 cup, not pumpkin pie filling): Make sure you grab 100% pure pumpkin, not the pre-sweetened pie mix. I prefer Libby’s for consistent texture, but store brands work just fine. If you open a can and only use half, freeze the rest in an airtight container for up to three months.
- All-Purpose Flour (1 ¾ cups): Spoon and level it into your measuring cup—don’t scoop directly from the bag, or you’ll end up with too much flour and a dry loaf. If you want to experiment, you can swap half the flour for whole wheat pastry flour for a slightly nuttier flavor.
- Granulated Sugar (½ cup): Just enough to complement the natural sweetness from the bananas. You can reduce it to ⅓ cup if your bananas are super ripe, or swap in coconut sugar for a deeper flavor.
- Brown Sugar (½ cup, packed): This adds moisture and that subtle molasses note that pairs beautifully with pumpkin. Light or dark brown sugar both work—dark gives a richer taste.
- Eggs (2 large, room temperature): Room-temperature eggs blend more evenly into the batter. If you forgot to take them out early, place them in a bowl of warm water for five minutes.
- Vegetable Oil (⅓ cup): Keeps the bread tender and moist. You can substitute melted coconut oil or melted butter for a slightly different flavor profile. If using coconut oil, make sure your other ingredients are at room temperature so it doesn’t solidify.
- Vanilla Extract (1 teaspoon): Pure vanilla extract is worth the splurge here. It rounds out the spices beautifully.
- Baking Soda (1 teaspoon): This is your main leavening agent. Make sure it’s fresh—test it by dropping a little into vinegar; if it fizzes vigorously, you’re good.
- Baking Powder (½ teaspoon): Adds a little extra lift. Again, check the expiration date.
- Salt (½ teaspoon): Don’t skip it. Salt enhances all the other flavors and balances the sweetness.
- Ground Cinnamon (1 ½ teaspoons): The backbone of the spice blend. I use Vietnamese cinnamon for a stronger, sweeter kick.
- Ground Nutmeg (½ teaspoon): Freshly grated if you have it—the flavor is noticeably brighter.
- Ground Cloves (¼ teaspoon): A little goes a long way. It adds that warm, almost peppery note that makes fall baking feel complete.
- Optional Mix-Ins (½ cup): Chocolate chips, chopped walnuts, or dried cranberries all work beautifully. I’m partial to dark chocolate chips because that pumpkin-chocolate combo is unbeatable.
Equipment Needed
You don’t need a fancy kitchen to make this bread. Here’s what you’ll use:
- Large Mixing Bowl: Any medium-to-large bowl works. I use a glass one because I can see if the batter is fully mixed.
- Wooden Spoon or Rubber Spatula: A spatula is my go-to for scraping down the sides and making sure nothing gets left behind.
- 9×5-inch Loaf Pan: Standard size. If you use an 8×4-inch pan, your bread will be taller and可能需要 a few extra minutes of baking time. If you only have a 9-inch round cake pan, that works too—just adjust the time.
- Parchment Paper or Non-Stick Spray: Parchment paper makes cleanup effortless and ensures the loaf comes out cleanly. Leave a little overhang on the sides so you can lift it right out.
- Cooling Rack: Essential for even cooling. If you let the bread sit in the pan too long, the bottom can get soggy.
- Measuring Cups and Spoons: For accuracy. I cannot stress this enough—baking is science, and eyeballing measurements leads to inconsistent results.
- Fork or Potato Masher: For mashing the bananas. A fork works perfectly; just mash until mostly smooth with a few small lumps for texture.
If you don’t have a cooling rack, you can use the inverted lid of a clean roasting pan or even a wire oven rack. Budget-friendly tip: dollar stores often carry small cooling racks that work fine for loaves.
Preparation Method
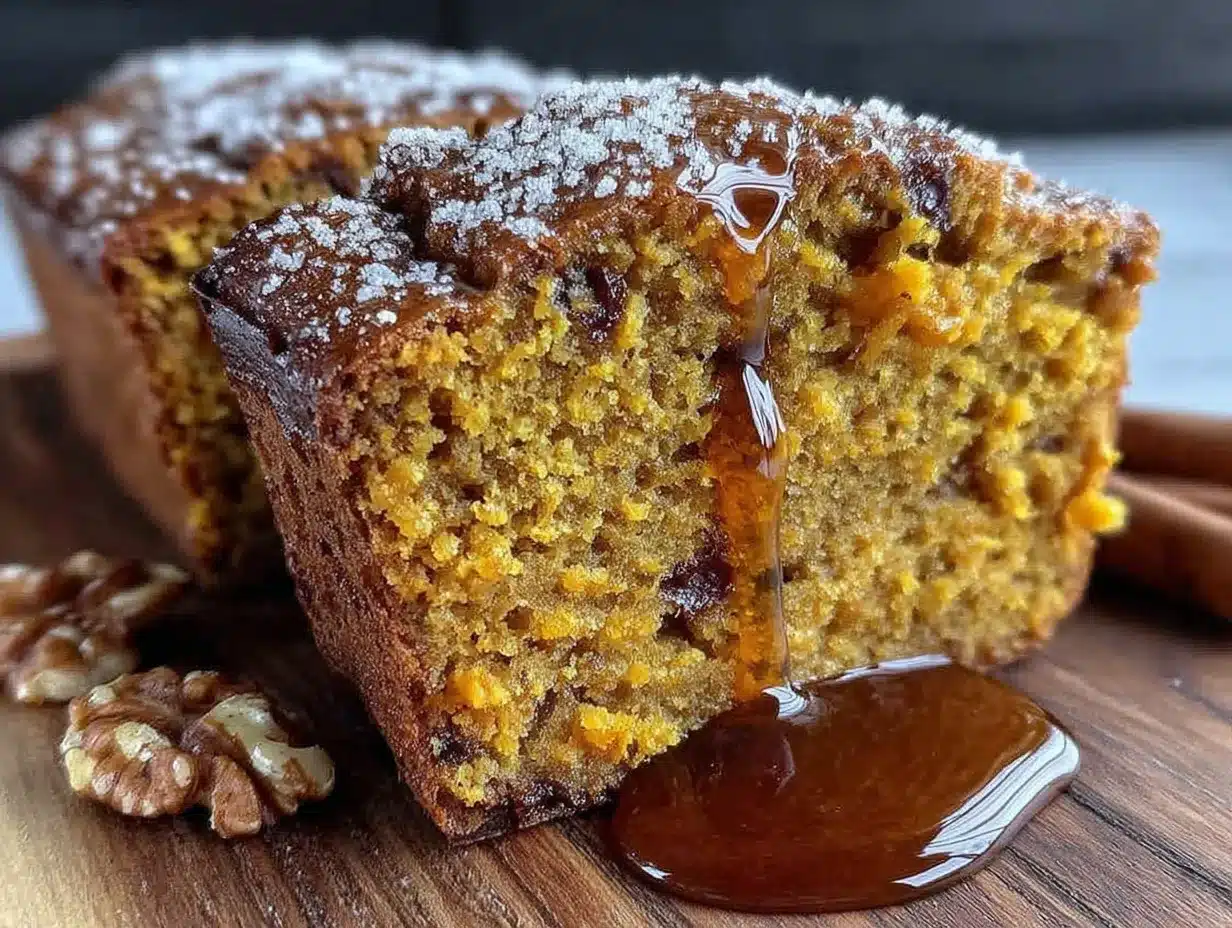
- Preheat your oven to 350°F (175°C). Position the rack in the center. While it heats up, line your loaf pan with parchment paper or spray it generously with non-stick spray. I prefer parchment because it guarantees the loaf won’t stick.
- Mash the bananas. In your large mixing bowl, add the three ripe bananas. Mash them with a fork until they’re mostly smooth. A few small chunks are fine—they’ll melt into the bread as it bakes and add little pockets of sweetness.
- Add the wet ingredients. To the mashed bananas, add the pumpkin puree, eggs, vegetable oil, and vanilla extract. Stir everything together with your spatula until it’s well combined. Don’t overmix—just until you can’t see any streaks of egg. The mixture will look slightly thick and glossy.
- Add the sugars. Pour in the granulated sugar and packed brown sugar. Stir gently until the sugars are fully incorporated. Taste the batter if you want—it’s safe since there are no raw eggs yet. Adjust sweetness if needed, though I find this ratio is just right.
- Add the dry ingredients. Sprinkle the flour, baking soda, baking powder, salt, cinnamon, nutmeg, and cloves directly over the wet mixture. Use a spoon to lightly stir the dry ingredients on top before folding them in—this helps distribute the leaveners evenly without overmixing. Then fold everything together using a gentle hand. Stop as soon as the flour disappears. Overmixing develops gluten and makes the bread tough.
- Fold in optional mix-ins. If you’re adding chocolate chips, nuts, or dried fruit, gently fold them in now. I like to reserve a handful to sprinkle on top of the batter once it’s in the pan—it makes the top look prettier.
- Pour the batter into the prepared loaf pan. Use your spatula to spread it evenly. Tap the pan gently on the counter a few times to release any air bubbles. Sprinkle your reserved mix-ins on top if you’re using them.
- Bake for 50-60 minutes. Start checking at the 50-minute mark. The bread is done when a toothpick inserted into the center comes out clean or with just a few moist crumbs. If the top is browning too quickly (around 45 minutes), tent the pan loosely with aluminum foil.
- Cool in the pan for 10 minutes. This allows the bread to set and makes it easier to remove. After 10 minutes, lift the bread out using the parchment paper overhang and transfer it to a cooling rack. Let it cool completely before slicing—about 1 hour. I know it’s tempting to cut into it warm, but it will be too fragile and might crumble.
- Slice and enjoy. Use a serrated knife for clean slices. Serve plain, with a pat of butter, or drizzled with a simple glaze made from powdered sugar and milk.
Cooking Tips & Techniques
I’ve made this bread enough times to learn a few things the hard way. Here’s what I wish I knew from the start:
Don’t overmix the batter. This is the number one mistake I see. When you stir too vigorously, the gluten in the flour develops and creates a dense, rubbery texture. You want a tender crumb, so mix just until the flour disappears. A few small streaks are okay—they’ll work themselves out as the bread bakes.
Use room-temperature ingredients. Cold eggs and cold pumpkin can cause the oil to seize up, leading to a lumpy batter. Take your eggs out of the fridge 30 minutes before you start, or place them in warm water for 5 minutes. If your pumpkin puree is straight from the fridge, microwave it for 15 seconds to take the chill off.
Check your baking soda. This recipe relies on baking soda for lift. If your baking soda is old, the bread won’t rise properly. Test it by dropping a teaspoon into a small bowl of vinegar—if it fizzes aggressively, you’re good. If not, buy a new box.
Rotate the pan halfway through. Ovens have hot spots, and rotating the pan ensures even browning. I do this at the 25-minute mark. Be gentle—the batter is still liquid at that point.
Let it cool completely. I know, I know. The smell is intoxicating, and you want that warm slice with butter melting into it. But if you cut into it too soon, the inside will be gummy and under-set. Trust me, waiting an hour is worth it. If you absolutely cannot wait, at least let it cool for 30 minutes in the pan.
Use the toothpick test wisely. Insert the toothpick into the center of the loaf, not the edges. If it comes out with wet batter, bake for another 5 minutes and check again. If it comes out with a few moist crumbs, it’s perfect. If it comes out completely dry, you’ve overbaked it slightly—still delicious, just a bit less moist.
Variations & Adaptations
This recipe is incredibly forgiving, so feel free to make it your own. Here are some variations I’ve tried and loved:
- Gluten-Free Version: Swap the all-purpose flour with a 1:1 gluten-free baking blend (I like Bob’s Red Mill). Add 1 teaspoon of xanthan gum if your blend doesn’t already include it. The texture will be slightly more tender, but still delicious.
- Dairy-Free Option: This recipe is already dairy-free if you use vegetable oil. If you want to add a creamy element, substitute the eggs with flax eggs (2 tablespoons ground flaxseed mixed with 6 tablespoons water) for a vegan version. The bread will be a bit denser but still moist.
- Low-Sugar Adaptation: Reduce the granulated sugar to ¼ cup and the brown sugar to ¼ cup. The bananas and pumpkin provide enough natural sweetness that you won’t miss it much. You can also add 2 tablespoons of maple syrup for extra flavor without refined sugar.
- Spice It Up: Add ½ teaspoon of ground ginger and ¼ teaspoon of allspice for a more complex spice profile. Or swap the cinnamon for pumpkin pie spice if you want a shortcut.
- Chocolate Lover’s Version: Fold in ½ cup of dark chocolate chips and drizzle melted chocolate over the cooled loaf. This is my personal favorite—the bitterness of the chocolate balances the sweetness perfectly.
- Nutty Crunch: Add ½ cup of toasted pecans or walnuts. Toast them in a dry pan over medium heat for 3-4 minutes until fragrant, then chop roughly. Fold them in just before baking.
- Muffin Adaptation: Divide the batter into a greased 12-cup muffin tin. Bake at 350°F for 18-22 minutes. You’ll get about 12 muffins. Perfect for grab-and-go breakfasts.
Serving & Storage Suggestions
This bread is versatile enough for any time of day. Here’s how I like to serve and store it:
Serving Temperature: Room temperature is ideal. The flavors are more pronounced, and the texture is at its best. If you want it warm, microwave a slice for 10-15 seconds—just enough to soften it without making it soggy.
Presentation Ideas: Slice the loaf and arrange on a wooden board. Serve with a small dish of softened butter, a drizzle of honey, or a dollop of whipped cream cheese. For a fall brunch, pair it with a hot apple cider or a pumpkin spice latte. It also goes beautifully with a simple cup of black coffee—the bitterness cuts through the sweetness.
Complementary Dishes: This bread is wonderful on its own, but it also pairs well with a cozy stuffed pepper soup for a comforting fall meal. Or serve it alongside a fresh pesto tortellini salad for a lighter lunch option.
Storage Instructions: Wrap the cooled loaf tightly in plastic wrap or aluminum foil. Store at room temperature for up to 3 days. Do not refrigerate—it will dry out the bread. If you live in a humid climate, store it in an airtight container instead of wrapping it.
Freezing Instructions: This bread freezes beautifully. Wrap the whole loaf or individual slices in plastic wrap, then place them in a freezer-safe bag. Freeze for up to 3 months. To thaw, leave it at room temperature for 2-3 hours, or microwave a frozen slice for 30 seconds.
Reheating Tips: For the best texture, reheat slices in a toaster oven at 300°F for 5-7 minutes. The outside gets slightly crisp while the inside stays soft. If using a microwave, cover the slice with a damp paper towel to prevent it from drying out.
Flavor Development: This bread actually tastes better the next day. The spices have time to meld together, and the moisture distributes more evenly. So don’t be disappointed if you don’t finish it all on day one—day two is when the magic happens.
Nutritional Information & Benefits
Here’s an approximate nutritional breakdown per slice (based on 10 slices, without mix-ins):
- Calories: 245
- Total Fat: 9g
- Saturated Fat: 1.5g
- Cholesterol: 37mg
- Sodium: 260mg
- Total Carbohydrates: 38g
- Dietary Fiber: 2g
- Sugars: 20g
- Protein: 4g
Health Benefits: This bread packs some surprising nutritional perks. Pumpkin is loaded with vitamin A (great for eye health) and fiber (keeps you full longer). Bananas provide potassium, which supports heart health and muscle function. The cinnamon in this recipe has anti-inflammatory properties and can help regulate blood sugar levels. Plus, using oil instead of butter keeps the saturated fat content lower than traditional quick breads.
Dietary Considerations: This recipe is naturally dairy-free and nut-free (unless you add nuts). For a lower-carb option, you can reduce the sugar by half—the bananas and pumpkin provide enough sweetness to compensate. If you’re watching your sugar intake, pair a slice with a protein source like Greek yogurt or a hard-boiled egg to balance your blood sugar.
Potential Allergens: Contains wheat (gluten) and eggs. For a gluten-free version, use a 1:1 gluten-free flour blend. For an egg-free version, use flax eggs as mentioned in the variations section.
Conclusion
This easy one-bowl pumpkin banana bread is everything I want in a fall recipe—simple, forgiving, and genuinely delicious. It’s the kind of bread that makes your kitchen smell like a cozy bakery without requiring hours of effort or a sink full of dirty dishes. Whether you’re a seasoned baker or someone who rarely turns on the oven, this recipe is for you.
I love how adaptable it is. You can dress it up with chocolate chips and nuts, or keep it plain and let the pumpkin-banana flavor shine. You can make it for a holiday brunch, a weekday breakfast, or just because you have a spotty banana and a can of pumpkin staring at you from the pantry. It never disappoints.
Now I want to hear from you. Did you try this recipe? Did you add your own twist? Drop a comment below and let me know how it turned out. And if you loved it, share it with a friend who needs a little fall comfort in their life. Happy baking, friends—here’s to warm slices, full bellies, and cozy kitchens.
Frequently Asked Questions
Can I use fresh pumpkin instead of canned?
Yes, you can. Roast a small sugar pumpkin at 400°F for 45 minutes until tender, then scoop out the flesh and puree it until smooth. Just make sure to drain any excess liquid—fresh pumpkin can be more watery than canned. You might need to reduce the oil by a tablespoon to compensate.
Why did my bread sink in the middle?
This usually happens for one of three reasons: the batter was overmixed (developing too much gluten), the oven temperature was too low (causing the bread to rise too quickly and then collapse), or the bread was underbaked. Make sure your oven is properly preheated to 350°F and use an oven thermometer to verify accuracy.
Can I make this recipe into cupcakes?
Absolutely. Divide the batter into a lined 12-cup muffin tin and bake at 350°F for 18-22 minutes. You’ll get about 12 standard muffins. They’re perfect for freezing—just pop one in the microwave for 20 seconds when you need a quick breakfast.
How do I know when the bread is fully baked?
Insert a toothpick into the center of the loaf. If it comes out clean or with just a few moist crumbs attached, it’s done. If it comes out with wet batter, bake for another 5 minutes and check again. The top should also be golden brown and spring back slightly when gently pressed.
Can I add cream cheese frosting to this bread?
You absolutely can. Whip together 4 ounces of softened cream cheese, 2 tablespoons of softened butter, 1 cup of powdered sugar, and ½ teaspoon of vanilla extract. Spread it over the completely cooled loaf. It turns this simple bread into a decadent dessert—perfect for special occasions.
Pin This Recipe!
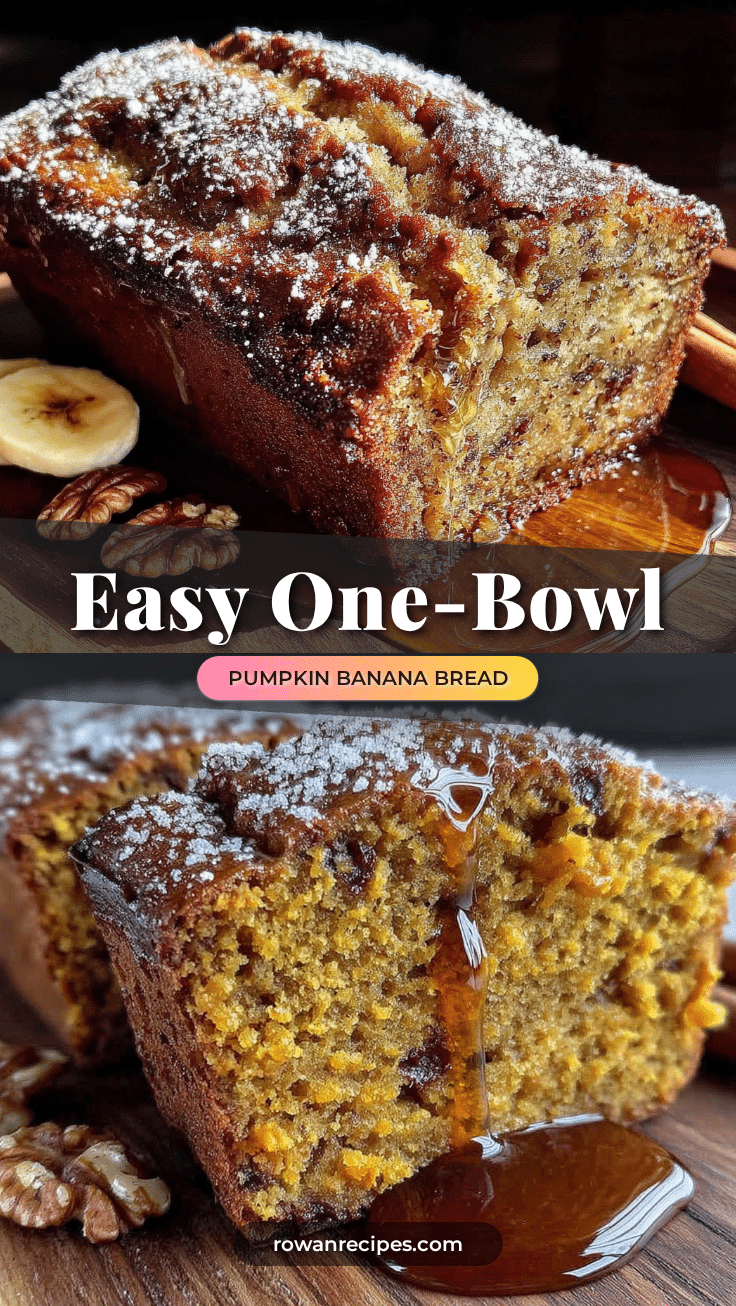
Easy One-Bowl Pumpkin Banana Bread: Best Fall Recipe
This easy one-bowl pumpkin banana bread is moist, flavorful, and made with simple pantry ingredients. It’s the perfect fall treat that comes together in minutes with minimal cleanup.
- Prep Time: 10 minutes
- Cook Time: 55 minutes
- Total Time: 1 hour 5 minutes
- Yield: 10 servings 1x
- Category: Dessert
- Cuisine: American
Ingredients
- 3 ripe bananas (about 1 cup mashed)
- 1 cup pumpkin puree (not pumpkin pie filling)
- 1 ¾ cups all-purpose flour
- ½ cup granulated sugar
- ½ cup brown sugar, packed
- 2 large eggs, room temperature
- ⅓ cup vegetable oil
- 1 teaspoon vanilla extract
- 1 teaspoon baking soda
- ½ teaspoon baking powder
- ½ teaspoon salt
- 1 ½ teaspoons ground cinnamon
- ½ teaspoon ground nutmeg
- ¼ teaspoon ground cloves
- ½ cup optional mix-ins (chocolate chips, chopped walnuts, or dried cranberries)
Instructions
- Preheat your oven to 350°F (175°C). Line a 9×5-inch loaf pan with parchment paper or spray with non-stick spray.
- In a large mixing bowl, mash the bananas with a fork until mostly smooth.
- Add the pumpkin puree, eggs, vegetable oil, and vanilla extract. Stir until well combined.
- Add the granulated sugar and packed brown sugar. Stir gently until fully incorporated.
- Sprinkle the flour, baking soda, baking powder, salt, cinnamon, nutmeg, and cloves over the wet mixture. Stir lightly on top before folding in. Fold until just combined—do not overmix.
- If using, fold in optional mix-ins (chocolate chips, nuts, or dried fruit). Reserve a handful to sprinkle on top.
- Pour the batter into the prepared loaf pan and spread evenly. Tap the pan gently on the counter to release air bubbles. Sprinkle reserved mix-ins on top.
- Bake for 50-60 minutes, until a toothpick inserted into the center comes out clean or with a few moist crumbs. If browning too quickly, tent with foil after 45 minutes.
- Cool in the pan for 10 minutes, then lift out using parchment overhang and transfer to a cooling rack. Cool completely before slicing (about 1 hour).
- Slice and serve plain, with butter, or with a simple glaze.
Notes
Use very ripe (almost black) bananas for maximum sweetness. Do not overmix the batter to avoid a dense texture. Let the bread cool completely before slicing for best results. The bread tastes even better the next day as flavors meld.
Nutrition
- Serving Size: 1 slice
- Calories: 245
- Sugar: 20
- Sodium: 260
- Fat: 9
- Saturated Fat: 1.5
- Carbohydrates: 38
- Fiber: 2
- Protein: 4
Keywords: pumpkin banana bread, one bowl, fall recipe, easy, moist, quick bread


