Butter melting in the microwave, the phone ringing, and my toddler pulling on my pant leg—I was already elbow-deep in flour when I realized the hand mixer was still in the garage from last weekend’s bake sale. Honestly, I almost quit right there. I’d promised my neighbor I’d bring cookies to her book club, and here I was, staring at a bowl of butter and sugar with no way to cream them properly. But I’d already measured everything out, and throwing away butter felt criminal. So I grabbed a wooden spoon and just went for it.
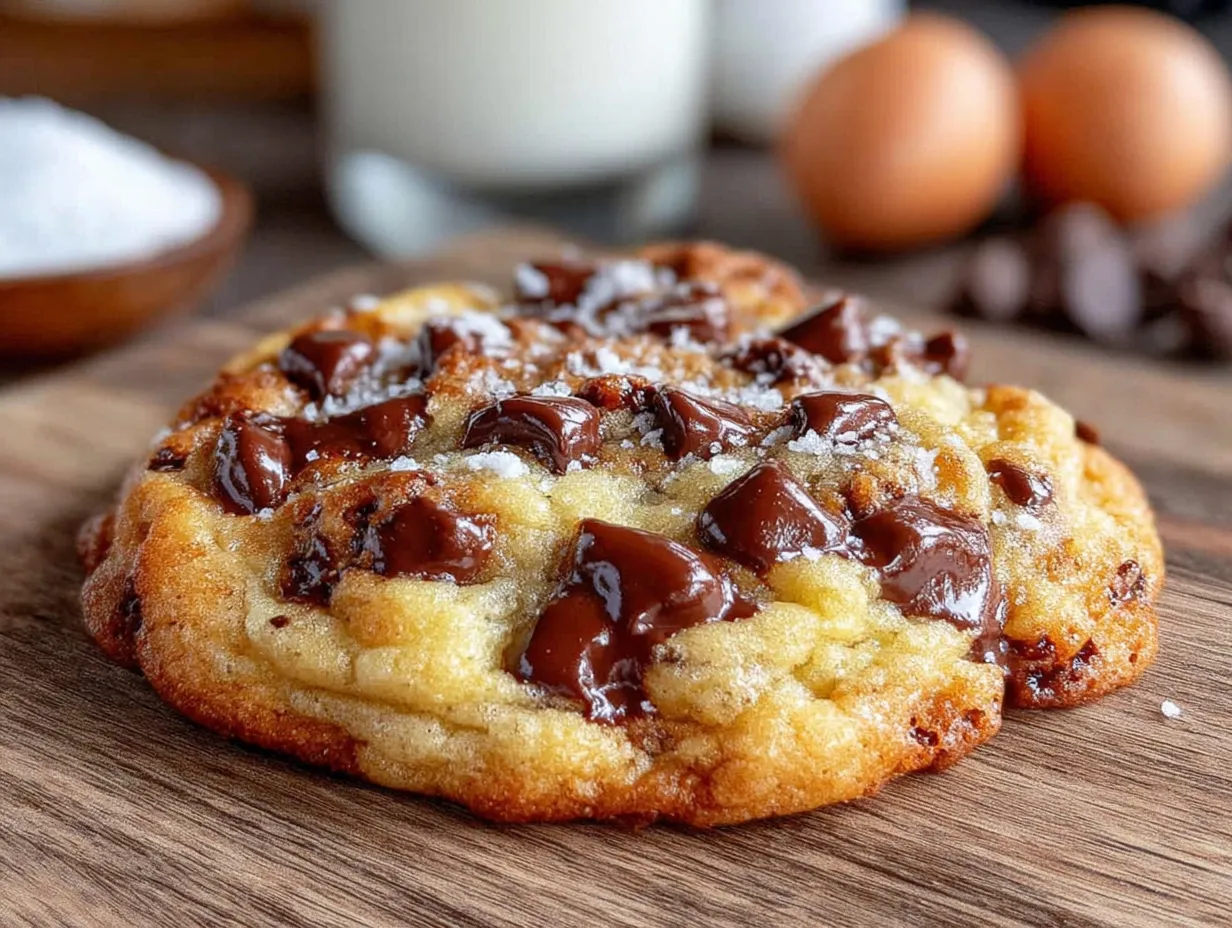
That’s how these easy one-bowl chocolate chip cookies were born. No mixer, no fuss, no extra dishes piled in the sink. Just a wooden spoon, a single bowl, and a whole lot of hope. And you know what? They came out better than any batch I’d ever made with my stand mixer. The edges were perfectly crispy, the centers stayed soft and chewy, and they had that slightly rustic look that makes homemade cookies feel extra special.
I’ve made these easy one-bowl chocolate chip cookies at least twenty times since that chaotic afternoon. They’ve become my go-to for last-minute dessert emergencies, lazy Sunday afternoons, and those moments when you just need something warm and sweet. No fancy equipment required, no complicated steps, and honestly—they might be the best cookies I’ve ever made.
Why You’ll Love This Recipe
Let me tell you why these cookies have earned a permanent spot in my recipe rotation. I’ve tested this method more times than I can count, and every single time, I’m amazed at how simple yet perfect the results are.
- No Mixer Required : You don’t need a stand mixer, hand mixer, or any fancy gadget. Just a bowl and a spoon. Perfect for small kitchens, college dorms, or when your mixer is buried somewhere in the back of a cabinet.
- One Bowl Only : Less dishes means less cleanup. Everything comes together in a single bowl—no separate mixing of dry ingredients, no dirtying extra measuring cups for wet ingredients. It’s the kind of efficiency that makes weeknight baking actually possible.
- Perfect Texture Every Time : The butter-to-sugar ratio and the technique create cookies that are crispy on the edges, soft and chewy in the middle, and loaded with melty chocolate in every bite.
- Ready in Under 30 Minutes : From start to finish, you can have warm cookies on your plate in about 25 minutes. That’s faster than ordering delivery.
- Simple Pantry Ingredients : Butter, sugar, eggs, flour, vanilla, baking soda, salt, and chocolate chips. That’s it. Nothing weird, nothing expensive, nothing you need to hunt down at a specialty store.
These cookies are the kind that disappear before they even cool down. I’ve brought them to potlucks, bake sales, and family gatherings, and they always get the same reaction—people asking for the recipe, then looking shocked when I tell them there’s no mixer involved. It’s comfort food at its simplest, and honestly, that’s what makes it so special.
What Ingredients You Will Need
This recipe uses simple, everyday ingredients that work together to create the perfect cookie texture. No complicated shopping list, no obscure items—just the basics done right.
- Unsalted butter (1 cup, melted and slightly cooled) — I use Land O’Lakes for consistent results. Melting the butter instead of creaming it with sugar is what makes this recipe work without a mixer. Just make sure it’s cooled slightly so it doesn’t cook the eggs.
- Granulated sugar (¾ cup) — Adds sweetness and helps create those crispy edges. Regular white sugar works perfectly here.
- Light brown sugar (¾ cup, packed) — This is where the chewiness comes from. The molasses in brown sugar keeps the centers soft and adds a deeper flavor. I prefer light brown sugar, but dark brown works too for a richer taste.
- Large eggs (2, room temperature) — Room temperature eggs mix more evenly into the melted butter. If you forget to take them out ahead of time, just place them in a bowl of warm water for 5 minutes.
- Vanilla extract (2 teaspoons) — Pure vanilla extract makes a noticeable difference, but imitation vanilla works in a pinch. I’ve used both, and honestly, the cookies are still delicious either way.
- All-purpose flour (2¼ cups, spooned and leveled) — Spoon the flour into your measuring cup and level it off with a knife. Scooping directly from the bag packs the flour down and gives you too much, which leads to dry cookies.
- Baking soda (1 teaspoon) — Helps the cookies spread and gives them that slightly crisp texture. Make sure it’s fresh—if it’s been sitting in your cabinet for over a year, it might not work as well.
- Salt (½ teaspoon) — Balances the sweetness and enhances the chocolate flavor. I use fine sea salt for baking.
- Semi-sweet chocolate chips (2 cups) — I’m partial to Ghirardelli for their rich flavor and how well they hold their shape during baking. You can use milk chocolate, dark chocolate, or even chopped chocolate bars if you prefer bigger chunks.
A quick note on substitutions—if you’re out of brown sugar, you can use all granulated sugar, but the cookies won’t be as chewy. For a dairy-free version, use melted coconut oil or vegan butter in place of the regular butter. And if you want to experiment with different chocolates, go for it. I’ve made these with white chocolate and macadamia nuts, and they were incredible.
Equipment Needed
One of the best things about this recipe is how little equipment you actually need. Here’s what you’ll need:
- Large mixing bowl — Any medium-to-large bowl works. I use a glass mixing bowl because I can see when everything is fully combined.
- Wooden spoon or sturdy spatula — A wooden spoon is my go-to because it has enough leverage to really work the dough. A silicone spatula works too, but you’ll need to use a bit more elbow grease.
- Measuring cups and spoons — Standard dry measuring cups for flour and sugar, and a liquid measuring cup for the melted butter.
- Baking sheets — Two standard half-sheet pans work perfectly. If you only have one, just bake the cookies in batches.
- Parchment paper or silicone baking mats — Parchment paper is cheap and disposable, while silicone mats are reusable and eco-friendly. Either works great for preventing sticking and ensuring even browning.
- Cooling rack — Not strictly necessary, but it helps the cookies cool evenly and keeps them from getting soggy on the bottom.
- Cookie scoop (optional) — A 1.5-tablespoon cookie scoop makes portioning the dough quick and uniform. If you don’t have one, just use two spoons to drop rounded tablespoons of dough.
I’ve made these cookies in a tiny apartment kitchen with nothing but a fork and a cereal bowl, and they still turned out amazing. Don’t let missing equipment stop you—improvise and make it work.
Preparation Method
- Preheat your oven to 375°F (190°C) and line two baking sheets with parchment paper or silicone mats. Getting the oven hot before you start mixing ensures even baking from the moment the cookies go in.
- Melt the butter in a microwave-safe bowl in 20-second intervals, stirring between each, until just melted. You want it liquid but not hot. Let it sit for 2-3 minutes to cool slightly while you gather the other ingredients.
- In your large mixing bowl, combine the melted butter, granulated sugar, and brown sugar. Stir with your wooden spoon until everything is well combined and looks like wet sand. This should take about 1 minute. Don’t worry if it looks a bit grainy—that’s normal.
- Add the eggs and vanilla extract to the butter-sugar mixture. Stir vigorously until the mixture becomes smooth and slightly lighter in color, about 30 seconds. You’ll notice it starts to look like a thick caramel sauce. If the mixture looks separated or greasy, keep stirring—it will come together.
- Sprinkle the baking soda and salt over the wet mixture and stir to combine. This ensures they’re evenly distributed before you add the flour.
- Add the flour all at once. Stir gently at first to avoid a flour cloud, then increase to a steady, firm stirring motion. Stop as soon as the flour is fully incorporated—overmixing at this point can make the cookies tough. The dough should be thick and slightly sticky.
- Fold in the chocolate chips with a few final stirs. Make sure they’re evenly distributed throughout the dough. If you want a few chips on top for presentation, reserve a handful to press onto the dough balls before baking.
- Chill the dough for 10-15 minutes in the refrigerator. This step isn’t strictly necessary, but it prevents the cookies from spreading too thin and gives them a better texture. If you’re in a hurry, you can skip it—the cookies will just be slightly flatter.
- Scoop rounded tablespoons of dough (about 1.5 tablespoons each) and place them 2 inches apart on the prepared baking sheets. If you want perfectly round cookies, roll the dough balls between your palms to smooth them out.
- Bake for 8-10 minutes, rotating the pans halfway through for even baking. The cookies are done when the edges are golden brown and the centers still look slightly soft and underdone. They’ll continue to set as they cool on the baking sheet.
- Let the cookies cool on the baking sheet for 5 minutes before transferring them to a wire rack to cool completely. This resting time is crucial—moving them too early will cause them to fall apart.
Pro tip: For extra thick cookies, chill the dough for at least 30 minutes before baking. The colder dough spreads less in the oven, giving you taller, chewier cookies with a more pronounced crispy edge.
Cooking Tips & Techniques
I’ve made this recipe so many times that I’ve learned a few tricks the hard way. Here’s what I wish someone had told me when I first started making these cookies.
Don’t overmix the dough. I know it’s tempting to keep stirring until everything looks perfectly smooth, but once the flour is incorporated, stop. Overmixing develops the gluten in the flour, which makes cookies tough and cakey instead of tender and chewy. You want to see a few streaks of flour right up until the very last stir.
Use a cookie scoop for uniform sizing. I learned this after making a batch where some cookies were tiny and others were massive. They baked unevenly, with the small ones burning and the big ones staying raw in the middle. A cookie scoop gives you evenly sized cookies that bake at the same rate. It’s one of those small investments that makes a huge difference.
Chill the dough if you have time. I’ve made these cookies with both chilled and unchilled dough, and the difference is noticeable. Chilled dough spreads less, giving you thicker cookies with a better texture. Even 10 minutes in the fridge helps. If you’re planning ahead, you can chill the dough for up to 48 hours—the flavor actually gets better as it rests.
Watch the edges, not the centers. The biggest mistake I made early on was waiting until the centers looked fully baked before pulling the cookies out. By then, they were already overdone. Pull the cookies out when the edges are golden brown and the centers still look slightly soft and puffy. They’ll continue to cook on the hot baking sheet as they cool.
Rotate your pans halfway through. Ovens have hot spots, and if you don’t rotate the pans, you’ll end up with some cookies that are perfectly golden and others that are pale or burnt. Halfway through the baking time, swap the top and bottom racks and turn the pans 180 degrees.
Let them cool on the pan. I once tried to move cookies to a cooling rack immediately after they came out of the oven. They fell apart into a crumbly mess. The cookies need those 5 minutes on the hot baking sheet to set properly. Be patient—it’s worth it.
Variations & Adaptations
These easy one-bowl chocolate chip cookies are incredibly versatile. Here are some of my favorite variations:
- Double Chocolate Chip Cookies : Replace ¼ cup of the flour with ¼ cup of unsweetened cocoa powder. Use dark chocolate chips instead of semi-sweet for an extra rich, fudgy cookie that tastes like a brownie in cookie form.
- Oatmeal Chocolate Chip Cookies : Reduce the flour to 1½ cups and add 1 cup of old-fashioned oats. The oats add a wonderful chewy texture and a slightly nutty flavor that pairs beautifully with the chocolate.
- Peanut Butter Chocolate Chip Cookies : Reduce the butter to ½ cup and add ½ cup of creamy peanut butter. Mix the peanut butter in with the butter and sugars for a deliciously nutty twist. These are always a hit at bake sales.
- Gluten-Free Option : Substitute the all-purpose flour with a 1:1 gluten-free baking flour blend. I’ve had great results with Bob’s Red Mill gluten-free flour. The texture is slightly different—a bit more delicate—but still delicious.
- Vegan Chocolate Chip Cookies : Use melted coconut oil or vegan butter instead of regular butter, and replace the eggs with flax eggs (1 tablespoon ground flaxseed mixed with 3 tablespoons water per egg). Let the flax mixture sit for 5 minutes to thicken before adding it to the butter-sugar mixture.
- Add-In Variations : Swap half the chocolate chips for white chocolate chips, butterscotch chips, or peanut butter chips. Add ½ cup of chopped nuts like walnuts, pecans, or almonds. Toss in ½ cup of dried cranberries or cherries for a sweet-tart contrast.
I’ve tried most of these variations myself, and my personal favorite is the double chocolate version. It’s rich enough to feel like a special treat but still comes together in one bowl with no mixer. Perfect for those days when you need a serious chocolate fix.
Serving & Storage Suggestions
These cookies are best enjoyed warm, when the chocolate chips are still melty and the edges are perfectly crisp. Let them cool for about 5 minutes on the baking sheet, then transfer them to a plate and serve immediately. A glass of cold milk is the classic pairing, but they’re also amazing with a scoop of vanilla ice cream sandwiched between two cookies for an impromptu ice cream sandwich.
For a dessert spread, these cookies pair beautifully with a creamy tiramisu in a jar for a cozy night in, or alongside peanut butter cup rice krispie treats for a party platter that will disappear in minutes.
Storage: Store cooled cookies in an airtight container at room temperature for up to 5 days. Place a slice of bread in the container to keep them soft—the cookies will absorb moisture from the bread, keeping them chewy instead of dry. Replace the bread slice every other day if needed.
Freezing: These cookies freeze beautifully. You can freeze either the baked cookies or the raw dough. For baked cookies, let them cool completely, then place them in a single layer in a freezer-safe bag or container. They’ll keep for up to 3 months. To thaw, just leave them at room temperature for about 30 minutes.
For the dough, scoop it into balls and place them on a parchment-lined baking sheet. Freeze until solid, about 1 hour, then transfer the frozen dough balls to a freezer bag. You can bake them straight from frozen—just add 1-2 minutes to the baking time. This is my favorite method for having fresh cookies on demand.
Reheating: To revive day-old cookies, pop them in a 300°F (150°C) oven for 3-5 minutes. They’ll come out tasting almost as good as fresh-baked. You can also microwave them for 10-15 seconds, but be careful not to overdo it—they can get tough.
The flavors actually develop and deepen over the first 24 hours, so don’t be disappointed if they taste even better the next day. The brown sugar and vanilla continue to meld, creating a more complex, caramel-like flavor.
Nutritional Information & Benefits
Here’s the estimated nutritional breakdown for one cookie (based on a batch of 24 cookies):
| Nutrient | Amount Per Cookie |
|---|---|
| Calories | 195 |
| Total Fat | 10g |
| Saturated Fat | 6g |
| Cholesterol | 30mg |
| Sodium | 115mg |
| Total Carbohydrates | 25g |
| Dietary Fiber | 1g |
| Sugars | 16g |
| Protein | 2g |
While these cookies are undoubtedly a treat, the dark chocolate chips do offer some health benefits. Dark chocolate is rich in antioxidants called flavonoids, which can help reduce inflammation and improve heart health. The eggs provide a good source of protein and essential vitamins like B12 and D.
For those watching their sugar intake, you can reduce the sugar by ¼ cup without significantly affecting the texture. The cookies won’t be as sweet, but they’ll still be delicious. If you’re following a low-carb or keto diet, these cookies aren’t ideal, but you can try substituting the flour with almond flour and the sugar with a monk fruit-based sweetener.
As with any dessert, moderation is key. I like to think of these cookies as a little moment of joy—something to savor and enjoy without guilt. Life’s too short to skip dessert.
Conclusion
These easy one-bowl chocolate chip cookies have become a staple in my kitchen for a reason. They’re simple enough to make on a whim, delicious enough to impress anyone, and forgiving enough that even beginner bakers can nail them on the first try. No mixer, no complicated techniques, no stress—just warm, gooey, perfect cookies every single time.
What I love most about this recipe is how adaptable it is. You can customize it with different add-ins, adjust the sweetness to your liking, or make it gluten-free or vegan without losing the soul of the cookie. It’s the kind of recipe that becomes yours over time, with your own little tweaks and modifications.
I’d love to hear how these turn out for you. Did you try any variations? Did you add something unexpected that made them even better? Drop a comment below and share your experience. And if you loved these, you might also enjoy these thick, gooey Levain bakery copycat cookies for when you’re craving something extra indulgent, or this collection of soft Crumbl cookie copycat recipes for more cookie inspiration.
Happy baking, friends. Your next batch of perfect cookies is just one bowl away.
Frequently Asked Questions
Can I use salted butter instead of unsalted?
Yes, you can. Just reduce the added salt in the recipe to ¼ teaspoon to avoid overly salty cookies. The flavor will be slightly different, but still delicious.
Why did my cookies turn out flat?
Flat cookies usually happen when the butter is too warm or the dough isn’t chilled. Make sure your melted butter has cooled slightly before mixing, and try chilling the dough for 15-20 minutes before baking. Also, check that your baking soda is fresh—old baking soda loses its effectiveness.
Can I make these cookies gluten-free?
Absolutely. Substitute the all-purpose flour with a 1:1 gluten-free baking flour blend. I recommend one that contains xanthan gum for better texture. The cookies will be slightly more delicate, but they’ll still taste amazing.
How do I make my cookies extra chewy?
For extra chewy cookies, use all brown sugar instead of a mix of granulated and brown sugar. You can also add an extra egg yolk to the dough. The extra fat and moisture from the yolk creates a softer, chewier texture.
Can I freeze the cookie dough?
Yes, and I highly recommend it. Scoop the dough into balls, freeze them on a baking sheet until solid, then transfer to a freezer bag. You can bake them straight from frozen—just add 1-2 minutes to the baking time. Fresh cookies whenever you want them.
Pin This Recipe!
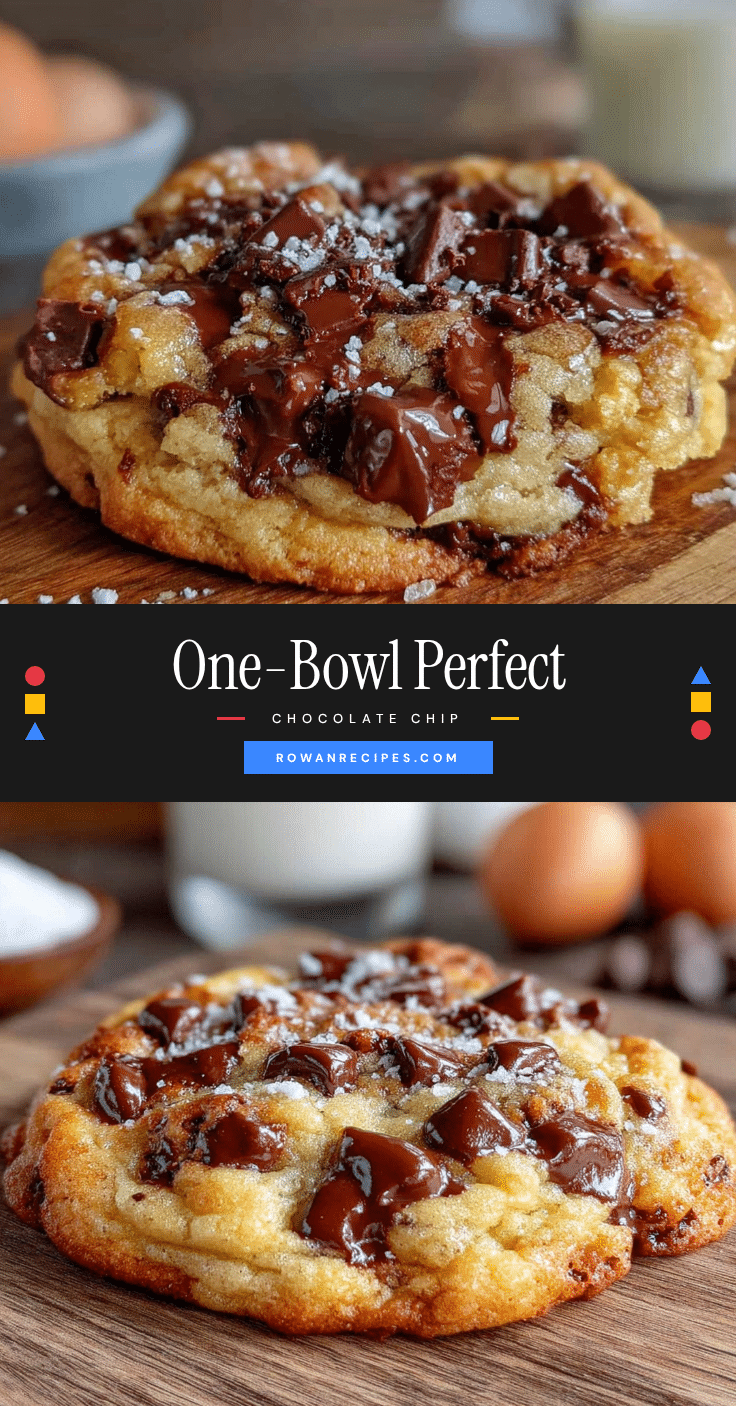
Easy One-Bowl Chocolate Chip Cookies: Best No-Mixer Recipe

These easy one-bowl chocolate chip cookies require no mixer and just a single bowl, delivering perfectly crispy edges and soft, chewy centers every time. Made with simple pantry ingredients, they’re ready in under 30 minutes and perfect for last-minute dessert emergencies.
- Prep Time: 15 minutes
- Cook Time: 10 minutes
- Total Time: 25 minutes
- Yield: 24 servings 1x
- Category: Dessert
- Cuisine: American
Ingredients
- 1 cup unsalted butter, melted and slightly cooled
- ¾ cup granulated sugar
- ¾ cup light brown sugar, packed
- 2 large eggs, room temperature
- 2 teaspoons vanilla extract
- 2¼ cups all-purpose flour, spooned and leveled
- 1 teaspoon baking soda
- ½ teaspoon salt
- 2 cups semi-sweet chocolate chips
Instructions
- Preheat your oven to 375°F (190°C) and line two baking sheets with parchment paper or silicone mats.
- Melt the butter in a microwave-safe bowl in 20-second intervals, stirring between each, until just melted. Let it sit for 2-3 minutes to cool slightly.
- In your large mixing bowl, combine the melted butter, granulated sugar, and brown sugar. Stir with a wooden spoon until well combined and looks like wet sand, about 1 minute.
- Add the eggs and vanilla extract to the butter-sugar mixture. Stir vigorously until smooth and slightly lighter in color, about 30 seconds.
- Sprinkle the baking soda and salt over the wet mixture and stir to combine.
- Add the flour all at once. Stir gently at first, then increase to a steady, firm motion until the flour is fully incorporated. Do not overmix.
- Fold in the chocolate chips with a few final stirs. Reserve a handful to press onto dough balls for presentation if desired.
- Chill the dough for 10-15 minutes in the refrigerator (optional but recommended for better texture).
- Scoop rounded tablespoons of dough (about 1.5 tablespoons each) and place them 2 inches apart on the prepared baking sheets.
- Bake for 8-10 minutes, rotating the pans halfway through. Cookies are done when edges are golden brown and centers still look slightly soft.
- Let the cookies cool on the baking sheet for 5 minutes before transferring to a wire rack to cool completely.
Notes
For extra thick cookies, chill the dough for at least 30 minutes before baking. Don’t overmix the dough to avoid tough cookies. Pull cookies out when edges are golden and centers are still soft—they’ll continue to set on the hot pan. Store in an airtight container at room temperature for up to 5 days; add a slice of bread to keep them soft. Freeze baked cookies or dough balls for up to 3 months.
Nutrition
- Serving Size: 1 cookie
- Calories: 195
- Sugar: 16
- Sodium: 115
- Fat: 10
- Saturated Fat: 6
- Carbohydrates: 25
- Fiber: 1
- Protein: 2
Keywords: chocolate chip cookies, one-bowl cookies, no-mixer cookies, easy cookies, homemade cookies, chewy cookies, crispy edge cookies


