That first crack of the lid—the sharp, sweet smell of caramel hitting warm air—still takes me straight back to my grandmother’s tiny kitchen. She had this old ice cream maker, a beast of a machine that required rock salt and elbow grease and what felt like hours of cranking. I loved the result, but I hated the process. Honestly, it felt like a science experiment I was never patient enough to finish.
Years later, after I’d long since given up on homemade ice cream, I found myself staring at a can of sweetened condensed milk in my pantry. A friend had mentioned, almost as a throwaway, that you could make ice cream without a machine. No churning. No rock salt. Just a whisk and a freezer. I was skeptical—deeply skeptical. But I had a pint of heavy cream and a sudden, undeniable craving for something cold and salty and sweet.
That first batch was a revelation. It wasn’t just good; it was dangerously good. The texture was creamy, not icy. The caramel swirled through it like ribbons of gold. And the salt? That little crunch of flaky sea salt on top made it feel like something from a fancy restaurant, not my own kitchen counter. This easy no-churn salted caramel ice cream recipe became my summer secret. It’s the kind of thing you make when you want to impress without the stress, or when you just need a bowl of something that tastes like a hug.
So trust me on this one. You don’t need a fancy machine or a culinary degree. You just need a few ingredients and a little bit of patience. Let’s make some magic.
Why You’ll Love This Recipe
This isn’t just another ice cream recipe. It’s the one you’ll come back to all summer long. Here’s why it works so well:
- No Machine Required: Zero special equipment. No churning, no freezing bowls, no complicated steps. Just a whisk and a freezer.
- 5 Simple Ingredients: You probably have most of these in your kitchen right now. Heavy cream, sweetened condensed milk, vanilla, caramel sauce, and salt. That’s it.
- Perfect for Hot Days: When the temperature hits 90 degrees, the last thing you want to do is turn on the oven. This comes together in 15 minutes of active time.
- Crowd-Pleaser: I’ve served this at barbecues, birthday parties, and quiet nights in. Every single person asks for the recipe. Kids love the sweet caramel, and adults appreciate that sophisticated salty finish.
- Unbelievably Creamy: The texture is what gets people every time. It’s rich, smooth, and scoopable straight from the freezer. No icy crystals, no hard-as-a-rock blocks.
What makes this version different from all the other no-churn recipes out there? It’s the balance. I tested this about six times before I got it just right. The caramel needs to be deep and buttery, not cloyingly sweet. The salt needs to be flaky and pronounced, not an afterthought. And the ratio of cream to condensed milk? That’s the secret to that velvety texture that doesn’t freeze solid.
This recipe isn’t just good—it’s the kind that makes you close your eyes after the first bite. It’s comfort food reimagined for summer, and it’s exactly what you need right now.
What Ingredients You Will Need
This recipe uses simple, everyday ingredients to deliver that rich, complex flavor. The magic is in how they come together, not in any fancy pantry items.
- 2 cups (480 ml) heavy cream or heavy whipping cream (This is the base of the ice cream. The high fat content is what gives you that luscious, creamy texture. Don’t substitute with half-and-half or milk—it won’t whip properly and the ice cream will be icy. I prefer using a brand like Horizon Organic or Land O’Lakes for consistent results.)
- 1 can (14 ounces / 397 grams) sweetened condensed milk (This is the sweetener and the stabilizer all in one. It prevents ice crystals from forming and gives the ice cream that soft, scoopable texture. There’s really no substitute for this, though you can find dairy-free versions if needed.)
- 1 teaspoon vanilla extract (Pure vanilla extract is best here. It rounds out the caramel flavor and adds warmth. If you have a vanilla bean, scrape the seeds into the condensed milk for an even more intense flavor.)
- ½ cup (120 ml) homemade or store-bought caramel sauce, cooled (This is where the flavor lives. You can use a high-quality store-bought sauce like Smucker’s or Stonewall Kitchen, but homemade is truly special. If you’re using store-bought, look for one that lists cream and butter in the ingredients, not just corn syrup and artificial flavor.)
- 1 teaspoon flaky sea salt, plus more for garnish (This is non-negotiable for the “salted” part of the equation. Flaky sea salt like Maldon or Fleur de Sel dissolves beautifully and gives you those little bursts of saltiness. Regular table salt will work in a pinch, but use half the amount and expect a more intense, less delicate saltiness.)
Optional but recommended: ⅓ cup (about 40g) crushed shortbread cookies or toffee bits for texture. I love adding a handful of crushed Heath Bar pieces or Walkers Shortbread for a little crunch, but the plain version is perfect on its own.
Equipment Needed
You don’t need much for this recipe, which is honestly the best part. Here’s what you’ll need:
- A large mixing bowl (Glass or stainless steel works best. Make sure it’s very clean—any trace of grease will keep your cream from whipping properly.)
- A hand mixer or stand mixer (You can whip the cream by hand with a whisk, but it’ll take about 8-10 minutes and a lot of arm strength. A hand mixer does it in 3-4 minutes. A stand mixer with the whisk attachment is even faster.)
- A rubber spatula (For folding the mixtures together gently. A metal spoon can deflate the whipped cream too much.)
- A 9×5-inch loaf pan or similar freezer-safe container (A standard loaf pan is perfect for this amount. You can also use a 2-quart freezer-safe dish with a lid.)
- Plastic wrap or parchment paper (To press directly onto the surface of the ice cream before freezing. This prevents freezer burn and keeps the texture creamy.)
If you don’t have a hand mixer, you can absolutely do this by hand. Just make sure your cream is very cold, and use a large balloon whisk. It’s a great arm workout! For the container, I’ve used everything from a fancy Le Creuset dish to an old takeout container. It all works the same.
Preparation Method
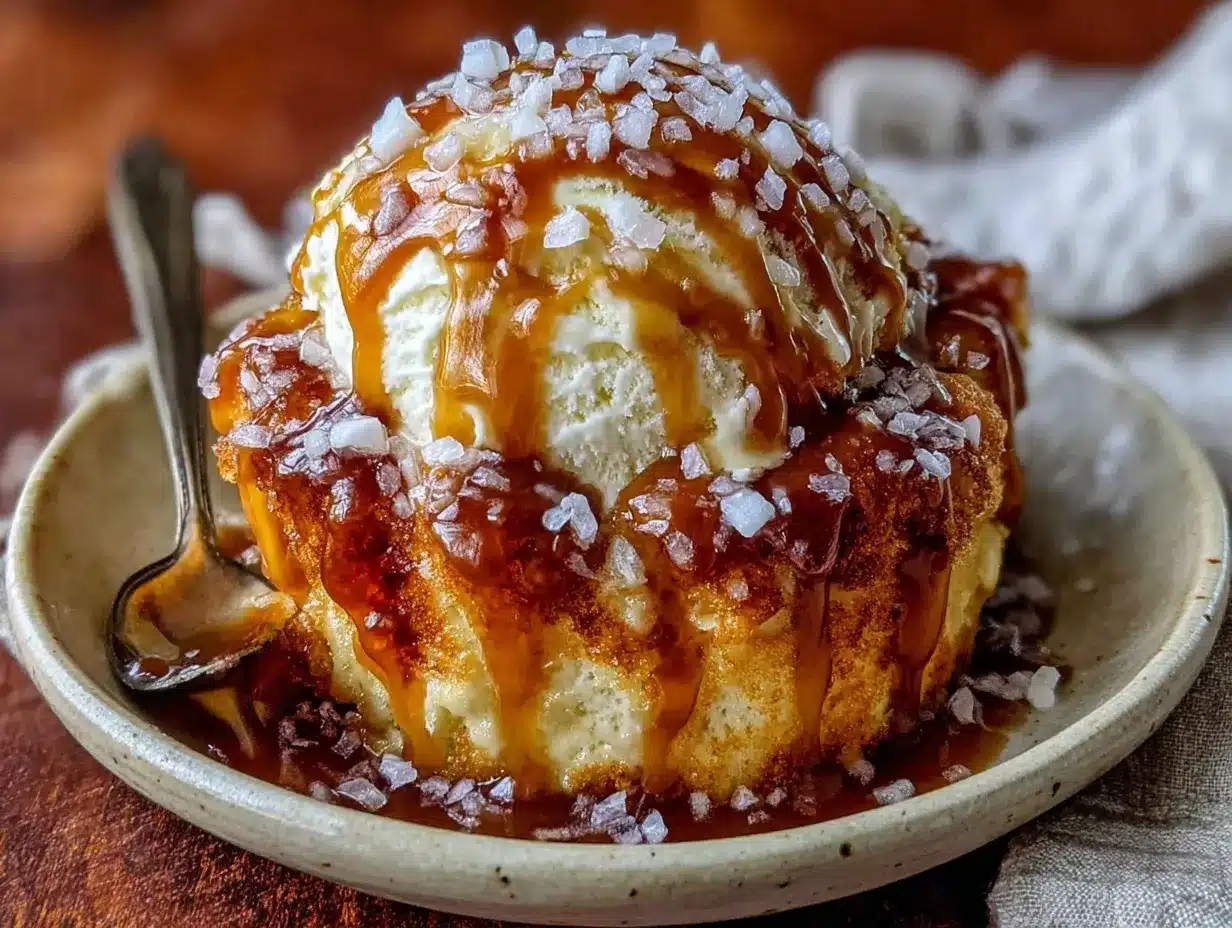
This is the easy part. I promise, if you can whip cream and stir, you can make this ice cream. Let’s break it down step by step.
- Chill your bowl and beaters. Pop your large mixing bowl and the beaters from your hand mixer into the freezer for about 15 minutes. This isn’t strictly necessary, but it makes whipping the cream faster and gives you a better volume. Cold cream whips up fluffier.
- Whip the heavy cream. Pour the 2 cups of cold heavy cream into your chilled bowl. Using your hand mixer on medium-high speed, whip the cream until stiff peaks form. You’re looking for the cream to hold its shape when you lift the beaters—it should stand up in a peak that doesn’t droop. This usually takes about 3-4 minutes with a mixer. Be careful not to over-whip, or you’ll end up with butter! You’ll know it’s done when the cream looks thick and cloud-like, and the whisk leaves distinct trails.
- Mix the base. In a separate medium bowl, combine the can of sweetened condensed milk, the vanilla extract, and ½ teaspoon of the flaky sea salt. Stir until everything is smooth and well combined. The salt should be fully dissolved into the condensed milk—no gritty bits left behind.
- Fold the mixtures together. This is the most important step. Take about one-third of the whipped cream and gently fold it into the condensed milk mixture using your rubber spatula. Don’t stir—fold. Use a gentle, scraping motion from the bottom of the bowl up and over. This lightens the condensed milk mixture. Then, pour this lightened mixture back into the bowl with the remaining whipped cream. Fold again, gently, until no white streaks remain. You want a uniform, pale, airy mixture. Over-mixing will deflate the cream and make the ice cream dense.
- Swirl in the caramel. Pour about half of the ice cream base into your loaf pan. Drizzle half of the cooled caramel sauce (about ¼ cup) over the top. Use a knife or a skewer to gently swirl it through the base—just a few figure-eight motions. Don’t over-swirl, or you’ll lose the distinct ribbons of caramel. Sprinkle a pinch of flaky sea salt over the caramel. Repeat with the remaining ice cream base, caramel sauce, and another pinch of salt.
- Add the finish. If you’re using crushed cookies or toffee bits, sprinkle them over the top now. Press a piece of plastic wrap directly onto the surface of the ice cream (this prevents ice crystals from forming). Place the lid on the container or cover tightly with foil.
- Freeze. Place the loaf pan in the freezer for at least 6 hours, but preferably overnight. The ice cream needs time to set up properly. After about 2 hours, you can check on it—it will be soft-serve consistency, which is delicious in its own right! For scoopable ice cream, wait the full 6-8 hours.
Pro tip from my kitchen: Before you scoop, let the ice cream sit at room temperature for about 5-10 minutes. This softens it just enough to make scooping easy and gives you that perfect, creamy texture. If you try to scoop it straight from the freezer, it might be a little too firm.
Cooking Tips & Techniques
I’ve made this recipe more times than I can count, and I’ve learned a few things the hard way. Here are my best tips for success.
Don’t over-whip the cream. This is the number one mistake I see. You want stiff peaks, but if you keep going, the cream will separate and turn into butter. The texture will be grainy, and your ice cream won’t be smooth. Stop the mixer the moment you see those stiff, glossy peaks. If you’re unsure, it’s better to under-whip slightly than over-whip. You can always whip a little more, but you can’t undo butter.
Use cold ingredients. Everything should be cold—the cream, the bowl, the beaters. Warm cream won’t whip properly. I even chill my can of sweetened condensed milk in the fridge for an hour before I start. This helps everything come together smoothly.
Cool your caramel completely. If you’re making your own caramel sauce, let it cool to room temperature before you swirl it into the ice cream base. Warm caramel will melt the whipped cream and create a soupy mess instead of those beautiful ribbons. I usually make my caramel the day before and let it chill in the fridge. It thickens up nicely and swirls in perfectly.
Be patient with the freeze time. I know it’s tempting to dig in after a few hours, but the texture really benefits from a full overnight freeze. The ice cream needs time to set up evenly. If you scoop it too early, it will be more like a milkshake—still delicious, but not quite the same.
My biggest failure: The first time I made this, I was in a hurry and used a warm bowl. The cream wouldn’t whip, and I ended up with a sad, liquid mess. I tried to salvage it by adding more cream and re-chilling, but it was a lost cause. I learned my lesson: patience pays off. Chill your tools, take your time, and the results will be worth it.
Variations & Adaptations
This recipe is incredibly forgiving and easy to customize. Here are a few of my favorite twists.
- Chocolate Salted Caramel: Add ¼ cup of unsweetened cocoa powder to the sweetened condensed milk before folding in the whipped cream. The chocolate and caramel are a classic combination, and the salt cuts through the richness beautifully.
- Vegan/Dairy-Free Version: Use full-fat canned coconut cream (chilled overnight) in place of the heavy cream. Use a dairy-free sweetened condensed coconut milk (like Nature’s Charm). The texture will be slightly different—a little lighter and more coconut-forward—but it’s still incredibly creamy and delicious. I’ve made this for friends with dairy allergies, and it was a huge hit.
- Boozy Salted Caramel: Add 2 tablespoons of bourbon, dark rum, or Irish cream liqueur to the sweetened condensed milk mixture. The alcohol lowers the freezing point, which means the ice cream will be even softer and more scoopable. It also adds a lovely warmth that pairs perfectly with the caramel.
- Cookie Butter Swirl: Replace the caramel sauce with cookie butter (like Biscoff spread). Swirl it in the same way, and add crushed Biscoff cookies on top. This is a dangerous, addictive variation that I can’t stop making.
- Low-Sugar Option: Use a sugar-free sweetened condensed milk (available at most grocery stores) and a sugar-free caramel sauce. The texture will be slightly less creamy, but it’s a great option if you’re watching your sugar intake. You might also want to add a pinch of xanthan gum to help with the texture.
My personal favorite variation is the one with crushed shortbread cookies. The buttery, crumbly texture is the perfect contrast to the smooth, creamy ice cream. It reminds me of those cozy pecan pie bars I love making in the fall—all those warm, comforting flavors in a cold, refreshing package.
Serving & Storage Suggestions
This ice cream is best served straight from the freezer, but with that little 5-10 minute rest on the counter. Scoop it into chilled bowls or cones. A drizzle of extra caramel sauce and a final pinch of flaky sea salt right before serving makes it look (and taste) like something from a fancy ice cream parlor.
What to serve with it: This ice cream is incredible on its own, but it also pairs beautifully with warm desserts. Try it alongside a slice of warm apple pie, a brownie, or a peanut butter cup rice krispie treat for the ultimate hot-and-cold experience. It’s also fantastic in a float—just add a scoop to a glass of root beer or cream soda.
Storage: Keep the ice cream in its loaf pan or an airtight freezer-safe container. Press a piece of plastic wrap or parchment paper directly onto the surface before sealing the lid. This prevents freezer burn and keeps the texture creamy for up to 2 weeks. After that, it will still be safe to eat, but the texture might start to get a little icy.
Reheating (sort of): If the ice cream gets too hard after a few days, just let it sit at room temperature for 10-15 minutes before scooping. You can also microwave the container for 10-15 seconds to soften it up, but be careful not to melt it completely.
Flavor development: The flavors actually deepen and meld together after a day or two in the freezer. The caramel becomes more pronounced, and the saltiness balances out beautifully. So if you can wait, make it a day ahead of time. It’s worth it.
Nutritional Information & Benefits
Let’s be real—this is a treat, not a health food. But that doesn’t mean it can’t have a place in a balanced diet. Here’s a rough estimate per serving (based on 8 servings per recipe):
- Calories: Approximately 380-420
- Fat: 24-28g (mostly from the heavy cream)
- Carbohydrates: 38-42g (from the condensed milk and caramel)
- Protein: 4-6g
- Sugar: 34-38g
- Sodium: 250-300mg (from the sea salt)
Potential allergens: This recipe contains dairy and may contain gluten depending on your mix-ins. For a dairy-free version, see the variations section above.
A note on balance: I believe in enjoying food without guilt. This ice cream is made with real, whole ingredients—cream, milk, vanilla, salt. There are no artificial flavors, preservatives, or high-fructose corn syrup here. It’s a homemade indulgence that’s far better for you than anything from a box. Plus, the protein from the dairy and the healthy fats from the cream will keep you satisfied longer than a store-bought alternative. So go ahead, have a scoop (or two). You deserve it.
Conclusion
This easy no-churn salted caramel ice cream is more than just a recipe—it’s a summer essential. It’s the kind of dessert that makes you slow down and appreciate the simple things. The creamy texture, the sweet-salty caramel, the little crunch of sea salt on your tongue. It’s pure, uncomplicated joy in a bowl.
I love this recipe because it feels like a little bit of magic. You take a few ordinary ingredients, give them a little time and patience, and they transform into something truly special. It’s the perfect dessert for a lazy Sunday afternoon, a backyard barbecue, or a quiet night in when you just need something sweet.
I’d love to hear how yours turns out. Did you add any fun mix-ins? Did you try a different variation? Drop a comment below and let me know. And if you’re looking for another easy, crowd-pleasing dessert, you have to try my creamy no-bake strawberry cheesecake delight—it’s another summer favorite that requires zero oven time.
Now go make some ice cream. Trust me, your future self will thank you.
Frequently Asked Questions
Can I use half-and-half or milk instead of heavy cream?
No, I really don’t recommend it. Heavy cream has a high fat content (at least 36%) which is what gives the ice cream its rich, creamy texture. Half-and-half or milk won’t whip into stiff peaks, and the finished ice cream will be icy and thin instead of luscious and scoopable. Stick with heavy cream for the best results.
How long does this ice cream need to freeze?
At least 6 hours, but overnight is best. After about 2 hours, it will be soft-serve consistency, which is delicious for a quick treat. For a firm, scoopable ice cream that holds its shape, give it the full 8 hours or more. Patience is key here!
Can I make this without a hand mixer?
Absolutely! You can whip the cream by hand using a large balloon whisk. It will take about 8-10 minutes of steady whisking, and your arm will definitely get a workout. Make sure your cream and bowl are very cold, and use a whisk with lots of wires to incorporate air quickly. It’s totally doable, just a little more effort.
My ice cream turned out icy. What went wrong?
This usually happens for one of two reasons. First, you might have over-whipped the cream, which can cause it to separate and create a grainy texture. Second, the ice cream might not have been stored properly—air exposure leads to ice crystals. Make sure you press plastic wrap directly onto the surface of the ice cream before freezing to create an airtight seal. Also, check that your caramel sauce is completely cool before swirling it in.
Can I double this recipe?
Yes, you can easily double it! Just use a larger mixing bowl (or work in batches if your mixer is small) and a larger freezer container, like a 9×13-inch dish. The freezing time might be slightly longer since there’s more volume to freeze. I’d recommend at least 8-10 hours for a double batch. This is perfect for parties or for stocking your freezer for the summer.
Pin This Recipe!
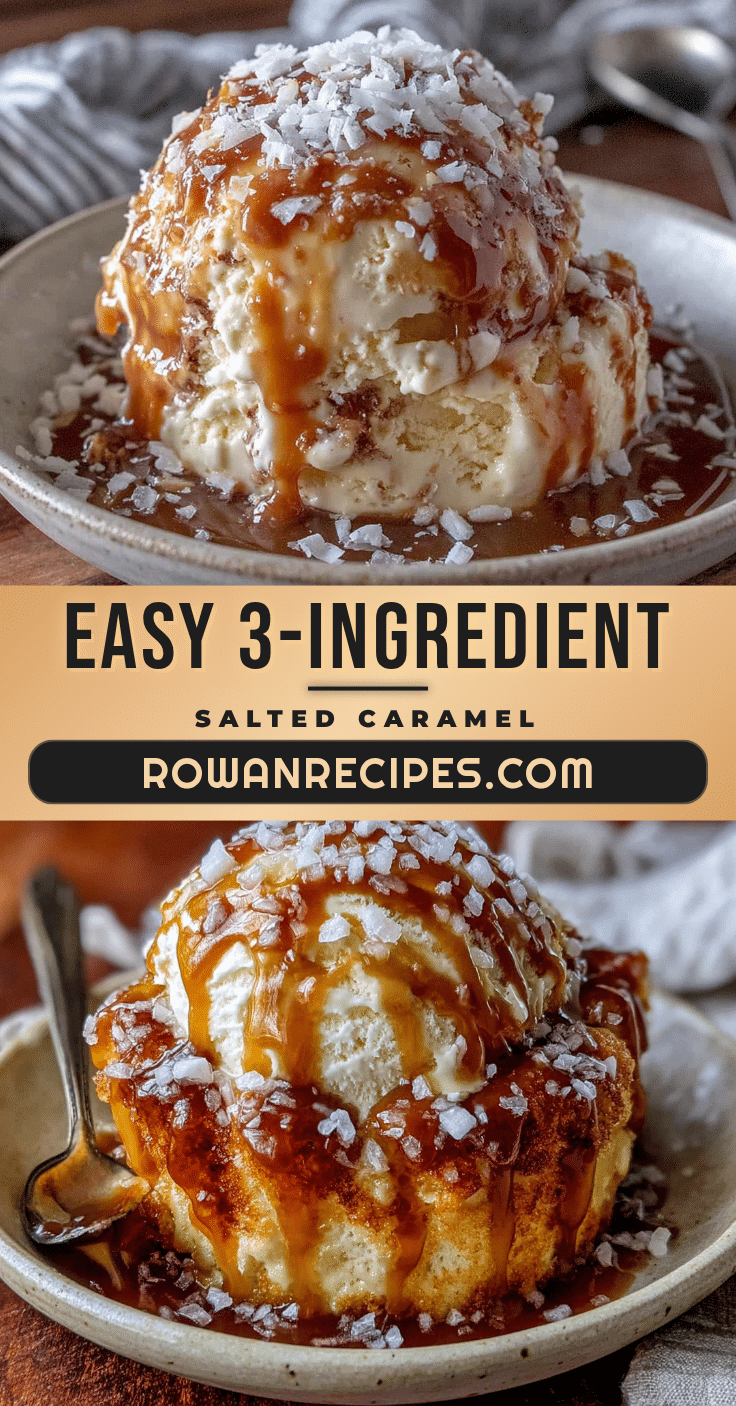
Easy No-Churn Salted Caramel Ice Cream: Perfect Summer Dessert

This easy no-churn salted caramel ice cream is a creamy, dreamy summer treat made with just 5 simple ingredients and no ice cream maker. It’s the perfect balance of sweet and salty, with a velvety texture that will impress everyone.
- Prep Time: 15 minutes
- Cook Time: 0 minutes
- Total Time: 6 hours 15 minutes (includes freezing)
- Yield: 8 servings 1x
- Category: Dessert
- Cuisine: American
Ingredients
- 2 cups (480 ml) heavy cream or heavy whipping cream
- 1 can (14 ounces / 397 grams) sweetened condensed milk
- 1 teaspoon vanilla extract
- ½ cup (120 ml) homemade or store-bought caramel sauce, cooled
- 1 teaspoon flaky sea salt, plus more for garnish
- ⅓ cup (about 40g) crushed shortbread cookies or toffee bits (optional)
Instructions
- Chill your large mixing bowl and hand mixer beaters in the freezer for about 15 minutes.
- Pour the 2 cups of cold heavy cream into the chilled bowl. Using a hand mixer on medium-high speed, whip the cream until stiff peaks form (about 3-4 minutes). Be careful not to over-whip.
- In a separate medium bowl, combine the sweetened condensed milk, vanilla extract, and ½ teaspoon of the flaky sea salt. Stir until smooth and the salt is dissolved.
- Take about one-third of the whipped cream and gently fold it into the condensed milk mixture using a rubber spatula. Then pour this lightened mixture back into the bowl with the remaining whipped cream and fold gently until no white streaks remain.
- Pour about half of the ice cream base into a 9×5-inch loaf pan. Drizzle half of the cooled caramel sauce (about ¼ cup) over the top. Use a knife or skewer to gently swirl it through the base. Sprinkle a pinch of flaky sea salt over the caramel. Repeat with the remaining ice cream base, caramel sauce, and another pinch of salt.
- If using, sprinkle crushed cookies or toffee bits over the top. Press a piece of plastic wrap directly onto the surface of the ice cream. Cover with lid or foil.
- Freeze for at least 6 hours, preferably overnight. Before serving, let the ice cream sit at room temperature for 5-10 minutes to soften slightly for easy scooping.
Notes
For best results, chill your bowl and beaters before whipping cream. Cool caramel completely before swirling to avoid melting the whipped cream. Freeze overnight for optimal texture. Let ice cream sit at room temperature for 5-10 minutes before scooping.
Nutrition
- Serving Size: 1 serving (about ½ c
- Calories: 400
- Sugar: 36
- Sodium: 275
- Fat: 26
- Saturated Fat: 16
- Carbohydrates: 40
- Protein: 5
Keywords: no-churn ice cream, salted caramel, easy ice cream, summer dessert, homemade ice cream, no machine


