It was a Tuesday afternoon, about 2:47 PM, and I was standing in my kitchen staring into the open fridge like it held the secrets to the universe. The truth is, I was just tired. The kind of tired where you don’t want to chew anything, but your stomach is growling loud enough to wake the neighbor’s dog. I needed something. Something fast. Something that didn’t require turning on the oven or washing a million dishes. And that’s when I saw the peanut butter staring back at me from the pantry shelf. These Easy No-Bake Peanut Butter Protein Bites were born from that very specific, very real moment of snack desperation. They weren’t planned or photographed for a blog post that day. They were just a survival snack that ended up being so good, so perfectly chewy and satisfying, that I made them again the next day. And the day after that. Now, they’re the recipe I turn to when I need a quick win in the kitchen—something that feels like a treat but fuels my body right. No oven, no fuss, just pure, honest snack happiness.
Why You’ll Love This Recipe
Honestly, I’ve tested a lot of protein ball recipes over the years. Some were dry and crumbly. Others were so sticky they were practically inedible without a spoon. These Easy No-Bake Peanut Butter Protein Bites are the Goldilocks version—just right in every way. They’re the result of trial and error, a few sticky fingers, and one very patient husband who acted as my official taste tester.
- Ready in 5 Minutes: No kidding. From pantry to plate in less time than it takes to decide what to order for delivery.
- Simple Ingredients: You probably have everything in your kitchen right now. No weird superfood powders or expensive extracts.
- Perfect for Busy Weeks: Grab one on your way out the door, toss one in a lunchbox, or keep a batch in the fridge for those 3 PM slumps.
- Naturally Sweetened: Just a touch of honey or maple syrup does the trick. No refined sugar needed.
- Crowd-Pleaser: I’ve brought these to potlucks and kid’s parties, and they disappear faster than anything else on the table.
What makes this recipe different from the rest? It’s the texture. Most no-bake bites are either too wet or too dry. I spent weeks tweaking the ratios of peanut butter to oats to get that perfect, fudgy, chewy consistency that holds together without being a sticky mess. It’s the kind of snack that makes you close your eyes for a second after the first bite—simple, honest, and deeply satisfying.
What Ingredients You Will Need
This recipe uses simple, wholesome ingredients that work together to create a snack that’s both nutritious and delicious. No fancy trips to specialty stores required—just your everyday pantry staples.
- 1 cup creamy peanut butter (I prefer Skippy or Jif for consistency, but any brand works. Natural peanut butter will work too, just stir it well and expect a slightly softer bite.)
- 1 cup rolled oats (Old-fashioned oats give the best texture. Quick oats will work but result in a finer, less chewy bite. Avoid steel-cut oats—they’re too hard.)
- 1/3 cup honey or maple syrup (Honey gives a classic sweetness. Maple syrup adds a subtle, almost caramel-like flavor. Both work beautifully.)
- 1/2 cup dark chocolate chips (I use Enjoy Life for a dairy-free option. Semi-sweet or milk chocolate chips work too, but dark chocolate balances the sweetness perfectly.)
- 1/4 cup ground flaxseed (Adds fiber and helps bind the bites together. You can substitute chia seeds or skip it entirely if you don’t have it.)
- 1 teaspoon vanilla extract (Pure vanilla extract makes a difference. Imitation works in a pinch, but the real stuff adds warmth.)
- Pinch of sea salt (Don’t skip this. It enhances the peanut butter flavor and balances the sweetness.)
Optional add-ins:
- 1/4 cup shredded coconut (Adds texture and a tropical twist.)
- 2 tablespoons chia seeds (For extra omega-3s.)
- 1/4 cup chopped nuts (Almonds or pecans add a nice crunch.)
Ingredient selection tip: Look for peanut butter that has no added sugar or hydrogenated oils if you want a cleaner snack. The natural oils can separate, so give it a good stir before measuring. For the oats, I’ve found that Bob’s Red Mill old-fashioned oats hold up the best in no-bake recipes.
Equipment Needed
You don’t need a fancy kitchen to make these bites. In fact, you probably already own everything on this list.
- Large mixing bowl (Any size will do, but a wide bowl makes mixing easier.)
- Measuring cups and spoons (Accuracy matters for texture, so don’t eyeball it.)
- Rubber spatula or wooden spoon (I prefer a sturdy silicone spatula for scraping the bowl clean.)
- Baking sheet or plate (For chilling the bites. A small baking sheet lined with parchment paper works perfectly.)
- Parchment paper or wax paper (Prevents sticking and makes cleanup a breeze.)
- Cookie scoop or tablespoon (A 1-tablespoon scoop creates uniform bites. If you don’t have one, just use a regular spoon.)
Budget-friendly tip: If you don’t have a cookie scoop, wet your hands slightly before rolling the bites. It prevents the mixture from sticking to your palms and gives you perfectly round balls without any special tools.
Preparation Method
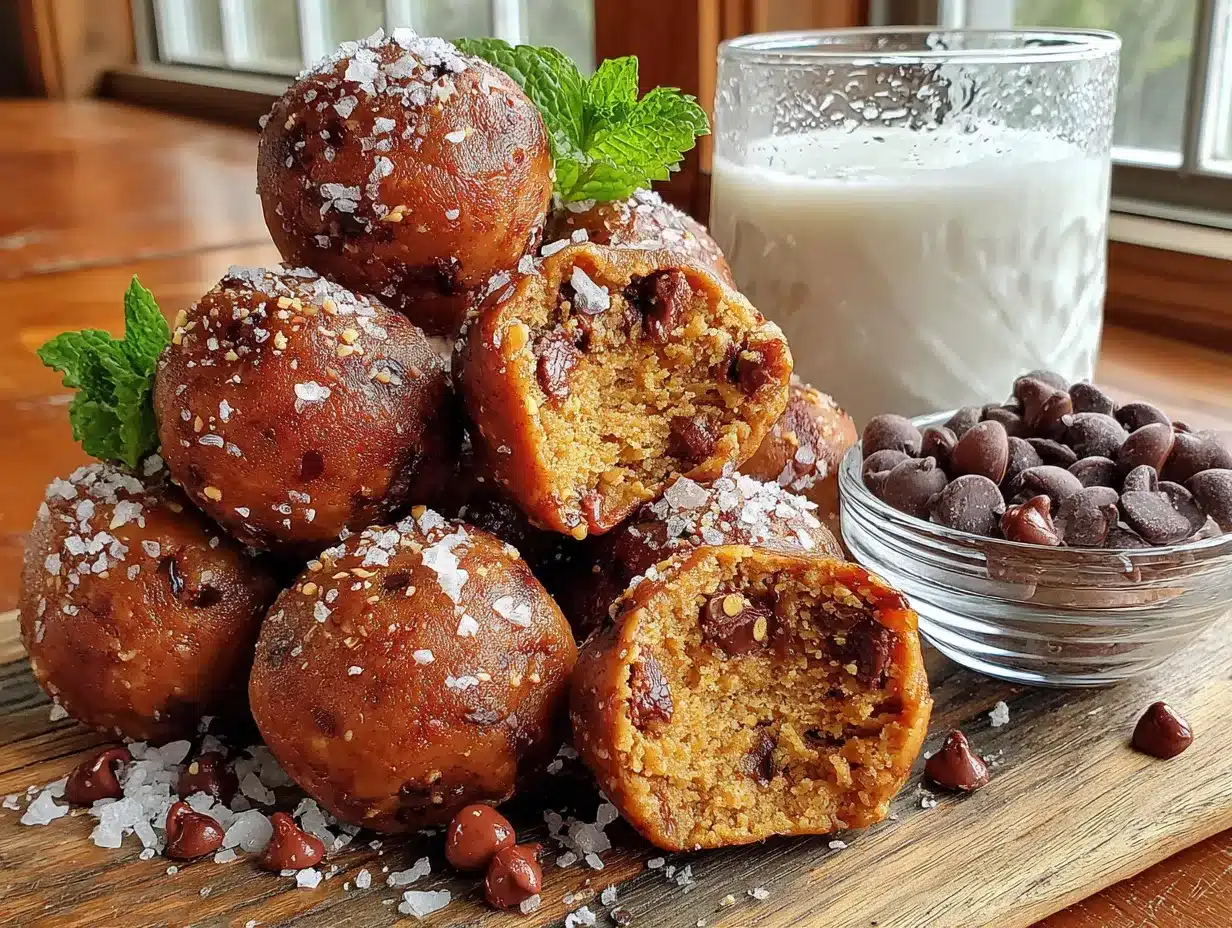
This is the easiest part. Follow these steps, and you’ll have a batch of protein bites ready before your coffee finishes brewing.
- Combine the wet ingredients. In a large mixing bowl, add the creamy peanut butter, honey (or maple syrup), and vanilla extract. Stir until smooth and well combined. The mixture should look glossy and uniform.
- Add the dry ingredients. Add the rolled oats, ground flaxseed, and a pinch of sea salt to the bowl. Stir everything together with a rubber spatula or wooden spoon. At first, it will look like a crumbly mess—don’t panic. Keep mixing, and the oats will absorb the moisture from the peanut butter and honey.
- Fold in the chocolate chips. Add the dark chocolate chips and stir gently until they’re evenly distributed throughout the mixture. If you’re adding any optional ingredients like shredded coconut or chopped nuts, add them now.
- Check the consistency. The mixture should hold together when pressed between your fingers. If it feels too dry and crumbly, add another tablespoon of peanut butter or honey. If it’s too sticky, add another tablespoon of oats. This is where your personal preference comes in—I like mine on the fudgier side.
- Chill the mixture (optional but recommended). Pop the bowl in the refrigerator for 15-20 minutes. This firms up the mixture and makes rolling much easier. If you’re in a hurry, you can skip this step, but your bites will be a bit softer.
- Roll into bites. Using a cookie scoop or a tablespoon, scoop out portions of the mixture. Roll them between your palms to form smooth balls. You should get about 18-20 bites, depending on the size.
- Place on a lined baking sheet. Arrange the bites on a baking sheet lined with parchment paper. Make sure they’re not touching each other.
- Chill to set. Refrigerate the bites for at least 30 minutes. This allows them to firm up completely. If you can wait an hour, even better.
- Store and enjoy. Transfer the bites to an airtight container. They’ll keep in the refrigerator for up to two weeks—if they last that long.
Sensory cue: The mixture should feel like a thick, slightly sticky dough. When you press it between your fingers, it should hold its shape without crumbling. The chocolate chips should be visible throughout, creating little pockets of sweetness in every bite.
Personal tip: I always lick the spatula clean before washing the bowl. It’s the cook’s privilege, and honestly, it’s the best part of making these bites.
Cooking Tips & Techniques
I’ve made this recipe more times than I can count, and I’ve learned a few things along the way. Here are the tips that will save you time and frustration.
- Don’t overmix. Once the oats are incorporated, stop stirring. Overmixing can break down the oats and make the bites mushy instead of chewy.
- Use room temperature peanut butter. Cold peanut butter is hard to mix and won’t combine evenly. If your peanut butter has been in the fridge, let it sit on the counter for 20 minutes before starting.
- Wet your hands slightly. If the mixture is sticking to your palms while rolling, dampen your hands with a little water. It creates a barrier and makes rolling effortless.
- Chill before rolling. I know I said it’s optional, but trust me—chilling the mixture for 15 minutes makes a world of difference. The bites come out smoother and more uniform.
- Adjust sweetness to taste. If you prefer a sweeter bite, add an extra tablespoon of honey. If you like it more savory, reduce the honey and add an extra pinch of salt.
- Make a double batch. These bites disappear fast. I always make a double batch and keep one in the fridge and one in the freezer for emergencies.
Common mistake to avoid: Don’t use natural peanut butter that’s been sitting with a layer of oil on top without stirring it first. The oil will make the bites too wet and they won’t hold together. Always stir natural peanut butter thoroughly before measuring.
Variations & Adaptations
One of the best things about this recipe is how adaptable it is. Here are some of my favorite variations.
- Vegan version: Swap the honey for maple syrup or agave nectar. Use dairy-free chocolate chips. Everything else is already plant-based.
- Gluten-free option: Use certified gluten-free rolled oats. The rest of the ingredients are naturally gluten-free.
- Low-carb/Keto-friendly: Replace the oats with unsweetened shredded coconut and almond flour. Use sugar-free chocolate chips and a keto-friendly sweetener like monk fruit.
- Protein boost: Add 1-2 scoops of vanilla or chocolate protein powder. You may need to add an extra tablespoon of peanut butter or milk to balance the dryness.
- Seasonal twist: In the fall, add 1/2 teaspoon of pumpkin pie spice and swap the chocolate chips for dried cranberries. In the summer, add 1/4 cup of freeze-dried strawberries for a fruity pop.
- Nut-free version: Replace the peanut butter with sunflower seed butter (sunbutter) or tahini. The flavor will be different but equally delicious.
Personal variation I love: I once added a tablespoon of instant coffee granules to the mixture on a whim. It gave the bites a subtle mocha flavor that paired beautifully with the peanut butter. It’s now my go-to variation when I need an extra energy boost.
Serving & Storage Suggestions
These bites are incredibly versatile when it comes to serving. Here’s how I recommend enjoying them.
- Serving temperature: Serve them straight from the fridge for a firm, chewy texture. If you prefer a softer bite, let them sit at room temperature for 5-10 minutes before eating.
- Presentation: Arrange them on a small plate or in a mason jar for a cute, grab-and-go snack. They look beautiful on a charcuterie board alongside fresh fruit and nuts.
- Pairings: Enjoy them with a glass of cold milk, a cup of coffee, or a smoothie for a complete snack. They also pair wonderfully with a creamy no-bake strawberry cheesecake delight for a dessert spread.
Storage instructions:
- Refrigerator: Store in an airtight container for up to 2 weeks. They actually get better after a day or two as the flavors meld together.
- Freezer: Place the bites in a single layer on a baking sheet and freeze for 1 hour. Transfer to a freezer-safe bag or container. They’ll keep for up to 3 months. Thaw in the refrigerator overnight or at room temperature for 15 minutes.
- Room temperature: If you’re taking them on a hike or to work, they’ll hold up at room temperature for about 24 hours. Beyond that, they should be refrigerated.
Flavor development note: The flavor of these bites deepens after a day in the fridge. The oats soften slightly, and the peanut butter and honey blend together into something truly special. If you can resist eating them right away, they’re even better the next day.
Nutritional Information & Benefits
These bites aren’t just delicious—they’re packed with nutrition. Here’s a rough breakdown per bite (based on 20 bites).
| Nutrient | Amount per Bite |
|---|---|
| Calories | 150 |
| Protein | 6g |
| Fat | 9g |
| Carbohydrates | 14g |
| Fiber | 3g |
| Sugar | 7g |
Health benefits of key ingredients:
- Peanut butter: Rich in healthy monounsaturated fats and protein. It keeps you full and satisfied for hours.
- Rolled oats: A great source of soluble fiber, which supports heart health and digestion.
- Flaxseed: Packed with omega-3 fatty acids and lignans, which have antioxidant properties.
- Dark chocolate chips: Contains flavonoids that can support brain health and reduce inflammation.
Dietary considerations: This recipe is naturally vegetarian and can easily be made vegan, gluten-free, and dairy-free. It’s also free from refined sugar if you use maple syrup. Potential allergens include peanuts and oats (which may contain gluten).
My personal perspective: I love that these bites give me sustained energy without the crash that comes from processed snacks. They’re my go-to pre-workout fuel and my afternoon pick-me-up. They make me feel good about what I’m eating, and that matters.
Conclusion
These Easy No-Bake Peanut Butter Protein Bites are proof that you don’t need a complicated recipe or a lot of time to make something truly satisfying. They’re the kind of snack that fits into real life—busy mornings, hectic afternoons, and lazy weekends alike. They’re forgiving, adaptable, and always delicious.
I hope you give them a try and make them your own. Add your favorite mix-ins, adjust the sweetness, or double the batch and share them with someone you love. That’s what cooking is all about, right? Making something simple feel special.
If you make these bites, I’d love to hear about it. Leave a comment below, tag me in your photos, or tell me what variations you tried. And if you’re looking for more easy, no-fuss recipes, check out my delicious peanut butter cup rice krispie treats or my easy cheesy tater tot breakfast casserole for more quick and satisfying ideas.
Happy snacking, friends!
Frequently Asked Questions
Can I use crunchy peanut butter instead of creamy?
Absolutely! Crunchy peanut butter adds a nice texture and works just as well. The bites will be slightly less uniform, but the added crunch is delicious.
How long do these protein bites last?
They last up to 2 weeks in the refrigerator in an airtight container. You can also freeze them for up to 3 months.
Can I make these without oats?
Yes, you can substitute the oats with unsweetened shredded coconut, almond flour, or crushed nuts. The texture will be different, but they’ll still be delicious.
Why are my bites too crumbly?
This usually happens when the mixture is too dry. Add an extra tablespoon of peanut butter or honey to help bind everything together. Make sure you’re using creamy peanut butter and not a natural one that’s separated.
Can I use a sugar substitute?
Yes, you can use monk fruit sweetener, stevia, or a sugar-free syrup. Adjust the amount to your taste, as some substitutes are sweeter than honey. You may need to add a little extra liquid to compensate for the change in texture.
Pin This Recipe!
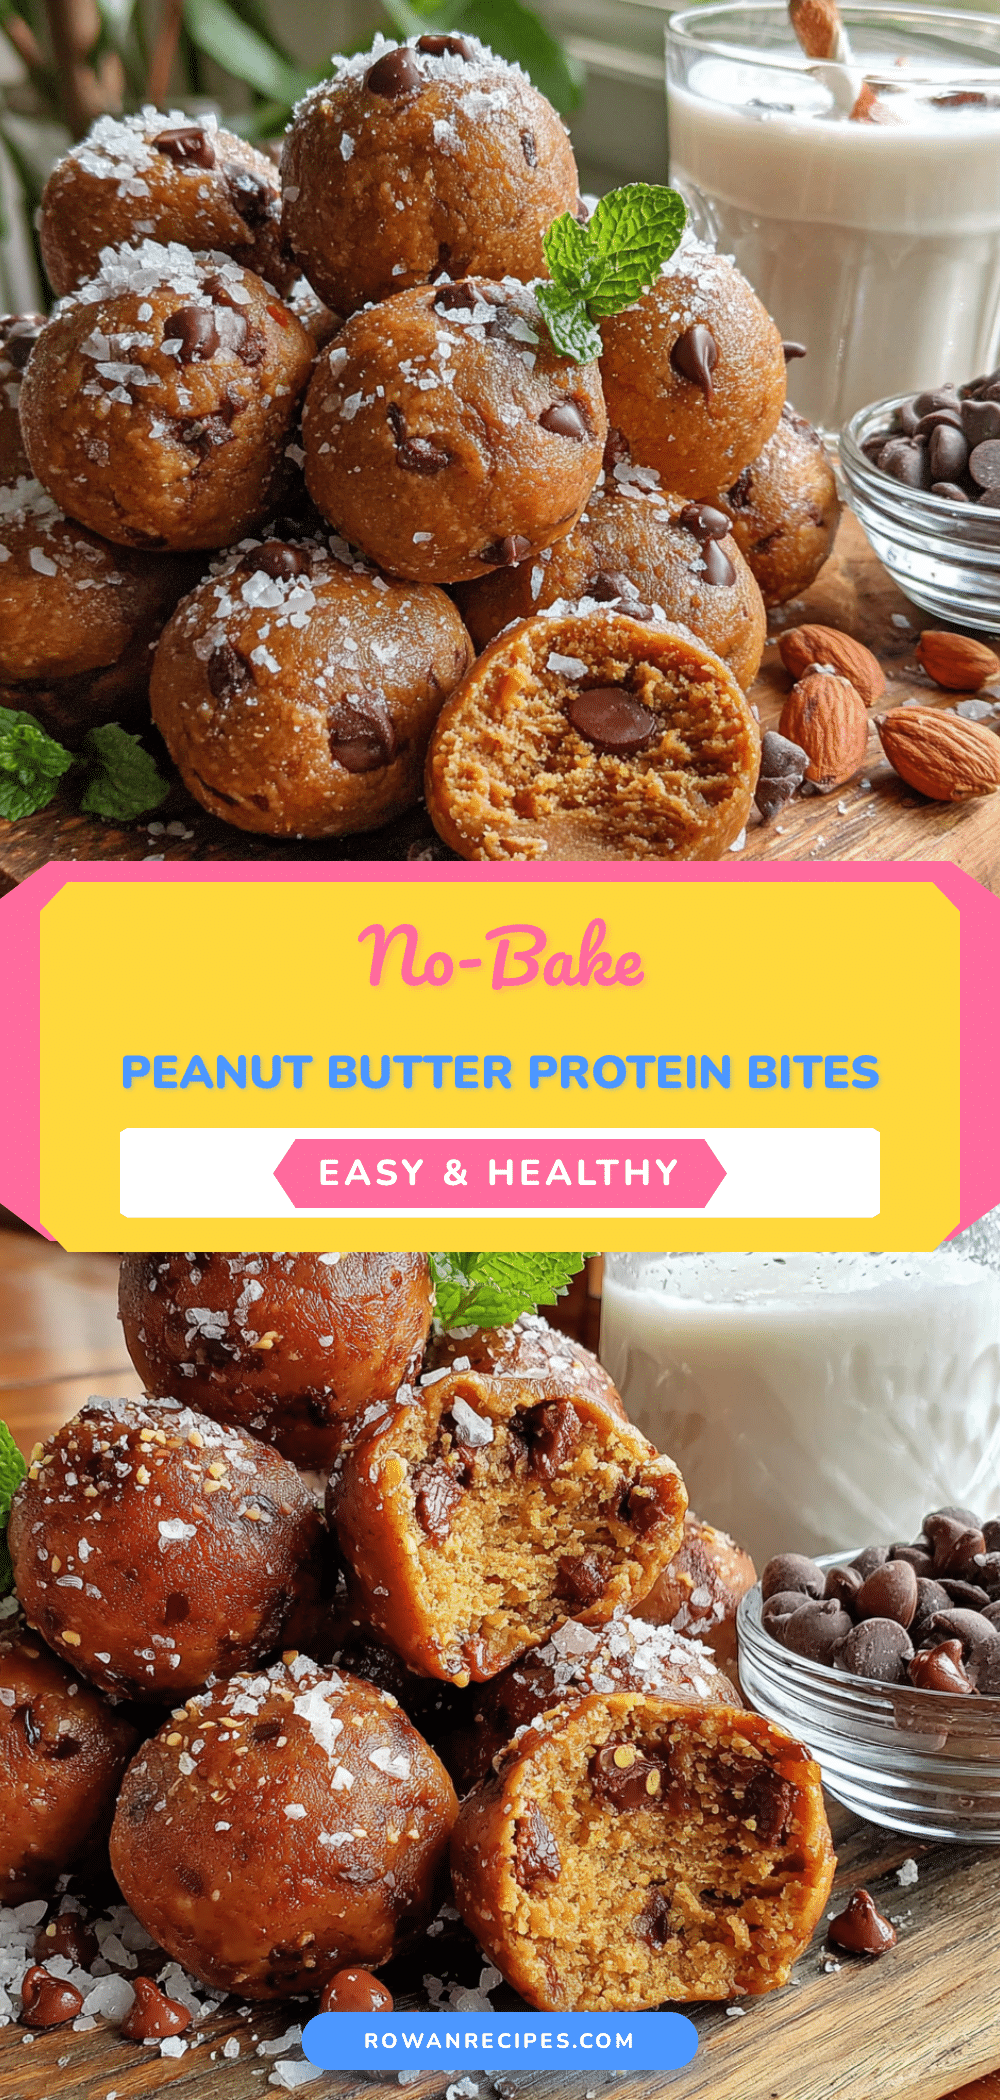
Easy No-Bake Peanut Butter Protein Bites: Best 5-Minute Snack

These Easy No-Bake Peanut Butter Protein Bites are the perfect quick snack, ready in just 5 minutes with simple ingredients. They’re naturally sweetened, gluten-free adaptable, and ideal for busy weeks.
- Prep Time: 5 minutes
- Cook Time: 0 minutes
- Total Time: 5 minutes (plus 30 minutes chilling)
- Yield: 18-20 bites 1x
- Category: Snack
- Cuisine: American
Ingredients
- 1 cup creamy peanut butter
- 1 cup rolled oats
- 1/3 cup honey or maple syrup
- 1/2 cup dark chocolate chips
- 1/4 cup ground flaxseed
- 1 teaspoon vanilla extract
- Pinch of sea salt
- Optional: 1/4 cup shredded coconut
- Optional: 2 tablespoons chia seeds
- Optional: 1/4 cup chopped nuts
Instructions
- Combine the wet ingredients: In a large mixing bowl, add the creamy peanut butter, honey (or maple syrup), and vanilla extract. Stir until smooth and well combined.
- Add the dry ingredients: Add the rolled oats, ground flaxseed, and a pinch of sea salt to the bowl. Stir everything together until the oats absorb the moisture.
- Fold in the chocolate chips: Add the dark chocolate chips and stir gently until evenly distributed. Add any optional ingredients if desired.
- Check the consistency: The mixture should hold together when pressed. If too dry, add another tablespoon of peanut butter or honey. If too sticky, add another tablespoon of oats.
- Chill the mixture (optional but recommended): Refrigerate the bowl for 15-20 minutes to firm up the mixture for easier rolling.
- Roll into bites: Using a cookie scoop or tablespoon, scoop portions and roll between your palms to form smooth balls. You should get about 18-20 bites.
- Place on a lined baking sheet: Arrange the bites on a baking sheet lined with parchment paper, ensuring they don’t touch.
- Chill to set: Refrigerate the bites for at least 30 minutes to firm up completely.
- Store and enjoy: Transfer to an airtight container and refrigerate for up to 2 weeks.
Notes
Chilling the mixture before rolling makes it easier to handle. For a vegan version, use maple syrup and dairy-free chocolate chips. For gluten-free, use certified gluten-free oats. The bites can be frozen for up to 3 months.
Nutrition
- Serving Size: 1 bite
- Calories: 150
- Sugar: 7
- Sodium: 80
- Fat: 9
- Saturated Fat: 2
- Carbohydrates: 14
- Fiber: 3
- Protein: 6
Keywords: no-bake, peanut butter, protein bites, healthy snack, 5-minute recipe, gluten-free, vegan option


