My niece came home from school one October afternoon, her backpack still on, and announced with the kind of conviction only a seven-year-old can muster that we needed to make “the dirt cups with the worms.” She’d seen them at a class party, apparently, and the imagery had stuck. I hadn’t made them in years—honestly, I’d kind of forgotten how much kids love the whole concept. Eating something that looks like a miniature garden of creepy-crawlies? It’s pure magic to them.
So I started digging through my pantry. I had the pudding mix, the Cool Whip, and a bag of Oreos that was dangerously close to being demolished for a late-night snack. What I didn’t have was a plan that didn’t involve a ton of fuss. I wanted something that felt like a treat but didn’t require me to turn on the oven or dirty every bowl I owned. That’s when I realized the classic version is already no-bake, but it can get a little complicated with all the layering and chilling times.
I tweaked it. I streamlined it. I swapped a few things around until the whole thing came together in about ten minutes flat. And you know what? It worked. The kids went absolutely wild for them, and the adults snuck a few when they thought no one was looking. These Easy No-Bake Halloween Dirt Cups with Gummy Worms are the kind of recipe that just works. They look like you spent way more time than you actually did, and they taste like childhood in a cup. It’s a little messy, a little silly, and exactly what a Halloween dessert should be.
Why You’ll Love This Recipe
Let’s be real for a second. Halloween is chaotic. Between the costume searches, the pumpkin carving, and the candy negotiations, the last thing you need is a complicated dessert. These dirt cups solve that problem. They are the ultimate last-minute Halloween treat that looks impressive without any real effort.
- Quick & Easy: We’re talking ten minutes from start to finish. No oven, no stovetop, no stress. Just mix, crush, and layer.
- Simple Ingredients: You probably already have most of this stuff in your kitchen. Instant pudding, milk, Cool Whip, Oreos, and gummy worms. That’s it.
- Perfect for Parties: Whether it’s a classroom party, a Halloween gathering, or just a fun family night, these are always a hit. Kids love assembling them, and they disappear fast.
- Crowd-Pleaser: I’ve yet to meet a kid (or adult) who can resist digging into a cup of chocolate pudding with cookie “dirt” and a gummy worm peeking out. It’s universally loved.
- Unbelievably Customizable: You can dress them up with pumpkin-shaped sprinkles, add a ghost Peep, or even swap the pudding flavor. They’re a blank canvas for Halloween fun.
What makes these different from your average dirt cup recipe is the texture. I use a specific ratio of pudding to Cool Whip that makes the base extra creamy and light, not heavy or dense. It’s the difference between a good dirt cup and a great one. And honestly, seeing a kid’s face light up when they spot the gummy worm wiggling out of the “dirt” is the whole point. It’s not just dessert—it’s a little moment of joy.
What Ingredients You Will Need
This recipe relies on a handful of pantry staples to create something that feels special. The magic is in the combination of creamy, crunchy, and chewy textures. Here’s what you’ll need to gather.
- 1 (3.9 oz) box instant chocolate pudding mix – This is the foundation of the “dirt.” I prefer Jell-O brand for consistent results, but any brand works. Do not use cook-and-serve pudding; it won’t set up the same way.
- 2 cups cold milk – Whole milk gives the creamiest texture, but 2% works fine. You can even use oat milk or almond milk for a dairy-free version, just know the pudding might be slightly less thick.
- 1 (8 oz) tub Cool Whip, thawed – This is what makes the pudding layer light and fluffy. If you want to skip the processed stuff, you can whip 1 ½ cups of heavy cream with 2 tablespoons of powdered sugar until stiff peaks form. It works beautifully.
- 1 (14.3 oz) package Oreo cookies – You’ll use the whole cookie, cream filling and all. The chocolate wafers create that perfect “dirt” texture. I’ve tried using regular chocolate sandwich cookies, but Oreos really do give the best color and flavor.
- 1 (4.6 oz) bag gummy worms – The star of the show! Look for sour or regular gummy worms. I like the classic Trolli brand because they’re bright and hold their shape well. You can also use gummy spiders or bugs for variety.
- Optional: Halloween sprinkles, candy eyeballs, or crushed graham crackers for garnish – These are purely for decoration, but they add a fun touch. I sometimes add a few pumpkin-shaped Reese’s pieces on top for extra color.
One thing I’ve learned the hard way: don’t skip the step of crushing the Oreos finely enough. If you leave big chunks, they don’t look like dirt—they look like someone dropped a cookie in your pudding. A food processor makes quick work of it, but a zip-top bag and a rolling pin work just fine too.
Equipment Needed
You don’t need any fancy gadgets for this recipe, which is part of the appeal. Here’s what you’ll want to have on hand.
- Mixing bowls – One large bowl for the pudding mixture and one medium bowl for crushing the Oreos.
- Whisk – For combining the pudding mix and milk. A hand whisk is fine, but an electric mixer works faster and ensures no lumps.
- Food processor or zip-top bag and rolling pin – For crushing the Oreos into fine crumbs. The food processor is faster and gives a more uniform texture, but the bag method is great for getting kids involved.
- Small cups or glasses – Clear plastic cups are perfect for showing off the layers. I use 9-ounce Solo cups for parties, but small mason jars or even juice glasses work well. You want something clear so the layers are visible.
- Spatula – For folding the Cool Whip into the pudding. A rubber spatula is best for this.
- Spoon or small scoop – For layering the pudding and cookie crumbs into the cups.
If you don’t have a food processor, don’t stress. I’ve made these countless times using a rolling pin and a bag. It’s a little more work, but the kids love helping with the smashing part. Just make sure the bag is sealed tight—I learned that lesson the hard way when Oreo dust exploded all over my kitchen.
Preparation Method
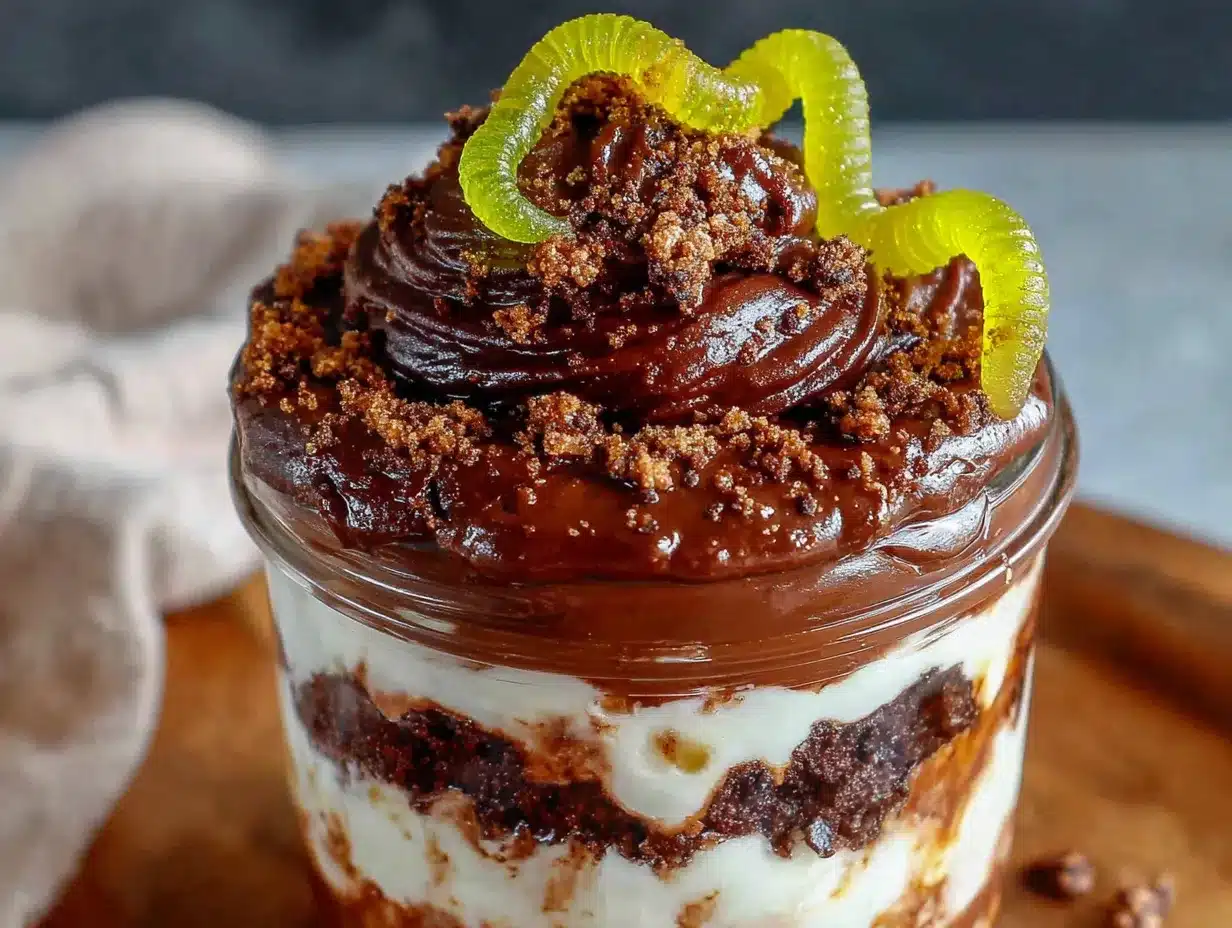
This is where the magic happens. Follow these steps, and you’ll have a batch of spooky dirt cups ready in no time. The key is to work quickly and not overthink it.
- Make the pudding base. In a large mixing bowl, whisk together the instant chocolate pudding mix and 2 cups of cold milk. Whisk for about 2 minutes until the mixture starts to thicken. It should be smooth and glossy. If you see any lumps, keep whisking—they’ll dissolve. Let it sit for about 5 minutes to set up slightly.
- Fold in the Cool Whip. Add the thawed Cool Whip to the pudding mixture. Use a rubber spatula to gently fold it in until no white streaks remain. You want the mixture to be uniform in color and texture. It should be light, airy, and mousse-like. Don’t overmix, or it can deflate.
- Crush the Oreos. While the pudding sets, crush the Oreos. If using a food processor, pulse until you have fine crumbs. If using a bag, place the cookies in a zip-top bag, seal it, and crush them with a rolling pin. You want a mix of fine powder and tiny pebbles—like actual dirt. Set aside about ¼ cup of the crumbs for topping.
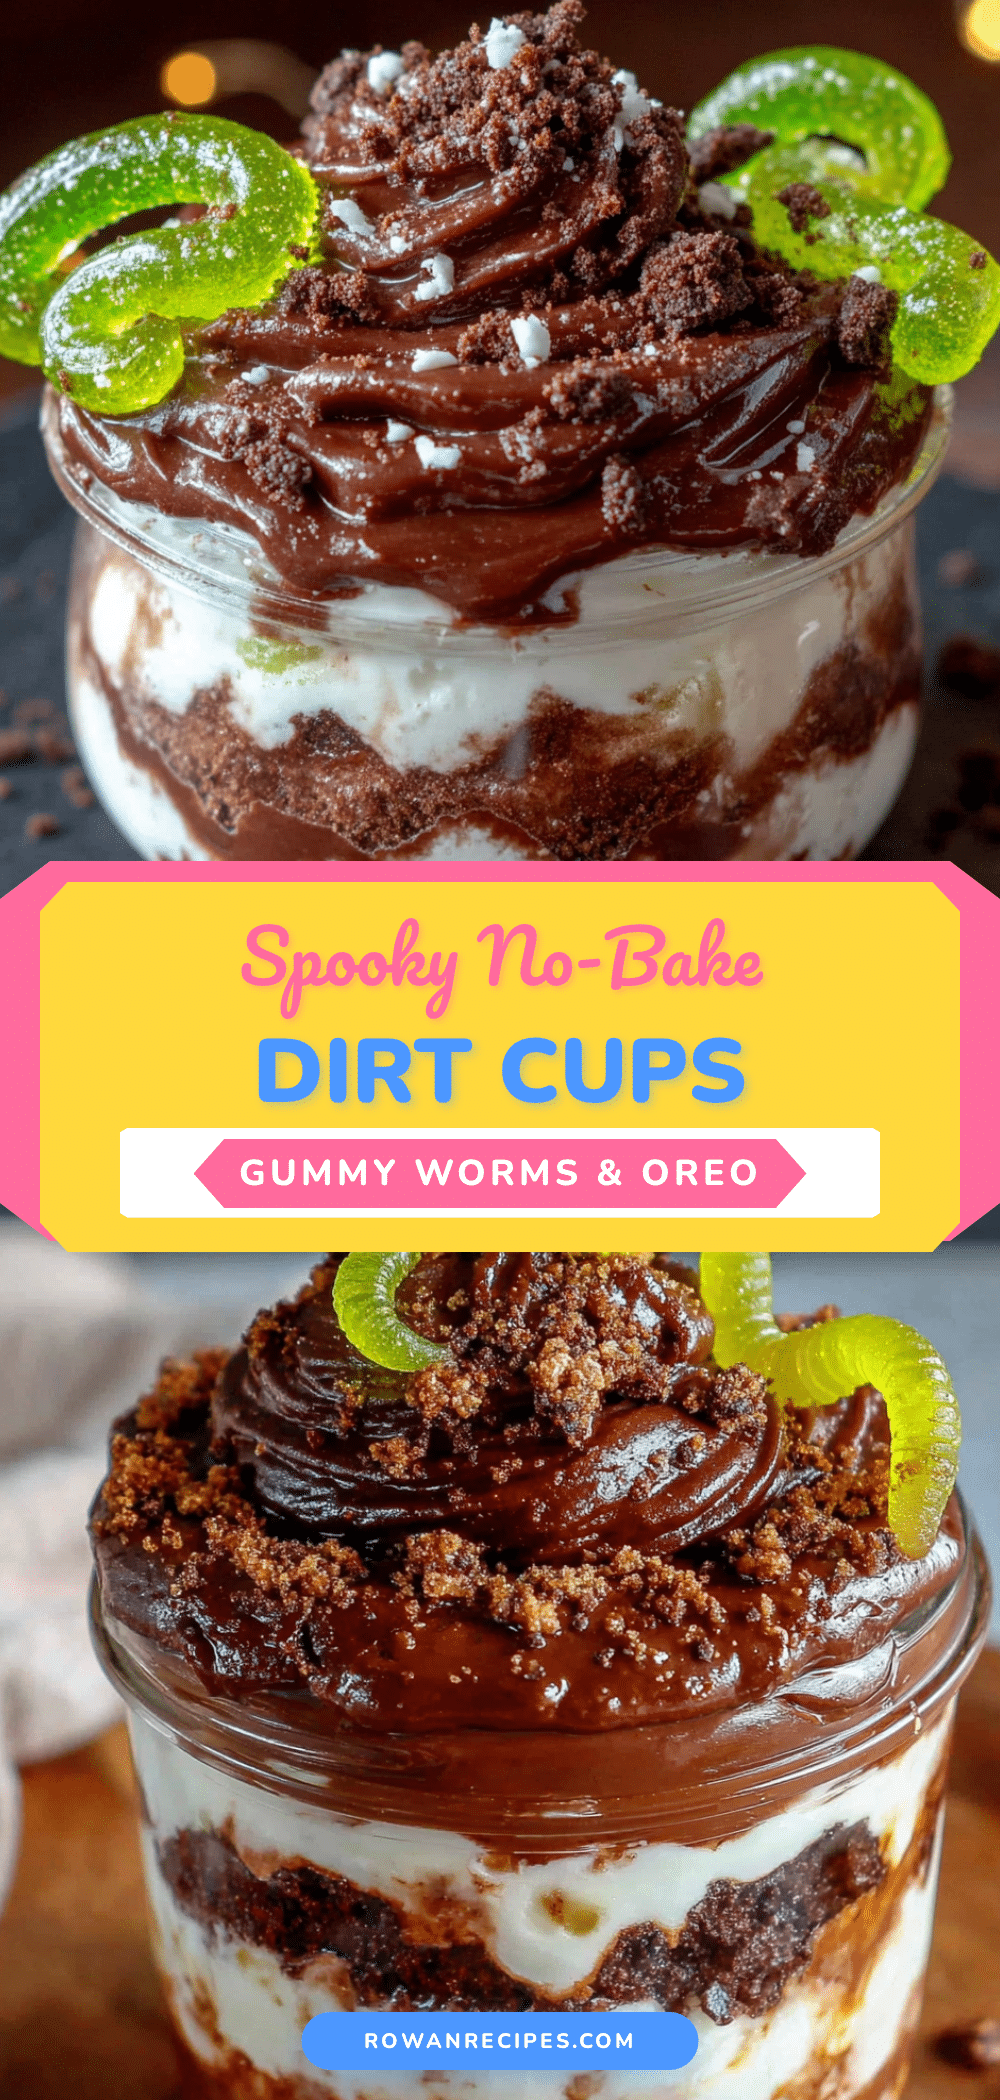
- Layer the cups. Grab your clear cups or glasses. Start with a layer of the chocolate pudding mixture at the bottom—about 2 tablespoons. Then add a layer of crushed Oreos—about 1 tablespoon. Repeat the layers until the cups are almost full. I usually do three layers of each.
- Add the worms. Here’s the fun part. Before adding the final layer of Oreo crumbs, press a few gummy worms into the pudding so they’re partially buried. Let one end stick out, like the worm is trying to escape. Then top with the reserved Oreo crumbs.
- Chill (optional but recommended). These can be served immediately, but they’re even better after about 30 minutes in the fridge. The flavors meld together, and the pudding sets up perfectly. If you’re making them ahead, cover them with plastic wrap and refrigerate for up to 24 hours.
- Garnish and serve. Right before serving, add a few extra gummy worms on top for decoration. You can also add Halloween sprinkles, candy eyeballs, or a small ghost Peep. Serve cold and watch them disappear.
A quick tip: if you’re making these for a party, set up a “dirt cup bar” with all the components in separate bowls and let guests assemble their own. It’s a great activity for kids and takes the pressure off you.
Cooking Tips & Techniques
I’ve made these dirt cups more times than I can count, and I’ve picked up a few tricks along the way. These tips will help you avoid the common pitfalls and get the best results every time.
- Don’t overmix the Cool Whip. I know it’s tempting to keep folding until everything is perfectly combined, but overmixing can deflate the mixture and make it dense. Fold just until you don’t see white streaks anymore.
- Crush the Oreos to the right consistency. If the crumbs are too coarse, they won’t look like dirt. If they’re too fine, they’ll turn into a paste. Aim for a texture that’s similar to sand with a few tiny pebbles. A food processor on pulse mode works best for this.
- Use cold milk. Instant pudding needs cold milk to set properly. If your milk is warm, the pudding won’t thicken correctly. I keep my milk in the fridge until the last minute.
- Let the pudding rest. After whisking the pudding mix and milk, let it sit for about 5 minutes before adding the Cool Whip. This gives it time to start setting up, which helps the final texture hold its shape better.
- Make them ahead of time. These actually taste better after a few hours in the fridge. The Oreo crumbs soften slightly and meld with the pudding, creating a more cohesive dessert. Just wait to add the gummy worms until right before serving, or they’ll get soggy.
- Double the recipe for a crowd. This recipe makes about 6-8 small cups. If you’re serving a crowd, double or triple it easily. Just make sure you have enough cups and space in the fridge.
I once made the mistake of using generic chocolate sandwich cookies instead of Oreos, and the “dirt” came out looking gray instead of dark brown. It wasn’t a disaster, but it definitely didn’t have the same visual appeal. Stick with Oreos if you can—they really do make a difference.
Variations & Adaptations
One of the best things about this recipe is how easy it is to adapt. You can change it up based on what you have on hand or what your family prefers. Here are some of my favorite variations.
- Dairy-Free Version: Use a dairy-free instant pudding mix (many brands are naturally dairy-free) and substitute the milk with oat milk or almond milk. Use a dairy-free whipped topping like CocoWhip. The texture will be slightly different, but it’s still delicious.
- Gluten-Free Option: Gluten-free chocolate sandwich cookies are available at most grocery stores. Brands like Kinnitoons and Glutino make excellent versions. Everything else in the recipe is naturally gluten-free, so this is an easy swap.
- Pumpkin Dirt Cups: For a fall twist, use vanilla or butterscotch pudding instead of chocolate. Top with crushed graham crackers instead of Oreos, and add a small pumpkin-shaped candy on top. It’s like a pumpkin pie in a cup.
- Mint Chocolate Version: Swap the chocolate pudding for chocolate mint pudding if you can find it. Add a few crushed peppermint candies to the Oreo crumbs for a refreshing twist. This is great for Christmas parties too.
- Peanut Butter Cup Dirt Cups: Add a layer of peanut butter to the pudding mixture. Swirl in about ¼ cup of creamy peanut butter when you fold in the Cool Whip. Top with chopped peanut butter cups instead of gummy worms for a Reese’s-inspired treat.
I once tried a version with crushed pretzels mixed into the Oreo crumbs for a salty-sweet contrast. It was a hit with the adults but the kids weren’t as into it. Sometimes simple is best, especially when it comes to Halloween treats.
Serving & Storage Suggestions
These dirt cups are best served cold, straight from the fridge. The contrast between the creamy pudding, the crunchy cookie crumbs, and the chewy gummy worms is perfect when everything is chilled. Here’s how to serve and store them.
- Serving Temperature: Serve them cold. If they sit out at room temperature for too long, the pudding will start to soften and the cookie crumbs will get soggy. I recommend keeping them in the fridge until just before serving.
- Presentation: Use clear cups so the layers are visible. You can also add a small Halloween-themed pick or a paper straw for decoration. For a party, arrange them on a platter with some fake spiderwebs and plastic spiders for a spooky effect.
- Complementary Dishes: These pair well with other Halloween treats like mint brownies or peanut butter cup rice krispie treats. They’re also great alongside a cup of hot apple cider or a pumpkin spice latte.
- Storage: Store any leftover dirt cups in the refrigerator, covered with plastic wrap or in an airtight container. They’ll keep for up to 3 days, but the cookie crumbs will soften over time. I think they’re best within the first 24 hours.
- Freezing: I don’t recommend freezing these. The pudding can become watery when thawed, and the gummy worms will turn into hard little rocks. If you need to make them ahead, just refrigerate them for up to 24 hours before serving.
One thing I’ve noticed is that the flavors actually get better after a few hours in the fridge. The pudding sets up more firmly, and the Oreo crumbs absorb a little moisture, creating a more cohesive texture. If you have the time, make them the morning of your party and let them chill until you’re ready to serve.
Nutritional Information & Benefits
Let’s be honest—these are a treat, not a health food. But that doesn’t mean they can’t fit into a balanced lifestyle. Here’s a general breakdown of what you’re looking at per serving (based on one small cup made with whole milk and regular Cool Whip).
- Calories: Approximately 280-320 per serving
- Fat: 12-15g (mostly from the Cool Whip and Oreos)
- Carbohydrates: 40-45g
- Sugar: 28-32g
- Protein: 4-5g
- Calcium: About 10% of your daily value from the milk
If you’re looking to lighten them up, you can use sugar-free pudding mix, skim milk, and light Cool Whip. That will cut the calories and sugar by about half. You can also use reduced-fat Oreos, though I find the texture isn’t quite as good.
On the plus side, this recipe does offer a small amount of calcium from the milk, and the gummy worms provide a little bit of gelatin, which some people find beneficial for joint health. Mostly, though, this is a dessert for fun, not for nutrition. And that’s okay. Halloween is about indulgence and joy, and these dirt cups deliver both in spades.
Conclusion
So there you have it—the easiest, most fun Halloween dessert you’ll make all year. These Easy No-Bake Halloween Dirt Cups with Gummy Worms are the kind of recipe that saves the day when you’re short on time but still want to impress. They take ten minutes, use simple ingredients, and deliver a big dose of nostalgia and fun.
I love this recipe because it brings people together. Whether you’re making them with your kids on a rainy October afternoon or serving them at a Halloween party, they always spark smiles and laughter. There’s something about digging into a cup of “dirt” and finding a gummy worm that makes everyone feel like a kid again.
I’d love to hear how yours turn out. Did you add any fun toppings? Did your kids help with the assembly? Drop a comment below and let me know. And if you’re looking for more easy Halloween treats, check out my no-bake strawberry cheesecake delight or these mini corn dog muffins for a savory option. Happy Halloween, and happy snacking!
Frequently Asked Questions
Can I make these dirt cups ahead of time?
Yes, you can make them up to 24 hours in advance. Just wait to add the gummy worms until right before serving, or they’ll get soggy. Cover them with plastic wrap and keep them in the fridge.
Can I use homemade whipped cream instead of Cool Whip?
Absolutely. Whip 1 ½ cups of heavy cream with 2 tablespoons of powdered sugar until stiff peaks form. Fold it into the pudding the same way you would with Cool Whip. The texture will be a little lighter, but it works great.
How do I get the Oreo crumbs to look like real dirt?
The key is to crush them finely. Use a food processor and pulse until you have a mix of fine powder and tiny pebbles. If you’re using a bag and rolling pin, take your time and crush them thoroughly. You can also remove the cream filling first if you want a darker “dirt” color.
Can I use sugar-free pudding mix?
Yes, sugar-free instant pudding works just fine. The texture might be slightly less creamy, but it’s a good option if you’re watching your sugar intake. Just follow the package directions for the milk ratio.
What other candies can I use instead of gummy worms?
You can use gummy spiders, bugs, or even gummy bones. Candy eyeballs, pumpkin-shaped Reese’s pieces, or small candy corn are also fun options. Get creative and use whatever fits your Halloween theme.
Pin This Recipe!
Easy No-Bake Halloween Dirt Cups with Gummy Worms
These Easy No-Bake Halloween Dirt Cups with Gummy Worms are the ultimate last-minute Halloween treat that looks impressive without any real effort. They take ten minutes, use simple ingredients, and deliver a big dose of nostalgia and fun.
- Prep Time: 10 minutes
- Cook Time: 0 minutes
- Total Time: 10 minutes
- Yield: 6-8 servings 1x
- Category: Dessert
- Cuisine: American
Ingredients
- 1 (3.9 oz) box instant chocolate pudding mix
- 2 cups cold milk
- 1 (8 oz) tub Cool Whip, thawed
- 1 (14.3 oz) package Oreo cookies
- 1 (4.6 oz) bag gummy worms
- Optional: Halloween sprinkles, candy eyeballs, or crushed graham crackers for garnish
Instructions
- In a large mixing bowl, whisk together the instant chocolate pudding mix and 2 cups of cold milk. Whisk for about 2 minutes until the mixture starts to thicken. It should be smooth and glossy. Let it sit for about 5 minutes to set up slightly.
- Add the thawed Cool Whip to the pudding mixture. Use a rubber spatula to gently fold it in until no white streaks remain. The mixture should be light, airy, and mousse-like.
- While the pudding sets, crush the Oreos. If using a food processor, pulse until you have fine crumbs. If using a bag, place the cookies in a zip-top bag, seal it, and crush them with a rolling pin. Set aside about ¼ cup of the crumbs for topping.
- Grab your clear cups or glasses. Start with a layer of the chocolate pudding mixture at the bottom—about 2 tablespoons. Then add a layer of crushed Oreos—about 1 tablespoon. Repeat the layers until the cups are almost full. I usually do three layers of each.
- Before adding the final layer of Oreo crumbs, press a few gummy worms into the pudding so they’re partially buried. Let one end stick out, like the worm is trying to escape. Then top with the reserved Oreo crumbs.
- These can be served immediately, but they’re even better after about 30 minutes in the fridge. If you’re making them ahead, cover them with plastic wrap and refrigerate for up to 24 hours.
- Right before serving, add a few extra gummy worms on top for decoration. You can also add Halloween sprinkles, candy eyeballs, or a small ghost Peep. Serve cold.
Notes
Don’t overmix the Cool Whip to keep the mixture light and airy. Crush Oreos to a fine, sand-like consistency for best ‘dirt’ appearance. Use cold milk for proper pudding setting. For best results, chill for 30 minutes before serving. Make ahead up to 24 hours, but add gummy worms just before serving to prevent sogginess.
Nutrition
- Serving Size: 1 small cup
- Calories: 300
- Sugar: 30
- Sodium: 320
- Fat: 13.5
- Saturated Fat: 7
- Carbohydrates: 42.5
- Fiber: 1
- Protein: 4.5
Keywords: Halloween dessert, no-bake dessert, dirt cups, gummy worms, easy dessert, kid-friendly, chocolate pudding, Oreo, 10-minute dessert


