My friend Jenna took one bite of the candy corn cheese ball, stopped chewing, and just stared at me. Not in a “this is weird” way—more like she was trying to figure out how something so silly could taste so good. I’d whipped up this Halloween charcuterie board mostly as a joke, honestly. A cheese ball shaped like candy corn? Come on. But watching her grab another pretzel and go back for a second dip without even saying anything? That’s when I knew I’d accidentally made something worth sharing.
Halloween entertaining always feels like a tug-of-war between looking cute and actually tasting good. You know what I mean—those store-bought snack trays with orange-colored crackers that taste like cardboard? Not my style. I wanted a Halloween charcuterie board that would make people stop and take a picture, but also keep them standing around the kitchen island eating long after the photos were taken. This board does both. The candy corn cheese balls are the star, obviously, but the whole spread comes together faster than you’d think.
Let me walk you through how to build a Halloween grazing board that actually delivers on flavor. Because let’s face it—nobody remembers the party platter that looked cute but tasted boring.
Why You’ll Love This Recipe
This isn’t just another themed snack board you’ll find floating around Pinterest. I tested this Halloween charcuterie board at three different gatherings before I felt confident sharing it here. Here’s why it works:
- Quick & Easy: The cheese balls come together in about 20 minutes of active work. The rest is just arranging things on a board. Perfect for last-minute Halloween plans.
- Simple Ingredients: Cream cheese, cheddar, a few spices, and some pretzels. No weird specialty items that’ll sit in your pantry until next October.
- Perfect for Parties: This board feeds a crowd without anyone needing a plate or fork. Napkins only. That’s my kind of entertaining.
- Crowd-Pleaser: I’ve watched kids bypass the candy bowl to grab these cheese balls. Adults too. Something about the shape just makes people smile.
- Unbelievably Delicious: The candy corn cheese balls have this creamy, tangy-savory thing going on that pairs perfectly with the salty pretzels and sweet dried fruit on the board.
What makes this different from other Halloween boards? The cheese balls aren’t just shaped like candy corn—they’re actually layered with flavor. I use a blend of sharp cheddar and cream cheese with a pinch of cayenne and garlic powder that gives them this subtle kick. It’s not spicy, just interesting. Plus, the orange, yellow, and white layers look genuinely festive without food coloring. The paprika does all the heavy lifting.
This is the kind of board that makes people close their eyes after the first bite. It’s Halloween comfort food—fun to look at, even better to eat, and stress-free to put together.
Ingredients You Will Need
This Halloween charcuterie board uses simple, everyday ingredients to create something that looks like you spent hours on it. Most of these are probably already in your fridge or pantry.
For the Candy Corn Cheese Balls (Makes 3-4 small balls)
- 16 oz cream cheese, softened (two standard blocks; I prefer Philadelphia for the creamiest texture)
- 1 cup sharp cheddar cheese, finely shredded (freshly shredded melts better than pre-shredded)
- 1/2 cup white cheddar or Monterey Jack, finely shredded (for the white layer)
- 1/4 cup grated Parmesan cheese (adds saltiness and helps the layers hold shape)
- 1 teaspoon garlic powder
- 1/2 teaspoon onion powder
- 1/4 teaspoon cayenne pepper (optional, but adds a nice warmth)
- 1/2 teaspoon salt
- 1/4 teaspoon black pepper
- 1 tablespoon paprika (for coloring the orange layer)
- 1 tablespoon milk or cream (to adjust consistency if needed)
For the Halloween Charcuterie Board
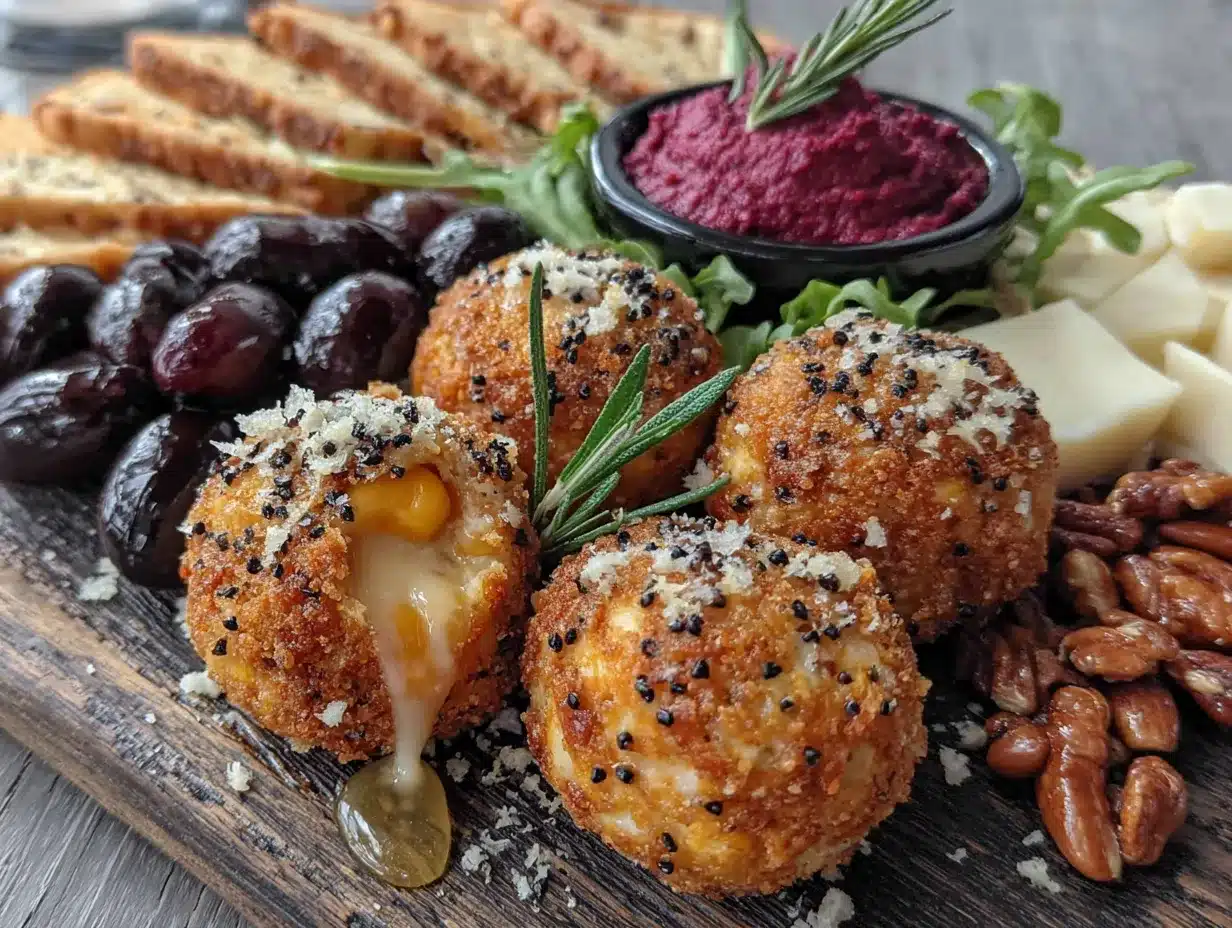
- Pretzel sticks or mini pretzels (the salty crunch is essential)
- Crackers (butter crackers, wheat thins, or bagel chips work great)
- Sliced apples or pears (toss with lemon juice to prevent browning)
- Dried cranberries or cherries (adds sweetness and Halloween color)
- Roasted and salted pumpkin seeds (pepitas—stays on theme)
- Dark chocolate pieces or candy corn (for the sweet element)
- Sliced salami or prosciutto (optional, but adds savory depth)
- Fresh rosemary or sage sprigs (for garnish—makes it look fancy)
A note on the cream cheese: let it sit out for at least 30 minutes before you start. Cold cream cheese doesn’t blend smoothly, and you’ll end up with lumpy cheese balls. Trust me on this one—I learned the hard way when I tried to rush it before a party.
For the paprika, I recommend sweet Hungarian paprika if you have it. It gives the most vibrant orange color without being spicy. Regular paprika works fine too, just expect a slightly lighter shade.
Equipment Needed
- Large mixing bowl (for combining the cheese mixture)
- Hand mixer or stand mixer (makes blending cream cheese much easier)
- Plastic wrap (for shaping and chilling the cheese balls)
- Small bowls or ramekins (for holding dips and smaller items on the board)
- Large wooden board or serving platter (any flat surface works—I’ve used a cutting board in a pinch)
- Parchment paper (optional, but helps with cleanup)
- Spatula (for scraping every last bit of cheese mixture)
If you don’t have a hand mixer, you can absolutely do this by hand with a wooden spoon. It’ll take a few extra minutes and some elbow grease, but it’s doable. Just make sure your cream cheese is really soft.
For the board itself, don’t overthink it. A large cutting board, a baking sheet flipped upside down, or even a clean pizza pan works. The key is having enough surface area to spread everything out without things touching too much.
Preparation Method
Let’s break this down step by step. I promise it’s simpler than it looks.
Step 1: Make the Base Cheese Mixture
In your large mixing bowl, combine the softened cream cheese, shredded sharp cheddar, Parmesan, garlic powder, onion powder, cayenne (if using), salt, and pepper. Beat with your hand mixer on medium speed until everything is smooth and well combined. This takes about 2-3 minutes. Scrape down the sides halfway through. If the mixture seems too stiff, add the tablespoon of milk or cream and mix again.
Step 2: Divide and Color the Mixture
Divide the cheese mixture into three equal portions. You can eyeball this—close enough is fine. Leave one portion plain (this will be your white layer). To the second portion, add the paprika and mix until the color is even. This becomes your orange layer. To the third portion, add the shredded white cheddar or Monterey Jack and mix well. This gives you a pale yellow layer.
Step 3: Shape the Candy Corn Cheese Balls
This part takes a little patience, but it’s fun. Tear off a sheet of plastic wrap for each cheese ball you’re making. Working with one color at a time:
Start with the white portion. Take about a tablespoon of the white mixture and shape it into a small disc, about 1/4 inch thick. Set it aside on the plastic wrap. Next, take the same amount of the yellow mixture and shape it into a disc the same size, placing it directly on top of the white disc. Finally, take the orange mixture and shape it into a disc, placing it on top of the yellow. You should have a little stack of three colors.
Now, carefully gather the edges of the plastic wrap and twist the top to form the mixture into a ball. Gently shape it with your hands through the plastic wrap until you get a rounded shape that tapers slightly at the top—like a candy corn. Don’t stress about perfection. The colors will naturally blend a little at the edges, which looks even better.
Repeat with the remaining mixture. You should get 3-4 cheese balls depending on how big you make them.
Step 4: Chill the Cheese Balls
Wrap each cheese ball tightly in the plastic wrap and refrigerate for at least 2 hours. Overnight is even better. This step is crucial—the cheese balls need to firm up so they hold their shape when you put them on the board. I’ve tried skipping this step before, and let me tell you, it was a melty mess.
Step 5: Assemble the Halloween Charcuterie Board
About 15 minutes before serving, take the cheese balls out of the fridge to soften slightly. This makes them easier to spread on crackers.
Place your board on the counter. Start by positioning the cheese balls—spread them out so there’s a natural flow across the board. I like to put one at each end and one in the middle. Next, add your small bowls or ramekins. Fill them with things like the pumpkin seeds, dried cranberries, or extra dipping items.
Now, start filling in the gaps. Arrange the pretzel sticks in little clusters. Fan out the crackers in small groups. Place the sliced salami or prosciutto in loose folds. Add the apple slices and dried fruit in between. Finally, tuck in the fresh rosemary or sage sprigs for a pop of green—it makes the orange and yellow cheese balls really pop.
Step back and look at your board. Add more crackers or fruit to any empty spots. The goal is to make it look abundant, not crowded.
Cooking Tips & Techniques
I’ve made this Halloween charcuterie board about six times now, and I’ve picked up a few things along the way.
Don’t skip the chilling time. I know, I know—you’re in a rush. But warm cheese balls don’t hold their shape. They’ll start to slump and lose that candy corn silhouette. Two hours minimum. Set a timer if you have to.
Wet your hands slightly when shaping the cheese mixture. It keeps the cheese from sticking to your fingers and makes the layers smoother. Just a light mist of water on your palms.
Use a microplane or fine grater for the garlic and onion powder. Wait—I mean, just use the powdered versions. Fresh garlic will make the cheese balls watery and the flavor will be too sharp. Stick with powders for the best texture.
Make the cheese balls a day ahead. They actually taste better the next day after the flavors have had time to meld together. Plus, it’s one less thing to do on party day. Win-win.
Let the board sit out for 15-20 minutes before serving. Cold cheese doesn’t have as much flavor. Letting it come to room temperature makes everything taste better. Just don’t leave it out for more than 2 hours for food safety reasons.
One mistake I made the first time? I put the cheese balls directly on the board without any barrier. They started sweating and the board got a little greasy. Now I place them on a small lettuce leaf or a piece of parchment paper. Keeps everything clean.
Variations & Adaptations
This Halloween charcuterie board is super flexible. Here are some ways to make it your own:
Make it vegetarian: Skip the salami or prosciutto and load up on more veggies. Roasted bell pepper strips, cucumber rounds, and cherry tomatoes add color and crunch. I’ve also added marinated artichoke hearts—they’re unexpected but delicious.
Gluten-free option: Use gluten-free crackers and pretzels. The cheese balls themselves are naturally gluten-free, so you just need to swap the dippers. Rice crackers work surprisingly well here.
Spicy version: Add an extra 1/2 teaspoon of cayenne to the orange layer and mix in some chopped pickled jalapeños. The heat pairs beautifully with the creamy cheese. My husband requests this version every time.
Sweet twist: Instead of savory cheese balls, make dessert cheese balls using cream cheese mixed with powdered sugar and vanilla. Roll them in crushed graham crackers instead of paprika. Add chocolate chips and pretzels for that sweet-salty thing. I tried this for a Halloween dessert table and it disappeared fast.
Mini board idea: If you’re not feeding a crowd, make smaller individual boards using salad plates. One cheese ball per person with a handful of crackers and some fruit. Perfect for a Halloween movie night.
Add a dip: A small bowl of honey or hot honey next to the cheese balls is incredible. The sweetness cuts through the tangy cheese perfectly. Or try a balsamic glaze for something more savory.
Serving & Storage Suggestions
Serve this Halloween charcuterie board at room temperature. Take it out of the fridge about 20 minutes before guests arrive. The cheese will be softer, the flavors will be more pronounced, and everything just tastes better.
For presentation, I like to scatter a few candy corn pieces around the board for visual fun. They’re not really meant to be eaten with the cheese—though I’ve seen people do it—but they add to the Halloween vibe. A few fake spider webs or plastic spiders tucked around the edges also make it more festive.
Storage: Leftover cheese balls can be wrapped tightly in plastic wrap and stored in the fridge for up to 5 days. The crackers and pretzels should be stored separately in an airtight container to keep them crunchy. The fruit will get soft, so it’s best eaten the same day.
Reheating: You don’t really reheat cheese balls. Just let them sit at room temperature for 15 minutes before serving leftovers. If the texture seems a little dry, stir in a teaspoon of milk before serving.
One thing I love about this board? The flavors actually get better after a day in the fridge. The garlic and onion powders mellow out and blend with the cheese. So if you’re making this for a party, definitely prep the cheese balls ahead of time.
Nutritional Information & Benefits
This Halloween charcuterie board is indulgent, but it’s not all bad news. Here’s a rough breakdown per serving (about 2 ounces of cheese mixture plus accompaniments):
- Calories: Approximately 280-320
- Protein: 10-12 grams
- Fat: 22-25 grams
- Carbohydrates: 12-15 grams (varies based on crackers and fruit)
- Fiber: 2-3 grams
The cream cheese provides calcium and vitamin A, while the cheddar adds protein and more calcium. The apples and dried fruit contribute fiber and antioxidants. Pumpkin seeds are a great source of magnesium and zinc. So while this isn’t health food by any means, it’s not empty calories either.
For those watching carbs, this board can easily be made low-carb by swapping the crackers for cucumber rounds or bell pepper strips. The cheese balls themselves are very low in carbs.
Potential allergens: dairy (cream cheese, cheddar), gluten (crackers, pretzels). Make sure to check labels if serving guests with allergies.
Conclusion
This Halloween charcuterie board with candy corn cheese balls is the kind of recipe that makes people smile before they even taste it. And then they taste it, and they smile even bigger. It’s fun without being fussy, festive without being complicated, and delicious without requiring hours in the kitchen.
I love that this board brings people together. There’s something about standing around a shared platter, grabbing a pretzel here and a slice of apple there, that just makes a party feel like a party. And when someone picks up one of those little candy corn cheese balls and says, “Wait, this is actually amazing?” That’s the moment that makes all the effort worth it.
I’d love to see how your Halloween charcuterie board turns out! Tag me in your photos or leave a comment below telling me what variations you tried. Did you go spicy? Sweet? Did you add something totally unexpected? Share your creation—I’m always looking for new ideas.
Now go make your cheese balls and have the best Halloween party ever. You’ve got this.
Frequently Asked Questions
Can I make the candy corn cheese balls vegan?
Yes! Use vegan cream cheese and vegan shredded cheddar. The texture will be slightly different—vegan cream cheese is a bit softer—so you might need to chill the balls for an extra hour. But the flavor works great. I’ve tested this with Kite Hill brand and it held up well.
How far in advance can I assemble the full board?
You can prep the cheese balls up to 2 days ahead and keep them wrapped in the fridge. But don’t assemble the whole board more than 2 hours before serving. The crackers get stale and the fruit starts to brown. I recommend arranging everything right before guests arrive.
What if I don’t have paprika for the orange layer?
You can use a pinch of turmeric mixed with a tiny drop of red food coloring to get that orange shade. Or just skip the coloring altogether—the cheese balls will still taste great, they just won’t look like candy corn. Another option is to use a store-bought orange cheddar for the top layer.
Can I freeze the cheese balls?
Technically yes, but I don’t recommend it. The texture gets grainy after freezing and thawing. Cream cheese doesn’t freeze well. If you absolutely must, wrap them tightly and freeze for up to 1 month. Thaw overnight in the fridge and stir before serving. Just know they won’t be as creamy.
What if my cheese balls won’t hold their shape?
This usually means the mixture is too soft. Pop it back in the fridge for 30 minutes to firm up. If it’s still too soft after chilling, you can mix in a little more shredded cheddar or Parmesan to absorb excess moisture. Next time, make sure your cream cheese isn’t overly softened.
Pin This Recipe!

Easy Halloween Charcuterie Board with Candy Corn Cheese Balls
A fun and delicious Halloween charcuterie board featuring candy corn-shaped cheese balls made with cream cheese and cheddar. Perfect for parties, this board is quick to assemble and packed with flavor.
- Prep Time: 20 minutes
- Cook Time: 0 minutes
- Total Time: 2 hours 20 minutes (includes chilling)
- Yield: 4 servings 1x
- Category: Appetizer
- Cuisine: American
Ingredients
- 16 oz cream cheese, softened
- 1 cup sharp cheddar cheese, finely shredded
- 1/2 cup white cheddar or Monterey Jack, finely shredded
- 1/4 cup grated Parmesan cheese
- 1 teaspoon garlic powder
- 1/2 teaspoon onion powder
- 1/4 teaspoon cayenne pepper (optional)
- 1/2 teaspoon salt
- 1/4 teaspoon black pepper
- 1 tablespoon paprika
- 1 tablespoon milk or cream
- Pretzel sticks or mini pretzels
- Crackers (butter crackers, wheat thins, or bagel chips)
- Sliced apples or pears (tossed with lemon juice)
- Dried cranberries or cherries
- Roasted and salted pumpkin seeds (pepitas)
- Dark chocolate pieces or candy corn
- Sliced salami or prosciutto (optional)
- Fresh rosemary or sage sprigs (for garnish)
Instructions
- In a large mixing bowl, combine softened cream cheese, shredded sharp cheddar, Parmesan, garlic powder, onion powder, cayenne (if using), salt, and pepper. Beat with a hand mixer on medium speed until smooth, about 2-3 minutes. Add milk or cream if needed.
- Divide the cheese mixture into three equal portions. Leave one portion plain (white layer). To the second portion, add paprika and mix until evenly colored (orange layer). To the third portion, add shredded white cheddar or Monterey Jack and mix well (yellow layer).
- Tear off a sheet of plastic wrap for each cheese ball. Take about 1 tablespoon of the white mixture and shape into a small disc. Place on plastic wrap. Add the same amount of yellow mixture on top, then orange mixture on top of that. Gather the edges of the plastic wrap and twist to form a ball, shaping it into a candy corn shape. Repeat with remaining mixture to make 3-4 cheese balls.
- Wrap each cheese ball tightly in plastic wrap and refrigerate for at least 2 hours, or overnight.
- About 15 minutes before serving, remove cheese balls from fridge to soften slightly. Place them on a large board or platter. Add small bowls with pumpkin seeds, dried cranberries, or other items.
- Fill the board with pretzel sticks, crackers, sliced salami or prosciutto, apple slices, dried fruit, and dark chocolate or candy corn. Garnish with fresh rosemary or sage sprigs. Serve at room temperature.
Notes
Don’t skip the chilling time—cheese balls need at least 2 hours to firm up. Wet your hands slightly when shaping to prevent sticking. Make cheese balls a day ahead for best flavor. Let board sit out 15-20 minutes before serving. For food safety, don’t leave out more than 2 hours.
Nutrition
- Serving Size: 2 ounces of cheese m
- Calories: 300
- Sugar: 5
- Sodium: 450
- Fat: 23
- Saturated Fat: 12
- Carbohydrates: 13
- Fiber: 2
- Protein: 11
Keywords: Halloween charcuterie board, candy corn cheese balls, Halloween appetizer, cheese ball recipe, party snack, Halloween party food


