My neighbor, Mrs. Kowalski, watched me struggle with a batch of crescent roll dough one October afternoon. I was trying—and failing—to make something cute for my nephew’s Halloween party. She didn’t say anything at first. Then she just smiled, reached into her fridge, and pulled out a package of hot dogs and a block of cheddar cheese. “You’re overthinking it,” she said, handing me a butter knife. “Kids just want something fun that tastes good. Watch.”
That afternoon, standing in her cozy kitchen with the smell of baking dough and melted cheese filling the air, I learned the secret to crowd-pleasing Halloween food. It wasn’t about fancy decorations or elaborate recipes. It was about making something that made people smile when they saw it—and then made them reach for seconds. These mummy hot dogs with cheese ribbons were born right there, on her worn-out baking sheet, and honestly, I haven’t stopped making them since.
Let me tell you, there’s something magical about watching a tray of these little guys come out of the oven. The golden, flaky dough wrapped around each hot dog, with those tiny cheese peeking through like little mummy bandages. Every single time, people’s faces light up. Maybe you’ve been there—standing in the kitchen, wondering if your Halloween snacks will actually impress anyone. I promise you, these will. They’re the kind of recipe that makes you look like you spent hours, when really, you pulled it together in minutes.
Why You’ll Love This Recipe
These crowd-pleasing mummy hot dogs with cheese ribbons aren’t just another Halloween snack. They’re the ones that disappear first at every party, and I’ve tested them at enough gatherings to know. Here’s why they work so beautifully:
- Quick & Easy: Comes together in under 30 minutes, which is a lifesaver when you’re juggling decorations, costumes, and a house full of excited kids.
- Simple Ingredients: You probably already have crescent roll dough, hot dogs, and cheese in your fridge. No special trips to the store for weird Halloween-themed ingredients.
- Perfect for Hosting: These are designed for parties. They’re easy to scale up, fun to assemble with kids, and they hold up beautifully on a buffet table.
- Crowd-Pleaser: Kids love the mummy look, and adults love the gooey cheese and flaky pastry. Everyone wins.
- Unbelievably Delicious: The cheese ribbons melt into the hot dog as it bakes, creating this amazing, savory pocket of flavor in every bite.
What makes these different from every other mummy dog recipe out there? It’s the cheese ribbons. Most recipes just slap cheese on top, but by tucking thin strips of cheese into the dough as you wrap it, you get cheese in every single bite. Not just on top—inside. It’s a small tweak that makes a huge difference, and honestly, once you try it, you won’t go back.
This recipe is the kind that makes you close your eyes after the first bite. It’s comfort food reimagined—faster, funnier, but with the same soul-soothing satisfaction. Perfect for impressing guests without stress, or turning a simple snack into something memorable.
What Ingredients You Will Need
This recipe uses simple, pantry-friendly ingredients to deliver big flavor and maximum fun without any fuss. Most of these are things you probably already have on hand, especially if you’re a regular host.
- 1 package (8 oz) refrigerated crescent roll dough (I recommend Pillsbury for the flakiest texture, but any brand works well)
- 8 beef or turkey hot dogs (look for all-beef for the best flavor; turkey works great for a lighter option)
- 4 oz cheddar cheese, cut into thin strips (about 1/4 inch wide and 3 inches long—these are your “ribbons”)
- 1 large egg, beaten (for the egg wash that gives them that golden, shiny finish)
- 2 tablespoons melted butter (optional, but adds incredible richness to the dough)
- Mustard or ketchup for eyes (just a tiny dab on each mummy face)
Ingredient Tips & Substitutions:
- For the crescent dough, you can also use puff pastry sheets if you want an extra-flaky texture. Just cut them into thin strips the same way.
- Cheese-wise, cheddar is classic, but pepper jack adds a nice kick, and mozzarella gives you that amazing stretchy pull.
- If you’re feeding a crowd, double the recipe easily—these disappear fast, and you’ll want extras.
- For a gluten-free version, use gluten-free crescent dough or even gluten-free tortillas cut into strips.
- Hot dogs can be swapped for vegetarian sausages or even smoked sausage links for a fancier version.
The beauty of this recipe is its flexibility. You can mix and match based on what you have, and it still turns out fantastic every time.
Equipment Needed
You don’t need much for these mummy hot dogs, which is part of their charm. Here’s what you’ll want on hand:
- Baking sheet (a standard half-sheet pan works perfectly; line it with parchment paper for easy cleanup)
- Sharp knife or pizza cutter (for cutting the crescent dough into strips and slicing the cheese into ribbons)
- Small bowl (for beating the egg wash)
- Pastry brush (for applying the egg wash; a silicone one is easiest to clean)
- Cutting board (for assembling everything without making a mess on your counter)
- Toothpicks (optional, but helpful if you need to secure any loose dough ends)
I’ve made these with just a butter knife and my hands when I couldn’t find my pizza cutter, so don’t stress if you’re missing something. The key is having a sharp enough blade to cut the dough cleanly—dull knives just squish it.
If you’re making a big batch for a party, having two baking sheets helps you fit more at once. And honestly, a good parchment paper is worth its weight in gold for cleanup.
Preparation Method
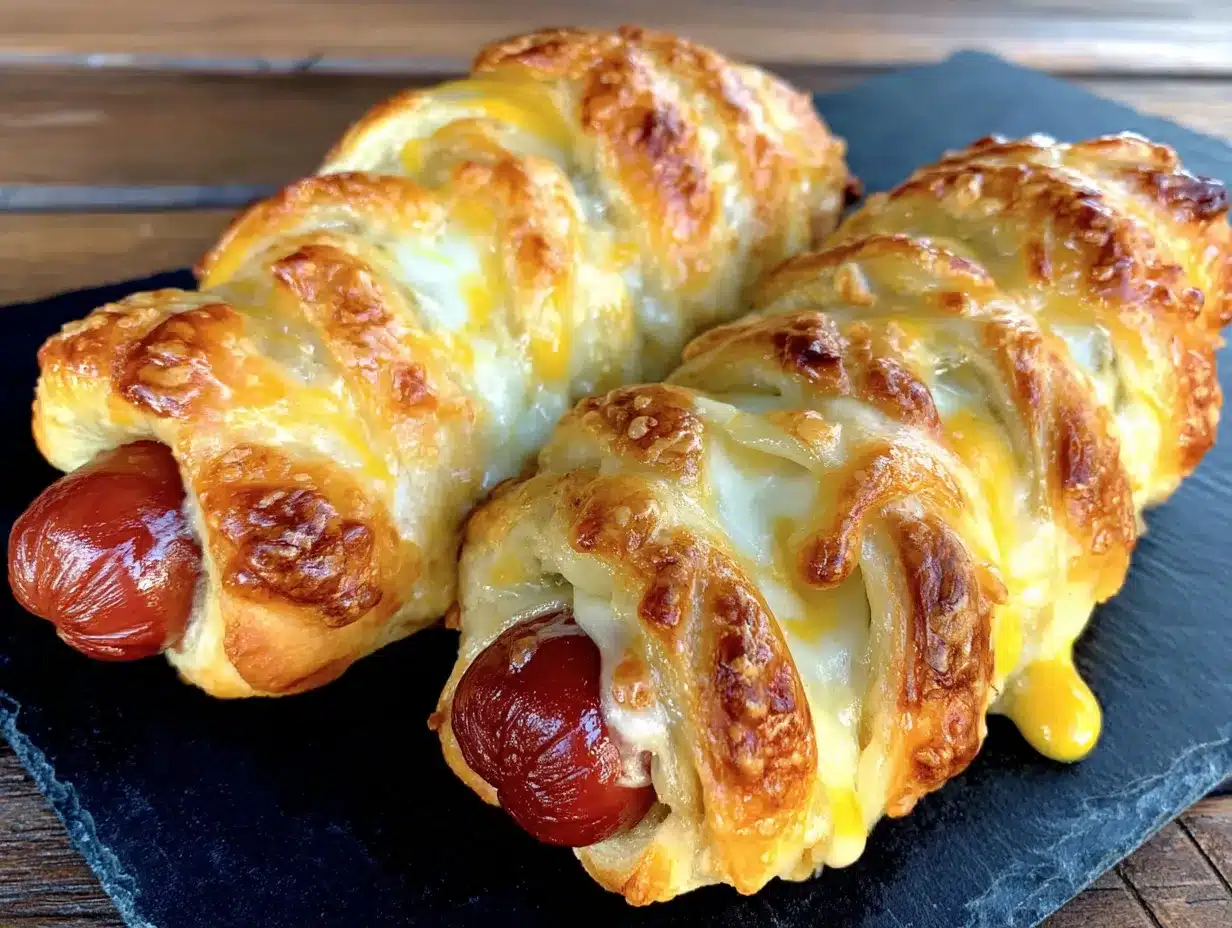
Let’s get these little guys assembled. Trust me, it’s easier than it looks, and the process is actually pretty fun—especially if you’ve got kids helping out.
- Preheat your oven to 375°F (190°C). Line your baking sheet with parchment paper and set it aside. Getting the oven hot first means you’re not waiting around later.
- Unroll your crescent dough onto a clean cutting board. You’ll notice it’s perforated into triangles—don’t separate them. Instead, use a sharp knife or pizza cutter to cut the entire sheet of dough lengthwise into 8 thin strips, each about 1/2 inch wide. Each strip will be long and skinny, perfect for wrapping.
- Cut your cheese into ribbons. Take your block of cheddar and slice it into thin strips, about 1/4 inch thick and 3 inches long. You want them thin enough to bend but thick enough to hold their shape. Aim for about 16 strips—two per mummy dog.
- Prepare each hot dog. Take one hot dog and place two cheese ribbons on top, running lengthwise along the hot dog. Press them gently so they stick a little.
- Start wrapping. Take one strip of crescent dough and begin wrapping it around the hot dog, starting at one end and working your way to the other. Leave a small gap at the top (about 1/2 inch) for the “face” where you’ll add the eyes. The dough should overlap slightly as you go, creating that mummy bandage look. Don’t wrap too tightly—leave a little room for the dough to expand as it bakes.
- Secure the end. When you reach the top, tuck the end of the dough strip under the wrap or press it gently against the hot dog. If it’s being stubborn, a dab of water helps it stick.
- Place on baking sheet. Arrange your wrapped mummy dogs on the prepared baking sheet, leaving about 1 inch of space between each one. They’ll puff up a bit as they bake, so give them room.
- Apply the egg wash. In your small bowl, beat the egg with a tablespoon of water until smooth. Use your pastry brush to lightly coat each mummy dog with the egg wash. This is what gives them that beautiful golden-brown color. If you’re using melted butter, brush that on after the egg wash for extra richness.
- Bake for 12-15 minutes, or until the dough is golden brown and puffed, and the cheese is bubbly and melted. Keep an eye on them—ovens vary, and you want them golden, not burnt.
- Add the eyes. Once they’re out of the oven and slightly cooled (about 5 minutes), use a toothpick to dab tiny dots of mustard or ketchup on the exposed hot dog at the top. Two little dots per mummy, and you’ve got a face. Don’t add the eyes before baking—they’ll just melt and disappear.
That’s it. Ten simple steps, and you’ve got a tray of adorable, delicious mummy hot dogs that will steal the show at any Halloween gathering.
Cooking Tips & Techniques
After making these more times than I can count, I’ve picked up a few tricks that make the process smoother and the results better. Here are the ones that matter most:
Don’t overwork the dough. Crescent roll dough is delicate, and if you handle it too much, it gets tough. Cut your strips cleanly and wrap gently. If the dough tears, just press it back together—it’ll bake up fine.
Cheese placement matters. Tuck the cheese ribbons against the hot dog, not on top of the dough. When the cheese melts, it stays inside the wrap instead of leaking out onto the baking sheet. Trust me, I learned this the messy way.
Space them out. These little guys puff up as they bake, and if they’re too close together, they’ll stick to each other. An inch of space between each one is plenty.
Watch the oven like a hawk. The difference between perfect golden mummies and burnt ones is about two minutes. Start checking at the 12-minute mark, and pull them out the second they look right.
Let them cool slightly before serving. The cheese inside is molten-hot right out of the oven. Five minutes of cooling gives the cheese time to set just enough that nobody burns their mouth. Plus, the eyes stay put better on a slightly cooled surface.
One mistake I made early on was trying to wrap the dough too tightly. I thought it would look neater, but the dough just tore as it expanded. A loose, slightly messy wrap actually looks more like a mummy anyway—so embrace the imperfection.
Variations & Adaptations
One of the best things about these mummy hot dogs is how easily they adapt. Here are some variations I’ve tried and loved:
- Spicy Mummy Dogs: Use pepper jack cheese instead of cheddar, and add a thin slice of jalapeño under the cheese ribbons. The heat cuts through the richness beautifully.
- Breakfast Mummy Dogs: Swap the hot dogs for breakfast sausages, use mozzarella cheese, and serve with a side of maple syrup for dipping. It sounds weird, but it’s amazing.
- Veggie Mummy Dogs: Use vegetarian sausages and your favorite plant-based cheese. Everything bakes up the same way, and even meat-eaters love these.
- Pizza Mummy Dogs: Before wrapping, brush the hot dog with a little pizza sauce and add a ribbon of mozzarella. Serve with extra sauce for dipping.
- Puff Pastry Version: Use puff pastry sheets cut into thin strips instead of crescent dough. The result is extra flaky and buttery—perfect for a more grown-up version.
My personal favorite variation is the spicy one. I made it for a Halloween party last year, and the adults kept sneaking back to the tray. There’s something about that little kick of heat that makes them irresistible.
Serving & Storage Suggestions
These mummy hot dogs are best served warm, right when the cheese is still gooey and the dough is at its flakiest. Arrange them on a platter with a small bowl of mustard or ketchup in the center for dipping. The eyes on top make them instantly recognizable, and kids love being able to pick their own.
For a Halloween spread, pair them with other finger foods like veggie sticks with ranch dip, popcorn balls, or a bowl of Halloween-themed fruit (clementines with little faces drawn on them are always a hit). If you’re serving adults, a batch of these alongside a hearty chili or a big salad makes for a fun, casual dinner.
Storage: Leftover mummy dogs keep well in an airtight container in the refrigerator for up to 3 days. To reheat, pop them in a 350°F oven for about 5 minutes—the microwave works in a pinch, but the dough won’t be as crispy.
Make-Ahead Tip: You can assemble these up to a day in advance. Just wrap them, place them on the baking sheet, cover with plastic wrap, and refrigerate. When you’re ready to bake, add an extra 2-3 minutes to the cooking time since they’re starting from cold. This is a lifesaver when you’re hosting a party and want to minimize last-minute work.
The flavors actually develop nicely overnight—the cheese melds with the hot dog in a way that’s even better the next day. Not that they usually last that long.
Nutritional Information & Benefits
Here’s the honest truth: these are a treat, not a health food. But that doesn’t mean they can’t fit into a balanced diet. Here’s a rough breakdown per mummy dog (based on using standard crescent dough, beef hot dogs, and cheddar cheese):
- Calories: Approximately 220-250 per serving
- Protein: 8-10 grams (thanks to the hot dog and cheese)
- Carbohydrates: 18-20 grams (mostly from the dough)
- Fat: 14-16 grams (with about 6 grams of saturated fat)
- Calcium: 10-15% of your daily value (from the cheese)
The cheese provides a good dose of calcium and protein, while the hot dog adds iron and B vitamins. If you’re looking to lighten things up, use turkey hot dogs and reduced-fat cheese—you’ll save about 50 calories and 5 grams of fat per serving.
For those with dietary concerns, these can be made gluten-free with appropriate dough and dairy-free with vegan cheese. Just keep an eye on the baking time, as alternative products can behave differently in the oven.
Honestly, I see these as a fun, occasional treat. They’re perfect for holidays and parties, and they bring so much joy that the nutritional trade-off feels worth it.
Conclusion
These crowd-pleasing mummy hot dogs with cheese ribbons are everything I love about Halloween cooking—they’re fun, they’re delicious, and they make people happy. Every time I make them, I think of Mrs. Kowalski and her simple wisdom: kids just want something fun that tastes good. And honestly, adults do too.
What I love most about this recipe is how it brings people together. There’s something about wrapping those little dough strips around hot dogs that feels almost meditative, and the payoff—watching everyone’s faces light up when they see the tray—is pure magic. Whether you’re hosting a big Halloween bash or just making a fun dinner for your family, these mummy dogs deliver every single time.
I’d love to hear how yours turn out. Did you try a fun variation? Did your kids help with the wrapping? Drop a comment below and share your mummy dog creations—I read every single one, and I love seeing how you make this recipe your own. Happy Halloween, and happy cooking!
Frequently Asked Questions
Can I make these mummy hot dogs ahead of time?
Absolutely! You can assemble them up to 24 hours in advance, keep them covered in the fridge, and bake them fresh when you’re ready. Just add a couple of extra minutes to the baking time since they’re starting cold.
What’s the best cheese to use for the ribbons?
Cheddar is my go-to because it melts beautifully and has great flavor. But mozzarella gives you that amazing stretchy pull, and pepper jack adds a nice kick. Just avoid super soft cheeses like brie—they’ll melt too fast and leak out.
Can I freeze these before baking?
Yes! Arrange the assembled mummy dogs on a baking sheet and freeze until solid (about 2 hours), then transfer to a freezer bag. They’ll keep for up to 3 months. Bake from frozen, adding 5-7 minutes to the cooking time.
How do I keep the dough from tearing when wrapping?
Work with the dough at room temperature—cold dough is more likely to crack. If it does tear, just press it back together gently. A little imperfection actually makes them look more like mummies!
Can I use homemade dough instead of crescent roll dough?
Definitely. A simple pizza dough or even a basic pie crust works beautifully. Just roll it out thin, cut it into strips, and wrap the same way. The baking time might vary slightly, so keep an eye on them.
Pin This Recipe!
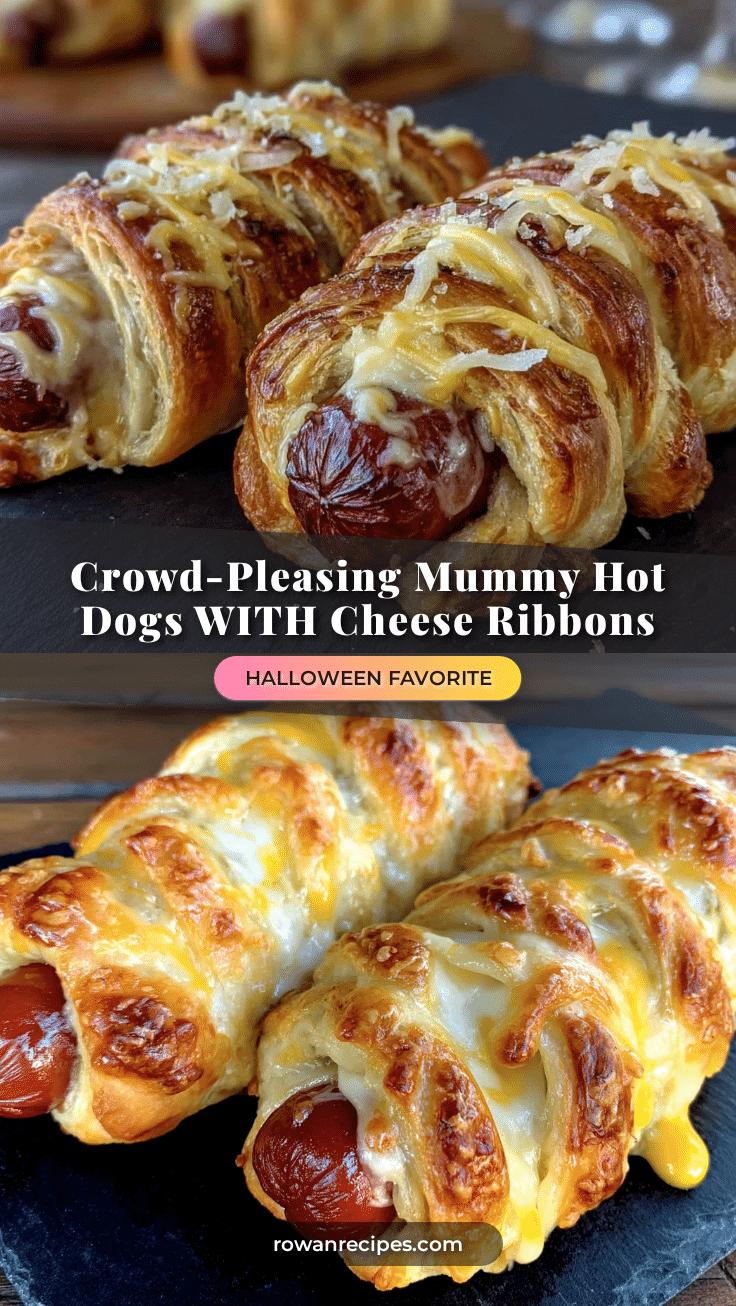
Crowd-Pleasing Mummy Hot Dogs with Easy Cheese Ribbons
These adorable mummy hot dogs with cheese ribbons are the perfect Halloween snack. Quick to assemble with simple ingredients, they feature flaky crescent dough wrapped around hot dogs with melted cheese in every bite.
- Prep Time: 15 minutes
- Cook Time: 15 minutes
- Total Time: 30 minutes
- Yield: 8 servings 1x
- Category: Appetizer
- Cuisine: American
Ingredients
- 1 package (8 oz) refrigerated crescent roll dough
- 8 beef or turkey hot dogs
- 4 oz cheddar cheese, cut into thin strips (about 1/4 inch wide and 3 inches long)
- 1 large egg, beaten
- 2 tablespoons melted butter (optional)
- Mustard or ketchup for eyes
Instructions
- Preheat your oven to 375°F (190°C). Line your baking sheet with parchment paper and set it aside.
- Unroll your crescent dough onto a clean cutting board. Use a sharp knife or pizza cutter to cut the entire sheet of dough lengthwise into 8 thin strips, each about 1/2 inch wide.
- Cut your cheese into ribbons. Take your block of cheddar and slice it into thin strips, about 1/4 inch thick and 3 inches long. Aim for about 16 strips—two per mummy dog.
- Prepare each hot dog. Take one hot dog and place two cheese ribbons on top, running lengthwise along the hot dog. Press them gently so they stick a little.
- Start wrapping. Take one strip of crescent dough and begin wrapping it around the hot dog, starting at one end and working your way to the other. Leave a small gap at the top (about 1/2 inch) for the ‘face’ where you’ll add the eyes. The dough should overlap slightly as you go, creating that mummy bandage look. Don’t wrap too tightly—leave a little room for the dough to expand as it bakes.
- Secure the end. When you reach the top, tuck the end of the dough strip under the wrap or press it gently against the hot dog. If it’s being stubborn, a dab of water helps it stick.
- Place on baking sheet. Arrange your wrapped mummy dogs on the prepared baking sheet, leaving about 1 inch of space between each one.
- Apply the egg wash. In your small bowl, beat the egg with a tablespoon of water until smooth. Use your pastry brush to lightly coat each mummy dog with the egg wash. If you’re using melted butter, brush that on after the egg wash for extra richness.
- Bake for 12-15 minutes, or until the dough is golden brown and puffed, and the cheese is bubbly and melted.
- Add the eyes. Once they’re out of the oven and slightly cooled (about 5 minutes), use a toothpick to dab tiny dots of mustard or ketchup on the exposed hot dog at the top.
Notes
Don’t overwork the dough. Tuck cheese ribbons against the hot dog to keep cheese inside. Space mummy dogs 1 inch apart on baking sheet. Watch oven closely—check at 12 minutes. Let cool 5 minutes before serving to avoid burning mouths. Can be assembled up to 24 hours in advance and refrigerated. Freeze unbaked for up to 3 months.
Nutrition
- Serving Size: 1 mummy hot dog
- Calories: 235
- Sugar: 3
- Sodium: 580
- Fat: 15
- Saturated Fat: 6
- Carbohydrates: 19
- Protein: 9
Keywords: Halloween, mummy hot dogs, cheese ribbons, crescent roll, party snack, kid-friendly, easy appetizer


