My brother called me last Tuesday with a problem. He had a bag of frozen chicken wings, a bottle of honey, and absolutely no idea what to do with either. “I keep ending up with sad, soggy wings that taste like regret,” he said. I knew exactly what he meant. For years, I avoided making wings at home because the oven took forever, the deep fryer was a grease bomb waiting to happen, and the results were always disappointing. I honestly thought crispy wings were something you had to leave to the professionals.
Then I got an air fryer as a housewarming gift, and everything changed. But even then, I ruined a few batches. They came out dry, the garlic burned, or the honey glaze turned into a sticky mess that stuck to the basket. I almost gave up. But I kept tweaking—lowering the temperature, changing when I added the sauce, testing different coatings. After maybe six or seven attempts (and a lot of edible mistakes), I landed on this version. And let me tell you, the first time I pulled these crispy air fryer honey garlic chicken wings out of the basket, I actually stood there in the kitchen eating them straight off the tray, burning my fingers, not caring at all.
These wings are the kind of recipe that makes you wonder why you ever ordered takeout. The skin shatters when you bite into it, and the honey garlic glaze is sticky, savory, and just sweet enough. It’s not complicated. It’s not fussy. It’s just really, really good food that feels like a win. And honestly, that’s the best kind of recipe to have in your back pocket.
Why You’ll Love This Recipe
I have tested this recipe more times than I care to count, and I can tell you with confidence—it works. These wings come out consistently crispy without any deep frying, and the sauce clings to every nook and cranny without making the skin soggy. That is not easy to pull off, and it took me a while to figure out the right balance.
- Quick & Easy: From fridge to table in under 40 minutes. No marinating required, no complicated steps. Perfect for a weeknight when you need something satisfying fast.
- Simple Ingredients: Chicken wings, honey, soy sauce, garlic, and a few pantry staples. You probably have everything already, minus the wings themselves.
- Perfect for Game Day or Dinner: These work for a crowd watching football, a casual dinner with the family, or even a solo snack session when you just need something crispy and saucy.
- Crowd-Pleaser: I have brought these to three different gatherings now, and they disappear every single time. Kids love them. Adults love them. Even my picky aunt who “doesn’t eat chicken on the bone” ate four of them.
- Unbelievably Delicious: The contrast between the shatteringly crispy skin and the sticky, savory-sweet glaze is next-level. It is comfort food that feels special without a ton of effort.
What makes this recipe different from the rest is the technique. Most recipes either toss the wings in sauce after cooking (which turns the skin soft) or bake them at too low a temperature. Here, we use a cornstarch coating for extra crunch, cook the wings at the perfect high heat, and toss them in a reduced glaze that sticks without soaking in. It is a small tweak that makes a huge difference.
Honestly, this is the kind of recipe that makes you close your eyes after the first bite. It’s comfort food reimagined—healthier than deep-fried, faster than oven-baked, but with the same soul-soothing satisfaction. Perfect for impressing guests without stress, or turning a simple Tuesday night into something memorable.
What Ingredients You Will Need
This recipe uses simple, honest ingredients to build layers of flavor. Nothing fancy, nothing hard to find—just good staples that work together beautifully. Here is what you will need:
For the Wings
- Chicken wings: 2 lbs (about 900g), separated into drumettes and flats. You can buy them pre-cut or do it yourself with a sharp knife. I usually buy a family pack and cut them at home—it is cheaper and takes about five minutes.
- Cornstarch: 2 tablespoons. This is the secret to the extra-crispy skin. It helps absorb moisture and creates that shatter effect when cooked at high heat. Do not skip it.
- Baking powder: 1 teaspoon. Not baking soda! Baking powder helps the skin dry out and crisp up in the air fryer. It is a game-changer for wings.
- Salt: 1 teaspoon. Use fine sea salt for even distribution.
- Garlic powder: ½ teaspoon. Adds a subtle savory note to the coating.
- Black pepper: ¼ teaspoon, freshly ground.
For the Honey Garlic Glaze
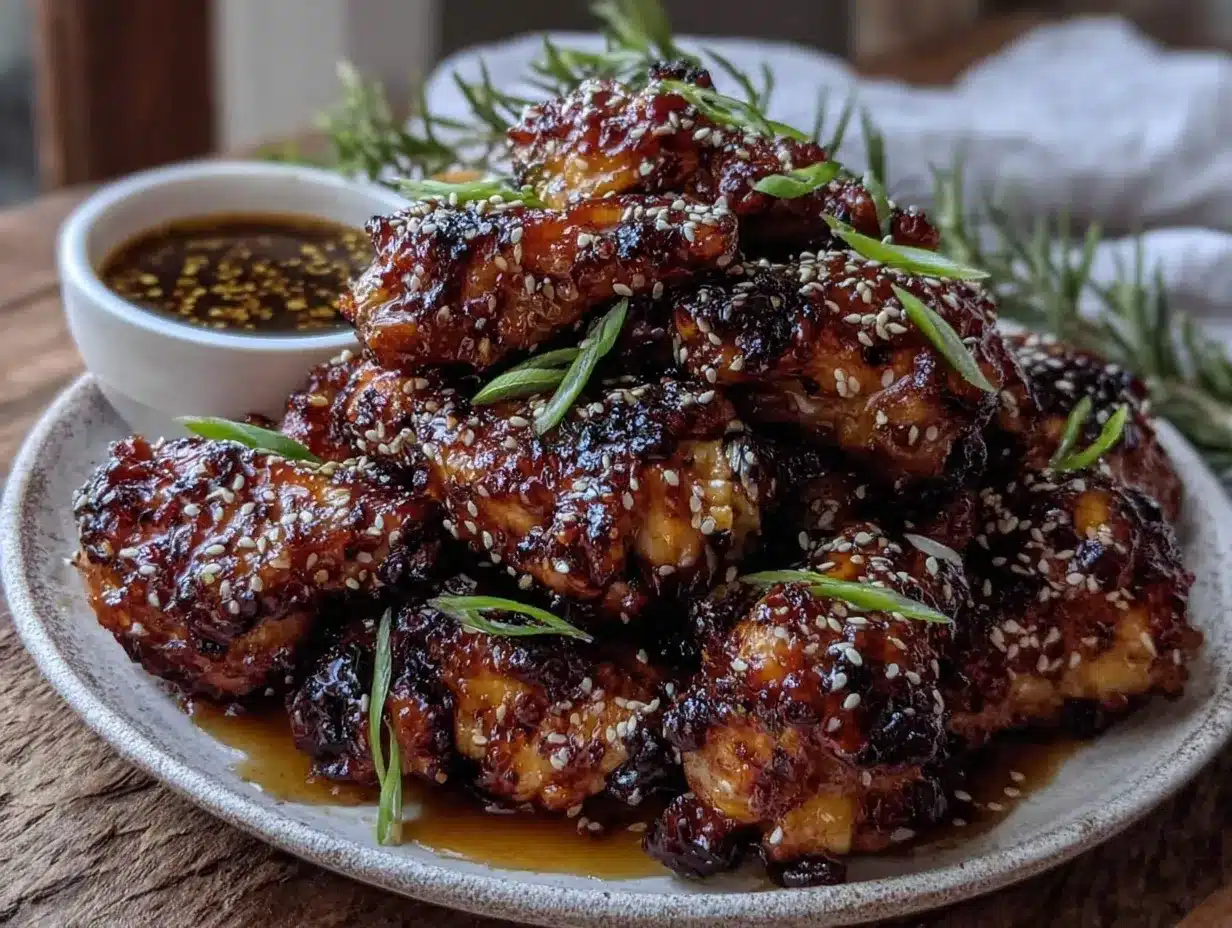
- Honey: ⅓ cup (about 110g). Use a good quality honey—it makes a difference in flavor. I prefer a mild wildflower honey, but any kind works.
- Soy sauce: 3 tablespoons. Low-sodium is best so you can control the saltiness. Tamari or coconut aminos work great for gluten-free options.
- Garlic: 4 cloves, minced fresh. Do not use jarred garlic here—fresh garlic gives the glaze a punchy, aromatic quality that is worth the extra thirty seconds of chopping.
- Rice vinegar: 1 tablespoon. Adds a touch of acidity to balance the sweetness. Apple cider vinegar works in a pinch.
- Sesame oil: 1 teaspoon. Optional, but it adds a lovely nutty depth. I recommend it if you have it on hand.
- Cornstarch slurry: 1 teaspoon cornstarch mixed with 2 teaspoons water. This helps thicken the glaze so it clings to the wings without being runny.
For Garnish (Optional but Recommended)
- Sesame seeds: 1 tablespoon, toasted.
- Green onions: 2, thinly sliced.
- Red pepper flakes: A pinch for heat, if you like.
I recommend using fresh, never-frozen wings if you can find them. Frozen ones release more water as they cook, which can make it harder to get that perfect crisp. If you only have frozen, just thaw them completely and pat them very dry before coating. For the soy sauce, I personally prefer Kikkoman for its balanced flavor, but any brand you trust will work.
Equipment Needed
You do not need a lot of fancy gear for this recipe, which is part of why I love it. Here is what you will need:
- Air fryer: Any model works, but a 5-6 quart basket-style air fryer is ideal for cooking 2 lbs of wings without overcrowding. If yours is smaller, cook in batches.
- Large mixing bowl: For tossing the wings with the dry coating.
- Small saucepan: For making the glaze. A non-stick one is easiest to clean.
- Tongs: For flipping the wings and tossing them in sauce. Silicone-tipped tongs are gentle on non-stick baskets.
- Paper towels: For drying the wings thoroughly—this step is non-negotiable for crispiness.
- Measuring spoons and cups: For accuracy, especially with the cornstarch and baking powder.
- Pastry brush (optional): For brushing the glaze onto the wings if you want to be extra precise, though tossing works fine.
If you do not have an air fryer, you can bake these in a conventional oven at 425°F on a wire rack set over a baking sheet. It will take about 40-45 minutes, and you will need to flip them halfway. The texture will be slightly less crispy, but still very good.
Preparation Method
Let me walk you through this step by step. I have made these wings more times than I can count, so I am including every little detail that makes the difference between good wings and great wings.
- Prep the wings: Start by patting the chicken wings completely dry with paper towels. This is the most important step. Any moisture on the skin will steam instead of crisp, and nobody wants steamed wings. If you have time, let them sit uncovered on a plate in the fridge for 30 minutes to dry out even more. I do this when I am planning ahead, and it makes a noticeable difference.
- Make the coating: In a large mixing bowl, whisk together the cornstarch, baking powder, salt, garlic powder, and black pepper. Make sure there are no clumps—baking powder loves to hide in corners.
- Coat the wings: Add the dried wings to the bowl and toss them with your hands until every piece is evenly coated. The mixture should look like a light dusting, not a thick paste. Shake off any excess. This coating is what gives you that shatteringly crispy exterior, so take your time here.
- Preheat the air fryer: Set your air fryer to 380°F (193°C) and let it preheat for 3-5 minutes. Preheating ensures the wings start cooking immediately, which helps the skin crisp up faster.
- Arrange the wings: Place the wings in a single layer in the air fryer basket. Do not overcrowd! Leave space between each wing so the hot air can circulate. If you need to cook in batches, do it. Crowding leads to steaming, and steaming leads to sadness.
- First cook: Air fry at 380°F for 12 minutes. Do not open the basket during this time. Let the heat do its job.
- Flip and increase heat: After 12 minutes, open the basket and flip each wing using tongs. Increase the temperature to 400°F (204°C) and cook for another 8-10 minutes, until the skin is golden brown and crispy. The wings should reach an internal temperature of 165°F (74°C). If you like them extra crispy, go the full 10 minutes.
- Make the glaze while the wings cook: In a small saucepan, combine the honey, soy sauce, minced garlic, rice vinegar, and sesame oil. Bring to a simmer over medium heat, stirring occasionally. Let it bubble gently for 3-4 minutes until it thickens slightly. Stir in the cornstarch slurry and cook for another 30 seconds until the glaze is glossy and coats the back of a spoon. Remove from heat.
- Toss the wings: Once the wings are done, transfer them to a clean bowl. Pour the warm glaze over the top and toss gently with tongs until every wing is coated. Do this right away while the wings are still hot—they absorb the glaze better.
- Garnish and serve: Sprinkle with toasted sesame seeds, sliced green onions, and a pinch of red pepper flakes if you want a little heat. Serve immediately while the skin is still crispy.
A quick note: The glaze will soften the skin slightly, but that is part of the magic. You get a shatteringly crisp first bite, then a sticky, saucy finish. If you want to keep the skin extra crispy for longer, serve the glaze on the side for dipping instead of tossing.
Cooking Tips & Techniques
I have made every mistake in the book with these wings, so you do not have to. Here is what I learned the hard way:
- Dry the wings thoroughly. I cannot stress this enough. Even a little moisture will steam the skin and ruin the crisp. Pat them dry, let them air-dry in the fridge if you can, and do not skip the paper towels.
- Do not skip the cornstarch. Some recipes skip it to save a step, but it is the key to that shatter effect. The cornstarch absorbs surface moisture and creates a thin, crispy shell when fried at high heat.
- Watch the garlic in the glaze. Fresh garlic can burn quickly if you simmer the glaze too long. Keep the heat at medium and stir frequently. If the garlic turns brown, it will taste bitter. Remove the glaze from heat as soon as it thickens.
- Batch cooking is your friend. If you are making wings for a crowd, do not try to cram them all into the air fryer at once. Cook in batches and keep the finished wings warm in a 200°F oven on a wire rack. They will stay crispy for up to 30 minutes this way.
- Use a meat thermometer. Chicken wings are small and cook fast, but undercooked chicken is no joke. Insert a thermometer into the thickest part of a drumette—it should read 165°F. Better safe than sorry.
- Let the glaze reduce properly. If the glaze is too thin, it will slide right off the wings. Let it bubble until it coats the back of a spoon. If it gets too thick, add a teaspoon of water to loosen it up.
I once forgot to flip the wings halfway through cooking, and the bottoms came out pale and soft while the tops were perfectly crispy. Learn from my mistake—set a timer for the flip, and do not skip it.
Variations & Adaptations
One of the best things about this recipe is how easy it is to tweak. Here are some variations I have tried and loved:
- Spicy Honey Garlic Wings: Add 1-2 teaspoons of sriracha or gochujang to the glaze for a kick of heat. The sweet-spicy combo is addictive. I make this version when I want something with a little more punch.
- Gluten-Free Option: Use tamari or coconut aminos instead of soy sauce, and make sure your baking powder is gluten-free (most are, but check the label). Everything else is naturally gluten-free.
- Oven-Baked Version: If you do not have an air fryer, bake the wings on a wire rack set over a baking sheet at 425°F for 40-45 minutes, flipping halfway. The texture will be slightly different, but the flavor is still fantastic. I have done this when my air fryer was too small for a big batch.
- Lemon Garlic Twist: Add the zest of one lemon and a tablespoon of lemon juice to the glaze. It brightens up the flavor and cuts through the richness. Perfect for summer cookouts.
- Low-Sugar Version: Swap the honey for a sugar-free honey alternative or use 2 tablespoons of honey and 2 tablespoons of sugar-free maple syrup. The glaze will be slightly thinner, so let it reduce a bit longer.
Personally, I love the spicy honey garlic version the most. I add a teaspoon of sriracha and a pinch of cayenne to the glaze, and it turns into something truly special. My brother, the one who called me in a panic, now makes this version every time he hosts game night.
Serving & Storage Suggestions
These wings are best served immediately, straight out of the bowl while the skin is still crispy and the glaze is sticky. But here is how to handle leftovers and make the most of them.
- Serving temperature: Serve hot, right after tossing with the glaze. If you are making a big batch, keep them warm in a 200°F oven on a wire rack for up to 30 minutes.
- Presentation: Arrange the wings on a platter and sprinkle with sesame seeds and green onions. Serve with extra glaze on the side for dipping, plus celery sticks and carrot sticks for crunch. A side of ranch or blue cheese dressing is never a bad idea.
- Complementary dishes: These wings pair beautifully with a fresh pesto tortellini salad for a complete meal, or with crispy sheet pan honey mustard chicken if you are feeding a crowd. For drinks, an ice-cold beer or a crisp white wine like Sauvignon Blanc works perfectly.
- Storage: Store leftover wings in an airtight container in the refrigerator for up to 4 days. The skin will soften, but the flavor will still be great. Reheat in the air fryer at 375°F for 3-4 minutes to bring back some of the crisp.
- Freezing: You can freeze the cooked wings (without the glaze) for up to 3 months. Place them on a baking sheet in a single layer, freeze until solid, then transfer to a freezer bag. When ready to use, reheat in the air fryer at 375°F for 5-6 minutes, then toss with freshly made glaze.
- Flavor development: The wings are best fresh, but the glaze actually deepens in flavor after a day in the fridge. If you are meal prepping, cook the wings and store the glaze separately, then combine when reheating.
Nutritional Information & Benefits
Here is the approximate nutritional breakdown for one serving (about 4-5 wings, based on 4 servings total):
| Nutrient | Amount |
|---|---|
| Calories | 385 |
| Protein | 28g |
| Fat | 18g |
| Saturated Fat | 5g |
| Carbohydrates | 24g |
| Sugar | 18g |
| Fiber | 0g |
| Sodium | 820mg |
Chicken wings are a good source of protein, selenium, and B vitamins, which support energy metabolism and immune function. The honey provides natural sugars and small amounts of antioxidants, while the garlic offers allicin, a compound known for its anti-inflammatory properties. This recipe is naturally dairy-free and can be made gluten-free with a simple swap. If you are watching your sodium, use low-sodium soy sauce and reduce the added salt in the coating.
I personally love that this air fryer version cuts down on oil compared to deep-fried wings, making it a lighter option that still delivers on flavor and texture. It is comfort food you can feel good about eating.
Conclusion
These crispy air fryer honey garlic chicken wings are the kind of recipe that makes you look forward to dinner. They are quick enough for a weeknight, impressive enough for guests, and delicious enough to make you forget you ever ordered takeout. The combination of shatteringly crispy skin and sticky, savory-sweet glaze is honestly hard to beat.
I hope you give these a try and make them your own. Maybe you will add extra garlic, or a splash of lime, or a handful of red pepper flakes. That is the beauty of a good recipe—it gives you a solid foundation and lets you play. If you make them, I would love to hear how they turned out. Drop a comment below and let me know your favorite variation, or tag me in your photos if you share them online.
Until next time, happy cooking. And remember—always save room for wings.
Frequently Asked Questions
Can I use frozen chicken wings in the air fryer?
Yes, but you will need to thaw them completely first and pat them very dry. Frozen wings release too much water as they cook, which prevents the skin from getting crispy. Thaw them overnight in the fridge, then proceed with the recipe as written.
Why are my wings not crispy in the air fryer?
The most common reasons are overcrowding the basket, not drying the wings thoroughly, or skipping the cornstarch coating. Make sure your wings are in a single layer with space between them, and dry them with paper towels until they feel tacky to the touch.
Can I make the glaze ahead of time?
Absolutely. The glaze can be made up to a week in advance and stored in an airtight container in the refrigerator. Reheat it gently on the stove or in the microwave before tossing with the wings. You may need to add a splash of water to thin it out if it thickens too much.
How do I reheat leftover wings without losing crispiness?
The air fryer is your best friend here. Reheat at 375°F for 3-4 minutes. Avoid the microwave—it will make the skin soggy and rubbery. If you do not have an air fryer, reheat in a 400°F oven on a wire rack for 5-7 minutes.
Can I use chicken thighs or drumsticks instead of wings?
Yes, but cooking times will vary. Chicken thighs and drumsticks are thicker and denser, so they will need about 5-8 minutes more cooking time at 380°F. Use a meat thermometer to check for doneness—165°F for white meat, 175°F for dark meat. The glaze works beautifully on any cut of chicken.
Pin This Recipe!
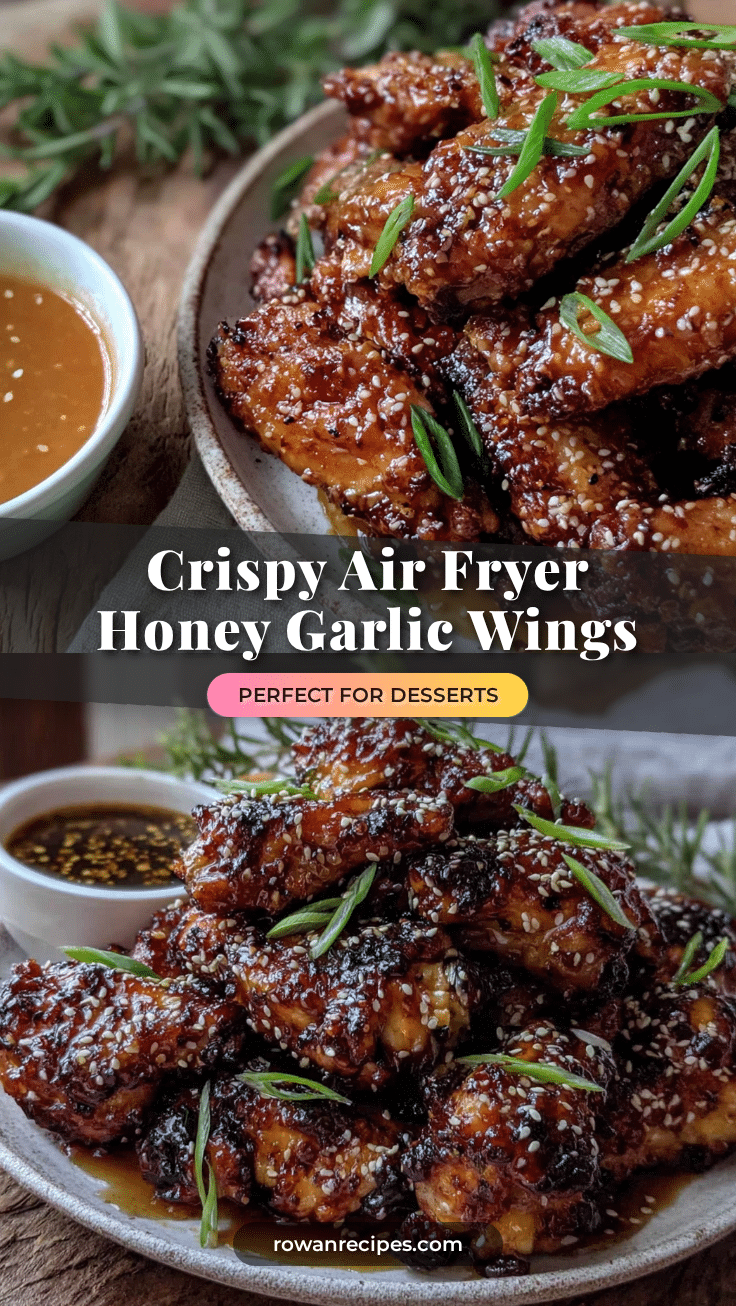
Crispy Air Fryer Honey Garlic Chicken Wings Easy Recipe
These crispy air fryer honey garlic chicken wings are quick, easy, and perfect for game day or a weeknight dinner. The skin shatters when you bite into it, and the sticky, savory-sweet glaze is absolutely addictive.
- Prep Time: 15 minutes
- Cook Time: 22 minutes
- Total Time: 37 minutes
- Yield: 4 servings 1x
- Category: Appetizer
- Cuisine: American
Ingredients
- 2 lbs chicken wings, separated into drumettes and flats
- 2 tablespoons cornstarch
- 1 teaspoon baking powder
- 1 teaspoon fine sea salt
- ½ teaspoon garlic powder
- ¼ teaspoon freshly ground black pepper
- ⅓ cup honey
- 3 tablespoons low-sodium soy sauce
- 4 cloves garlic, minced
- 1 tablespoon rice vinegar
- 1 teaspoon sesame oil (optional)
- 1 teaspoon cornstarch mixed with 2 teaspoons water (for slurry)
- 1 tablespoon toasted sesame seeds (for garnish)
- 2 green onions, thinly sliced (for garnish)
- Pinch of red pepper flakes (for garnish, optional)
Instructions
- Pat the chicken wings completely dry with paper towels. For best results, let them sit uncovered on a plate in the fridge for 30 minutes to dry out further.
- In a large mixing bowl, whisk together the cornstarch, baking powder, salt, garlic powder, and black pepper until no clumps remain.
- Add the dried wings to the bowl and toss with your hands until every piece is evenly coated. Shake off any excess coating.
- Preheat the air fryer to 380°F (193°C) for 3-5 minutes.
- Place the wings in a single layer in the air fryer basket, leaving space between each wing. Do not overcrowd; cook in batches if needed.
- Air fry at 380°F for 12 minutes without opening the basket.
- After 12 minutes, flip each wing using tongs. Increase the temperature to 400°F (204°C) and cook for another 8-10 minutes, until the skin is golden brown and crispy and the internal temperature reaches 165°F (74°C).
- While the wings cook, make the glaze: In a small saucepan, combine honey, soy sauce, minced garlic, rice vinegar, and sesame oil. Bring to a simmer over medium heat, stirring occasionally. Let it bubble gently for 3-4 minutes until slightly thickened. Stir in the cornstarch slurry and cook for 30 seconds until glossy. Remove from heat.
- Once the wings are done, transfer them to a clean bowl. Pour the warm glaze over the top and toss gently with tongs until every wing is coated.
- Sprinkle with toasted sesame seeds, sliced green onions, and a pinch of red pepper flakes if desired. Serve immediately.
Notes
The glaze will soften the skin slightly, but that’s part of the magic. For extra crispy skin, serve the glaze on the side for dipping instead of tossing. If you don’t have an air fryer, bake at 425°F on a wire rack over a baking sheet for 40-45 minutes, flipping halfway.
Nutrition
- Serving Size: 4-5 wings
- Calories: 385
- Sugar: 18
- Sodium: 820
- Fat: 18
- Saturated Fat: 5
- Carbohydrates: 24
- Protein: 28
Keywords: air fryer chicken wings, honey garlic wings, crispy wings, easy chicken wings, game day appetizer


