November rain streaked the kitchen window, and I was on my third cup of tea, watching my youngest wipe her nose on her sleeve for the fifth time in an hour. That familiar dread crept in—the one every parent knows, the one that comes with the sound of a congested cough echoing through a quiet house. I reached for another box of tissues, but what I really wanted was something that felt less like surrender and more like standing my ground. That’s when I remembered the dark purple jars my friend Mara pressed into my hands last winter, muttering something about “elderberry magic” before dashing off to her car. I had tucked them away, skeptical but desperate. That night, after a tablespoon each, something shifted. Not a miracle cure, but a quiet turning of the tide. The coughs spaced out. Sleep came easier. And I found myself researching how to make my own batch before the bottle ran dry.
This homemade elderberry immune syrup became my cold-weather anchor. It’s not a medicine cabinet replacement—let’s be clear about that—but it is a ritual I trust. A slow simmer of deep purple berries, ginger’s warmth, cinnamon’s sweetness, and raw honey’s golden promise. Every fall, when the first chill hits the air, I find myself pulling out the same heavy pot, breathing in that earthy, almost wine-like scent as the berries release their color into the water. It stains my fingers for days, and honestly? I kind of love that. It feels like proof that something real is happening in my kitchen.
There’s no urgency here. No rush to bottle it up and move on. Making elderberry syrup asks you to slow down, to pay attention to the way the liquid darkens and thickens, to trust that the process matters as much as the result. And when you finally pour that deep, jewel-toned syrup into a clean jar, you’re holding more than a recipe. You’re holding a quiet promise to yourself and your family that you’ll be ready—not with panic, but with patience and a spoonful of something good.
Why You’ll Love This Recipe
After three seasons of tweaking, testing on friends, and even converting my brother-in-law (a man who once called herbal remedies “fancy leaf water”), I can tell you exactly why this version sticks. It’s not just about the ingredients—it’s about how they come together without fuss or fancy equipment.
- Simple Ingredients, Real Results: You don’t need a specialty store or a herbalist’s license. Dried elderberries, fresh ginger, cinnamon sticks, cloves, and raw honey—that’s it. Most of these are probably in your pantry already, or at least within a quick grocery run.
- No Fussy Techniques: This isn’t a precise baking project. You simmer, you strain, you stir in honey. That’s the whole dance. No candy thermometers, no sterilizing dozens of jars under strict conditions (though clean jars matter, obviously).
- Kid-Tested, Parent-Approved: My kids actually ask for this. They call it “purple syrup” and treat it like a treat, not a chore. The honey and cinnamon do the heavy lifting on flavor, masking any bitterness from the berries.
- Cost-Effective: One batch costs a fraction of what you’d pay for a small bottle at the health food store. And you control exactly what goes in it—no preservatives, no artificial anything.
- Freezer-Friendly: Make a double batch in fall, freeze half in ice cube trays, and pop out a cube whenever someone starts sniffling. It’s like having insurance in your freezer.
This syrup has become my go-to gift for new parents, stressed-out coworkers, and anyone going through a rough season. It says “I care” without needing words. And honestly, watching someone taste it for the first time—that surprised look when they realize it actually tastes good—never gets old.
What Ingredients You Will Need
Every ingredient here pulls its weight. There’s no filler, no weird extras you’ll use once and forget about. Let me walk you through what you’ll need and why each one matters.
- Dried Elderberries (1 cup / about 140g): The star of the show. These tiny dark berries are packed with antioxidants and have been used for centuries in traditional remedies. I buy mine from a trusted online supplier—Mountain Rose Herbs is my go-to for consistency. Look for deep purple-black berries that smell slightly sweet and earthy. Avoid any that look dusty or faded.
- Fresh Ginger (2-inch piece, sliced thin): Ginger brings warmth and a gentle kick. It’s also known for its own immune-supporting properties. I don’t bother peeling it—just wash it well and slice it into thin coins. The skin adds a bit of earthiness that I actually like.
- Cinnamon Sticks (2 whole): Cinnamon adds sweetness without sugar and brings a cozy, familiar flavor. I use Ceylon cinnamon when I can find it—it’s milder and more floral than the more common Cassia variety. But honestly, whatever you have works.
- Whole Cloves (1 teaspoon): A little goes a long way here. Cloves add depth and a tiny bit of spice warmth. Don’t skip them—they round out the flavor in a way ground cloves just can’t replicate.
- Raw Honey (1 cup / about 340g): This is your sweetener and your preservative. Raw, unfiltered honey retains its natural enzymes and beneficial properties. I get mine from a local beekeeper, but any good-quality raw honey works. Important: Never add honey to boiling liquid—it destroys those good enzymes. Let the syrup cool first.
- Filtered Water (4 cups / 960ml): Tap water can contain chlorine and other minerals that might affect flavor. Filtered water gives you a cleaner taste. If you only have tap water, let it sit out for an hour before using to let some of the chlorine dissipate.
A note on substitutions: If you’re avoiding honey, you can use maple syrup or agave, but the shelf life will be shorter. For a sugar-free version, try monk fruit sweetener—though the texture will be thinner. And if you can’t find dried elderberries, you can use fresh ones in season, but you’ll need to adjust the cooking time and water ratio (fresh berries have more water content).
Equipment Needed
You don’t need a fancy kitchen setup. Here’s what I use every time:
- Medium Heavy-Bottomed Pot (3-4 quart): A stainless steel or enameled pot works best. Avoid aluminum—it can react with the berries and leave a metallic taste. I use my trusty Le Creuset, but a Cuisinart stainless pot does the job just fine.
- Fine-Mesh Strainer or Cheesecloth: You need something to catch all those tiny berry bits and spice pieces. A fine-mesh strainer works well; layering it with a double thickness of cheesecloth gives you an even clearer syrup. I’ve used a clean, thin kitchen towel in a pinch—just be prepared for purple stains.
- Glass Jars or Bottles: Mason jars work perfectly. I use 8-ounce or 16-ounce wide-mouth jars. Make sure they’re thoroughly washed in hot soapy water and completely dry before filling. I run mine through the dishwasher on the sanitize cycle.
- Wooden Spoon or Silicone Spatula: For stirring. Nothing fancy.
- Measuring Cups and Spoons: Standard set.
- Funnel (optional but helpful): Makes pouring into jars much less messy. I have a small stainless steel funnel I use just for syrups.
That’s it. No dehydrator, no pressure canner, no specialty gadgets. If you can boil water and pour it through a strainer, you can make this syrup.
Preparation Method
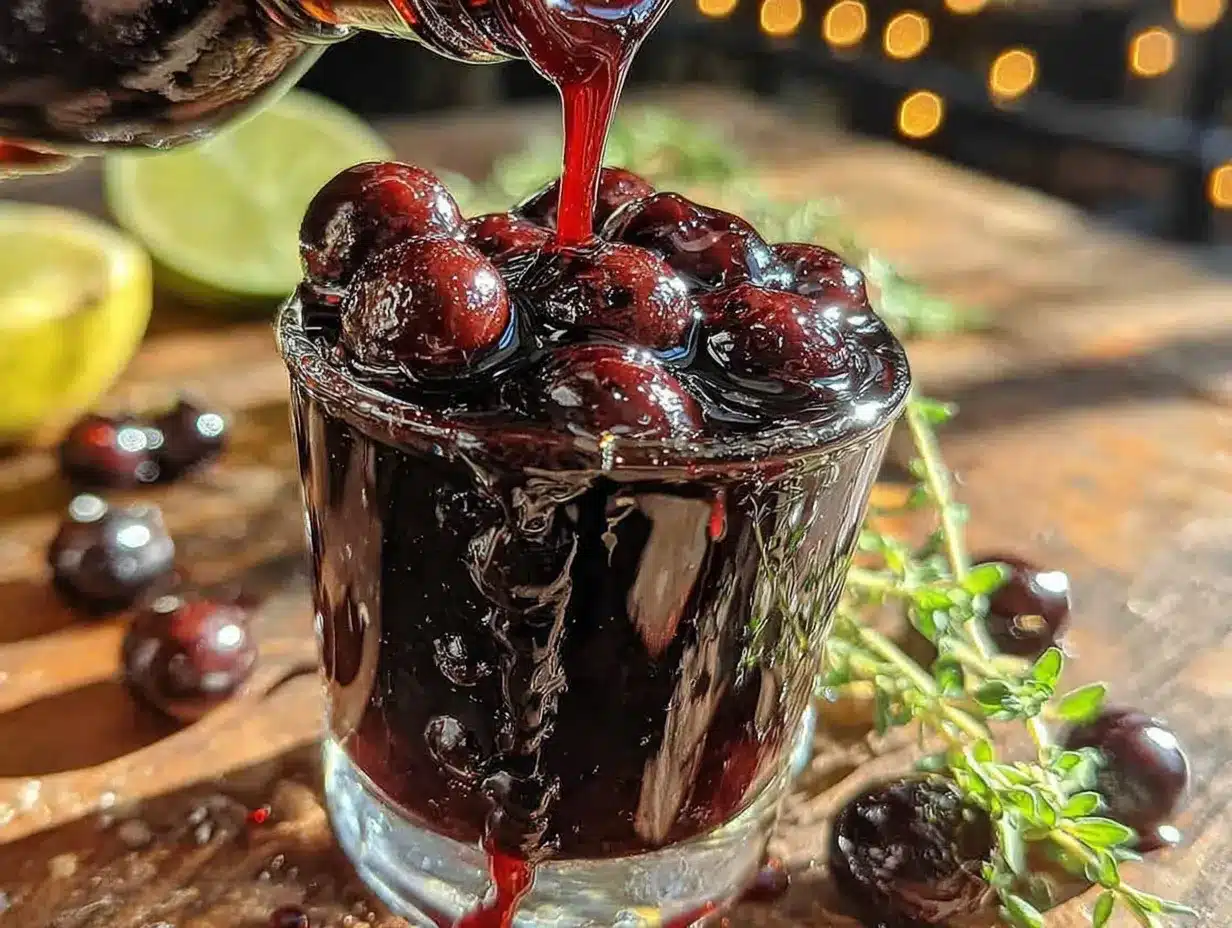
Let’s get to it. This is the part where the kitchen starts smelling like a cozy autumn cabin, and everything feels right with the world.
- Combine berries and water: Add the dried elderberries, sliced ginger, cinnamon sticks, and whole cloves to your pot. Pour in the 4 cups of filtered water. Give everything a gentle stir—the berries will float at first, and that’s fine.
- Bring to a boil, then simmer: Set the pot over medium-high heat and bring it to a gentle boil. You’ll see small bubbles breaking the surface, and the water will start taking on a deep purple hue almost immediately. Once it reaches a boil, reduce the heat to low and let it simmer uncovered for about 30-40 minutes. The liquid should reduce by about half—you’re aiming for roughly 2 cups of concentrated liquid. Set a timer, but also trust your eyes. The color should be deep, almost black-purple.
- Mash the berries (optional but recommended): About 20 minutes in, take a potato masher or the back of a wooden spoon and gently press down on the berries. This helps release more of their goodness. You don’t need to pulverize them—just a few good presses. I always forget to do this the first batch of the season, and the syrup is noticeably thinner. Don’t be like me.
- Strain the mixture: Place your fine-mesh strainer (lined with cheesecloth if you have it) over a large bowl or heatproof measuring cup. Carefully pour the hot liquid through. Let it sit and drip for a few minutes—resist the urge to press down on the solids, as that can make the syrup cloudy. I usually let it drain while I wash the pot.
- Cool the liquid: Let the strained liquid cool to room temperature. This takes about 30-45 minutes. You want it warm but not hot—test it with a clean finger. If it feels hot, it’s too soon. This step is crucial because hot liquid will damage the beneficial properties of the raw honey.
- Stir in the honey: Once the liquid is cool, add the 1 cup of raw honey. Whisk gently but thoroughly until the honey is completely dissolved. The syrup will look glossy and smooth. Taste it here—if you want it sweeter, add a bit more honey. If you want more ginger kick, you can add a drop of ginger juice (though I’ve never needed to).
- Bottle and store: Using your funnel, pour the syrup into clean, dry jars. Leave about ½ inch of headspace at the top. Seal tightly and label with the date. I write “Elderberry Syrup – [Month Year]” on a piece of masking tape and stick it on the lid. It feels official and satisfying.
A few notes from my own trial-and-error: If your syrup seems too thin after cooling, don’t panic. It will thicken slightly as it sits in the fridge. If it’s too thick, you can stir in a tablespoon of warm water at a time until it reaches your desired consistency. And if you forget to let it cool before adding honey (I’ve done this), you’ll end up with a thinner syrup and slightly less honey flavor—still usable, just not as rich.
Cooking Tips & Techniques
Over the years, I’ve made plenty of mistakes so you don’t have to. Here’s what I’ve learned:
- Don’t over-boil: A rolling boil is too aggressive for elderberries. It can make the syrup bitter and destroy some of the beneficial compounds. Keep it at a gentle simmer—just occasional bubbles breaking the surface.
- Watch the reduction: The goal is to reduce the liquid by about half. If you reduce it too much, the syrup will be overly concentrated and almost syrupy-thick in a way that’s hard to pour. If you don’t reduce it enough, it’ll be watery and won’t keep as well. I use a liquid measuring cup to check—aim for about 2 cups of strained liquid before adding honey.
- Strain twice for clarity: If you want a crystal-clear syrup (I don’t mind a bit of sediment, but some people prefer it clear), strain the liquid once through a fine-mesh strainer, then again through a coffee filter or a double layer of cheesecloth. It takes longer but gives you that beautiful, jewel-like appearance.
- Use a kitchen scale for consistency: Ingredients like dried elderberries can vary in volume depending on how they’re packed. Weighing them ensures you get the same results every time. I use a simple digital scale—best investment I’ve made for my kitchen.
- Timing is flexible: This isn’t baking. If you simmer it for 35 minutes instead of 30, it’ll be fine. If you get distracted and let it go for 45, it’ll be more concentrated but still good. The syrup is forgiving, which is part of why I love making it.
Variations & Adaptations
Once you’ve made the basic version a few times, you might want to play around. Here are some variations I’ve tried and loved:
- Spiced Chai Version: Add 2 star anise pods, 4 cardamom pods (lightly crushed), and a strip of orange zest along with the other spices. The result is a syrup that tastes like a warm hug in a bottle. I make this version for holiday gifts.
- Low-Sugar Version: Skip the honey entirely and use ½ cup of monk fruit sweetener or stevia glycerite instead. The syrup will be thinner and won’t keep as long in the fridge (about 2 weeks), but it works well for those watching their sugar intake. I’ve also used a combination of honey and monk fruit to cut the sugar without losing the preservative benefits.
- Extra Immune Boost: Add 1 tablespoon of dried echinacea root or 1 teaspoon of astragalus powder along with the elderberries. I do this during cold and flu season. The flavor gets a bit more earthy, but the honey balances it out.
- Kid-Friendly Version: Reduce the ginger to a 1-inch piece and use 3 cinnamon sticks instead of 2. The extra cinnamon masks any bitterness, and kids seem to love the sweeter, milder flavor. My niece calls this “purple magic.”
- Alcoholic Tincture Variation: If you want a shelf-stable version that doesn’t need refrigeration, replace the water with 80-proof vodka or brandy and skip the simmering step. Let the berries and spices steep in the alcohol for 4-6 weeks, shaking daily, then strain and sweeten with honey. This is a completely different product—more of a medicinal tincture—but it has its fans.
I once tried adding turmeric to the syrup, thinking it would be a brilliant anti-inflammatory boost. It was… not good. The flavor was medicinal in a way that even honey couldn’t fix. So maybe skip that one unless you really love turmeric.
Serving & Storage Suggestions
- How to take it: Adults take 1 tablespoon daily for maintenance, or 2-3 tablespoons at the first sign of a cold. For kids (ages 1 and up), give 1 teaspoon daily. I take mine straight off a spoon, but you can also stir it into warm tea, drizzle it over yogurt or oatmeal, or even use it as a pancake syrup in a pinch. It’s delicious in a hot toddy too—just saying.
- Refrigeration: Store the syrup in the refrigerator. It will keep for 2-3 months if you used raw honey and kept everything clean. I’ve pushed it to 4 months without issues, but the flavor starts to fade after that.
- Freezing: Pour the syrup into ice cube trays and freeze. Once solid, pop the cubes into a freezer bag. They’ll keep for up to a year. Thaw a cube in the fridge overnight or add it directly to hot tea. This is my favorite method for having syrup on hand year-round without worrying about spoilage.
- Signs it’s time to toss: If you see mold, smell anything off, or notice the syrup has fermented (bubbles, fizzy texture, alcohol smell), it’s time to make a new batch. Trust your nose—if it smells like wine or vinegar, it’s gone.
- Flavor development: The syrup actually gets better after a week in the fridge. The flavors meld and mellow, and the honey’s sweetness becomes more integrated. I always try to make it a week before I plan to use it regularly.
Nutritional Information & Benefits
I’m not a doctor, and this syrup isn’t a substitute for medical advice. But here’s what I’ve learned from my own research and experience:
Elderberries are rich in antioxidants called anthocyanins—the same compounds that give blueberries their deep color and health benefits. They’re also a good source of vitamin C (though much of that can be lost during simmering), dietary fiber, and flavonoids that may support immune function.
One tablespoon of this syrup contains approximately:
- Calories: 45-50
- Sugar: 10-12g (from honey)
- Vitamin C: 2-4% of daily value
- Small amounts of iron, potassium, and calcium
The raw honey adds natural enzymes and prebiotics that support gut health—and since so much of our immune system lives in our gut, that connection matters. Ginger is known for its anti-inflammatory properties, and cinnamon may help regulate blood sugar.
Important considerations: This syrup contains honey, so it’s not suitable for infants under 1 year old due to the risk of botulism. If you’re pregnant, nursing, or have an autoimmune condition, check with your healthcare provider before adding elderberry to your routine. Some people with autoimmune conditions may need to avoid elderberries as they can stimulate the immune system.
Conclusion
This homemade elderberry immune syrup has become more than just a recipe in my kitchen—it’s a seasonal ritual that marks the turning of the year. Every batch reminds me that good things take time, that simple ingredients can be powerful, and that taking care of ourselves doesn’t have to be complicated or expensive.
I hope you give this a try, whether you’re a seasoned herbalist or someone who’s never simmered a berry in your life. Start with the basic recipe, then make it your own. Add more ginger if you like the kick. Use less honey if you prefer it tart. Make a double batch and share it with someone who needs a little extra care this season.
I’d love to hear how your batch turns out. Drop a comment below and let me know what variations you tried, or tag me in your photos if you share them online. And if you’re looking for other cozy, comforting recipes to get you through the colder months, you might enjoy this cozy stuffed pepper soup or these easy strawberry rhubarb crisp bars for when you need something sweet. Happy simmering, friends—and here’s to a season of good health and good food.
Frequently Asked Questions
Can I use fresh elderberries instead of dried?
Yes, but you’ll need to adjust the recipe. Fresh elderberries have more water content, so use 2 cups of fresh berries for every 1 cup of dried, and reduce the water by about ½ cup. Also, fresh elderberries must be cooked—never eat them raw, as they can cause nausea and digestive upset.
How long does this syrup last in the fridge?
Properly stored in a clean, airtight jar, your elderberry syrup will keep for 2-3 months in the refrigerator. If you see any mold or notice an off smell, toss it and make a fresh batch. Freezing extends the shelf life to about a year.
Can I make this without honey?
Absolutely. You can substitute maple syrup, agave nectar, or a sugar-free sweetener like monk fruit. Just keep in mind that honey acts as a natural preservative, so syrups made with other sweeteners won’t last as long—plan to use them within 2-3 weeks, or freeze them.
Is this safe for children?
Yes, for children over 1 year old (due to the honey). For kids ages 1-6, give 1 teaspoon daily for maintenance. For older children, 1-2 teaspoons is fine. Always check with your pediatrician before starting any new supplement, especially if your child has health conditions or takes medications.
Can I use ground spices instead of whole?
You can, but I don’t recommend it. Ground spices will make your syrup cloudy and can leave a gritty texture. If you only have ground spices, use half the amount and strain through a coffee filter or very fine cheesecloth to remove as much sediment as possible. The flavor will be slightly different, but it’ll still work.
Pin This Recipe!
Best Homemade Elderberry Immune Syrup Recipe
A simple, slow-simmered elderberry syrup made with dried elderberries, ginger, cinnamon, cloves, and raw honey. This immune-supporting syrup is a cozy, kid-friendly ritual that’s easy to make and perfect for cold-weather wellness.
- Prep Time: 10 minutes
- Cook Time: 40 minutes
- Total Time: 1 hour 30 minutes (including cooling time)
- Yield: About 2 cups (32 servings of 1 tablespoon each) 1x
- Category: Condiment / Wellness Syrup
- Cuisine: American / Herbal
Ingredients
- 1 cup (about 140g) dried elderberries
- 2-inch piece fresh ginger, sliced thin
- 2 whole cinnamon sticks
- 1 teaspoon whole cloves
- 1 cup (about 340g) raw honey
- 4 cups (960ml) filtered water
Instructions
- Combine berries and water: Add the dried elderberries, sliced ginger, cinnamon sticks, and whole cloves to a medium heavy-bottomed pot. Pour in the 4 cups of filtered water. Give everything a gentle stir.
- Bring to a boil, then simmer: Set the pot over medium-high heat and bring it to a gentle boil. Once it reaches a boil, reduce the heat to low and let it simmer uncovered for about 30-40 minutes, until the liquid reduces by about half (roughly 2 cups).
- Mash the berries (optional but recommended): About 20 minutes in, use a potato masher or the back of a wooden spoon to gently press down on the berries to release more flavor.
- Strain the mixture: Place a fine-mesh strainer (lined with cheesecloth if available) over a large bowl or heatproof measuring cup. Carefully pour the hot liquid through. Let it sit and drip for a few minutes.
- Cool the liquid: Let the strained liquid cool to room temperature, about 30-45 minutes. It should be warm but not hot.
- Stir in the honey: Once the liquid is cool, add the 1 cup of raw honey. Whisk gently until the honey is completely dissolved.
- Bottle and store: Using a funnel, pour the syrup into clean, dry glass jars, leaving about ½ inch of headspace. Seal tightly and label with the date.
Notes
Do not add honey to boiling liquid as it destroys beneficial enzymes. Let syrup cool completely before adding honey. For a clearer syrup, strain twice. Syrup thickens slightly in the fridge. Not suitable for infants under 1 year due to honey. If using fresh elderberries, use 2 cups fresh for every 1 cup dried and reduce water by ½ cup; fresh berries must be cooked thoroughly.
Nutrition
- Serving Size: 1 tablespoon
- Calories: 4550
- Sugar: 1012
- Sodium: 2
- Carbohydrates: 12
Keywords: elderberry syrup, immune syrup, homemade elderberry, elderberry recipe, cold remedy, natural immune support, elderberry with honey, elderberry ginger syrup


