I figured mummy hot dog crescent rolls were just a cute Halloween novelty — something you throw together for the kids that tastes like, well, canned dough and hot dogs. It took about one bite of these crispy, buttery, golden little guys for that assumption to fall apart completely. I was standing in my kitchen last October, the counter dusted with flour, trying to figure out a snack that would actually get eaten. Not the kind that sits on the platter getting cold while everyone grabs candy. I wanted something that felt like a treat but was still, you know, actual food.
The first batch came out uneven — some mummies had too many dough strips and looked like they were wearing sweaters, others had too few and looked suspiciously like naked hot dogs. But that second batch? That’s when it clicked. The trick is in how you wrap them. Not too tight, not too loose. Just enough to look wrapped up but with a little gap for the “face.” And honestly? The way the crescent dough puffs up in the oven, turning all golden and flaky, it makes these feel way more special than the sum of their parts.
These mummy hot dog crescent rolls have become our official Halloween tradition. They’re the snack that gets devoured before the costume parade even starts. And the best part? They come together in about 20 minutes flat. No stress, no fancy ingredients, just pure crispy, salty, buttery goodness that somehow makes everyone smile. Even the adults sneak a few.
Why You’ll Love This Recipe
Let me tell you why these little mummies have earned a permanent spot in my Halloween rotation. I’ve tested them at kid parties, adult get-togethers, and even a Halloween movie marathon where everyone was too busy eating to talk.
- Quick & Easy: From fridge to table in under 25 minutes. Seriously. You need about 5 minutes of prep, 12 minutes of baking, and that’s it. Perfect for when the doorbell starts ringing and you realize you forgot to make snacks.
- Simple Ingredients: You probably already have everything in your fridge. Crescent rolls, hot dogs, a little butter, and some mustard or ketchup for the eyes. No special trips to the store required.
- Perfect for Halloween Parties: These are the first thing to disappear at any gathering. Kids love the mummy look, and adults love that they’re actually tasty. Not just cute — genuinely good.
- Crowd-Pleaser: I’ve never met a kid who didn’t gobble these up. And the adults? They’ll stand by the platter and eat three before anyone notices. They’re salty, buttery, and satisfying in that comfort-food way.
- Unbelievably Delicious: The crescent dough gets all golden and flaky on the outside while the hot dog stays juicy inside. The butter brush on top adds this subtle richness that makes them taste bakery-made.
What makes these different from every other mummy dog recipe out there? It’s the wrapping technique. Most recipes tell you to cut the dough into strips and wrap haphazardly. I figured out that cutting the dough into even strips and leaving a small gap for the “face” gives you a much cleaner, cuter result. Plus, brushing them with melted butter before baking gives them that gorgeous golden color that makes them look like they came from a fancy bakery, not your 20-minute kitchen session.
These aren’t just cute — they’re the kind of snack that makes you feel like a Halloween hero. Your kids will think you’re a culinary genius, and you’ll get to enjoy the party without sweating over a complicated recipe.
What Ingredients You Will Need
This recipe uses simple, pantry-friendly ingredients to deliver that perfect combination of flaky, buttery dough and juicy hot dog goodness. Most of these are probably already in your kitchen, which is exactly how I like it.
- 1 can (8 oz) refrigerated crescent roll dough — I prefer Pillsbury for the flakiest texture, but any brand works. Make sure it’s the sheet-style or the perforated triangles. If you get the triangles, just press the seams together before cutting.
- 8 hot dogs — Use your favorite brand. I like beef hot dogs for the best flavor, but turkey or chicken work great too. For a fun twist, try mini hot dogs or cocktail sausages for bite-sized mummies.
- 2 tablespoons unsalted butter, melted — This is the secret to that gorgeous golden color. Don’t skip it! The butter adds richness and helps the dough crisp up beautifully.
- 1 teaspoon garlic powder — Optional, but I love adding this to the melted butter for a savory kick. It gives the dough a subtle garlic flavor that pairs perfectly with the hot dogs.
- Mustard or ketchup for the eyes — You’ll use tiny dots for the mummy “eyes.” Yellow mustard gives a more traditional look, but ketchup works too. I’ve also used sriracha for a spicy version.
- Optional: Everything bagel seasoning or sesame seeds — Sprinkle these on top before baking for extra texture and flavor. Totally optional but highly recommended.
Ingredient Selection Tips: For the best results, use refrigerated crescent dough — not the frozen kind. The refrigerated version puffs up better and gives you that flaky, layered texture. If you’re using hot dogs, look for ones that are plump and juicy. I’ve found that all-beef hot dogs hold up better during baking and don’t get as wrinkly. For a healthier option, use turkey or chicken hot dogs — they work just as well.
Substitution Guidance: If you’re gluten-free, use gluten-free crescent dough or puff pastry sheets. For a dairy-free version, use vegan butter or olive oil for brushing. You can also swap the hot dogs for vegetarian sausages or cheese-stuffed sausages for a fun variation.
Equipment Needed
You don’t need much for this recipe, which is part of the beauty. Here’s what you’ll need:
- Baking sheet — A standard 13×18 inch sheet works perfectly. Line it with parchment paper for easy cleanup.
- Parchment paper or silicone baking mat — This prevents sticking and makes cleanup a breeze. I’ve forgotten this before and trust me, you don’t want to scrub baked-on dough.
- Sharp knife or pizza cutter — For cutting the crescent dough into strips. A pizza cutter gives cleaner edges, but a sharp knife works fine.
- Pastry brush — For brushing the melted butter on top. If you don’t have one, you can use a spoon or even your fingers (just wash your hands first).
- Small bowl — For the melted butter and garlic powder mixture.
- Toothpicks or skewers — For adding the mustard/ketchup eyes. A toothpick gives you tiny, precise dots.
If you don’t have a pastry brush, don’t stress. I’ve used a clean paintbrush in a pinch — just make sure it’s never been used for paint! A silicone brush is my favorite because it’s easy to clean and doesn’t shed bristles.
Preparation Method
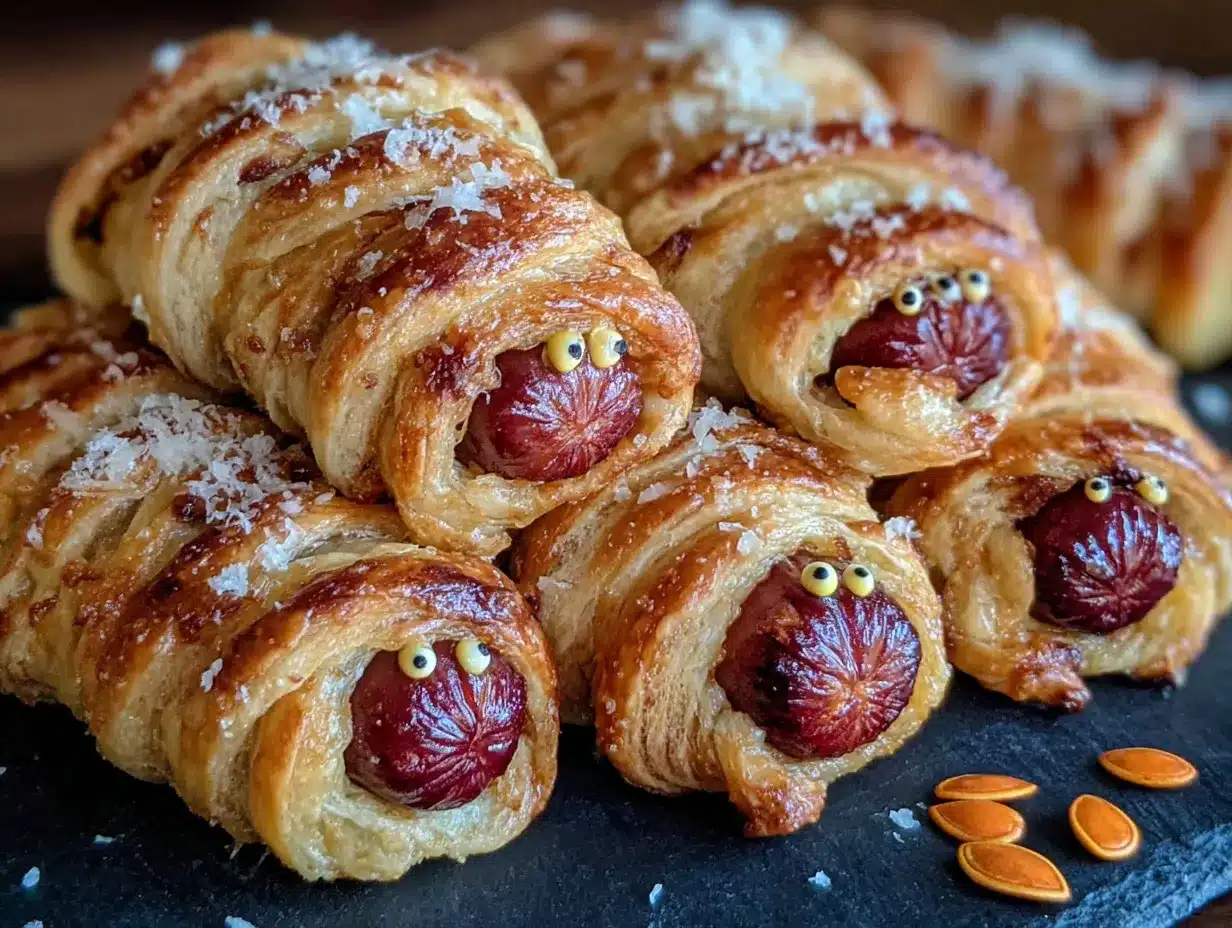
Let me walk you through this step by step. Trust me, once you make these once, you’ll have them memorized.
- Preheat your oven to 375°F (190°C). Line a baking sheet with parchment paper or a silicone mat. This is non-negotiable unless you enjoy scrubbing baked-on dough.
- Unroll the crescent dough onto a clean work surface. If you’re using the perforated triangles, press the seams together to form one large rectangle. If you’re using the sheet-style dough, you’re good to go.
- Cut the dough into strips using a sharp knife or pizza cutter. I like to cut the rectangle into 8 long strips, about 1 inch wide each. You want them thin enough to wrap around the hot dogs but thick enough to hold their shape. (Pro tip: if the strips are too thin, they’ll tear. Too thick, and the mummies look chunky.)
- Pat the hot dogs dry with a paper towel. This helps the dough stick better. If the hot dogs are wet, the dough can slide off during baking.
- Start wrapping: Take one strip of dough and wrap it around a hot dog at an angle, leaving a small gap at the top for the “face.” Don’t wrap too tightly — the dough needs room to puff up. Leave about 1/2 inch of the hot dog exposed at the top. This is where the eyes will go.
- Place the wrapped mummies on the prepared baking sheet, spacing them about 1 inch apart. They don’t spread much, but a little space helps them cook evenly.
- In a small bowl, mix the melted butter with the garlic powder (if using). Brush this mixture generously over each mummy. Don’t skimp — this is what gives them that gorgeous golden color and rich flavor.
- Bake for 12-14 minutes, or until the dough is golden brown and puffed. The hot dogs should be heated through. Keep an eye on them after 10 minutes — ovens vary, and you don’t want burnt mummies.
- Let them cool for 2-3 minutes on the baking sheet. This helps the dough set and makes them easier to handle.
- Add the eyes: Dip a toothpick into mustard or ketchup and make two tiny dots on the exposed hot dog at the top. You can also use candy eyes if you want them extra cute, but I prefer the classic mustard look.
Sensory Cues: When the mummies are done, the dough will be puffed and golden brown with darker spots on the edges. You’ll smell that buttery, baked-dough aroma filling your kitchen. The hot dogs will be plump and juicy. If you tap the dough, it should feel firm and slightly crispy on the outside.
Personal Tip: I always make a few extra because someone always eats one before the eyes go on. It’s a rule, apparently.
Cooking Tips & Techniques
I’ve made these mummy dogs at least a dozen times, and I’ve learned a few things the hard way. Let me save you the trouble.
The Dough Strip Width Matters. Too thin, and they tear when you wrap. Too thick, and the mummies look like they’re wearing winter coats. Aim for about 1 inch wide. If you’re using a pizza cutter, it’s easier to get even strips. I once used a butter knife and ended up with strips that looked like they’d been chewed by a puppy.
Don’t Overwrap. You want to see some dough and some hot dog. The gaps are what make them look like mummies. If you cover the whole thing, it’s just a hot dog in a bread blanket. Not as cute. Leave about 1/4 inch between each wrap.
The Butter Brush is Not Optional. I know it seems like an extra step, but that butter wash is what makes the dough turn golden and flaky. I skipped it once because I was in a hurry, and the mummies came out pale and sad-looking. Never again.
Watch the Oven. These go from golden to burnt really fast. Start checking at 10 minutes. If the tops are browning too quickly, tent them loosely with foil. I’ve had a batch turn into crispy charcoal because I got distracted by costume planning.
Let Them Rest. I know you want to eat them immediately, but letting them cool for 2-3 minutes makes a huge difference. The dough sets, the hot dogs stop steaming, and the mustard eyes don’t slide off. Trust me on this one.
Multitasking Tip: While the mummies are baking, set up your dipping sauces and prep the eyes. That way, as soon as they come out, you can add the eyes and serve immediately.
Variations & Adaptations
One of the best things about this recipe is how easy it is to customize. Here are some variations I’ve tried and loved:
- Cheesy Mummies: Before wrapping the hot dog, slice it lengthwise (not all the way through) and stuff a strip of cheddar or mozzarella cheese inside. Wrap as usual. The cheese gets all melty and oozes out a little — it’s incredible.
- Spicy Mummies: Use spicy Italian sausages instead of hot dogs, and add a pinch of cayenne pepper to the melted butter. Serve with sriracha mayo for dipping. These are my personal favorite for adult gatherings.
- Mini Mummies: Use cocktail sausages or mini hot dogs and cut the dough into thinner strips. Bake for 8-10 minutes instead of 12-14. Perfect for little hands or party platters.
- Veggie Mummies: Swap the hot dogs for vegetarian sausages or even cheese sticks. I’ve used mozzarella sticks before, and they’re amazing — the cheese gets all gooey inside the flaky dough.
- Breakfast Mummies: Use breakfast sausages instead of hot dogs, and brush the dough with maple syrup mixed into the melted butter. Serve with a side of scrambled eggs. It’s a Halloween morning tradition at our house.
- Gluten-Free Option: Use gluten-free crescent dough or puff pastry sheets. The texture is slightly different, but they still taste great.
I tried the cheesy version at a Halloween party last year, and they disappeared within minutes. People were standing by the oven waiting for the next batch. It was a little scary, honestly.
Serving & Storage Suggestions
These mummy hot dog crescent rolls are best served warm, right out of the oven. The dough is at its flakiest, the hot dogs are juicy, and the butter gives everything that irresistible golden sheen. I like to arrange them on a platter with a bowl of ketchup, mustard, and maybe some ranch dressing for dipping. They’re perfect for Halloween parties, movie nights, or just a fun weeknight dinner.
What to Serve With Them: These pair beautifully with a crispy mini corn dog muffins for a full Halloween snack spread. Add some veggie sticks, popcorn, and maybe a creamy no-bake strawberry cheesecake delight for dessert, and you’ve got a party.
Storage: If you have leftovers (unlikely, but possible), store them in an airtight container in the refrigerator for up to 3 days. The dough will soften slightly, but they’re still tasty.
Reheating: The best way to reheat them is in the oven or air fryer. Pop them in a 350°F (175°C) oven for 5-7 minutes, or in an air fryer at 350°F for 3-4 minutes. The microwave works in a pinch, but the dough will be soft instead of crispy. I don’t recommend it unless you’re in a hurry.
Freezer Instructions: You can freeze the unbaked mummies! Assemble them, place them on a baking sheet, and freeze until solid. Then transfer to a freezer bag. When you’re ready to bake, add 2-3 minutes to the baking time. No need to thaw first.
Flavor Development: Honestly, these are best fresh. The dough loses its magic after a day. But if you must store them, they’re still good — just not as spectacular.
Nutritional Information & Benefits
Let’s be real — these are a treat, not a health food. But here’s the approximate nutritional breakdown per mummy (based on one hot dog and one serving of dough):
| Nutrient | Amount Per Serving |
|---|---|
| Calories | 220-250 |
| Protein | 8-10g |
| Fat | 14-16g |
| Carbohydrates | 18-20g |
| Fiber | 0g |
| Sugar | 3-4g |
| Sodium | 500-600mg |
Health Benefits: Hot dogs provide protein, and the crescent dough gives you some carbs for energy. If you use turkey or chicken hot dogs, you’ll reduce the fat and calories. For a slightly healthier version, use low-fat crescent dough and turkey hot dogs. You can also add a side of veggie sticks or a simple salad to balance things out.
Dietary Considerations: This recipe contains gluten (crescent dough) and dairy (butter). For a gluten-free version, use gluten-free dough. For dairy-free, use vegan butter. Hot dogs may contain soy or other allergens, so check the label if needed.
Personal Perspective: Look, I’m not going to pretend these are a health food. They’re a fun, indulgent Halloween treat. But they’re also made with real ingredients — no weird additives or preservatives. And honestly, sometimes you just need a buttery, salty, satisfying snack that makes everyone smile. That’s what these are.
Conclusion
These easy mummy hot dog crescent rolls have become our Halloween tradition for a reason. They’re quick, they’re cute, and they’re genuinely delicious. Not just “cute for Halloween” delicious — like, actually good. The kind of snack you’ll find yourself making even when it’s not October.
I love that they’re so versatile. You can dress them up with cheese, spice them up with sriracha, or keep them classic with mustard eyes. They’re perfect for parties, movie nights, or just a fun dinner that makes everyone laugh. And the best part? They take less than 25 minutes from start to finish. No stress, no fuss, just pure buttery goodness.
If you make these, I’d love to hear how they turned out. Did you add cheese? Use spicy sausages? Make mini versions for the kids? Drop a comment below and let me know. And if you’re looking for more Halloween snack ideas, check out this crispy mini corn dog muffins recipe or these delicious peanut butter cup rice krispie treats for a sweet finish.
Happy Halloween, friends. May your mummies be golden, your eyes be mustardy, and your kitchen smell like butter and joy.
Frequently Asked Questions
Can I make these mummy hot dog crescent rolls ahead of time?
Yes! You can assemble them up to 24 hours in advance. Just wrap the hot dogs, place them on the baking sheet, cover with plastic wrap, and refrigerate. When you’re ready to bake, brush with butter and bake as directed. You might need to add 1-2 minutes to the baking time since they’ll be cold.
Can I use puff pastry instead of crescent dough?
Absolutely. Puff pastry gives you an even flakier, more buttery result. Just thaw it according to package instructions, cut it into strips, and wrap as usual. The baking time might be slightly longer — around 15-18 minutes — so keep an eye on them.
What can I use for the eyes besides mustard?
You’ve got options! Ketchup works great and gives a red-eyed monster look. Sriracha adds a spicy kick. You can also use candy eyes (the little white and black ones) for a super cute look, or even tiny dots of cream cheese mixed with a little food coloring. I’ve even used black sesame seeds in a pinch.
How do I keep the dough from tearing when wrapping?
This happens when the dough is too cold or the strips are too thin. Let the dough sit at room temperature for 5 minutes before cutting. Use a sharp knife or pizza cutter for clean edges. And don’t pull the dough too tight when wrapping — gentle tension is all you need.
Can I make these in an air fryer?
Yes! Preheat your air fryer to 350°F (175°C). Place the mummies in the basket in a single layer (you might need to work in batches). Cook for 8-10 minutes, or until golden brown. No need to flip them. The air fryer makes them extra crispy, which is a nice bonus.
Pin This Recipe!
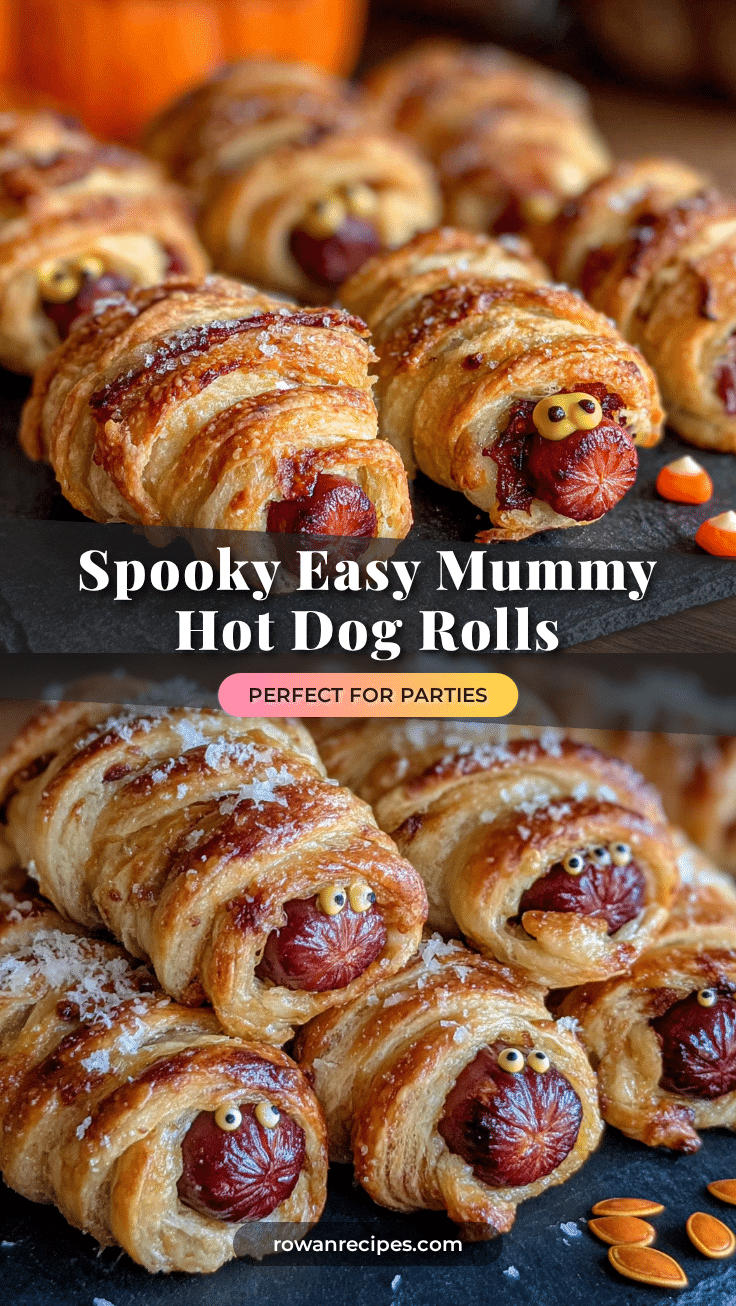
Easy Mummy Hot Dog Crescent Rolls: Best Halloween Snack
These crispy, buttery, golden mummy hot dog crescent rolls are the perfect Halloween snack. Quick to make with simple ingredients, they’re a crowd-pleaser that disappears before the costume parade even starts.
- Prep Time: 5 minutes
- Cook Time: 12-14 minutes
- Total Time: 20-25 minutes
- Yield: 8 servings 1x
- Category: Appetizer
- Cuisine: American
Ingredients
- 1 can (8 oz) refrigerated crescent roll dough
- 8 hot dogs
- 2 tablespoons unsalted butter, melted
- 1 teaspoon garlic powder (optional)
- Mustard or ketchup for the eyes
- Optional: Everything bagel seasoning or sesame seeds
Instructions
- Preheat your oven to 375°F (190°C). Line a baking sheet with parchment paper or a silicone mat.
- Unroll the crescent dough onto a clean work surface. If using perforated triangles, press the seams together to form one large rectangle.
- Cut the dough into strips using a sharp knife or pizza cutter. Cut the rectangle into 8 long strips, about 1 inch wide each.
- Pat the hot dogs dry with a paper towel to help the dough stick better.
- Take one strip of dough and wrap it around a hot dog at an angle, leaving a small gap at the top for the ‘face.’ Leave about 1/2 inch of the hot dog exposed at the top.
- Place the wrapped mummies on the prepared baking sheet, spacing them about 1 inch apart.
- In a small bowl, mix the melted butter with the garlic powder (if using). Brush this mixture generously over each mummy.
- Bake for 12-14 minutes, or until the dough is golden brown and puffed. The hot dogs should be heated through.
- Let them cool for 2-3 minutes on the baking sheet.
- Dip a toothpick into mustard or ketchup and make two tiny dots on the exposed hot dog at the top for eyes.
Notes
For best results, use refrigerated crescent dough (not frozen). Don’t overwrap the hot dogs – leave gaps for the mummy look. The butter wash is essential for golden color. Start checking at 10 minutes to prevent burning. Let rest 2-3 minutes before adding eyes. Can be assembled up to 24 hours in advance and refrigerated. Freeze unbaked mummies for up to 3 months.
Nutrition
- Serving Size: 1 mummy
- Calories: 235
- Sugar: 3.5
- Sodium: 550
- Fat: 15
- Saturated Fat: 6
- Carbohydrates: 19
- Protein: 9
Keywords: mummy hot dog, crescent rolls, Halloween snack, easy appetizer, kid-friendly, hot dog recipe, Halloween party food


