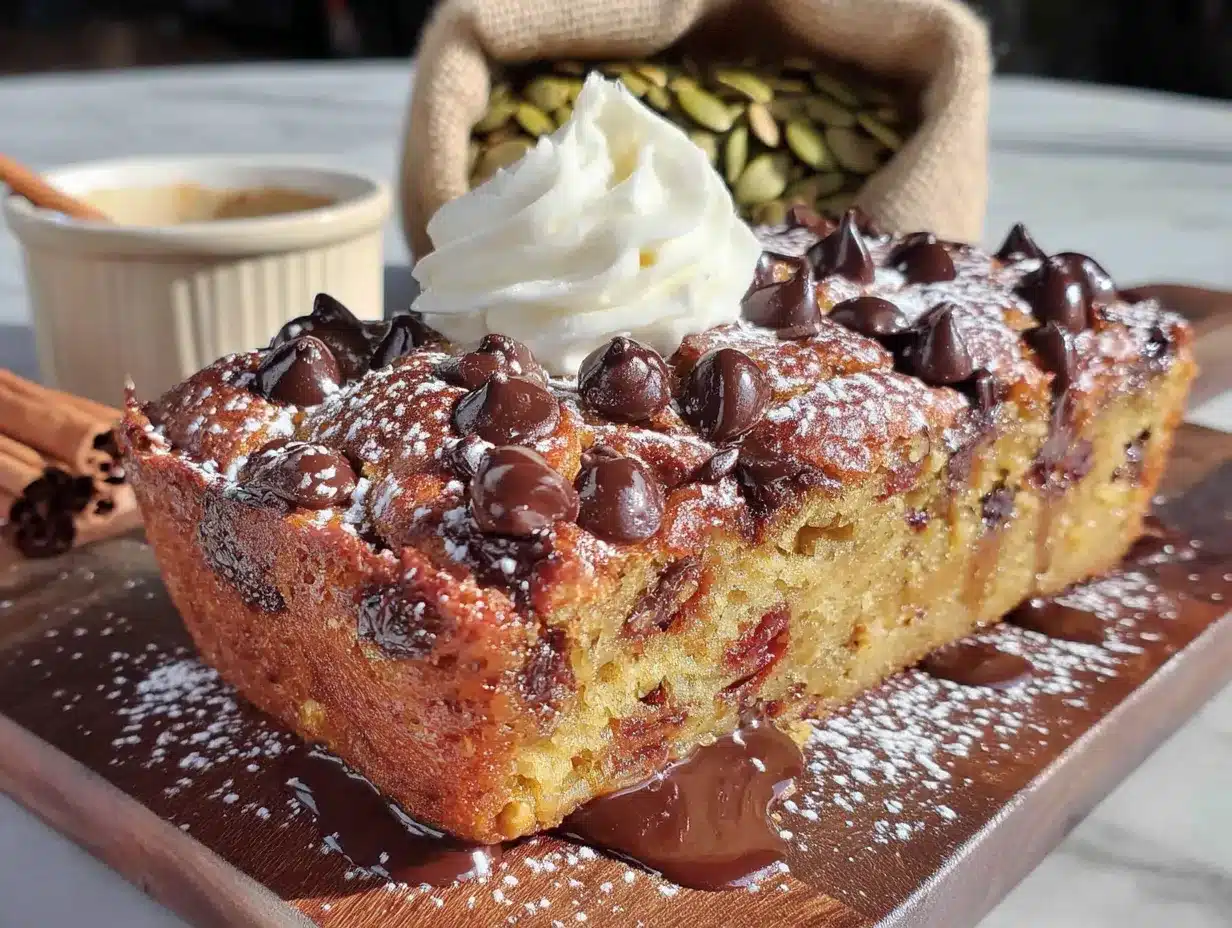
The top on these bars shatters when you bite into it. Not in an aggressive, teeth-jarring way, but in that delicate, sugar-crust way that tells you something good is about to happen. And underneath that crackly top, there’s this impossibly soft, almost fudgy layer that tastes like the best parts of fall got baked into one pan. Honestly, I wasn’t even trying to make pumpkin bars that day. I had a can of pumpkin puree staring at me from the pantry, a half-opened bag of chocolate chips from the last batch of cookies I made, and this itch to bake something that didn’t require a mixer or a lot of thought.
So I started throwing things in a bowl, hoping for the best. I wanted that chewy texture you get from a blondie, but with the warm, cozy flavor of pumpkin pie. The first batch came out too cakey. The second was too flat. But the third? The third had that perfect, crackly top and the gooiest center I’d ever pulled out of a 9×13 pan. I stood there at the counter, eating a warm bar straight from the pan, and I knew I had stumbled onto something special. It’s the kind of dessert that doesn’t need frosting or fancy decorations. It just needs a glass of cold milk and a quiet afternoon.
These bars have become my go-to for fall gatherings, impromptu dessert cravings, and those days when you just need something sweet without a ton of fuss. They’re the reliable friend in your recipe rotation. And once you try them, you’ll understand why I keep a can of pumpkin in my pantry year-round, just in case.
Why You’ll Love This Recipe
Let me tell you why these pumpkin chocolate chip bars are about to become your new favorite fall obsession. I’ve tested this recipe more times than I care to admit, tweaking the flour ratio, the pumpkin amount, and the baking time until everything was just right. Here’s what makes them stand out:
- Perfectly Chewy Texture : These bars have that dense, fudgy chew that blondies are famous for, but with the moistness of pumpkin. No dry, cakey crumbs here.
- Simple Ingredients : You probably have most of these in your kitchen right now. No weird specialty items or expensive extracts.
- One Bowl Wonder : No mixer needed. Just a bowl, a whisk, and a spatula. Less dishes means more time to enjoy the bars.
- Perfect for Fall Gatherings : They travel well, slice cleanly, and disappear fast at potlucks, tailgates, or Thanksgiving dessert tables.
- Freezer-Friendly : Make a batch, freeze half, and have emergency dessert ready for weeks. They thaw beautifully.
What really sets these bars apart is the texture. Most pumpkin desserts lean towards being soft and cakey, but these have that satisfying chew that makes you want to eat just one more. The chocolate chips add little pockets of melted richness that balance the warm pumpkin spices perfectly. It’s comfort food at its finest, and it comes together in under an hour.
What Ingredients You Will Need
This recipe uses simple, wholesome ingredients to create something truly special. Each component plays a specific role in achieving that perfect chewy texture and rich flavor. Here’s what you’ll need:
For the Bars
- 1/2 cup (113g) unsalted butter, melted and slightly cooled (I use Land O’Lakes for consistent results)
- 1 cup (200g) packed light brown sugar (dark brown works too, for a deeper molasses flavor)
- 1/2 cup (100g) granulated sugar
- 1 large egg, at room temperature
- 2 teaspoons vanilla extract (pure, not imitation, if you can swing it)
- 3/4 cup (170g) pumpkin puree (not pumpkin pie filling, just plain puree)
- 1 1/2 cups (190g) all-purpose flour (spooned and leveled)
- 1 teaspoon baking powder
- 1/2 teaspoon baking soda
- 1/2 teaspoon salt
- 2 teaspoons pumpkin pie spice (or 1 tsp cinnamon, 1/2 tsp nutmeg, 1/2 tsp ginger, 1/4 tsp cloves)
- 1 cup (180g) semi-sweet chocolate chips (plus a handful more for the top, because why not)
The butter and sugars are your foundation for that chewy texture. Melted butter gives you a denser, fudgier bar compared to creaming softened butter. The combination of brown and white sugar adds moisture from the molasses in the brown sugar while the white sugar helps with that crackly top. The pumpkin puree adds moisture and flavor, but don’t use too much or the bars will become too soft.
For the flour, I recommend all-purpose for the best structure. If you want to experiment with gluten-free, use a 1:1 baking blend, but the texture will be slightly different. The pumpkin pie spice is where the magic happens — it gives that warm, cozy fall flavor that makes these bars irresistible. I prefer to make my own blend so I can adjust the ratios, but store-bought works great too.
As for the chocolate chips, semi-sweet is my go-to because it’s not too sweet and balances the pumpkin nicely. You could use milk chocolate if you prefer a sweeter bar, or dark chocolate for a more intense flavor. White chocolate chips would also be delicious here, creating a beautiful contrast against the orange pumpkin.
Equipment Needed
You don’t need a fancy kitchen to make these bars. Here’s what you’ll need:
- 9×13-inch baking pan (metal pans work best for even browning, but glass is fine too)
- Parchment paper (for easy lifting and minimal cleanup)
- Large mixing bowl
- Whisk
- Rubber spatula
- Measuring cups and spoons
- Kitchen scale (optional, but highly recommended for accuracy)
- Cooling rack
If you don’t have a 9×13 pan, you can use a 9×9 square pan, but the bars will be thicker and will need about 5-10 minutes more baking time. Just keep an eye on them. I’ve used both metal and glass pans, and I prefer metal because it conducts heat better and gives you a nicer golden bottom. Glass pans tend to hold heat longer, which can sometimes lead to over-baking around the edges.
Parchment paper is non-negotiable for me. It makes lifting the entire block of bars out of the pan so much easier, and cleanup is basically zero. Just leave an overhang on two sides so you have handles to grab.
Preparation Method
Alright, let’s get baking. This is the easy part. Follow these steps, and you’ll have perfect pumpkin chocolate chip bars every time.
- Preheat your oven to 350°F (175°C). Line your 9×13-inch baking pan with parchment paper, leaving an overhang on the long sides. Lightly grease the parchment with cooking spray or butter.
- Melt the butter in a microwave-safe bowl or on the stovetop. Let it cool for a couple of minutes — you don’t want it hot enough to cook the egg when you add it.
- In your large mixing bowl, whisk together the melted butter, brown sugar, and granulated sugar until well combined. It should look like wet sand. This takes about a minute of whisking.
- Add the egg, vanilla extract, and pumpkin puree. Whisk until everything is smooth and fully incorporated. The mixture will be thick and glossy, with a beautiful orange color from the pumpkin.
- In a separate small bowl, whisk together the flour, baking powder, baking soda, salt, and pumpkin pie spice. This ensures the leavening agents and spices are evenly distributed.
- Add the dry ingredients to the wet ingredients. Fold gently with your rubber spatula until just combined. Do not overmix! Overmixing develops the gluten and will make your bars tough instead of tender. A few streaks of flour are okay.
- Fold in the chocolate chips using the spatula. Reserve about a quarter cup to sprinkle on top for a prettier presentation. The batter will be thick and slightly sticky — that’s exactly what you want.
- Transfer the batter to your prepared pan. Use the spatula to spread it evenly into all corners. The batter is thick, so take your time. Sprinkle the reserved chocolate chips evenly over the top.
- Bake for 22-26 minutes, or until the edges are golden brown and set, and the center looks slightly underdone. A toothpick inserted into the center should come out with a few moist crumbs, not wet batter. The top should have that beautiful crackly, shiny crust.
- Let the bars cool in the pan on a wire rack for at least 20 minutes. Then use the parchment paper overhang to lift the entire block out of the pan. Let cool completely on the rack before slicing. This is important — cutting them while warm will give you messy, crumbly edges.
- Slice into 24 squares (or 16 if you want bigger bars) using a sharp knife. For clean cuts, wipe the knife between slices.
A few notes from my trials: If your batter seems too thick after adding the flour, don’t panic. It should be thick. If it’s too thin, you might have used too much pumpkin or not enough flour. The baking time can vary depending on your oven and pan material, so start checking at 22 minutes. The bars will continue to set as they cool, so don’t overbake them trying to get the center to look fully done.
Cooking Tips & Techniques
After making these bars more times than I can count, I’ve picked up a few tricks that make a real difference. Let me share them with you so you can nail it on your first try.
Don’t overmix the batter. This is probably the most common mistake. When you overmix, you develop the gluten in the flour, which leads to tough, dense bars instead of tender, chewy ones. Fold just until the flour disappears, and then stop. A few lumps are totally fine.
Use room temperature ingredients. Your egg should be at room temperature so it emulsifies properly with the butter and sugar. Cold egg can seize the butter and create a lumpy batter. Just set your egg on the counter for 15-20 minutes before you start, or place it in a bowl of warm water for 5 minutes.
Measure your flour correctly. This is huge. Scooping flour directly from the bag can pack it down, giving you up to 25% more flour than you need. Instead, spoon the flour into your measuring cup and level it off with a knife. Or better yet, use a kitchen scale for accuracy.
Let them cool completely. I know it’s tempting to cut into them while they’re still warm, but patience pays off here. Warm bars are fragile and will crumble. Plus, the flavors need time to meld together. I’ve learned this the hard way more than once.
Use high-quality chocolate chips. The chocolate is a star ingredient here, so don’t skimp. I prefer Ghirardelli or Guittard chips because they have a better cocoa butter content, which means they melt more smoothly and taste richer. Cheap chips often have waxy coatings that don’t melt as well.
Add a sprinkle of flaky sea salt on top right after baking. It sounds fancy, but it’s actually a game-changer. The salt cuts through the sweetness and enhances the pumpkin and chocolate flavors. Maldon sea salt is my favorite, but any flaky salt will work.
Variations & Adaptations
One of the best things about this recipe is how versatile it is. Here are some variations I’ve tried and loved:
- Gluten-Free Version : Substitute the all-purpose flour with a 1:1 gluten-free baking blend that contains xanthan gum. I’ve had great results with Bob’s Red Mill 1-to-1 Baking Flour. The texture will be slightly more delicate, but still delicious.
- Dairy-Free Version : Use melted coconut oil or vegan butter instead of regular butter, and dairy-free chocolate chips. Enjoy Life makes great dairy-free chips. The coconut oil will add a subtle coconut flavor, which actually pairs beautifully with the pumpkin.
- Nutty Twist : Add 1/2 cup of chopped pecans or walnuts along with the chocolate chips. Toast them first for extra flavor. The crunch adds a lovely contrast to the soft, chewy bars.
- White Chocolate Cranberry : Swap the semi-sweet chips for white chocolate chips and add 1/2 cup of dried cranberries. This version is especially festive for Thanksgiving or Christmas.
- Extra Spicy : If you love warm spices, add an extra teaspoon of cinnamon and a pinch of cardamom. It gives the bars a more complex, chai-like flavor profile.
- Brown Butter Version : Brown the butter before using it for a nuttier, more intense flavor. Just melt the butter in a saucepan over medium heat, swirling occasionally, until it turns amber and smells nutty. Let it cool slightly before using. This adds about 5 minutes to the prep time, but the flavor payoff is huge.
I tried the brown butter version last fall, and honestly, it might be my new favorite way to make these bars. The nuttiness of the brown butter complements the pumpkin and chocolate in a way that feels almost decadent. It’s worth the extra step if you have the time.
Serving & Storage Suggestions
These bars are incredibly versatile when it comes to serving. Here’s how I like to enjoy them:
At Room Temperature : This is how they’re best, honestly. The texture is perfectly chewy, and the chocolate chips are set but not hard. Serve them on a pretty plate with a dusting of powdered sugar if you’re feeling fancy.
Warm with Ice Cream : Pop a bar in the microwave for 10-15 seconds, then top with a scoop of vanilla ice cream and a drizzle of caramel sauce. It’s basically fall in a bowl. This is my go-to dessert when I want to impress guests without much effort.
With Coffee or Tea : These bars are perfect for dunking. A cup of hot coffee or chai tea is the ideal companion. The bitterness of the coffee balances the sweetness of the bars beautifully.
Storage : Store leftover bars in an airtight container at room temperature for up to 4 days. If you live in a humid environment, you might want to refrigerate them to prevent sticking. Place a piece of parchment paper between layers to keep them from sticking together.
Freezing : These bars freeze like a dream. Wrap individual bars tightly in plastic wrap, then place them in a freezer-safe bag or container. They’ll keep for up to 3 months. To thaw, just leave them on the counter for about 30 minutes, or microwave for 15-20 seconds for that just-baked warmth.
Flavor Development : Here’s a secret — these bars actually taste better the next day. The flavors meld together overnight, and the texture becomes even more fudgy. So if you can resist eating them all on day one, you’re in for a treat on day two.
Nutritional Information & Benefits
While these bars are definitely a treat, they do have some redeeming qualities. Here’s a rough estimate of the nutritional breakdown per bar (based on 24 servings):
- Calories : Approximately 180-200
- Fat : 9g
- Carbohydrates : 26g
- Sugar : 17g
- Protein : 2g
- Fiber : 1g
These numbers are estimates and will vary based on the specific ingredients you use. The pumpkin puree is a nice source of vitamin A and fiber, and the dark chocolate chips offer some antioxidants. But let’s be real — we’re eating these because they taste amazing, not because they’re health food.
If you’re looking for a lower-sugar option, you can reduce the brown sugar to 3/4 cup and use sugar-free chocolate chips. The texture will be slightly less chewy, but still delicious. For a lower-carb version, try using almond flour and a sugar substitute like erythritol, but the texture will be quite different.
These bars are not gluten-free or dairy-free in their standard form, but as mentioned in the variations section, both adaptations work well. They do contain eggs, so they’re not suitable for a vegan diet unless you use a flax egg substitute.
Conclusion
These Ultimate Chewy Pumpkin Chocolate Chip Bars are everything I want in a fall dessert. They’re easy to make, they use simple ingredients, and they deliver that perfect chewy texture with warm pumpkin spices and rich chocolate in every bite. Whether you’re baking for a crowd or just treating yourself on a cozy autumn afternoon, these bars never disappoint.
I love how adaptable they are too. You can dress them up with a drizzle of caramel sauce for a party, or keep them simple for a weekday snack. They’re the kind of recipe that becomes a staple in your rotation, the one you turn to again and again because it always works.
So go ahead, give them a try. I’d love to hear how they turn out for you. Did you try any variations? Did you add nuts or switch up the chocolate? Drop a comment below and let me know. And if you’re looking for more easy dessert ideas, check out these cozy pecan pie bars for another fall favorite, or these peanut butter cup rice krispie treats when you need something no-bake. Happy baking!
Frequently Asked Questions
Can I use pumpkin pie filling instead of pumpkin puree?
No, I wouldn’t recommend it. Pumpkin pie filling is pre-sweetened and has added spices, which will throw off the sugar and spice balance in this recipe. Stick with 100% pure pumpkin puree for the best results.
Why did my bars turn out cakey instead of chewy?
This usually happens from overmixing the batter or using too much flour. Make sure you’re folding the dry ingredients in gently and measuring your flour correctly by spooning it into the cup and leveling it off. Overbaking can also make them cakey, so pull them out when the center still looks slightly underdone.
Can I make these bars ahead of time?
Absolutely! In fact, they taste even better the next day. You can bake them up to 2 days in advance and store them in an airtight container at room temperature. They also freeze beautifully for up to 3 months.
Can I use a different size pan?
Yes, but you’ll need to adjust the baking time. A 9×9 square pan will give you thicker bars that need about 30-35 minutes of baking. A 9×13 pan is ideal for the perfect thickness and baking time. If using a glass pan, expect a slightly longer bake time since glass doesn’t conduct heat as efficiently as metal.
Can I reduce the sugar in this recipe?
You can reduce the brown sugar to 3/4 cup without significantly affecting the texture, but I wouldn’t go lower than that. The sugar isn’t just for sweetness — it also contributes to the chewy texture and helps create that crackly top. If you want to reduce sugar, try using a sugar substitute like coconut sugar, but note that the texture will be slightly different.
Pin This Recipe!
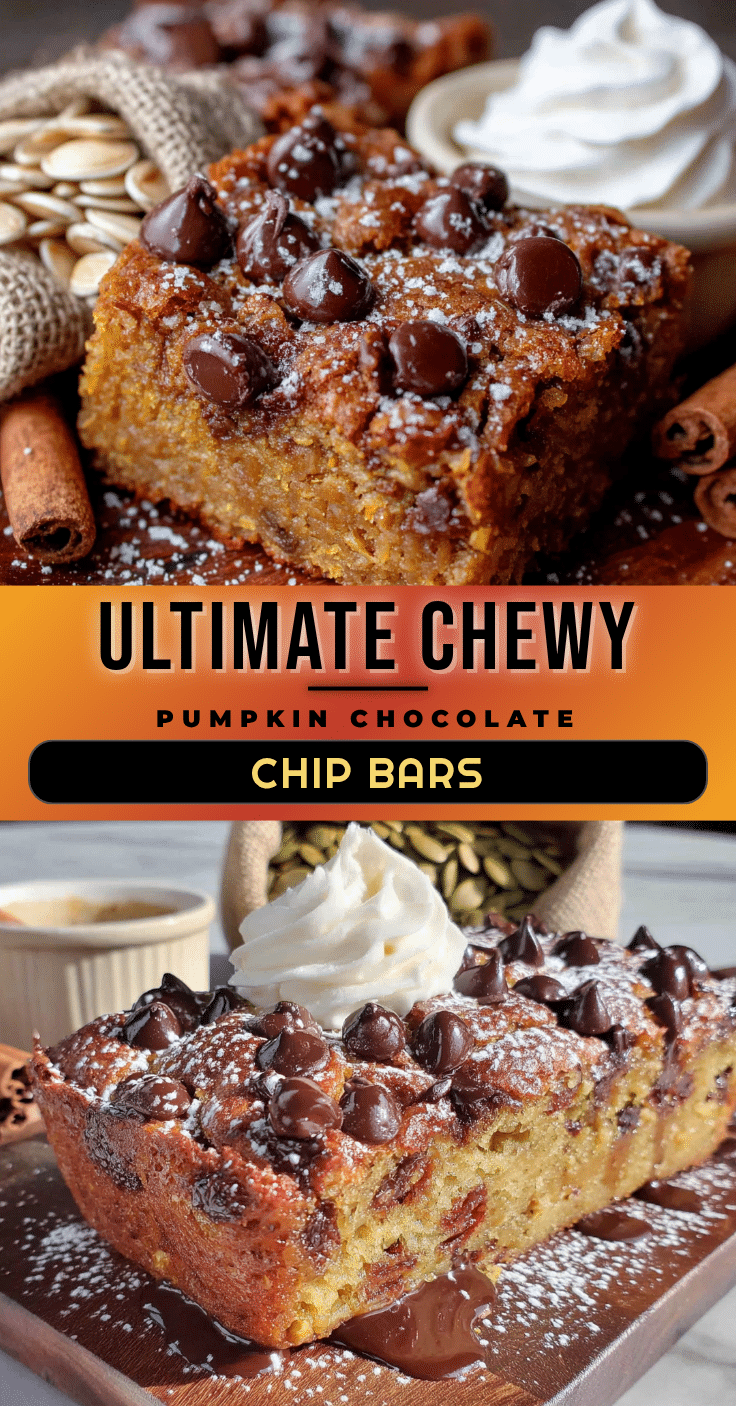
Ultimate Chewy Pumpkin Chocolate Chip Bars: Easy Fall Dessert
These pumpkin chocolate chip bars have a perfectly chewy, fudgy texture with a crackly top and warm pumpkin spice flavor. Made in one bowl with simple ingredients, they’re an easy fall dessert that’s perfect for gatherings or a cozy treat.
- Prep Time: 15 minutes
- Cook Time: 25 minutes
- Total Time: 40 minutes
- Yield: 24 servings 1x
- Category: Dessert
- Cuisine: American
Ingredients
- 1/2 cup (113g) unsalted butter, melted and slightly cooled
- 1 cup (200g) packed light brown sugar
- 1/2 cup (100g) granulated sugar
- 1 large egg, at room temperature
- 2 teaspoons vanilla extract
- 3/4 cup (170g) pumpkin puree (not pumpkin pie filling)
- 1 1/2 cups (190g) all-purpose flour, spooned and leveled
- 1 teaspoon baking powder
- 1/2 teaspoon baking soda
- 1/2 teaspoon salt
- 2 teaspoons pumpkin pie spice (or 1 tsp cinnamon, 1/2 tsp nutmeg, 1/2 tsp ginger, 1/4 tsp cloves)
- 1 cup (180g) semi-sweet chocolate chips, plus more for topping
Instructions
- Preheat oven to 350°F (175°C). Line a 9×13-inch baking pan with parchment paper, leaving overhang on long sides. Lightly grease parchment.
- Melt butter and let cool slightly.
- In a large bowl, whisk together melted butter, brown sugar, and granulated sugar until well combined (about 1 minute).
- Add egg, vanilla extract, and pumpkin puree; whisk until smooth and fully incorporated.
- In a separate small bowl, whisk together flour, baking powder, baking soda, salt, and pumpkin pie spice.
- Add dry ingredients to wet ingredients; fold gently with a rubber spatula until just combined. Do not overmix.
- Fold in chocolate chips, reserving about 1/4 cup for topping.
- Transfer batter to prepared pan and spread evenly. Sprinkle reserved chocolate chips on top.
- Bake for 22-26 minutes, until edges are golden and center looks slightly underdone. A toothpick inserted in center should come out with moist crumbs.
- Cool in pan on a wire rack for at least 20 minutes. Use parchment to lift bars out; cool completely before slicing.
- Slice into 24 squares (or 16 for larger bars).
Notes
For best results, use room temperature egg and measure flour correctly (spoon and level). Do not overmix batter. Bars taste even better the next day. For a dairy-free version, use melted coconut oil or vegan butter and dairy-free chocolate chips. For a gluten-free version, use a 1:1 gluten-free baking blend. Add flaky sea salt on top after baking for extra flavor.
Nutrition
- Serving Size: 1 bar
- Calories: 190
- Sugar: 17
- Sodium: 120
- Fat: 9
- Saturated Fat: 5
- Carbohydrates: 26
- Fiber: 1
- Protein: 2
Keywords: pumpkin bars, chocolate chip bars, fall dessert, chewy pumpkin bars, easy pumpkin recipe, pumpkin chocolate chip bars