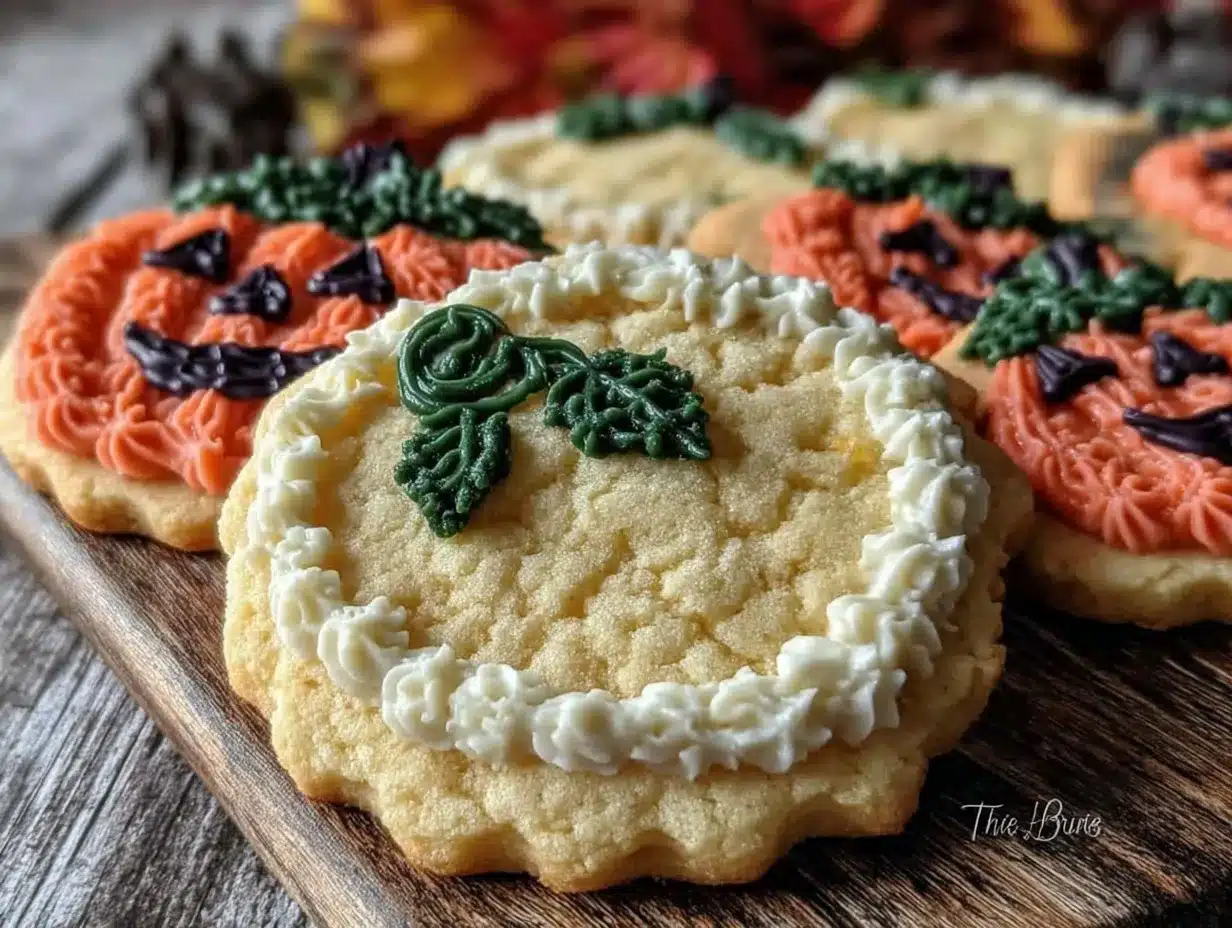
I burned the edges of my pumpkin-shaped sugar cookies three times before I figured out where I went wrong. Honestly, I never thought sugar cookies could be so tricky—especially ones decorated with royal icing. It wasn’t about the baking time alone; it was the delicate dance between dough consistency and icing drying that had me second-guessing my skills. My kitchen smelled like burnt sugar and disappointment more than once, and I almost gave up on making these festive treats for Halloween. But there was something about the idea of those bright orange, perfectly shaped pumpkins sitting on a plate that kept me coming back.
One night, after a mishap with the oven temperature and a rushed icing session, I paused and realized the problem wasn’t the recipe itself but how I approached it. Adjusting the dough texture and letting the royal icing dry slowly, instead of rushing, changed everything. Now, these easy pumpkin-shaped Halloween sugar cookies with royal icing are not just a seasonal indulgence but a little victory of patience and practice. The way the icing sets glossy and smooth, with just the right shade of orange and green accents for the pumpkin stems, feels like a small celebration every time.
It’s funny because I’m not even that into overly sweet cookies usually. But this recipe stuck around because it’s simple enough to make a mess with, forgiving enough for first-timers, and charming enough to steal the spotlight at any Halloween gathering. Plus, there’s something quietly satisfying about biting into a cookie that looks as good as it tastes. This recipe isn’t about perfection, but about finding that cozy, familiar joy in the process—and the treat.
Why You’ll Love This Recipe
After testing many variations, I can say this easy pumpkin-shaped Halloween sugar cookies recipe with royal icing stands out for a handful of reasons. Here’s what makes it worth your time when the spooky season rolls around:
- Quick & Easy: You can mix, roll, cut, bake, and decorate in under two hours if you pace yourself. It’s fantastic for busy days when you want a festive treat without fuss.
- Simple Ingredients: No exotic ingredients here—just pantry staples like flour, sugar, butter, and eggs. The royal icing needs just powdered sugar, meringue powder, and water.
- Perfect for Halloween Parties and Family Fun: These cookies are great for get-togethers, classroom treats, or crafting with kids (who love piping the icing).
- Crowd-Pleaser: The texture is soft but with just enough crisp edge, and the icing adds that sweet, smooth finish everyone raves about.
- Unique Decorating Twist: The royal icing recipe here is slightly thinner than usual, so it spreads easily but dries with that iconic glossy finish. Plus, the pumpkin shape cookie cutter is easy to find or improvise, making the decorating fun without stress.
What sets this recipe apart is the balance between a classic sugar cookie flavor and the vibrant Halloween spirit captured in the pumpkin shape and icing details. It’s not over-the-top sweet or fussy, which means you can enjoy these cookies with a cup of coffee or after a savory meal, like one of my favorite easy weeknight dinners such as the crispy sheet pan honey mustard chicken. And honestly, getting the icing right feels like a little craft project that’s totally worth the effort.
What Ingredients You Will Need
This recipe uses simple, wholesome ingredients to deliver bold flavor and satisfying texture without the fuss. Most are pantry staples you likely already have, and substitutions are straightforward.
- For the Sugar Cookies:
- All-purpose flour (2 ¾ cups / 345 grams) – provides structure and tenderness
- Baking powder (1 teaspoon) – helps the cookies puff slightly
- Salt (½ teaspoon) – balances sweetness
- Unsalted butter (1 cup / 227 grams), softened – adds richness and flavor
- Granulated sugar (1 cup / 200 grams) – for sweetness
- Large egg (1), room temperature – binds the dough
- Pure vanilla extract (1 teaspoon) – enhances flavor
- Milk (2 tablespoons), any kind – adds moisture (optional but recommended)
- For the Royal Icing:
- Powdered sugar (4 cups / 480 grams), sifted – the base of the icing
- Meringue powder (3 tablespoons) – helps the icing harden and hold shape
- Warm water (6-8 tablespoons), adjust for consistency – activates the meringue powder and thins the icing
- Orange gel food coloring – for that classic pumpkin hue
- Green gel food coloring – for the pumpkin stems
- Optional: Black gel food coloring or edible marker – for pumpkin face details
I recommend brands like King Arthur Flour for the all-purpose flour because it gives a reliable texture, and Wilton gel colors for vibrant hues that don’t thin out the icing. If you want a gluten-free option, almond flour or a gluten-free baking mix can work for the cookies, but expect a slightly different texture. For dairy-free baking, swap the butter with coconut oil or a plant-based butter substitute and use a non-dairy milk.
Equipment Needed
- Mixing bowls – at least two; one for dough, one for icing
- Electric mixer or stand mixer (recommended) – makes creaming butter and sugar easier
- Measuring cups and spoons – precise measurements are key
- Rolling pin – to roll out cookie dough evenly
- Pumpkin-shaped cookie cutter (about 3-4 inches) – you can find one seasonally or improvise with a small rounded cutter and knife
- Baking sheets lined with parchment paper or silicone mats – prevents sticking and helps even baking
- Wire cooling rack – helps cookies cool without getting soggy
- Small bowls or piping bags – for mixing and applying royal icing
- Toothpicks or fine brushes – great for detailing icing work or fixing small mistakes
If you don’t have a stand mixer, a hand mixer works fine, though it might take a bit more arm work. For piping, if you don’t own bags, small ziplock bags with a tiny corner cut off can be a budget-friendly alternative. I’ve also found that silicone mats make cleanup way easier than parchment paper, especially when decorating multiple batches. Keeping your equipment clean and dry helps royal icing set beautifully, so avoid any lingering moisture.
Preparation Method
- Mix the Dry Ingredients: In a medium bowl, whisk together 2 ¾ cups (345g) all-purpose flour, 1 teaspoon baking powder, and ½ teaspoon salt. Set aside. This ensures even distribution of leavening and salt.
- Cream Butter and Sugar: Using a stand or hand mixer, beat 1 cup (227g) softened unsalted butter with 1 cup (200g) granulated sugar on medium speed until light and fluffy, about 3-4 minutes. The texture should feel like soft whipped cream.
- Add Egg and Vanilla: Beat in 1 large room temperature egg and 1 teaspoon pure vanilla extract until combined. Scrape the bowl as needed to avoid uneven mixing.
- Combine Wet and Dry: Gradually add the flour mixture to the butter mixture in three parts, mixing on low speed. Add 2 tablespoons milk (optional) with the last addition to keep dough soft but manageable. Be careful not to over-mix; stop once flour disappears.
- Chill the Dough: Shape dough into a flat disk, wrap tightly in plastic wrap, and chill in the refrigerator for at least 1 hour or up to overnight. This step prevents spreading during baking and makes rolling easier.
- Preheat Oven and Prepare Pans: Preheat oven to 350°F (175°C). Line baking sheets with parchment paper or silicone mats.
- Roll and Cut Cookies: On a lightly floured surface, roll out dough to about ¼ inch (6 mm) thickness. Use a pumpkin-shaped cutter to cut out shapes, transfer to baking sheets about 1 inch (2.5 cm) apart.
- Bake: Bake for 8-10 minutes or until edges are just turning golden. Watch closely after 8 minutes to avoid burning. The cookies will feel firm but soft in the center.
- Cool: Let cookies cool on baking sheets for 5 minutes before transferring to wire racks to cool completely. Completely cool cookies are essential before icing.
- Prepare Royal Icing: In a large bowl, combine 4 cups (480g) powdered sugar and 3 tablespoons meringue powder. Add 6 tablespoons warm water and beat on high speed for 7-10 minutes until stiff peaks form. Adjust water to thin icing slightly for flooding: it should flow easily but hold its shape.
- Color the Icing: Divide icing into separate bowls. Add orange gel food coloring to most of the icing for the pumpkin body, green to a smaller portion for the stem, and optional black for faces or details.
- Decorate Cookies: Use piping bags or squeeze bottles to outline each cookie with icing, then flood the inside with thinned orange icing. Let dry for 10-15 minutes. Pipe green stems and any facial details last. Use toothpicks to spread icing evenly or fix bubbles.
- Dry Completely: Let decorated cookies dry at room temperature for 4-6 hours or overnight for the best finish. Avoid stacking until fully dry to prevent smudging.
Pro tip: If your dough feels sticky while rolling, chill it a bit longer. And if your royal icing seems too thick to spread, add water a teaspoon at a time. Also, remember to give the cookies enough space while baking; they don’t spread much but will puff slightly. For a fun twist, you can add a pinch of cinnamon or nutmeg to the dough for a warm fall flavor.
Cooking Tips & Techniques
Royal icing can intimidate many, but it’s pretty forgiving once you know a few tricks. One big mistake I made early on was rushing the drying time. Patience really pays off here—letting each layer set before adding another prevents colors from bleeding.
When mixing dough, don’t skip chilling. It keeps the shapes crisp and prevents cookies from spreading into blobs. Also, rolling the dough evenly ensures uniform baking, so invest a few minutes in measuring thickness or using rolling pin guides if you have them.
For piping, squeezing bags with small tips work better than spoons for detail. If you’re new to piping, practicing on parchment paper first can help build confidence. And if the icing crusts over while you’re working on it, add a few drops of water and stir to restore smoothness.
Timing-wise, bake cookies in batches, cool completely before icing, and decorate in stages. This multitasking approach saves time and reduces stress. I found that icing cookies the day before a party works well, as the flavors mellow and the icing hardens perfectly overnight.
Don’t be discouraged if your first batch isn’t flawless—the joy is in the process, and almost everyone loves a cookie with a little character. If you like comforting meals alongside your baking projects, you might enjoy pairing these cookies with a savory dinner like the creamy cheesy taco pasta for a fun family night.
Variations & Adaptations
You can easily tweak this recipe to fit your dietary needs or flavor preferences. Here are some ideas I’ve tried or considered:
- Gluten-Free: Substitute all-purpose flour with a 1:1 gluten-free baking flour. The texture changes slightly but still holds shape well.
- Vegan Version: Use vegan butter and a flaxseed “egg” (1 tablespoon flaxseed meal + 3 tablespoons water, chilled) in place of butter and egg. Use aquafaba (chickpea water) in royal icing instead of meringue powder.
- Flavor Twists: Add ½ teaspoon ground cinnamon or pumpkin pie spice to the dough for extra fall vibes. You can also swap vanilla extract for almond or maple extract for a different note.
- Alternative Decoration: Instead of royal icing, try a simple glaze made from powdered sugar and milk, then sprinkle with orange sanding sugar before drying. Less precise but super quick.
- Different Shapes: Use other Halloween cutters like ghosts or bats if pumpkins aren’t your style, and adjust icing colors accordingly. I once made a batch of spider web cookies that paired nicely with these pumpkin treats.
Serving & Storage Suggestions
These pumpkin-shaped sugar cookies are best served at room temperature, ideally a few hours after decorating when the royal icing has fully dried. Arrange them on a festive platter to show off the shiny icing and bright colors.
They pair wonderfully with warm drinks like hot apple cider or a simple cup of chai tea. For a Halloween party, they add a sweet touch alongside savory snacks. I often serve these cookies alongside hearty meals like the Italian sausage and peppers sheet pan dinner for a full seasonal spread.
Store cookies in an airtight container at room temperature for up to 5 days. If you want to keep them longer, freeze undecorated cookies wrapped tightly for up to 3 months; decorate after thawing. Decorated cookies freeze okay but can lose some icing texture.
Reheat cookies gently in a 300°F (150°C) oven for 3-4 minutes to revive softness without melting the icing. Remember, the flavors meld and improve slightly after a day, making leftovers even better.
Nutritional Information & Benefits
These pumpkin-shaped Halloween sugar cookies are a treat, so they do carry some sugar and carbs but come with a little homemade love that store-bought just can’t match. Here’s a rough estimate per cookie (based on 24 cookies):
| Calories | Carbs | Fat | Protein | Sugar |
|---|---|---|---|---|
| 120 kcal | 18 g | 5 g | 1.5 g | 10 g |
The butter provides some vitamin A and healthy fats, while the egg adds a bit of protein. The royal icing, made from meringue powder and powdered sugar, is lower in fat than buttercream and dries hard, making it less messy to eat. If you’re watching sugar intake, try cutting the icing sugar slightly or swapping granulated sugar in dough with coconut sugar for a subtle flavor change.
These cookies are naturally gluten-containing unless you use a gluten-free flour substitute. They’re nut-free unless you add any optional flavors. I appreciate that homemade treats like these give me control over ingredients and portion size, making indulgences feel a little more intentional and satisfying.
Conclusion
This easy pumpkin-shaped Halloween sugar cookies recipe with royal icing isn’t just a seasonal snack—it’s a little ritual of baking, decorating, and sharing that’s worth the tiny stumbles along the way. It’s forgiving enough for beginners but satisfying enough for those who want that perfect balance of soft cookie and crisp, shiny icing. I love how these cookies bring a bit of festivity and fun to the kitchen without the stress.
Feel free to make this recipe your own—whether that means swapping flavors, trying vegan options, or getting creative with decorations. The best part is the smiles they bring, especially when you see how even imperfectly iced pumpkins can light up a party table.
If you try this recipe, I’d love to hear how your cookies turned out or any creative twists you added. Sharing those moments makes the whole baking adventure even better. So grab your rolling pin and pumpkin cutter, and enjoy a sweet little slice of Halloween magic.
Frequently Asked Questions
How do I prevent my sugar cookies from spreading too much while baking?
Chilling the dough for at least an hour before rolling helps keep the cookies from spreading. Also, avoid using too much butter or sugar, and roll the dough evenly to about ¼ inch thickness.
Can I make the royal icing ahead of time?
Yes, royal icing can be made a day in advance. Store it in an airtight container with plastic wrap touching the surface to prevent drying. Stir well before use and add small amounts of water if it’s too thick.
What if I don’t have a pumpkin-shaped cookie cutter?
You can use a simple round cutter and gently shape the dough with a knife to mimic a pumpkin, or use other Halloween-themed cutters like bats or ghosts. Freehand cutting is fun too!
How do I fix royal icing that’s too thick or too thin?
Add a few drops of warm water to thin thick icing, stirring well after each addition. If it’s too thin, add more powdered sugar gradually until you reach the desired consistency.
Can I store decorated cookies in the fridge?
It’s best to keep decorated cookies at room temperature in an airtight container. Refrigeration can cause condensation that may soften the icing or make it sticky.
Pin This Recipe!
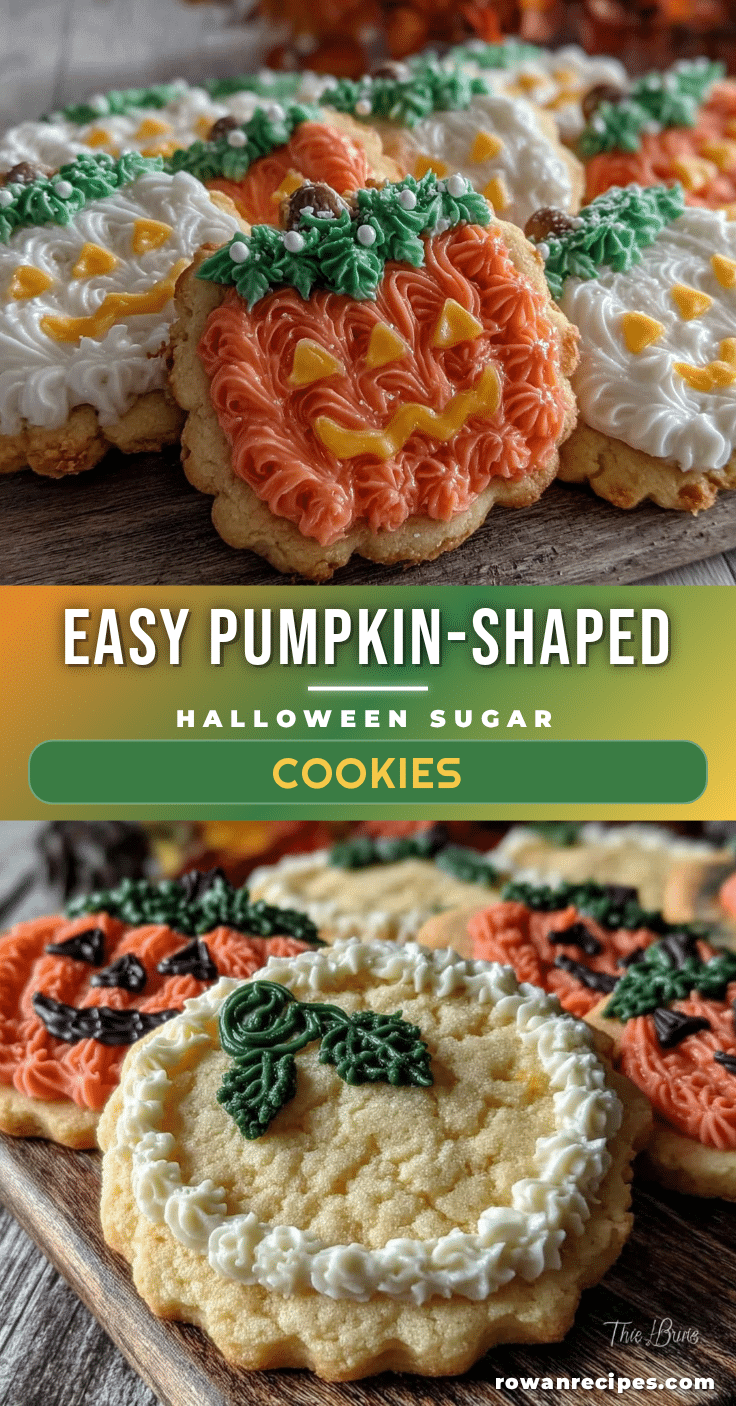
Easy Pumpkin-Shaped Halloween Sugar Cookies Recipe with Royal Icing Tutorial

A simple and festive recipe for pumpkin-shaped sugar cookies decorated with glossy royal icing, perfect for Halloween parties and family fun.
- Prep Time: 20 minutes
- Cook Time: 10 minutes
- Total Time: 1 hour 30 minutes
- Yield: 24 cookies 1x
- Category: Dessert
- Cuisine: American
Ingredients
- 2 ¾ cups (345 grams) all-purpose flour
- 1 teaspoon baking powder
- ½ teaspoon salt
- 1 cup (227 grams) unsalted butter, softened
- 1 cup (200 grams) granulated sugar
- 1 large egg, room temperature
- 1 teaspoon pure vanilla extract
- 2 tablespoons milk (optional)
- 4 cups (480 grams) powdered sugar, sifted
- 3 tablespoons meringue powder
- 6–8 tablespoons warm water
- Orange gel food coloring
- Green gel food coloring
- Optional: Black gel food coloring or edible marker
Instructions
- Mix the Dry Ingredients: In a medium bowl, whisk together 2 ¾ cups (345g) all-purpose flour, 1 teaspoon baking powder, and ½ teaspoon salt. Set aside.
- Cream Butter and Sugar: Using a stand or hand mixer, beat 1 cup (227g) softened unsalted butter with 1 cup (200g) granulated sugar on medium speed until light and fluffy, about 3-4 minutes.
- Add Egg and Vanilla: Beat in 1 large room temperature egg and 1 teaspoon pure vanilla extract until combined.
- Combine Wet and Dry: Gradually add the flour mixture to the butter mixture in three parts, mixing on low speed. Add 2 tablespoons milk (optional) with the last addition. Stop once flour disappears.
- Chill the Dough: Shape dough into a flat disk, wrap tightly in plastic wrap, and chill in the refrigerator for at least 1 hour or up to overnight.
- Preheat Oven and Prepare Pans: Preheat oven to 350°F (175°C). Line baking sheets with parchment paper or silicone mats.
- Roll and Cut Cookies: On a lightly floured surface, roll out dough to about ¼ inch (6 mm) thickness. Use a pumpkin-shaped cutter to cut out shapes, transfer to baking sheets about 1 inch (2.5 cm) apart.
- Bake: Bake for 8-10 minutes or until edges are just turning golden. Watch closely after 8 minutes to avoid burning.
- Cool: Let cookies cool on baking sheets for 5 minutes before transferring to wire racks to cool completely.
- Prepare Royal Icing: In a large bowl, combine 4 cups (480g) powdered sugar and 3 tablespoons meringue powder. Add 6 tablespoons warm water and beat on high speed for 7-10 minutes until stiff peaks form. Adjust water to thin icing slightly for flooding.
- Color the Icing: Divide icing into separate bowls. Add orange gel food coloring to most of the icing, green to a smaller portion, and optional black for details.
- Decorate Cookies: Use piping bags or squeeze bottles to outline each cookie with icing, then flood the inside with thinned orange icing. Let dry for 10-15 minutes. Pipe green stems and any facial details last. Use toothpicks to spread icing evenly or fix bubbles.
- Dry Completely: Let decorated cookies dry at room temperature for 4-6 hours or overnight before stacking.
Notes
Chill dough for at least 1 hour to prevent spreading. Let royal icing dry slowly and in layers to avoid bleeding colors. If dough is sticky, chill longer. Adjust icing consistency with water as needed. For a warm fall flavor, add ½ teaspoon cinnamon or pumpkin pie spice to dough. Store cookies in airtight container at room temperature up to 5 days or freeze undecorated cookies up to 3 months.
Nutrition
- Serving Size: 1 cookie
- Calories: 120
- Sugar: 10
- Fat: 5
- Carbohydrates: 18
- Protein: 1.5
Keywords: pumpkin sugar cookies, Halloween cookies, royal icing cookies, festive cookies, easy sugar cookies, Halloween treats