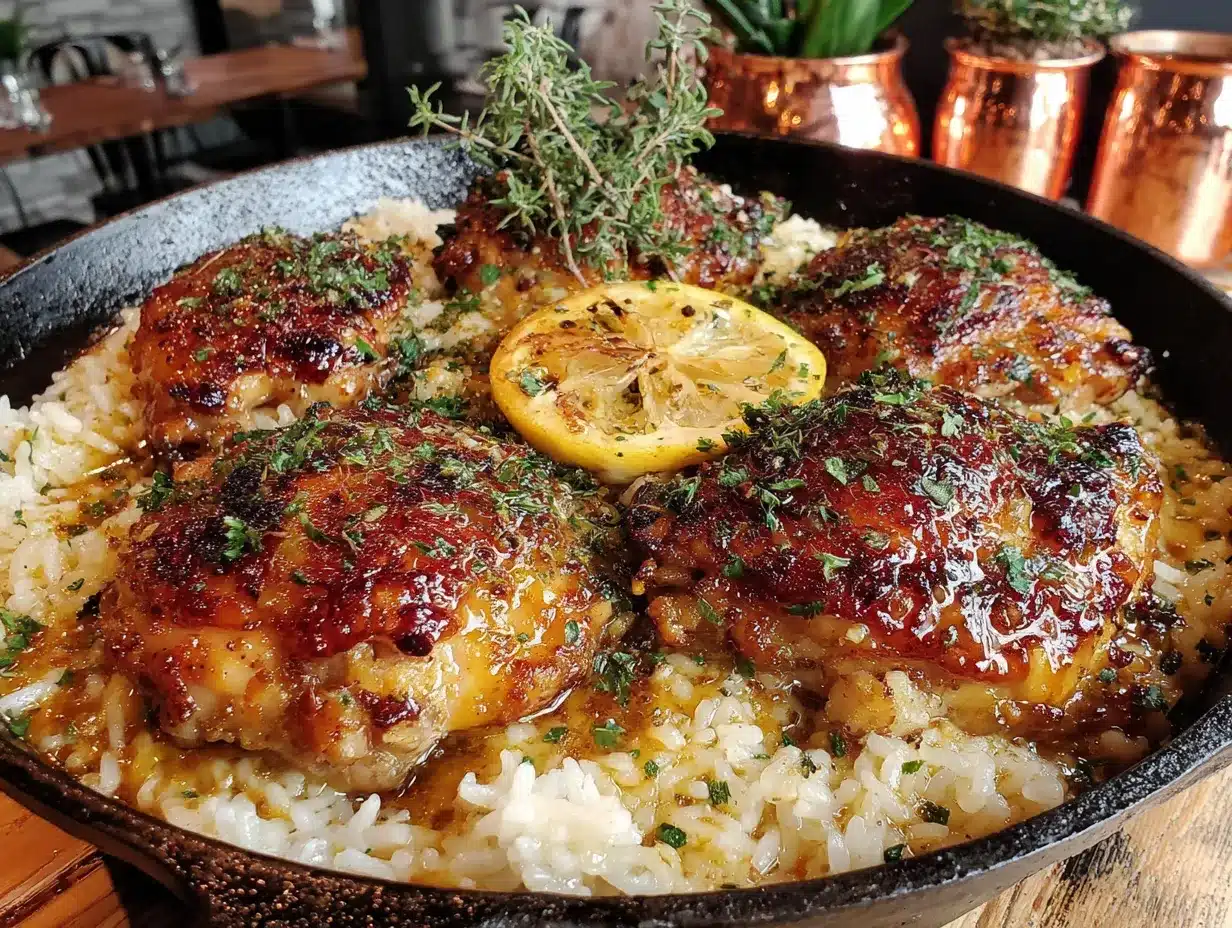
Standing at the stove, rice sticking to the bottom of a second pan while the chicken breast on the cutting board stared back at me—that was my Tuesday night low point. I had thirty minutes before everyone needed to eat, a half-empty jar of garlic in the fridge, and absolutely no patience for another sink full of dishes. So I threw everything into one skillet. The chicken went in first, sizzling in butter until the kitchen smelled like a restaurant kitchen. Then I dumped the rice right in without rinsing it first. No shame. I poured the broth over everything, covered it, and walked away to pour a glass of water. By the time I came back, the rice had soaked up all that garlicky butter, the chicken was tender enough to pull apart with a fork, and dinner was ready in the exact same pan I’d cooked it in. That was the night this easy one-pan garlic butter chicken and rice became a permanent fixture in my weekly rotation. It’s not fancy. It’s not complicated. But honestly, it’s the kind of dinner that makes you wonder why you ever bothered with multiple pots in the first place.
Why You’ll Love This Recipe
Let me tell you why this particular recipe has earned a permanent spot in my rotation. I’ve tested it probably a dozen times, tweaking the liquid ratio, adjusting the garlic level, and even burning a batch or two (we don’t talk about the first attempt). What came out of those trials is a dinner that actually delivers on every promise it makes.
- Quick & Easy: From fridge to table in about 40 minutes, and most of that time is hands-off while the rice cooks. Perfect for those nights when you walk in the door hungry and tired.
- Simple Ingredients: Chicken, rice, butter, garlic, broth, and a few pantry spices. No trips to a specialty store. No obscure ingredients you’ll use once and forget about.
- Perfect for Busy Weeknights: This is the definition of a weeknight hero. It’s cozy enough for a quiet dinner at home but impressive enough to serve when you have company.
- Crowd-Pleaser: My kids clean their plates. My husband asks for seconds. Even my picky mother-in-law went back for more. That’s a win in my book.
- Unbelievably Delicious: The rice absorbs all that garlic butter flavor, the chicken stays juicy, and the whole thing comes together with this rich, savory depth that tastes like you spent hours on it.
What makes this version different from the other one-pan chicken and rice recipes out there? It’s the technique. I brown the chicken first to build that fond on the bottom of the pan, then cook the rice in the same pan with the garlic butter. That fond—those browned bits stuck to the pan—adds a layer of flavor you just can’t get any other way. It’s not just another recipe. It’s the one that makes you close your eyes after the first bite.
What Ingredients You Will Need
This recipe uses simple, wholesome ingredients to deliver bold flavor and satisfying texture without the fuss. Most of these are pantry staples, which is exactly what you want on a busy weeknight.
- Chicken thighs or breasts: 4 boneless, skinless chicken thighs (about 1.5 pounds) or 2 large chicken breasts. I prefer thighs for their extra juiciness and flavor, but breasts work great too. Pat them dry with paper towels before seasoning—this helps them brown better.
- Unsalted butter: 3 tablespoons. I use unsalted so I can control the salt level. Kerrygold is my go-to for its rich flavor, but any good-quality butter works.
- Garlic: 6 cloves, minced (about 2 tablespoons). Don’t skimp here. Fresh garlic makes a huge difference. I’ve tried jarred minced garlic in a pinch, but fresh is undeniably better.
- Long-grain white rice: 1 cup. Basmati or jasmine work beautifully. Avoid short-grain rice, which can get too sticky. I don’t rinse my rice for this recipe because I want that extra starch to help thicken the sauce slightly.
- Chicken broth: 2 cups. Low-sodium is best so you can control the salt. I’ve used vegetable broth in a pinch, and it works fine—just not quite as rich.
- Onion: 1 medium yellow onion, finely diced. About 1 cup. The onion adds sweetness and depth as it cooks down.
- Dried thyme: 1 teaspoon. It pairs beautifully with garlic and butter. Fresh thyme works too—use 1 tablespoon, leaves stripped from the stems.
- Paprika: 1 teaspoon. I use sweet paprika for color and mild flavor. Smoked paprika would add a lovely depth if you have it.
- Salt and black pepper: To taste. Start with 1 teaspoon salt and ½ teaspoon pepper, then adjust at the end.
- Fresh parsley: 2 tablespoons, chopped, for garnish. Optional but highly recommended—it adds a pop of color and freshness.
- Optional add-ins: A squeeze of lemon juice at the end brightens everything up. Red pepper flakes add a nice kick if you like heat.
I’ve made this recipe with both chicken thighs and breasts, and honestly, both work well. Thighs are more forgiving and stay juicier, while breasts cook faster and are leaner. If you’re using breasts, keep an eye on them so they don’t dry out. You can also swap the butter for ghee if you’re dairy-sensitive, or use olive oil in a pinch—though you’ll lose some of that rich garlic butter flavor.
Equipment Needed
You don’t need much for this recipe, which is part of its beauty. Here’s what you’ll want to have on hand:
- A large, deep skillet or Dutch oven: A 12-inch skillet with a tight-fitting lid is ideal. I use my trusty cast-iron skillet, but a stainless steel or non-stick pan works perfectly too. The key is having a lid that seals well so the rice steams properly.
- A sharp knife and cutting board: For dicing the onion and mincing the garlic. A good knife makes prep so much faster.
- Measuring cups and spoons: For the rice, broth, and seasonings. I keep these in a drawer right next to my stove for easy access.
- A wooden spoon or spatula: For stirring and scraping up those browned bits from the bottom of the pan. A silicone spatula works too, but I prefer wood for its durability.
- Tongs: For flipping the chicken pieces without piercing them. This keeps the juices sealed inside.
If you don’t have a lid that fits your skillet, you can use a sheet of aluminum foil tightly crimped around the edges. I’ve done this more times than I care to admit, and it works like a charm. Just make sure it’s sealed well so steam doesn’t escape.
Preparation Method
Let’s get cooking. This recipe comes together in about 40 minutes, and most of that is hands-off time. Here’s how it goes:
- Season the chicken. Pat the chicken dry with paper towels. Season generously on both sides with salt, pepper, and ½ teaspoon of the paprika. Let it sit while you prep the onion and garlic. This gives the seasoning a chance to sink in.
- Brown the chicken. Heat 1 tablespoon of the butter in your skillet over medium-high heat. Once the butter is melted and sizzling, add the chicken pieces in a single layer. Don’t crowd the pan—work in batches if needed. Cook for 4-5 minutes per side, until golden brown and crispy on the outside. The chicken won’t be fully cooked through yet, and that’s fine. Transfer the chicken to a plate and set aside.
- Sauté the aromatics. Reduce the heat to medium. Add the remaining 2 tablespoons of butter to the same pan. Once melted, add the diced onion and cook for 3-4 minutes, stirring occasionally, until softened and translucent. Add the minced garlic and cook for 30 seconds more until fragrant. Stir constantly so the garlic doesn’t burn.
- Toast the rice. Add the rice to the pan and stir to coat it in the garlic butter. Cook for 1-2 minutes, stirring frequently, until the rice starts to smell nutty and turns slightly translucent at the edges. This step adds so much flavor.
- Add the liquid. Pour in the chicken broth and add the dried thyme, remaining ½ teaspoon paprika, and a pinch of salt and pepper. Stir everything together, scraping up any browned bits from the bottom of the pan with your wooden spoon. Those bits are pure flavor gold.
- Return the chicken. Nestle the browned chicken pieces back into the pan, pushing them down into the rice mixture. Any juices that accumulated on the plate should go in too. Bring the liquid to a gentle boil.
- Cover and simmer. Reduce the heat to low, cover the pan with a tight-fitting lid, and let it simmer for 18-20 minutes. Don’t lift the lid during this time—the steam is what cooks the rice perfectly. Set a timer so you don’t forget.
- Rest and fluff. After 18-20 minutes, remove the pan from the heat. Let it sit, still covered, for 5 minutes. This resting time allows the rice to absorb any remaining liquid and finish cooking. After 5 minutes, remove the lid and fluff the rice gently with a fork. Check the chicken’s internal temperature—it should read 165°F.
- Garnish and serve. Sprinkle the chopped fresh parsley over the top. If you’re using lemon, squeeze a wedge over everything. Serve straight from the pan—that’s the beauty of one-pan cooking.
A few things to watch for: If the rice looks dry before the 18 minutes are up, add a splash more broth or water. If it’s still wet after 20 minutes, let it cook uncovered for another 2-3 minutes. Every stovetop runs a little differently, so trust your eyes and nose.
Cooking Tips & Techniques
I’ve made this recipe enough times to know exactly where things can go wrong. Here are the lessons I learned the hard way so you don’t have to.
Don’t skip browning the chicken. I know it’s tempting to just throw everything in the pan and call it a day, but that browning step is where the magic happens. Those browned bits on the bottom of the pan—called fond in fancy cooking terms—are what give the rice its deep, savory flavor. If you skip this step, the whole dish tastes flat.
Use the right rice-to-liquid ratio. For long-grain white rice, the magic number is 1 cup of rice to 2 cups of liquid. I’ve tried using 1½ cups of broth before, thinking it would make the rice creamier, and ended up with crunchy, undercooked rice. Stick to the ratio, and you’ll be fine.
Let the rice rest. This is the step I used to skip, and my rice was always a little gummy. Letting the pan sit off the heat for 5 minutes after cooking allows the steam to redistribute evenly, resulting in perfectly fluffy rice. Don’t rush it.
Check your lid. If your skillet doesn’t have a tight-fitting lid, the steam will escape, and your rice won’t cook properly. Use foil if needed, and make sure it’s crimped tightly around the edges. I learned this one the hard way when I used a lid that was slightly too small and ended up with crunchy rice.
Multitask wisely. While the chicken is browning, chop your onion and mince your garlic. While the rice is simmering, set the table or make a quick salad. This recipe is designed to let you do other things, so take advantage of that hands-off time.
One of my biggest failures? I once used pre-minced garlic from a jar because I was out of fresh cloves. The garlic flavor was weak, and the whole dish tasted flat. Fresh garlic really does make a difference here. Trust me on that one.
Variations & Adaptations
This recipe is incredibly flexible. Here are some ways to make it your own:
- Make it creamy: Stir in ¼ cup of heavy cream or cream cheese at the end, after the rice is cooked. It turns the whole dish into a rich, decadent comfort meal. I’ve done this on cold winter nights, and it’s pure magic.
- Add vegetables: Toss in a cup of frozen peas and carrots during the last 5 minutes of cooking, or stir in a handful of fresh spinach right before serving. The spinach wilts into the rice beautifully. You could also add sliced mushrooms when you sauté the onions.
- Try different proteins: This works great with boneless pork chops, turkey cutlets, or even tofu for a vegetarian version. Just adjust the cooking time based on the protein you choose. For tofu, press it well and brown it just like you would the chicken.
- Go gluten-free: This recipe is naturally gluten-free as long as you use gluten-free chicken broth. Most brands are, but double-check the label. The rice itself is gluten-free, so you’re good there.
- Spice it up: Add ½ teaspoon of red pepper flakes or a pinch of cayenne pepper when you add the garlic. It gives the dish a subtle warmth that’s really lovely. I’ve also used a teaspoon of harissa paste stirred into the broth for a North African twist.
- Use brown rice: If you prefer brown rice, increase the cooking time to 40-45 minutes and add an extra ¼ cup of broth. The flavor is nuttier and more robust. Just plan ahead—it takes longer.
I once made this with boneless chicken thighs that had the skin on, and the crispy skin on top was absolutely incredible. It’s a bit more work, but if you have the time, it’s worth the effort for a special dinner.
Serving & Storage Suggestions
This dish is best served straight from the pan while it’s hot and steamy. The rice should be fluffy, the chicken tender, and the garlic butter flavor should hit you right away. I like to serve it with a simple side salad dressed with lemon vinaigrette to cut through the richness. A side of roasted broccoli or green beans also works beautifully—I often make this crispy air fryer bacon wrapped asparagus alongside it for a complete meal.
For a heartier meal, pair it with crusty bread to soak up any remaining buttery sauce. A glass of crisp white wine, like Sauvignon Blanc, complements the garlic and thyme perfectly. If you’re feeding a crowd, this recipe doubles easily—just use a larger pan or Dutch oven.
Storage: Leftovers keep well in an airtight container in the refrigerator for up to 4 days. The rice might absorb some of the remaining liquid, making it slightly denser, but the flavor stays excellent. To reheat, add a splash of broth or water and warm it in a skillet over medium heat, stirring occasionally. You can also microwave it in 30-second bursts, stirring between each. I actually think the flavors get even better overnight as they meld together.
Freezing: This dish freezes beautifully for up to 3 months. Let it cool completely, then transfer to a freezer-safe container. To reheat, thaw overnight in the refrigerator and warm in a skillet with a splash of broth. The chicken might be slightly less juicy, but it’s still delicious. I’ve made double batches just to freeze for busy weeks ahead.
Nutritional Information & Benefits
Here’s a rough estimate per serving (based on 4 servings with chicken thighs):
- Calories: 485
- Protein: 32g
- Fat: 18g
- Carbohydrates: 45g
- Fiber: 1g
- Sugar: 2g
- Sodium: 680mg
This meal offers a solid balance of protein, carbohydrates, and healthy fats. The chicken provides lean protein that keeps you full and satisfied, while the rice offers energy for the rest of your evening. Garlic is known for its anti-inflammatory properties and immune-supporting benefits. The butter adds richness and helps your body absorb fat-soluble vitamins from any vegetables you serve alongside.
If you’re watching your sodium, use low-sodium broth and go easy on the added salt. You can also swap the butter for olive oil to reduce saturated fat. For a lower-carb option, serve the chicken and garlic butter sauce over cauliflower rice instead of white rice—it’s surprisingly good and works with the same cooking method. If you’re looking for another cozy, one-pan meal, try this creamy one pot beef pasta for a different flavor profile.
Conclusion
This easy one-pan garlic butter chicken and rice is the kind of recipe that saves your sanity on busy nights. It’s simple enough for a Tuesday but satisfying enough to feel like a real meal. The garlic butter flavor infuses every grain of rice, the chicken stays tender and juicy, and the whole thing comes together in one pan with minimal cleanup. What more could you ask for?
I love this recipe because it reminds me that cooking doesn’t have to be complicated to be good. Sometimes the best meals come from throwing together a few ingredients and trusting the process. The first time I made this, I was skeptical that something so simple could be so delicious. Now I know better.
I’d love to hear how this turns out for you. Did you add any variations? Did your family love it as much as mine? Drop a comment below and let me know. And if you’re looking for another quick weeknight dinner, check out this easy crispy sheet pan honey mustard chicken that’s just as simple and satisfying. Happy cooking, friends!
Frequently Asked Questions
Can I use chicken breasts instead of thighs?
Absolutely. Chicken breasts work great, but they cook faster and can dry out more easily. Check the internal temperature at 15 minutes instead of 18. If you’re using large breasts, slice them in half horizontally so they cook evenly.
Do I need to rinse the rice first?
Not for this recipe. I actually prefer not rinsing the rice because the extra starch helps thicken the sauce slightly and gives the rice a creamier texture. If you prefer fluffier, more separated grains, you can rinse the rice in a fine-mesh strainer until the water runs clear before adding it to the pan.
Can I make this in a slow cooker or Instant Pot?
Yes, with adjustments. For the Instant Pot, use the sauté function to brown the chicken and cook the aromatics, then add the rice and broth, seal, and cook on high pressure for 5 minutes with a natural release. For a slow cooker, brown the chicken and aromatics first, then add everything to the slow cooker and cook on low for 3-4 hours. The rice might be softer than the stovetop version, but it’s still delicious.
Why is my rice still crunchy after 20 minutes?
This usually happens if the lid wasn’t tight enough and steam escaped, or if your stovetop runs cool. Add ¼ cup more broth, cover tightly, and cook for another 5-7 minutes. Next time, make sure your lid fits snugly and check that the liquid is at a gentle simmer before covering.
Can I use brown rice instead of white rice?
Yes, but you’ll need to adjust the cooking time and liquid. Use 2¼ cups of broth instead of 2, and cook for 40-45 minutes instead of 18-20. The brown rice has a nuttier flavor that pairs beautifully with the garlic butter. Just plan for the longer cooking time.
Pin This Recipe!

Easy One-Pan Garlic Butter Chicken and Rice: Best Weeknight Dinner

This easy one-pan garlic butter chicken and rice is the kind of recipe that saves your sanity on busy nights. It’s simple enough for a Tuesday but satisfying enough to feel like a real meal, with garlic butter flavor infusing every grain of rice and tender, juicy chicken.
- Prep Time: 10 minutes
- Cook Time: 30 minutes
- Total Time: 40 minutes
- Yield: 4 servings 1x
- Category: Main Course
- Cuisine: American
Ingredients
- 4 boneless, skinless chicken thighs (about 1.5 pounds) or 2 large chicken breasts
- 3 tablespoons unsalted butter (such as Kerrygold)
- 6 cloves garlic, minced (about 2 tablespoons)
- 1 cup long-grain white rice (basmati or jasmine)
- 2 cups low-sodium chicken broth
- 1 medium yellow onion, finely diced (about 1 cup)
- 1 teaspoon dried thyme (or 1 tablespoon fresh thyme leaves)
- 1 teaspoon sweet paprika (or smoked paprika)
- Salt and black pepper to taste (start with 1 teaspoon salt and ½ teaspoon pepper)
- 2 tablespoons fresh parsley, chopped (for garnish)
- Optional: lemon juice, red pepper flakes
Instructions
- Season the chicken: Pat the chicken dry with paper towels. Season generously on both sides with salt, pepper, and ½ teaspoon of the paprika. Let it sit while you prep the onion and garlic.
- Brown the chicken: Heat 1 tablespoon of the butter in a large, deep skillet or Dutch oven over medium-high heat. Once melted and sizzling, add the chicken pieces in a single layer (work in batches if needed). Cook for 4-5 minutes per side, until golden brown and crispy on the outside. The chicken won’t be fully cooked through yet. Transfer to a plate and set aside.
- Sauté the aromatics: Reduce heat to medium. Add the remaining 2 tablespoons of butter to the same pan. Once melted, add the diced onion and cook for 3-4 minutes, stirring occasionally, until softened and translucent. Add the minced garlic and cook for 30 seconds more until fragrant, stirring constantly.
- Toast the rice: Add the rice to the pan and stir to coat in the garlic butter. Cook for 1-2 minutes, stirring frequently, until the rice starts to smell nutty and turns slightly translucent at the edges.
- Add the liquid: Pour in the chicken broth and add the dried thyme, remaining ½ teaspoon paprika, and a pinch of salt and pepper. Stir everything together, scraping up any browned bits from the bottom of the pan.
- Return the chicken: Nestle the browned chicken pieces back into the pan, pushing them down into the rice mixture. Add any accumulated juices from the plate. Bring the liquid to a gentle boil.
- Cover and simmer: Reduce heat to low, cover the pan with a tight-fitting lid, and let it simmer for 18-20 minutes. Do not lift the lid during this time.
- Rest and fluff: After 18-20 minutes, remove the pan from the heat. Let it sit, still covered, for 5 minutes. After 5 minutes, remove the lid and fluff the rice gently with a fork. Check the chicken’s internal temperature—it should read 165°F.
- Garnish and serve: Sprinkle the chopped fresh parsley over the top. If using lemon, squeeze a wedge over everything. Serve straight from the pan.
Notes
Don’t skip browning the chicken—it builds flavor. Use the right rice-to-liquid ratio (1 cup rice to 2 cups liquid). Let the rice rest for 5 minutes after cooking for fluffy results. If your lid isn’t tight, use aluminum foil crimped around the edges. Fresh garlic is key; avoid jarred minced garlic. For chicken breasts, check internal temperature at 15 minutes instead of 18. If rice is crunchy after 20 minutes, add ¼ cup more broth and cook 5-7 minutes longer with a tight lid.
Nutrition
- Serving Size: 1 serving (about 1/4
- Calories: 485
- Sugar: 2
- Sodium: 680
- Fat: 18
- Saturated Fat: 8
- Carbohydrates: 45
- Fiber: 1
- Protein: 32
Keywords: one-pan chicken and rice, garlic butter chicken, easy weeknight dinner, one skillet meal, chicken and rice recipe