I was standing in the grocery store aisle last October, staring at a display of pre-carved pumpkins with that weird, waxy smell they get, when a different smell hit me — bell peppers, earthy and sweet, from the produce section nearby. And suddenly I was seven years old, standing on a step stool in my Aunt Rita’s tiny kitchen, watching her slice the top off an orange bell pepper like it was the most important thing in the world. She was laughing about something, I can’t remember what, but I remember the way the pepper felt in my hands when she handed it to me — smooth, cool, and surprisingly heavy. She told me we were making “monster faces” for dinner, and I believed her completely.
Aunt Rita moved to Arizona a few years ago, and we don’t talk as much as we should. But every October, when the leaves start turning and the stores fill up with candy corn and plastic skeletons, I find myself reaching for bell peppers at the market. Not just any bell peppers — the fat, squat ones with wide bottoms, the kind that sit up straight on a plate like they’re waiting for something. I grab orange ones, specifically, because they look like tiny pumpkins when you carve little faces into them. Honestly, the first time I tried making these for my own kids, I messed up the rice-to-meat ratio and ended up with stuffing that was way too dry. They ate it anyway, faces and all, because carving the peppers was half the fun. Maybe you’ve been there — trying to recreate a memory for your own family and realizing the joy is in the mess, not the perfection.
That’s why these jack-o-lantern stuffed bell peppers have become our Halloween tradition. They’re not fancy, and they’re not complicated, but they carry that same feeling I had in Aunt Rita’s kitchen — like dinner is a little bit of magic, even on a Tuesday night.
Why You’ll Love This Recipe
Let me tell you why this recipe works so well for families — and why I keep coming back to it year after year. I’ve tested this with my own kids (who are picky eaters, let’s be honest) and with neighbor kids who wouldn’t touch a green bean if their lives depended on it. The jack-o-lantern faces? They’re a game-changer.
- Quick & Easy: Comes together in about 40 minutes from start to finish, which is perfect for those chaotic weeknights between school pickup and bedtime. You can even prep the filling the night before.
- Simple Ingredients: Ground beef, rice, canned tomatoes, cheese, and bell peppers — all stuff you probably already have in your pantry or can grab without a second thought.
- Perfect for Halloween: These are the dinner you serve before the candy frenzy begins. They’re festive without being fussy, and kids actually get excited about eating them.
- Crowd-Pleaser: I’ve served these at a Halloween potluck and watched adults go back for seconds. The filling is savory and satisfying, and the pepper adds a sweetness that balances everything out.
- Unbelievably Delicious: The cheese gets all bubbly and golden on top, and the rice soaks up all the tomatoey goodness. It’s comfort food that happens to look like a decoration.
What makes this different from other stuffed pepper recipes? It’s the carving, honestly. Most recipes just cut the tops off and call it a day. But taking that extra five minutes to carve little triangle eyes and a crooked smile transforms the whole experience. Kids help with the carving (with a butter knife, supervised), and suddenly they’re invested in dinner. I’ve had parents tell me their kids ate vegetables for the first time because they were too busy being excited about the “monster face” to notice.
This recipe isn’t just good — it’s the kind that makes you close your eyes after the first bite. It’s Halloween dinner reimagined: healthier than candy, faster than a complicated casserole, but with the same soul-soothing satisfaction as a warm bowl of something your grandma used to make.
What Ingredients You Will Need
This recipe uses simple, wholesome ingredients to deliver bold flavor and satisfying texture without the fuss. Most of these are pantry staples or easy to find at any grocery store, so you won’t be hunting down obscure items.
- Orange bell peppers (4 large): Look for peppers with flat, stable bottoms so they sit upright on the plate. The wider and squatter they are, the easier they are to carve and stuff. (I’ve found that organic peppers tend to be more uniform in shape, but any orange bell pepper works.)
- Ground beef (1 pound, 85/15 lean): I prefer 85/15 for stuffed peppers because it has enough fat to keep the filling moist without being greasy. You can use ground turkey or chicken if you prefer, just add a tablespoon of olive oil to the pan.
- Cooked white rice (1 cup): Leftover rice works great here — it’s actually better because it’s drier and absorbs the tomato sauce more evenly. I usually make extra rice the night before. Brown rice works too, but it needs a slightly longer bake time.
- Canned diced tomatoes (15-ounce can, drained): I recommend Hunt’s or Muir Glen for consistent flavor. Don’t skip draining them, or the filling will be too soupy. Fire-roasted diced tomatoes add a nice smoky depth if you can find them.
- Shredded cheddar cheese (1 cup): Sharp cheddar gives the most flavor, but mild cheddar works if your kids are sensitive to strong tastes. Pre-shredded is fine, but freshly shredded melts more smoothly. (Pro tip: shred extra for topping the peppers before baking.)
- Onion (1 medium, finely chopped): Yellow or white onion both work. If your kids are onion-averse, you can grate the onion instead of chopping it — it melts right into the meat and they won’t notice it.
- Garlic (2 cloves, minced): Fresh garlic is best here. The jarred stuff works in a pinch, but fresh adds a brightness that really lifts the filling.
- Tomato sauce (8-ounce can): This is different from the diced tomatoes — you use the sauce to mix into the filling and also to spread in the bottom of the baking dish. It keeps the peppers from sticking and adds moisture.
- Dried oregano (1 teaspoon): Oregano is the classic Italian-style seasoning for stuffed peppers. You can substitute Italian seasoning if that’s what you have.
- Dried basil (1/2 teaspoon): Adds a subtle sweetness that kids tend to like. Fresh basil would be lovely too, but dried is more practical for a weeknight.
- Salt and black pepper (to taste): Don’t be shy with the salt — peppers need it to bring out their natural sweetness. I use about 1/2 teaspoon of salt and 1/4 teaspoon of pepper.
- Olive oil (1 tablespoon): For sautéing the onion and garlic. Any neutral oil works, but olive oil adds a nice flavor.
Substitution Guidance: For a gluten-free option, use certified gluten-free rice or quinoa instead of regular rice. For a dairy-free version, use nutritional yeast or dairy-free cheese shreds (I like Daiya or Follow Your Heart). If you’re watching your carb intake, cauliflower rice works surprisingly well — just squeeze out the excess moisture before mixing it in.
Equipment Needed
You don’t need a fancy kitchen to make these jack-o-lantern stuffed peppers. Here’s what you’ll need:
- Large skillet or frying pan: For browning the beef and sautéing the onion and garlic. A 12-inch skillet gives you plenty of room.
- Sharp knife and cutting board: You’ll need a sharp knife for slicing the tops off the peppers and carving the faces. A paring knife works best for the carving part.
- Small paring knife (for carving faces): This is the tool that makes the jack-o-lantern faces possible. A small, sharp blade lets you cut precise triangles and smiles.
- Mixing bowl: For combining the filling ingredients. Any medium-sized bowl works.
- Baking dish (9×13-inch): Large enough to hold all four peppers without them touching too much. A glass or ceramic dish works best because it distributes heat evenly.
- Aluminum foil: For covering the peppers during the first part of baking. This traps steam and helps the peppers soften without drying out.
- Measuring cups and spoons: For accurate ingredient portions. I’ve learned the hard way that eyeballing the rice leads to dry filling.
- Wooden spoon or spatula: For stirring the filling while it cooks.
If you don’t have a paring knife, a small serrated knife (like a steak knife) can work for carving the faces — just go slowly and carefully. I’ve also used a clean pair of kitchen scissors to cut the pepper tops, which is surprisingly effective. Budget-friendly tip: you can find a basic paring knife at most grocery stores for under five dollars, and it’s worth having for this recipe alone.
Preparation Method
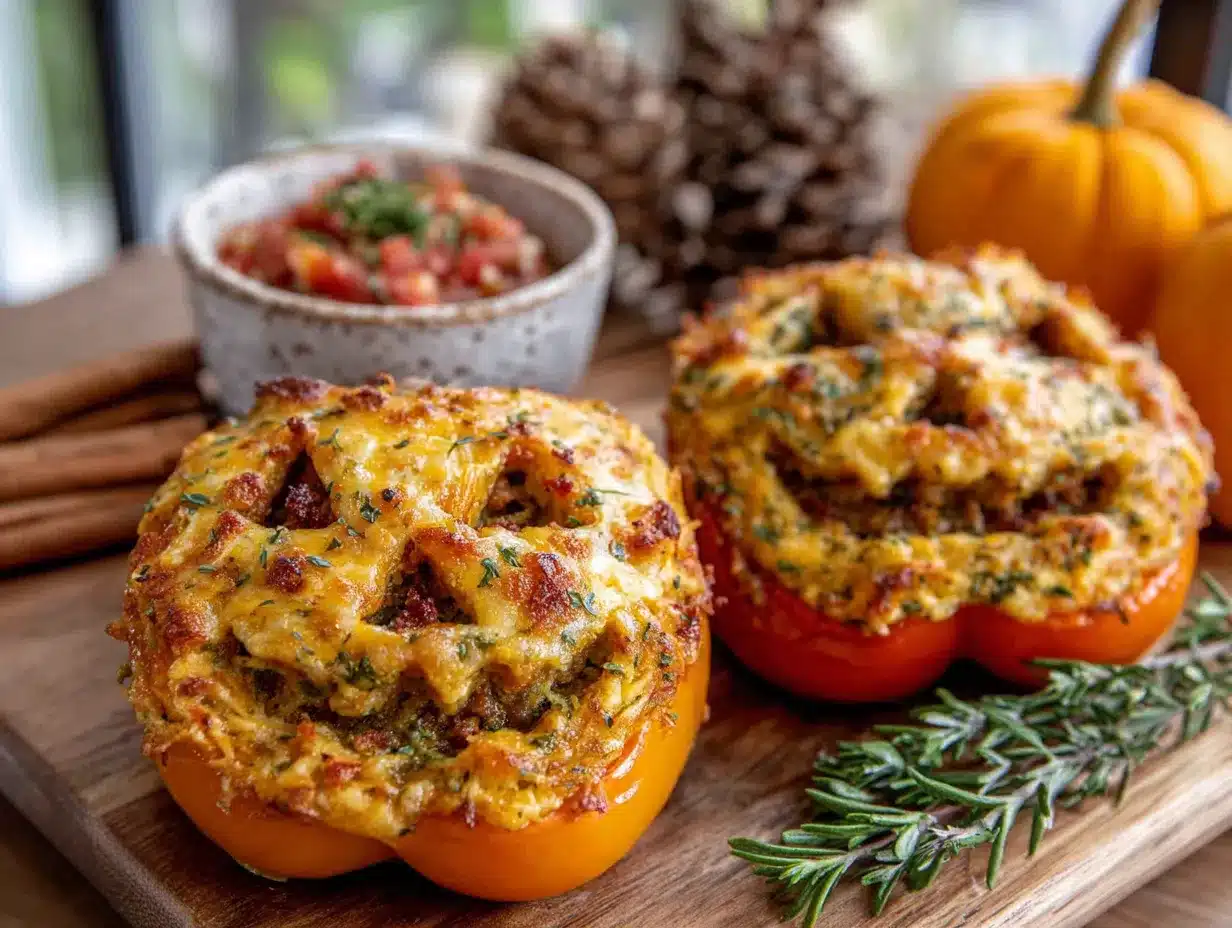
Let’s get cooking! Here’s how to make these kid-approved jack-o-lantern stuffed bell peppers step by step.
- Preheat your oven to 375°F (190°C). While the oven is heating up, bring a large pot of water to a boil. You’ll need it to par-cook the peppers before stuffing them — this ensures they’re tender but not mushy.
- Prepare the bell peppers. Wash the orange bell peppers thoroughly. Using a sharp knife, slice off the top quarter of each pepper — about 1/2 inch from the stem. Set the tops aside (you can use them as “lids” if you want, or chop them up and add them to the filling). Carefully remove the seeds and white membranes from inside each pepper. Rinse the peppers inside and out to remove any stray seeds.
- Par-cook the peppers. Place the hollowed peppers in the boiling water and let them cook for 3-4 minutes. You want them to start softening but still hold their shape. Use tongs to carefully remove them from the water and set them upside down on a paper towel to drain. (Don’t skip this step — I once tried to skip it and ended up with rock-hard peppers that took forever to bake.)
- Carve the jack-o-lantern faces. While the peppers are cooling slightly, use a small paring knife to carve faces into the peppers. Traditional jack-o-lantern faces work best: two triangle eyes and a jagged smile. You can also carve a little nose if you’re feeling fancy. Make sure the cuts go all the way through the pepper skin. Let your kids help with this part — supervised, of course — using a butter knife for the carving.
- Cook the filling. Heat 1 tablespoon of olive oil in a large skillet over medium heat. Add the finely chopped onion and cook for 3-4 minutes until it’s translucent and starting to brown. Add the minced garlic and cook for another 30 seconds until fragrant. (Don’t burn the garlic — it turns bitter and ruins the whole filling.)
- Brown the ground beef. Add the ground beef to the skillet, breaking it up with a wooden spoon as it cooks. Cook for 5-7 minutes until the beef is browned and no longer pink. Drain off any excess fat if necessary. (I usually leave a little bit for flavor.)
- Add the tomatoes and seasonings. Stir in the drained diced tomatoes, tomato sauce, dried oregano, dried basil, salt, and black pepper. Let the mixture simmer for 2-3 minutes so the flavors meld together.
- Mix in the rice and cheese. Remove the skillet from the heat. Stir in the cooked rice and 1/2 cup of the shredded cheddar cheese. Mix until everything is well combined. Taste the filling and adjust the seasoning if needed — it should be savory and slightly tangy from the tomatoes.
- Stuff the peppers. Place the par-cooked peppers upright in a 9×13-inch baking dish. Spoon the filling into each pepper, packing it gently but firmly. Don’t overstuff them — leave a little room at the top so the cheese doesn’t spill over. (I usually mound the filling slightly above the rim of the pepper.)
- Top with cheese and bake. Sprinkle the remaining 1/2 cup of shredded cheddar cheese over the tops of the stuffed peppers. If you want extra cheesy goodness, you can also sprinkle a little cheese around the base of the peppers in the dish. Cover the baking dish with aluminum foil and bake for 20 minutes.
- Uncover and finish baking. Remove the foil and bake for another 10-15 minutes until the cheese is bubbly and golden brown. The peppers should be tender but still hold their shape — you should be able to pierce them easily with a fork.
- Let them rest. Remove the baking dish from the oven and let the peppers rest for 5 minutes before serving. This helps the filling set and makes them easier to handle.
Sensory cues: When the peppers are done, you’ll smell the sweet, roasted pepper aroma mixed with the savory beef and tomatoes. The cheese on top should be golden and slightly crispy around the edges. When you cut into a pepper, the filling should be steaming and the rice should be tender.
Cooking Tips & Techniques
I’ve made these jack-o-lantern stuffed peppers more times than I can count, and I’ve learned a few things the hard way. Here are my best tips for getting them right every time.
Choose the right peppers. Not all bell peppers are created equal. Look for peppers that are squat and wide — they sit better on the plate and have more surface area for carving faces. Avoid peppers that are tall and narrow; they’re harder to carve and tend to tip over. I’ve also found that organic peppers tend to have thicker walls, which hold up better during baking.
Don’t overcook the peppers during par-boiling. Three to four minutes is all you need. If you boil them too long, they’ll become floppy and difficult to stuff. If you undercook them, they’ll be tough even after baking. The sweet spot is when you can just barely pierce the pepper with a fork but it still resists slightly.
Let the filling cool slightly before stuffing. I know it’s tempting to stuff the peppers right away, but letting the filling cool for a few minutes makes it easier to handle and prevents the cheese from melting too quickly. Plus, it gives the rice time to absorb some of the tomato sauce.
Use a piping bag for the filling. This is a game-changer if you’re making these for a party or with kids. Spoon the filling into a zip-top bag, snip off a corner, and pipe it into the peppers. It’s faster, less messy, and kids love helping with this step. (I learned this trick from a friend who runs a catering business.)
Make extra filling. I always make a little more filling than I think I’ll need. You can spoon the extra into the baking dish around the peppers — it bakes up into a delicious, tomatoey sauce that’s perfect for spooning over the peppers when you serve them.
Common mistake to avoid: Don’t skip draining the diced tomatoes. I made this mistake once and ended up with watery filling that leaked out of the peppers and made the cheese soggy. Drain them well — you can even press them gently with a paper towel to remove extra moisture.
Timing strategy: If you’re making these for a Halloween party, you can prep everything the day before. Carve the peppers, make the filling, and store them separately in the fridge. When you’re ready to bake, just stuff the peppers and pop them in the oven. Add 5-10 minutes to the bake time if the filling is cold from the fridge.
Variations & Adaptations
One of the best things about this recipe is how flexible it is. Here are some variations I’ve tried and loved.
Vegetarian version: Swap the ground beef for a can of black beans (rinsed and drained) or cooked lentils. Add an extra 1/2 cup of rice to bulk up the filling. I’ve made this for my vegetarian sister-in-law, and she said it was better than the meat version — though I’m not sure I agree!
Spicy jack-o-lanterns: If your family likes heat, add 1/2 teaspoon of cayenne pepper or a diced jalapeño to the filling. You can also use pepper jack cheese instead of cheddar for an extra kick. My husband loves this version, but I keep it mild for the kids.
Mexican-inspired version: Swap the oregano and basil for cumin and chili powder. Use black beans instead of rice, and top with Monterey Jack cheese and a dollop of sour cream. Serve with a side of tortilla chips for a fun twist.
Quinoa-stuffed peppers: Replace the rice with cooked quinoa for a protein-packed, gluten-free option. Quinoa has a slightly nutty flavor that pairs beautifully with the beef and tomatoes. Just make sure to cook the quinoa in vegetable broth instead of water for extra flavor.
Cheesy cauliflower version (low-carb): Replace the rice with riced cauliflower (about 2 cups). Sauté the cauliflower in the skillet before adding the beef to remove excess moisture. This version is surprisingly satisfying and doesn’t feel like you’re missing anything.
Personal variation I’ve tried: Last year, I added a handful of chopped spinach to the filling right before stuffing the peppers. My kids didn’t even notice — the spinach just disappeared into the tomatoey goodness. It’s now my go-to way to sneak in extra veggies.
Serving & Storage Suggestions
These jack-o-lantern stuffed peppers are best served warm, right out of the oven. Here’s how to make the most of them.
Serving temperature and presentation: Let the peppers rest for 5 minutes after baking, then transfer them to individual plates. Spoon any extra sauce from the baking dish over the top. The jack-o-lantern faces should be clearly visible — if the cheese has melted over them, you can gently scrape it away with a spoon. For a Halloween presentation, serve them on a dark plate or a bed of black beans to make the orange peppers pop.
Complementary dishes: These peppers pair well with a simple green salad dressed with vinaigrette — the acidity cuts through the richness of the filling. You can also serve them with crusty bread to soak up any extra sauce. For a Halloween-themed meal, add a side of “witches’ fingers” (breadsticks) or “mummy” hot dogs.
Storage instructions: Leftover stuffed peppers can be stored in an airtight container in the refrigerator for up to 4 days. The flavors actually get better as they sit — the rice absorbs more of the tomato sauce, and the pepper softens even more. I’ve eaten them cold straight from the fridge, and they’re surprisingly good that way.
Freezing instructions: These peppers freeze beautifully. Let them cool completely, then wrap each pepper individually in plastic wrap and place them in a freezer-safe bag. They’ll keep for up to 3 months. To reheat, thaw them in the refrigerator overnight, then bake at 350°F (175°C) for 20-25 minutes until heated through.
Reheating methods: The best way to reheat a single pepper is in the microwave — about 2 minutes on high, flipping halfway through. For multiple peppers, reheat them in the oven at 350°F (175°C) for 15-20 minutes. If the cheese looks dry, sprinkle a little water in the baking dish before reheating to create steam.
How flavors develop over time: I actually prefer the leftovers of these peppers. The pepper softens and becomes almost sweet, and the filling gets more cohesive. Day-old stuffed peppers are perfect for lunch the next day — they’re like a warm hug in a Tupperware container.
Nutritional Information & Benefits
Here’s the nutritional breakdown for one stuffed pepper (based on the recipe as written):
| Nutrient | Amount per Serving |
|---|---|
| Calories | 385 |
| Protein | 28g |
| Carbohydrates | 32g |
| Fiber | 5g |
| Fat | 16g |
| Saturated Fat | 8g |
| Sodium | 620mg |
| Vitamin C | 150% DV |
| Vitamin A | 45% DV |
| Iron | 20% DV |
| Calcium | 25% DV |
Health benefits of key ingredients: Bell peppers are packed with vitamin C — in fact, one orange bell pepper contains more vitamin C than an orange. They’re also rich in vitamin A, which is great for eye health. The ground beef provides high-quality protein and iron, while the rice offers complex carbohydrates for sustained energy. The tomatoes are loaded with lycopene, an antioxidant that supports heart health.
Dietary considerations: This recipe can be made gluten-free by using certified gluten-free rice or quinoa. For a lower-carb option, replace the rice with cauliflower rice. The recipe is naturally nut-free and soy-free (check your tomato products for added soy if you have allergies). It’s not suitable for a vegan diet as written, but the vegetarian version with black beans works well.
Potential allergens: This recipe contains dairy (cheese). If you’re lactose intolerant, use lactose-free cheese or dairy-free cheese alternatives. The recipe does not contain eggs, nuts, or shellfish.
Personal wellness perspective: I love that this recipe feels indulgent but is actually pretty balanced. You get protein, carbs, and vegetables all in one dish, and the portion size is naturally controlled by the pepper itself. It’s the kind of meal that makes you feel good about feeding your family — festive, delicious, and secretly nutritious.
Conclusion
These jack-o-lantern stuffed bell peppers are more than just a Halloween dinner — they’re a memory in the making. Every time I make them, I think of Aunt Rita’s kitchen and that feeling of wonder I had as a kid, watching a bell pepper turn into a monster face. And now, when my kids giggle at the crooked smiles I carve and argue over who gets the pepper with the best face, I know we’re making our own memories.
This recipe is worth trying because it’s simple enough for a busy weeknight but special enough for a holiday celebration. The ingredients are affordable, the prep is straightforward, and the result is something that makes everyone at the table smile — even the picky eaters. Don’t be afraid to customize the faces or the filling to suit your family’s taste. That’s the beauty of this recipe: it’s yours to play with.
I’d love to hear how your jack-o-lantern peppers turn out! Did your kids help with the carving? Did you try a fun variation? Drop a comment below and share your creation — or tag me on Pinterest with your photos. Happy Halloween cooking, and remember: the best meals are the ones that make you feel like a kid again.
Frequently Asked Questions
Can I make these jack-o-lantern stuffed peppers ahead of time?
Absolutely! You can prep everything the day before — carve the peppers, make the filling, and store them separately in the fridge. When you’re ready to bake, just stuff the peppers and add 5-10 minutes to the bake time since the filling will be cold. This is a lifesaver for Halloween parties or busy weeknights.
What if I can’t find orange bell peppers?
Orange bell peppers are ideal for the jack-o-lantern look, but you can use any color. Red bell peppers work well and have a slightly sweeter flavor. Yellow peppers also look festive. Green peppers are the most common and affordable, but they have a more bitter taste — I’d recommend using them only if that’s what you have on hand.
How do I get the cheese to stay on top without melting down the sides?
The key is to not overstuff the peppers. Leave about 1/4 inch of space at the top of each pepper before adding the cheese. Also, make sure the cheese is shredded finely — large chunks tend to slide off. If you’re still having trouble, you can create a little “rim” by folding the top edge of the pepper outward slightly before baking.
Can I use ground turkey instead of beef?
Yes, ground turkey works great. Just add a tablespoon of olive oil to the pan when browning the turkey, since it’s leaner than beef and can dry out quickly. I’ve also used ground chicken and even ground pork in a pinch. The seasoning is versatile enough to work with any ground meat.
How do I keep the peppers from tipping over in the baking dish?
This is a common issue! First, choose peppers with flat, stable bottoms. If they’re still wobbly, you can slice a thin layer off the bottom of the pepper to create a flat surface (just don’t cut through the bottom — you want the filling to stay inside). Another trick is to nestle the peppers in a bed of extra filling or sauce in the baking dish, which helps hold them upright.
Pin This Recipe!

Best Easy Jack-o-Lantern Stuffed Bell Peppers for Halloween

These festive jack-o-lantern stuffed bell peppers are a fun and delicious Halloween dinner that kids and adults will love. Made with simple ingredients like ground beef, rice, and cheese, they’re quick to prepare and perfect for a spooky weeknight meal.
- Prep Time: 15 minutes
- Cook Time: 40 minutes
- Total Time: 55 minutes
- Yield: 4 servings 1x
- Category: Main Course
- Cuisine: American
Ingredients
- 4 large orange bell peppers
- 1 pound ground beef (85/15 lean)
- 1 cup cooked white rice
- 15-ounce can diced tomatoes, drained
- 1 cup shredded cheddar cheese
- 1 medium onion, finely chopped
- 2 cloves garlic, minced
- 8-ounce can tomato sauce
- 1 teaspoon dried oregano
- 1/2 teaspoon dried basil
- Salt and black pepper to taste
- 1 tablespoon olive oil
Instructions
- Preheat oven to 375°F (190°C). Bring a large pot of water to a boil.
- Wash bell peppers. Slice off the top quarter of each pepper (about 1/2 inch from stem). Remove seeds and membranes. Rinse inside and out.
- Place hollowed peppers in boiling water and cook for 3-4 minutes until slightly softened. Remove with tongs and drain upside down on paper towels.
- Using a small paring knife, carve jack-o-lantern faces into the peppers (two triangle eyes and a jagged smile). Cut all the way through the pepper skin.
- Heat olive oil in a large skillet over medium heat. Add onion and cook 3-4 minutes until translucent. Add garlic and cook 30 seconds until fragrant.
- Add ground beef to skillet, breaking it up with a wooden spoon. Cook 5-7 minutes until browned. Drain excess fat if desired.
- Stir in drained diced tomatoes, tomato sauce, oregano, basil, salt, and pepper. Simmer 2-3 minutes.
- Remove skillet from heat. Stir in cooked rice and 1/2 cup shredded cheddar cheese until well combined. Adjust seasoning to taste.
- Place par-cooked peppers upright in a 9×13-inch baking dish. Spoon filling into each pepper, packing gently but firmly, leaving a little room at the top.
- Sprinkle remaining 1/2 cup cheddar cheese over the tops of the stuffed peppers. Cover dish with aluminum foil.
- Bake for 20 minutes covered. Remove foil and bake another 10-15 minutes until cheese is bubbly and golden brown and peppers are tender.
- Let peppers rest for 5 minutes before serving.
Notes
For best results, choose squat, wide orange bell peppers with flat bottoms. Par-boiling the peppers ensures they are tender but not mushy. Let the filling cool slightly before stuffing to make it easier to handle. You can prep the peppers and filling the day before and refrigerate; add 5-10 minutes to bake time if starting from cold.
Nutrition
- Serving Size: 1 stuffed pepper
- Calories: 385
- Sugar: 8
- Sodium: 620
- Fat: 16
- Saturated Fat: 8
- Carbohydrates: 32
- Fiber: 5
- Protein: 28
Keywords: stuffed bell peppers, Halloween dinner, jack-o-lantern peppers, kid-friendly, ground beef recipe, easy dinner