The second tray didn’t even make it to the table. I’d pulled the first batch of crispy baked buffalo cauliflower bites out of the oven, arranged them on a platter with a little bowl of ranch, and by the time I turned back from grabbing napkins, my husband was standing there with a guilty look and an empty plate. “I was just testing one,” he said, crumbs on his chin. “Then I tested another. And then they were gone.”
That was the moment I knew this recipe was a keeper. Not because of the cooking technique or the perfect crunch (though that came later), but because a grown man who claims he “doesn’t really like vegetables” had just single-handedly demolished an entire head of cauliflower without realizing it. That’s the magic of these little bites. They’re spicy, tangy, impossibly crispy, and somehow completely addictive in a way that makes you forget you’re eating something that’s actually good for you.
I developed this recipe after a string of disappointing attempts at healthier buffalo wings. The cauliflower was either soggy, or the breading fell off, or the buffalo sauce turned into a sad, watery mess. I wanted the real experience—the crunch, the heat, the messy fingers—without the deep fryer. After more trials than I care to admit, I landed on a method that actually works. The coating stays put. The edges get that perfect golden-brown crisp. And the buffalo sauce clings to every nook and cranny like it was meant to be there.
These bites have become my go-to for game days, movie nights, and those evenings when I’m craving something indulgent but don’t want to feel sluggish afterward. They’re the kind of recipe that makes you wonder why you ever bothered with frozen wings.
Why You’ll Love This Recipe
Let me tell you why this version is different from every other buffalo cauliflower recipe you’ve seen floating around Pinterest. I’ve tested this thing more times than I’d like to admit, and each failure taught me something that made the final version better.
- Actually Crispy, Not Soggy : The biggest complaint about baked cauliflower is that it turns into a sad, limp mess. Not here. The double-coating method creates a crust that stays crunchy even after you toss it in sauce. I’m not kidding—I’ve had leftovers that were still crispy the next day.
- No Deep Frying Required : You get that golden-brown crunch without standing over a pot of hot oil. Your kitchen stays clean, your fingers stay unburned, and your waistline thanks you.
- Simple Pantry Ingredients : Everything you need is probably already in your kitchen. Flour, breadcrumbs, spices, hot sauce, butter—that’s it. No fancy trips to specialty stores.
- Customizable Heat Level : I like mine with a serious kick, but you can dial the heat up or down by adjusting the hot sauce ratio. My kids version uses half the hot sauce and a little extra honey, and they inhale them.
- Perfect for Any Occasion : Game day appetizer? Check. Healthy weeknight dinner? Serve with a side salad and you’re set. Party snack that both vegans and meat-eaters will fight over? Absolutely.
- Naturally Gluten-Free Adaptable : Swap the flour for a gluten-free blend and use gluten-free breadcrumbs, and you’ve got a snack everyone can enjoy.
Honestly, this recipe has saved me more times than I can count. Last Super Bowl, I made a double batch and they disappeared before the halftime show even started. My cousin, who swears by traditional chicken wings, asked for the recipe before he even finished his first bite. That’s the kind of recipe this is—it converts people.
What Ingredients You Will Need
This recipe uses simple, humble ingredients that come together to create something genuinely impressive. The magic is in the technique, not the grocery list.
For the Cauliflower
- 1 large head of cauliflower (about 2 pounds) — Look for a head that’s firm and dense, with tightly packed florets. The fresher the cauliflower, the better the texture. I’ve found that organic cauliflower tends to have more flavor, but regular works just fine.
- 1 cup all-purpose flour (or gluten-free blend) — This creates the first layer of coating that helps the breading stick. I’ve tried using just cornstarch, and while it works, the flour gives a more substantial crunch.
- 1 cup water — You’ll whisk this with the flour to create a thin batter. The consistency should be like thick cream—not too runny, not too thick.
- 1 teaspoon garlic powder — Adds savory depth. I prefer the granulated kind over garlic salt because you can control the sodium.
- 1 teaspoon onion powder — Rounds out the flavor profile. Don’t skip this—it makes a difference.
- 1/2 teaspoon smoked paprika — This adds a subtle smokiness that complements the buffalo sauce beautifully. Regular paprika works too, but smoked is worth seeking out.
- 1/2 teaspoon salt — Use fine sea salt for even distribution.
- 1/4 teaspoon black pepper — Freshly ground if you have it.
For the Breading
- 1 1/2 cups panko breadcrumbs — Regular breadcrumbs won’t give you the same crunch. Panko is non-negotiable here. I’ve tried making my own from stale bread, and while it works in a pinch, panko is superior for this application.
- 2 tablespoons olive oil — This helps the panko brown and crisp up in the oven. You can use avocado oil if you prefer.
- 1/2 teaspoon garlic powder — A little extra in the breading layer never hurts.
For the Buffalo Sauce
- 1/2 cup hot sauce — I use Frank’s RedHot Original. It’s the gold standard for buffalo sauce. Don’t use something super thick or sweet—you want that vinegary, cayenne-based kick.
- 3 tablespoons unsalted butter (or vegan butter) — Melted and whisked into the hot sauce. This tempers the heat and adds richness. If you’re dairy-free, Miyoko’s or Earth Balance work great.
- 1 tablespoon honey (or maple syrup for vegan) — Just a touch of sweetness balances the heat. This is optional but highly recommended.
- 1 teaspoon Worcestershire sauce (or soy sauce for vegan) — Adds umami depth. I tried it without once, and the sauce felt flat.
For Serving (Optional but Recommended)
- Ranch or blue cheese dressing — For dipping. I’m a ranch person myself, but blue cheese is the traditional buffalo wing companion.
- Celery and carrot sticks — For that classic wing experience.
- Fresh chives or green onions — Chopped for garnish.
Equipment Needed
You don’t need much for this recipe, which is part of what makes it so approachable.
- Large baking sheet — A half-sheet pan (18×13 inches) is ideal. You want enough space so the cauliflower isn’t crowded. I’ve used smaller pans and ended up with steamed, not crispy, cauliflower. Learn from my mistake.
- Parchment paper or silicone baking mat — This prevents sticking and makes cleanup a breeze. Silicone mats are my favorite because they’re reusable and create an even better crisp than parchment.
- Mixing bowls — You’ll need one large bowl for the batter, one for the breadcrumbs, and one for the sauce. Nothing fancy.
- Whisk — For combining the batter ingredients smoothly.
- Tongs — For dipping the cauliflower in batter and breadcrumbs without making a huge mess. Your fingers will get sticky, but tongs help.
- Wire rack (optional but helpful) — Placing a wire rack on your baking sheet allows air to circulate around the cauliflower, creating an even crispier result. I bought a cheap one from the dollar store and it’s been a game-changer.
- Small saucepan — For melting the butter and warming the sauce.
If you don’t have a wire rack, don’t sweat it. Just flip the cauliflower halfway through baking and you’ll still get good results. I’ve done it both ways, and while the rack is better, it’s not a dealbreaker.
Preparation Method

Alright, let’s get cooking. This might look like a lot of steps, but I promise it’s straightforward once you get going.
Step 1: Preheat and Prep
Preheat your oven to 450°F (230°C). Line your baking sheet with parchment paper or a silicone mat. If you’re using a wire rack, place it on top of the baking sheet and give it a light spray of cooking oil. Trust me on this—the oil spray prevents the breading from sticking to the rack.
Step 2: Cut the Cauliflower
Remove the leaves and tough stem from the cauliflower. Cut it into bite-sized florets—about 1 to 1.5 inches across. You want them roughly the same size so they cook evenly. I aim for pieces that are about the size of a golf ball. Too small and they’ll dry out; too big and they won’t get crispy all the way through.
Here’s a tip I learned the hard way: pat the florets dry with a clean kitchen towel. Any excess moisture will steam the cauliflower instead of crisping it. I usually let them sit on a paper towel for 10 minutes while I prepare the batter.
Step 3: Make the Batter
In a large bowl, whisk together the flour, water, garlic powder, onion powder, smoked paprika, salt, and pepper. The consistency should be smooth and slightly thick—like heavy cream. If it’s too thick, add a tablespoon more water. If it’s too thin, add a little more flour. You want it to coat the back of a spoon without dripping off too quickly.
Step 4: Prepare the Breading
In a separate shallow bowl, combine the panko breadcrumbs, olive oil, and garlic powder. Use your fingers to rub the oil into the breadcrumbs until they’re evenly coated. This step is crucial—the oil helps the breadcrumbs brown and crisp in the oven. I’ve skipped this before, and the result was pale, sad cauliflower. Don’t be like me.
Step 5: Coat the Cauliflower
Working in batches, drop a handful of florets into the batter. Use tongs or your hands to turn them until they’re fully coated. Let the excess batter drip off—you don’t want a thick, gloppy coating. Then transfer each floret to the breadcrumb mixture, turning to coat all sides. Press the breadcrumbs gently so they stick.
This is the messy part. Your fingers will get covered in batter and breadcrumbs. That’s okay. Embrace it. I usually keep one hand for wet ingredients and one for dry to minimize the mess.
Step 6: Arrange on Baking Sheet
Place the coated florets on your prepared baking sheet in a single layer. Make sure they’re not touching—crowding leads to steaming, and steaming is the enemy of crispiness. If they’re too close together, use two baking sheets or bake in batches.
Step 7: Bake Until Golden
Bake for 20 minutes at 450°F (230°C). Then flip each floret using tongs—carefully, so the breading doesn’t fall off. Bake for another 10 to 15 minutes, until the cauliflower is golden brown and crispy on the outside, tender on the inside.
The smell at this point is intoxicating. Your kitchen will smell like a fair or a carnival, all warm and savory. Try not to eat them straight off the baking sheet—I’ve burned my mouth more times than I’d like to admit.
Step 8: Make the Buffalo Sauce
While the cauliflower bakes, combine the hot sauce, melted butter, honey, and Worcestershire sauce in a small saucepan. Warm over low heat, whisking until smooth. Don’t let it boil—you just want everything melted and combined. Taste it and adjust. Want more heat? Add another splash of hot sauce. Prefer it milder? Add a little extra honey or butter.
Step 9: Toss and Serve
Transfer the baked cauliflower to a large bowl. Pour the warm buffalo sauce over the top and toss gently until every floret is coated. Don’t be rough here—you don’t want the breading to fall off. Use a spatula and a gentle hand.
Serve immediately with ranch or blue cheese dressing, celery sticks, and a sprinkle of fresh chives. The sooner you eat them, the crispier they’ll be.
Cooking Tips & Techniques
I’ve made this recipe at least two dozen times, and I’ve collected some wisdom along the way. Here’s what I wish someone had told me before my first attempt.
The Secret to Maximum Crispiness
The double-coating method (batter then breadcrumbs) is non-negotiable. Some recipes skip the batter and just toss cauliflower in oil and breadcrumbs, but you end up with a thin, uneven coating that falls off. The batter creates a sticky base that the breadcrumbs can cling to, and it puffs up slightly in the oven, creating air pockets that translate to crunch.
Don’t Skip the Oil in the Breadcrumbs
I learned this one the hard way. The first time I made these, I forgot to add oil to the panko, and the result was pale, dry, and honestly pretty sad. The oil helps the breadcrumbs toast and brown, giving you that deep golden color and satisfying crunch. It’s a small step that makes a huge difference.
Temperature Matters
Baking at 450°F (230°C) is hot enough to crisp the exterior without burning the breadcrumbs. If your oven runs hot, check the cauliflower at the 15-minute mark. Every oven is different, and you’ll learn yours over time. My old apartment oven needed a full 25 minutes; my current one does it in 20.
Flip Gently
When it’s time to flip the florets halfway through, use a gentle touch. The breading is still delicate at this point, and aggressive flipping will leave you with a pile of breadcrumbs and naked cauliflower. Slide a thin spatula underneath and turn them carefully.
Make Ahead Strategy
You can bread the cauliflower up to 2 hours ahead of time and keep it in the fridge on the prepared baking sheet. Just don’t add the sauce until right before serving. The breading will stay crispy for a surprisingly long time if you keep them in a single layer.
Variations & Adaptations
One of the best things about this recipe is how flexible it is. Here are some variations I’ve tried and loved.
Air Fryer Version
If you have an air fryer, this recipe adapts beautifully. Preheat your air fryer to 400°F (200°C). Arrange the breaded cauliflower in a single layer in the basket (you’ll need to work in batches). Spray lightly with cooking oil and cook for 10-12 minutes, shaking the basket halfway through. The result is even crispier than the oven version, and it’s faster too. I actually prefer this method when I’m making a smaller batch.
Gluten-Free Adaptation
Swap the all-purpose flour for a 1:1 gluten-free flour blend (I like Bob’s Red Mill), and use gluten-free panko breadcrumbs. The texture will be slightly different, but still delicious. I’ve made this for my gluten-sensitive friends multiple times, and they always ask for seconds.
Extra Spicy Version
For those who like it hot, add 1/2 teaspoon cayenne pepper to the batter and use a hotter hot sauce like Cholula or Tabasco. You can also add a pinch of red pepper flakes to the breadcrumb mixture. My husband calls this the “fire breather” version, and he loves it.
Mild Version for Kids
For little ones or spice-sensitive folks, reduce the hot sauce to 1/4 cup and add an extra tablespoon of honey. You can also skip the buffalo sauce entirely and serve the crispy cauliflower with a honey mustard dipping sauce instead. My niece devours these—she calls them “crunchy clouds.”
Asian-Inspired Twist
Swap the buffalo sauce for a mixture of 1/4 cup soy sauce, 2 tablespoons honey, 1 tablespoon rice vinegar, and 1 teaspoon sesame oil. Toss the baked cauliflower in this mixture and top with sesame seeds and sliced green onions. It’s completely different from the buffalo version, but equally addictive.
Serving & Storage Suggestions
These bites are best served immediately, while they’re still hot and crispy. That’s when the magic happens. But I know life gets busy, and sometimes you need to make things ahead.
How to Serve
Arrange the buffalo cauliflower on a platter with a bowl of ranch or blue cheese dressing in the center. Add celery sticks, carrot sticks, and maybe some extra hot sauce on the side for those who want more heat. If you’re serving them as a main dish, pair them with a simple side salad dressed with something creamy to balance the heat. I also love serving them alongside these crispy honey mustard chicken thighs for a game day spread that has something for everyone.
Storage
Leftovers can be stored in an airtight container in the refrigerator for up to 3 days. The texture won’t be as crispy as fresh, but they’re still tasty. I actually enjoy them cold straight from the fridge—the buffalo sauce soaks in and they become almost like pickled cauliflower bites.
Reheating
To restore some of that crunch, reheat them in the oven at 400°F (200°C) for 5-7 minutes. The air fryer works even better—just 3-4 minutes at 375°F (190°C). Don’t use the microwave unless you’re okay with soft, steamed cauliflower. I’ve made that mistake, and the texture is just sad.
Freezing
You can freeze the baked (but unsauced) cauliflower for up to 2 months. Spread them on a baking sheet and freeze until solid, then transfer to a freezer bag. To serve, reheat directly from frozen at 400°F (200°C) for 10-12 minutes, then toss with fresh buffalo sauce. I do this when I find cauliflower on sale—it’s a great way to meal prep for busy weeks.
Nutritional Information & Benefits
Let’s be real—these are still a treat, but they’re a treat that happens to be built on a vegetable. Here’s the breakdown.
Estimated Nutrition per Serving (1/4 of recipe)
| Nutrient | Amount |
|---|---|
| Calories | 245 |
| Total Fat | 12g |
| Saturated Fat | 5g |
| Carbohydrates | 28g |
| Fiber | 4g |
| Sugar | 6g |
| Protein | 6g |
| Sodium | 680mg |
Health Benefits
Cauliflower is a cruciferous vegetable packed with vitamin C, vitamin K, and fiber. It’s also rich in antioxidants and compounds that support digestive health. When you eat these buffalo bites, you’re getting actual nutrition along with the indulgence. The cayenne in the hot sauce contains capsaicin, which can boost metabolism and reduce inflammation. And the garlic and onion powder provide prebiotic fibers that feed your gut bacteria.
Dietary Considerations
This recipe can easily be made gluten-free and dairy-free (using vegan butter). It’s naturally nut-free and egg-free. If you’re watching your sodium, use a low-sodium hot sauce and reduce the added salt. The honey can be swapped for maple syrup to make it fully vegan.
I’m not a nutritionist, and I don’t pretend to be one. But I do believe in eating food that makes you feel good—both in the moment and afterward. These cauliflower bites hit that sweet spot where indulgence and nourishment meet.
Conclusion
This recipe has become a staple in my kitchen for good reason. It’s the kind of food that brings people together—whether it’s a quiet Tuesday night or a house full of guests. The crispy texture, the spicy-savory sauce, the way they disappear before you’ve even sat down—that’s the kind of magic that keeps me coming back to the kitchen.
I hope you make these buffalo cauliflower bites and love them as much as I do. Don’t be afraid to tweak the heat level, try different dipping sauces, or experiment with the variations. Cooking should be fun, and this recipe is forgiving enough to let you play around.
If you try this recipe, I’d love to hear about it. Drop a comment below and let me know how they turned out—did you add extra heat? Serve them with something unexpected? Did someone in your house eat the whole batch before you got a single bite? (No judgment here.) Share your photos and tag me, too. There’s nothing that makes my day like seeing your crispy, saucy, beautiful creations.
And if you’re looking for another crowd-pleasing appetizer that delivers big flavor with minimal fuss, you’ve got to try these crispy mini corn dog muffins—they’re the perfect partner for a game day spread. Happy cooking, friends!
Frequently Asked Questions
Can I make these buffalo cauliflower bites ahead of time?
Yes! You can bread the cauliflower up to 2 hours ahead and keep it refrigerated on the baking sheet. Just bake and sauce them right before serving for the best texture. If you need to make them further ahead, bake them without the sauce, freeze them, and reheat with fresh sauce later.
Why aren’t my cauliflower bites getting crispy?
The most common culprit is moisture. Make sure your cauliflower is thoroughly dried before battering, and don’t crowd the baking sheet. If florets are touching, they’ll steam instead of crisp. Also, check that your oven is fully preheated to 450°F (230°C)—a cooler oven won’t create the same crunch.
Can I use frozen cauliflower florets?
I don’t recommend it. Frozen cauliflower releases a lot of water as it thaws, which makes the breading soggy and prevents crisping. If you’re in a pinch, thaw the florets completely, pat them extremely dry with paper towels, and proceed with the recipe. But fresh cauliflower will always give you better results.
How do I make the sauce less spicy?
Reduce the hot sauce to 1/4 cup and increase the butter to 4 tablespoons. Adding an extra tablespoon of honey or maple syrup will also help balance the heat. You can also use a milder hot sauce like a mild buffalo sauce or even a sweet chili sauce for a completely different but delicious flavor.
What dipping sauces go well with buffalo cauliflower?
Classic ranch and blue cheese are the most popular choices, but don’t stop there. Try honey mustard, garlic aioli, tzatziki, or even a creamy avocado lime dressing. For a fun twist, serve them with a side of homemade chicken nuggets with honey mustard for a complete snack platter that everyone will love.
Pin This Recipe!
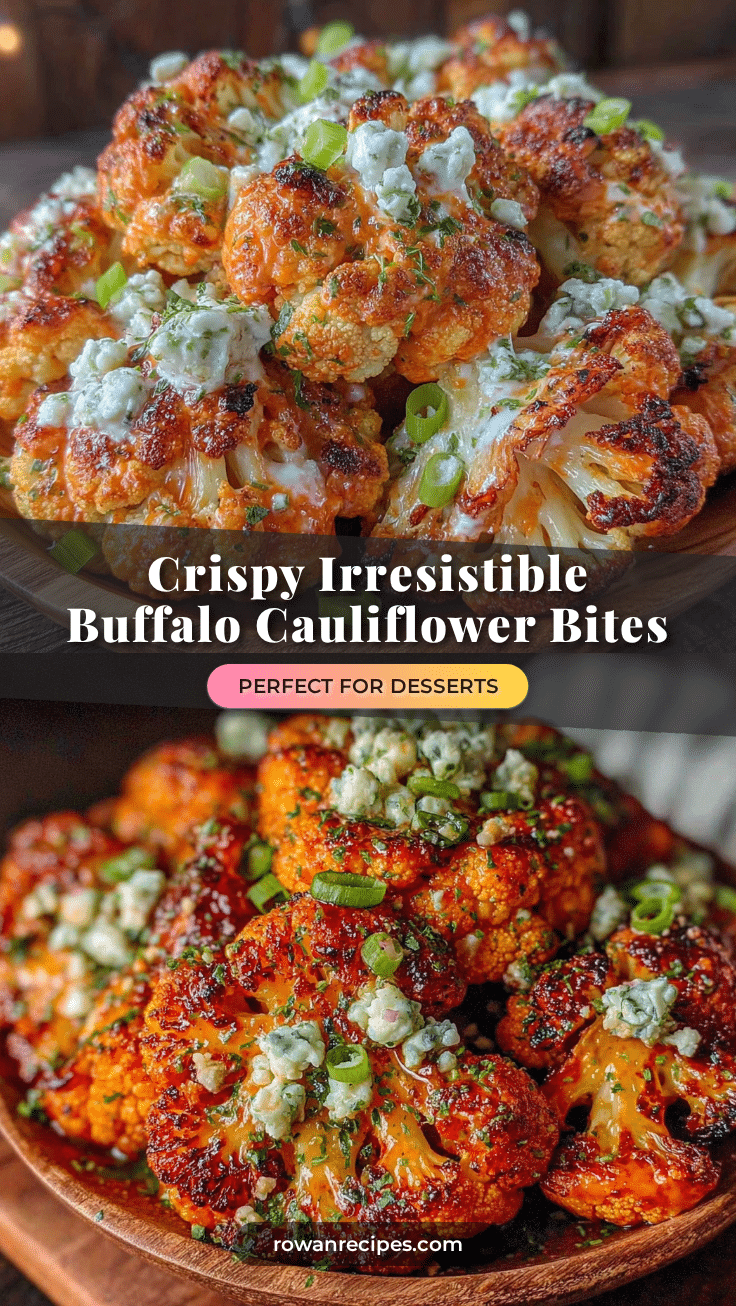
Crispy Baked Buffalo Cauliflower Bites: The Best Easy Recipe

These crispy baked buffalo cauliflower bites are spicy, tangy, and impossibly crunchy without deep frying. A healthy, addictive appetizer or main dish that even vegetable skeptics will love.
- Prep Time: 15 minutes
- Cook Time: 30 minutes
- Total Time: 45 minutes
- Yield: 4 servings 1x
- Category: Appetizer
- Cuisine: American
Ingredients
- 1 large head of cauliflower (about 2 pounds), cut into bite-sized florets
- 1 cup all-purpose flour (or gluten-free blend)
- 1 cup water
- 1 teaspoon garlic powder
- 1 teaspoon onion powder
- 1/2 teaspoon smoked paprika
- 1/2 teaspoon salt
- 1/4 teaspoon black pepper
- 1 1/2 cups panko breadcrumbs
- 2 tablespoons olive oil
- 1/2 teaspoon garlic powder (for breading)
- 1/2 cup hot sauce (e.g., Frank’s RedHot Original)
- 3 tablespoons unsalted butter (or vegan butter), melted
- 1 tablespoon honey (or maple syrup for vegan)
- 1 teaspoon Worcestershire sauce (or soy sauce for vegan)
- Ranch or blue cheese dressing, for serving (optional)
- Celery and carrot sticks, for serving (optional)
- Fresh chives or green onions, chopped for garnish (optional)
Instructions
- Preheat oven to 450°F (230°C). Line a large baking sheet with parchment paper or a silicone mat. If using a wire rack, place it on the baking sheet and spray lightly with cooking oil.
- Remove leaves and tough stem from cauliflower. Cut into bite-sized florets (about 1 to 1.5 inches). Pat dry with a clean towel to remove excess moisture.
- In a large bowl, whisk together flour, water, garlic powder, onion powder, smoked paprika, salt, and pepper until smooth and slightly thick (like heavy cream).
- In a separate shallow bowl, combine panko breadcrumbs, olive oil, and 1/2 teaspoon garlic powder. Rub oil into breadcrumbs with your fingers until evenly coated.
- Working in batches, dip florets into batter, letting excess drip off. Then coat in breadcrumb mixture, pressing gently to adhere. Place on prepared baking sheet in a single layer, not touching.
- Bake for 20 minutes. Carefully flip each floret using tongs. Bake for another 10 to 15 minutes, until golden brown and crispy.
- While cauliflower bakes, combine hot sauce, melted butter, honey, and Worcestershire sauce in a small saucepan. Warm over low heat, whisking until smooth. Do not boil.
- Transfer baked cauliflower to a large bowl. Pour warm buffalo sauce over and toss gently until evenly coated.
- Serve immediately with ranch or blue cheese dressing, celery sticks, and a sprinkle of fresh chives.
Notes
For maximum crispiness, ensure cauliflower is thoroughly dried before battering. Do not crowd the baking sheet. The double-coating method (batter then breadcrumbs) is key. For air fryer: cook at 400°F for 10-12 minutes, shaking halfway. Leftovers can be stored in the fridge for up to 3 days; reheat in oven or air fryer for best texture. Freeze baked (unsauced) cauliflower for up to 2 months.
Nutrition
- Serving Size: 1/4 of recipe
- Calories: 245
- Sugar: 6
- Sodium: 680
- Fat: 12
- Saturated Fat: 5
- Carbohydrates: 28
- Fiber: 4
- Protein: 6
Keywords: buffalo cauliflower, baked cauliflower bites, healthy buffalo wings, vegetarian appetizer, game day snack, crispy cauliflower, gluten-free option


