My daughter came home from school with a crumpled flyer about the Halloween party—two weeks away, and I was supposed to bring “spooky treats.” I nodded along, thinking I’d grab a bag of candy corn on the way out the door. But then she looked up at me with those big eyes and said, “Mom, can we make something really gross-looking?” Honestly, that changed everything.
I stood in front of the pantry, scanning shelves. Marshmallows from a camping trip we never took. A box of Rice Krispies I bought for breakfasts that never happened. Green food coloring left over from a St. Patrick’s Day cake disaster. And right there, the idea hit me—witch fingers. Not just any witch fingers, but these easy witch finger halloween rice krispie treats that look creepy but taste like pure buttery marshmallow goodness.
The first batch came out looking more like mutant pickle slices than fingers (I won’t lie to you). But by the third try, I had it down. The trick is in the shaping—you have to work fast while the mixture is still warm, pressing those almond nail beds in just right. My daughter screamed with delight when she saw the final tray, and honestly, that sound is why I keep coming back to this recipe every October. These aren’t just cute—they’re the kind of treat that makes people do a double-take before they laugh and grab two.
Why You’ll Love This Recipe
I’ve tested this recipe more times than I care to admit, and here’s what I know for sure—these treats deliver every single time. They’re the perfect balance of spooky and simple, which is exactly what Halloween entertaining should be.
- No Baking Required : You don’t even need to turn on the oven. Everything comes together on the stovetop in about 10 minutes flat.
- Kid-Friendly Activity : Little hands love pressing those almond “fingernails” into place. It’s messy in the best way possible.
- Budget-Friendly Ingredients : Marshmallows, butter, cereal, and a few drops of food coloring—that’s it. No fancy grocery store runs required.
- Customizable Creep Factor : Want them extra gory? Add some red gel icing for bloody knuckles. Prefer cute and spooky? Skip the red and go full witch green.
- Make-Ahead Magic : These hold up beautifully for days, which means you can prep them Thursday night and still be the hero at Friday’s party.
What makes these different from every other Halloween dessert out there? It’s the texture—crispy on the outside, soft and chewy on the inside, with that unmistakable marshmallow pull when you bite into one. I’ve tried store-b versions, and honestly, they taste like cardboard with food coloring. Homemade is the only way to go, and this recipe gives you that perfect ratio of sticky to crunchy every single time.
Plus, there’s something deeply satisfying about watching people’s faces when they realize your “witch fingers” are actually Rice Krispie treats. It’s the Halloween equivalent of a magic trick, and you get to be the magician.
What Ingredients You Will Need
This recipe uses simple pantry staples to create something that looks like it crawled out of a witch’s kitchen. The ingredients are straightforward, but each one plays an important role in getting that perfect texture and color.
For the Treat Base
- 6 tablespoons unsalted butter (I use Land O’Lakes—it has the right fat content for that creamy marshmallow coating)
- 1 package (10 oz) regular marshmallows (not mini—they melt differently and can make the mixture too dense)
- 6 cups Rice Krispies cereal (generic brands work fine, but the name brand gives the best snap)
- 1/2 teaspoon vanilla extract (adds warmth and depth; don’t skip it)
- Neon green gel food coloring (liquid drops won’t give you that vibrant witchy green—trust me on this one)
For the Witch Fingers
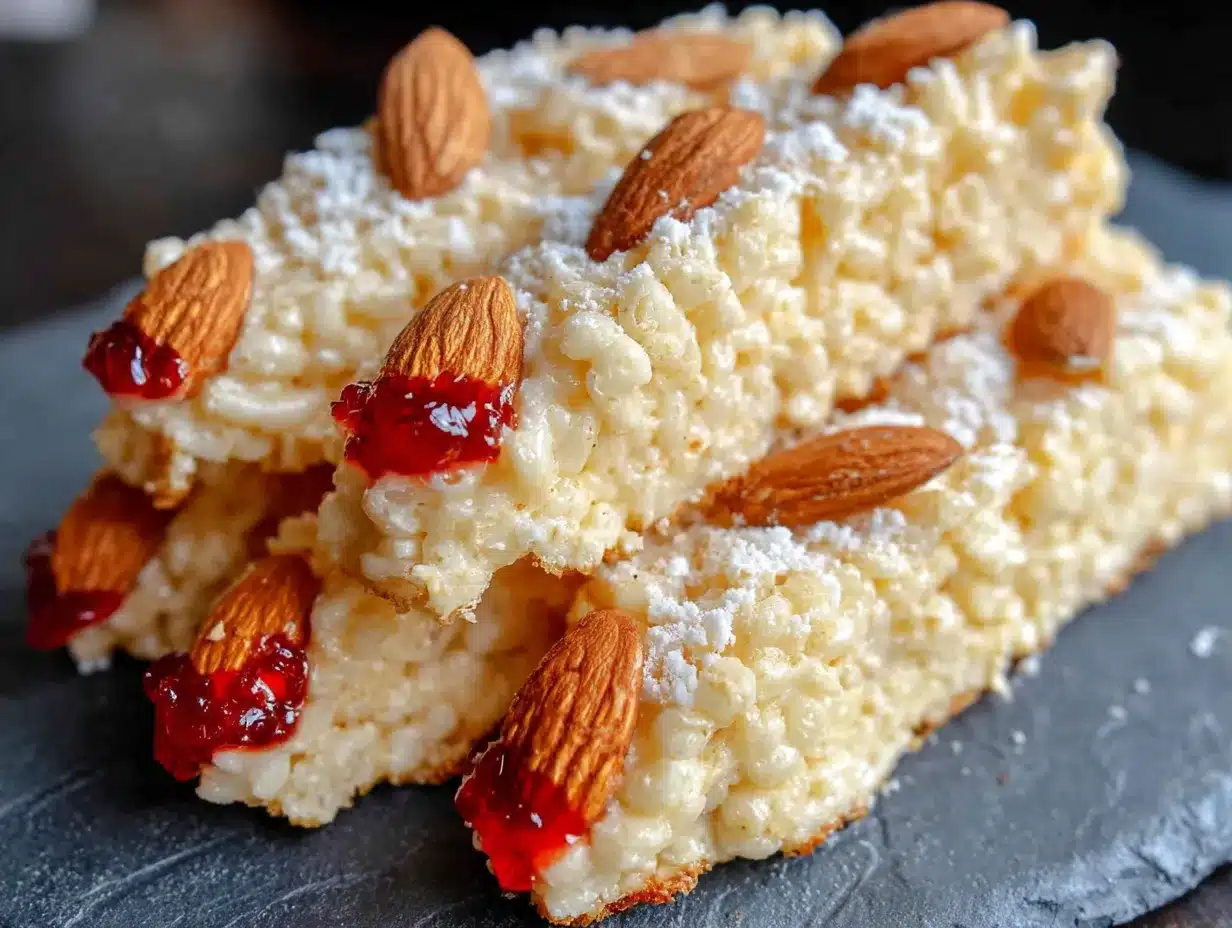
- 1/2 cup whole almonds (unroasted, unsalted—you want them pale for that nail-bed look)
- Red gel icing or strawberry jam (for the “bloody” knuckle effect, optional but highly recommended)
- Powdered sugar for dusting (gives them that dusty, crypt-crawled appearance)
Ingredient Selection Tips: When choosing your marshmallows, look for a fresh bag—stale marshmallows won’t melt smoothly and can leave you with lumpy treats. I learned this the hard way during a late-night baking session, and let me tell you, lumpy witch fingers are not the vibe.
Substitution Guidance: If you’re avoiding dairy, use vegan butter and vegan marshmallows (Dandies brand works beautifully). For a gluten-free option, Rice Krispies are naturally gluten-free, but always check the label because some generic brands add malt flavoring that contains gluten. You can also swap the almonds for slivered macadamia nuts if you want a more realistic nail shape.
Brand Recommendation: For the green food coloring, I swear by Americolor’s “Electric Green.” It’s concentrated, so you only need a tiny bit, and it doesn’t water down the marshmallow mixture like liquid dyes do. One bottle lasts me through multiple Halloween seasons.
Equipment Needed
You don’t need a professional kitchen to pull these off. Here’s what you’ll want on hand:
- Large saucepan or Dutch oven (at least 4-quart capacity—you need room to stir without making a mess)
- Wooden spoon or silicone spatula (metal spoons can scratch your pan and don’t fold the cereal as gently)
- 9×13-inch baking pan (lined with parchment paper—this is non-negotiable for easy removal)
- Parchment paper (for lining the pan and for shaping the fingers without sticking)
- Small bowl of water (keep it nearby—damp hands are your best friend when shaping sticky treats)
- Sharp knife or bench scraper (for cutting clean edges)
- Cutting board (dedicated one, because the green food coloring can stain)
If you don’t have a 9×13 pan, you can use a rimmed baking sheet instead. Just press the mixture into an even layer and chill before cutting. I’ve also used silicone muffin molds to make individual finger shapes, which cuts down on the shaping time significantly.
Pro tip: Keep a damp paper towel next to your work station. You’ll thank me when your hands get sticky halfway through shaping those fingers.
Preparation Method
Let me walk you through this step by step. The whole process takes about 30 minutes from start to finish, and most of that is just cooling time.
Step 1: Prep Your Pan and Almonds
Line your 9×13 pan with parchment paper, leaving overhang on two sides. This creates handles that let you lift the whole block out later. Set aside 24 whole almonds—you’ll need one for each finger. If some almonds are broken, don’t worry; you can position the flat side against the treat and the pointed end outward.
Step 2: Melt the Butter
Place your large saucepan over medium-low heat and add the butter. Let it melt slowly—don’t rush this step. You want the butter fully melted but not bubbling or browning. Swirl the pan occasionally to help it melt evenly. This takes about 2-3 minutes.
Step 3: Add the Marshmallows
Pour in the entire bag of marshmallows and stir constantly with your wooden spoon. The marshmallows will start to puff up and then collapse into a gooey puddle. Keep stirring until they’re completely smooth and no white streaks remain. This usually takes 4-5 minutes. Remove from heat immediately once smooth.
Step 4: Add Color and Flavor
Stir in the vanilla extract and add your green gel food coloring. Start with a small dab—about the size of a pea—and stir. You can always add more, but you can’t take it away. I usually end up using about 1/4 teaspoon total to get that vivid witchy green. Stir until the color is evenly distributed throughout the marshmallow mixture.
Step 5: Fold in the Cereal
Add the Rice Krispies cereal all at once. Fold gently with your spatula, using a cutting motion through the center and then folding from the bottom up. Don’t stir vigorously or you’ll crush the cereal and end up with dense, crumbly treats. Fold just until no white cereal remains. The mixture should look evenly coated but still have visible cereal pieces.
Step 6: Shape the Fingers
This is where the magic happens. Dampen your hands with water from your small bowl. Scoop out a golf ball-sized portion of the mixture (about 2 tablespoons). Roll it into a log shape, then taper one end to create a finger shape. Press gently to flatten slightly—real fingers aren’t perfectly round. Place each shaped finger on the parchment-lined pan, leaving about an inch between them. Repeat until all the mixture is used. You should get about 20-24 fingers, depending on size.
Step 7: Add the Almond Nails
Working quickly while the treats are still warm, press one almond into the tapered end of each finger. Press firmly so the almond stays embedded. The pointed end of the almond should extend slightly beyond the treat to look like a fingernail. If the mixture starts to cool and crack, pop the pan in the microwave for 10 seconds to soften it up.
Step 8: Create the Knuckle Lines
Use the back of a butter knife or a chopstick to gently press lines into each finger, mimicking knuckle creases. Press about 1/4 inch deep—deep enough to create a visible indent but not so deep that you cut through the treat. You want two or three lines per finger, spaced evenly apart.
Step 9: Add Bloody Details (Optional)
If you’re going for the gory look, dab a tiny bit of red gel icing at the base of each almond nail and along the knuckle lines. I use a toothpick for precision. Don’t overdo it—a little goes a long way, and you want it to look like a witch’s manicure gone wrong, not a crime scene.
Step 10: Chill and Dust
Place the pan in the refrigerator for 15-20 minutes to set the treats. Once firm, dust lightly with powdered sugar using a fine-mesh sieve. This gives them that eerie, crypt-crawled appearance that makes them look like they’ve been dug up from a witch’s garden. Serve immediately or store as directed below.
Cooking Tips & Techniques
I’ve made these treats more times than I can count, and I’ve learned a few things the hard way. Here are my best tips to ensure your witch fingers turn out perfectly every time.
Work Fast, But Not Frantic
The marshmallow mixture starts setting as soon as it cools, so you need to shape those fingers quickly. But don’t rush so much that you burn your hands—damp hands help prevent sticking, but the mixture is still hot. If it becomes too stiff to shape, microwave the entire batch for 10-15 seconds to soften it back up.
The Water Trick Is Real
Keep that bowl of water nearby and dip your hands between every 2-3 fingers. Dry hands will stick to the mixture like glue. I keep a kitchen towel next to the water bowl so I can dry my hands between dips—wet hands are good, but dripping water will make the treats soggy.
Don’t Overcook the Marshmallows
This is the most common mistake I see. Overcooked marshmallows turn into hard, chewy bricks that are impossible to shape. As soon as the marshmallows are fully melted and smooth, pull the pan off the heat. The residual heat will continue melting them as you add the cereal.
Almond Placement Matters
Press the almond in at a slight angle, not straight on. Real fingernails grow at an angle, and this small detail makes a huge difference in the overall creepiness factor. Also, make sure the almond is pointing away from the “wrist” end of the finger.
My Biggest Failure
The first time I made these, I used liquid green food coloring. The treats turned out a murky brownish-green that looked more like swamp water than witch fingers. Plus, the liquid made the marshmallow mixture seize up and become grainy. Gel food coloring is non-negotiable for vibrant, smooth results.
Variations & Adaptations
One of the best things about this recipe is how easily it adapts to different tastes and dietary needs. Here are some variations I’ve tried and loved.
Gluten-Free Version
Use certified gluten-free Rice Krispies or another crispy rice cereal. The rest of the ingredients are naturally gluten-free, so this is an easy swap. I’ve used Nature’s Path Organic Crispy Rice Cereal with great results—it stays crunchy even after mixing.
Vegan Witch Fingers
Swap the butter for vegan butter (Miyoko’s or Earth Balance work well) and use vegan marshmallows. Dandies brand marshmallows melt beautifully and have the same texture as regular marshmallows. The almond nails are already vegan, so you’re good there.
Chocolate Witch Fingers
For a darker, more gothic look, add 2 tablespoons of unsweetened cocoa powder to the marshmallow mixture along with the vanilla. The treats will turn a deep chocolate brown that looks like dirt-crusted witch fingers. Top with slivered almonds for a bone-white contrast.
Spicy Witch Fingers
Add 1/4 teaspoon of cayenne pepper and 1/2 teaspoon of cinnamon to the marshmallow mixture. The heat builds slowly and pairs surprisingly well with the sweet marshmallow base. These are always a hit at adult Halloween parties.
Mini Finger Bites
Instead of shaping full-sized fingers, roll the mixture into small balls and press an almond sliver into each one. These bite-sized versions are perfect for kids’ parties or for snacking without committing to a full finger.
Serving & Storage Suggestions
These witch fingers are best served at room temperature, which lets the marshmallow texture soften slightly for that perfect chewy bite. Arrange them on a black platter or a bed of crushed chocolate cookies (to look like dirt) for maximum spooky effect.
Complementary Treats: These pair beautifully with other Halloween goodies. I love serving them alongside a batch of crispy mac and cheese cups for a savory-sweet Halloween spread. For a full dessert table, add some shamrock mint brownies (just skip the green frosting and add orange sprinkles instead).
Beverage Pairings: Serve with a steaming mug of apple cider or a creamy pumpkin spice latte. For the adults, a dark stout beer or a bourbon-spiked hot chocolate complements the sweet marshmallow flavor beautifully.
Storage Instructions: Store these treats in an airtight container at room temperature for up to 5 days. Layer them between sheets of parchment paper to prevent sticking. Do not refrigerate them after the initial setting period—the fridge makes them hard and less enjoyable to eat.
Freezer Tips: You can freeze these treats for up to 3 months. Place them in a single layer on a baking sheet and freeze until solid, then transfer to a freezer-safe bag. Thaw at room temperature for about 30 minutes before serving. The texture remains surprisingly good after freezing.
Flavor Development: These treats actually taste better the next day. The marshmallow absorbs into the cereal slightly, creating a more cohesive texture. If you’re making them for a party, I recommend preparing them the day before.
Nutritional Information & Benefits
Let’s be real—these are a treat, not a health food. But here’s what you should know about what’s in each finger-sized serving (based on 24 servings per batch).
| Nutrient | Amount Per Serving |
|---|---|
| Calories | 145 |
| Total Fat | 6g |
| Saturated Fat | 3g |
| Carbohydrates | 22g |
| Sugar | 12g |
| Protein | 2g |
| Fiber | 1g |
| Sodium | 115mg |
Health Highlights: The almonds provide healthy monounsaturated fats and vitamin E, which supports skin health. Rice Krispies are fortified with iron and B vitamins, so there’s a tiny nutritional silver lining. The marshmallows are low in fat but high in sugar, so enjoy these in moderation.
Dietary Considerations: This recipe contains dairy (butter) and tree nuts (almonds). For a nut-free version, use sunflower seeds or pumpkin seeds instead of almonds for the nails. The treats are egg-free and can be made vegan with simple substitutions as noted above.
My Perspective: Halloween comes once a year, and I firmly believe in enjoying the season’s treats without guilt. These witch fingers are about fun and creativity, not daily nutrition. Make them, share them, and savor every bite.
Conclusion
These easy witch finger halloween rice krispie treats are everything I want in a holiday dessert—creepy-looking, delicious-tasting, and simple enough that my daughter can help make them. Every time I bring a tray to a party, they disappear within minutes, and people always ask for the recipe.
The best part? You can customize them endlessly. Make them bloody and gory for a haunted house party, or keep them cute and green for a classroom celebration. Add a sprinkle of edible glitter for a magical twist, or dip the tips in chocolate for extra indulgence. This recipe is a canvas for your Halloween creativity.
I’d love to hear how yours turn out! Drop a comment below and tell me your favorite variation, or tag me in your photos on social media. Did you go full gory witch or keep it family-friendly? Did your kids help shape the fingers? Share your stories—I read every single one.
Now go forth and make some spooky magic. Your Halloween table is waiting.
Frequently Asked Questions
Can I make these witch fingers ahead of time?
Absolutely! These treats store beautifully for up to 5 days at room temperature. In fact, the texture improves after a day as the marshmallow settles into the cereal. Just keep them in an airtight container with parchment paper between layers.
Why did my treats turn out hard instead of chewy?
This usually happens when the marshmallows are overcooked. As soon as they’re fully melted and smooth, remove the pan from the heat. Overcooking causes the sugar to crystallize, resulting in hard, brittle treats. Also, make sure you’re using fresh marshmallows—stale ones don’t melt properly.
Can I use mini marshmallows instead of regular ones?
I don’t recommend it. Mini marshmallows have a different moisture content and melt more quickly, which can result in a denser, less airy texture. Stick with regular-sized marshmallows for the best results.
How do I get the green color to be vibrant without staining everything?
Use gel food coloring, not liquid drops. Gel is concentrated, so you need less, and it won’t water down the marshmallow mixture. Wear disposable gloves when shaping to prevent green hands, and line your pan with parchment paper for easy cleanup.
My almond nails keep falling off—what am I doing wrong?
Press the almonds into the treats while the mixture is still warm and pliable. If the treats have cooled too much, the almonds won’t stick. Pop the pan in the microwave for 10 seconds to soften the mixture, then press the almonds in firmly. Also, make sure your almonds are dry—any moisture on the surface will prevent them from adhering.
Pin This Recipe!
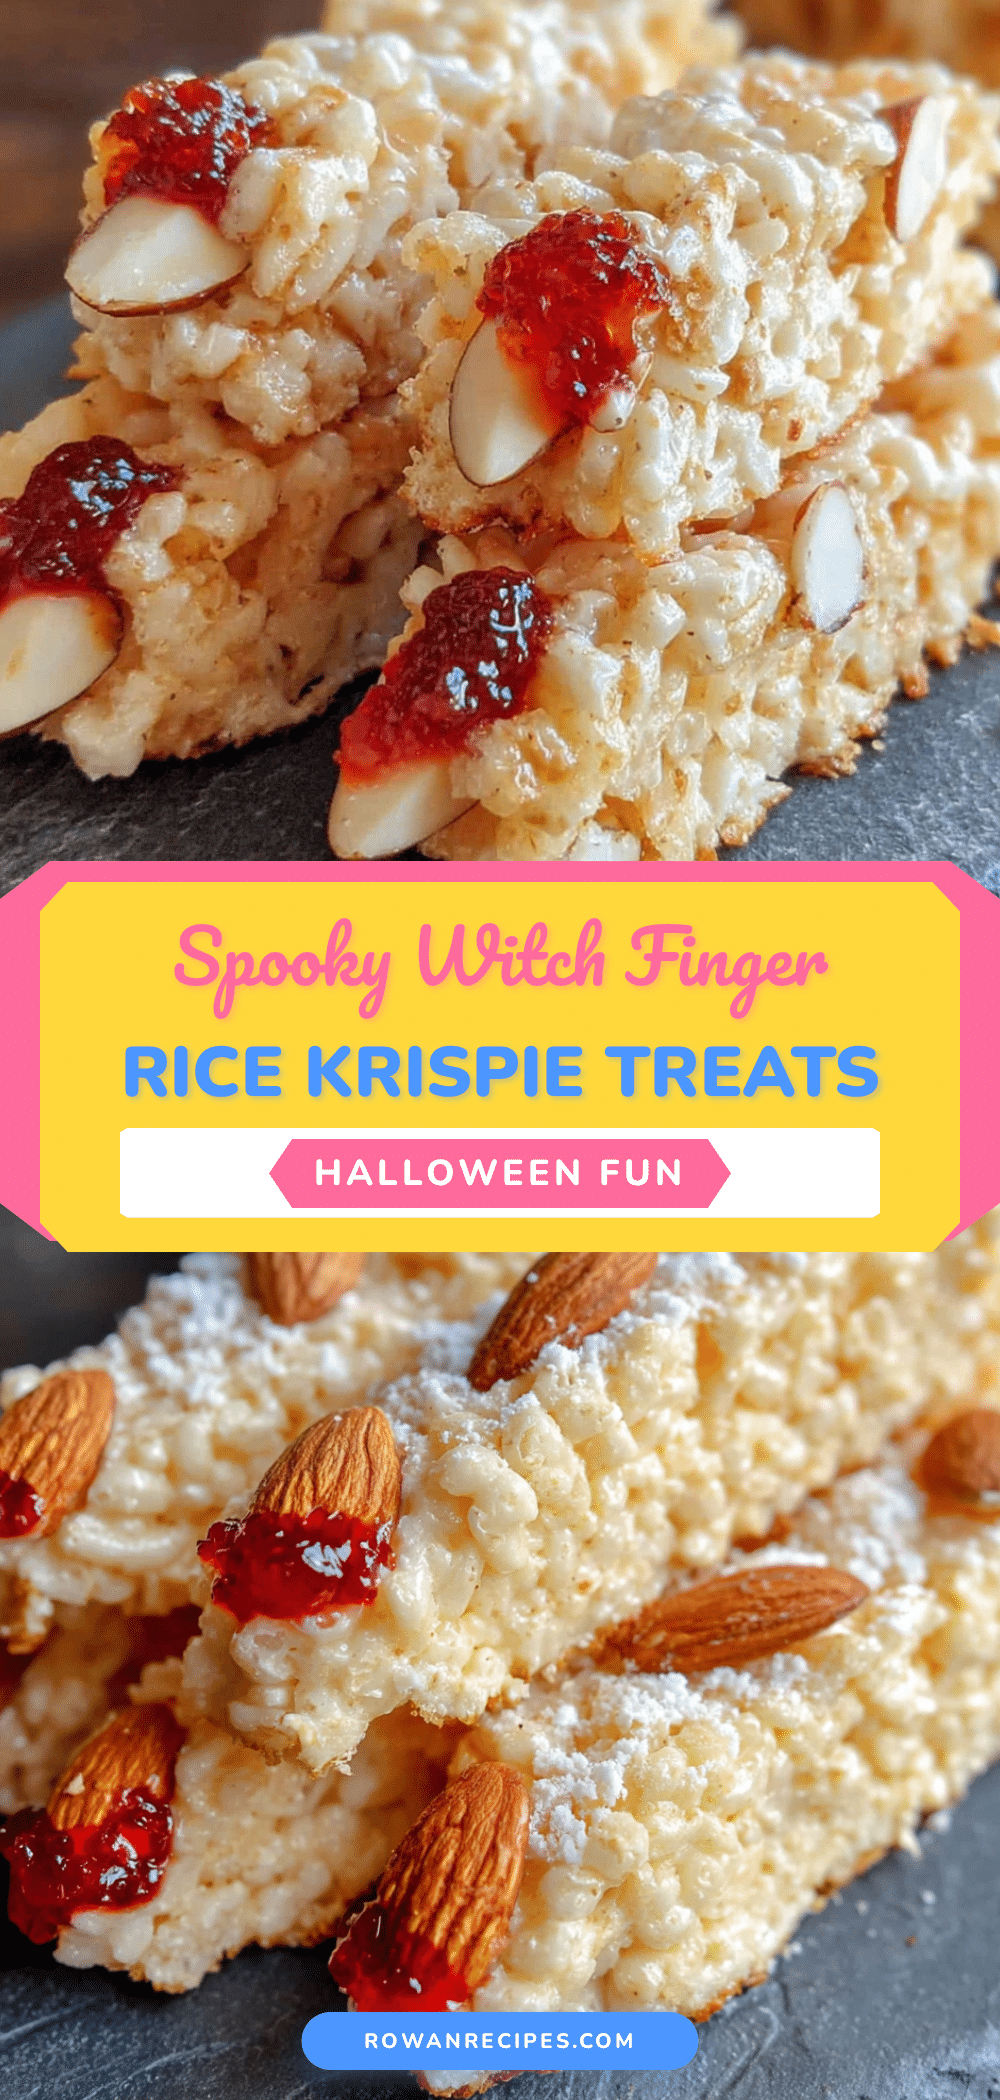
Easy Witch Finger Halloween Rice Krispie Treats
These creepy yet delicious witch finger Rice Krispie treats are perfect for Halloween. Made with simple pantry ingredients, they look like they crawled out of a witch’s kitchen but taste like buttery marshmallow goodness.
- Prep Time: 15 minutes
- Cook Time: 10 minutes
- Total Time: 30 minutes
- Yield: 24 servings 1x
- Category: Dessert
- Cuisine: American
Ingredients
- 6 tablespoons unsalted butter
- 1 package (10 oz) regular marshmallows
- 6 cups Rice Krispies cereal
- 1/2 teaspoon vanilla extract
- Neon green gel food coloring
- 1/2 cup whole almonds (unroasted, unsalted)
- Red gel icing or strawberry jam (optional)
- Powdered sugar for dusting
Instructions
- Line a 9×13-inch baking pan with parchment paper, leaving overhang on two sides. Set aside 24 whole almonds.
- In a large saucepan over medium-low heat, melt the butter slowly, about 2-3 minutes.
- Add the marshmallows and stir constantly until completely smooth and no white streaks remain, about 4-5 minutes. Remove from heat immediately.
- Stir in the vanilla extract and green gel food coloring (start with a pea-sized amount, add more as needed) until evenly distributed.
- Add the Rice Krispies cereal all at once. Fold gently with a spatula using a cutting motion until no white cereal remains.
- Dampen your hands with water. Scoop out golf ball-sized portions (about 2 tablespoons) and shape into finger shapes, tapering one end. Place on the prepared pan, leaving about an inch between each. Repeat until all mixture is used (about 20-24 fingers).
- While still warm, press one almond into the tapered end of each finger at a slight angle to look like a fingernail.
- Use the back of a butter knife or chopstick to gently press 2-3 knuckle lines into each finger, about 1/4 inch deep.
- Optional: Dab red gel icing at the base of each almond nail and along knuckle lines using a toothpick.
- Refrigerate for 15-20 minutes to set. Dust lightly with powdered sugar before serving.
Notes
Work quickly while the mixture is warm for shaping. Keep hands damp to prevent sticking. If mixture cools and becomes stiff, microwave for 10 seconds to soften. For best texture, make a day ahead. Store in an airtight container at room temperature for up to 5 days. Do not refrigerate after initial setting.
Nutrition
- Serving Size: 1 finger
- Calories: 145
- Sugar: 12
- Sodium: 115
- Fat: 6
- Saturated Fat: 3
- Carbohydrates: 22
- Fiber: 1
- Protein: 2
Keywords: Halloween treats, Rice Krispie treats, witch fingers, no-bake dessert, spooky snacks, kid-friendly Halloween recipe


