By the third batch in as many days, I realized I was gripping the piping bag a little too tightly, my tongue poking out in concentration as I dragged a toothpick through melted chocolate. The first round of spiderwebs looked like a toddler had sneezed on them. The second batch was better, but the legs were uneven. This time, though, the dark chocolate lines pulled into perfect, delicate arcs against the creamy white frosting. I actually whispered “yes” to an empty kitchen. That’s the thing about these spiderweb Halloween brownies—they hook you. It’s not just about the fudgy, crackly top or the way the center stays gloriously dense. It’s the tiny, satisfying moment when the web actually works. I kept making them because the process felt like a secret trick I was slowly mastering, one pan at a time. And honestly, the way the webs look against that dark brownie? Pure spooky magic. By the end of the week, I had a freezer full of perfect brownies and a newfound respect for the humble toothpick.
These fudgy and spooky brownies are the kind of Halloween treat that doesn’t need fancy molds or scary decorations. They rely on a simple, rich brownie base and a clever icing trick that looks way harder than it actually is. You get that deep, chocolatey flavor with a soft, almost gooey center, topped with a crisp white spiderweb that cracks beautifully when you bite into it. I think that’s why this recipe stuck with me. It’s not about being the most elaborate Halloween dessert. It’s about the quiet satisfaction of pulling a toothpick through icing and watching a web appear, like a little magic trick you can eat.
Why You’ll Love This Recipe
I’ve tested a lot of brownie recipes over the years, and this one hits the sweet spot between fudgy and firm. It holds up to the topping without crumbling, which is crucial for that clean web look. Here’s why these spiderweb Halloween brownies are worth your time:
- Quick & Easy: From mixing to decorating, you’ll be done in under an hour. Perfect for a last-minute Halloween party or a fun afternoon project with the kids.
- Simple Ingredients: No candy melts, no gelatin, no weird stabilizers. You probably have everything in your pantry right now.
- Perfect for Halloween: They look spooky and impressive, but the technique is surprisingly forgiving. Great for parties, school treats, or just a cozy movie night.
- Crowd-Pleaser: The fudgy texture wins over chocolate lovers, and the spiderweb design is a guaranteed conversation starter. Kids and adults both go for seconds.
- Unbelievably Delicious: The brownie itself is rich, buttery, and intensely chocolatey. The sweet white icing provides the perfect contrast, making each bite a little celebration.
What makes this version different from other Halloween brownies is the technique. I use a simple buttercream-like icing that doesn’t run, so the webs stay sharp. Most recipes use a runny glaze, which can bleed into the brownie and look messy. This one stays put, giving you that crisp, professional-looking web every time. It’s a small tweak that makes a huge difference.
This recipe is the kind that makes you close your eyes after the first bite. It’s comfort food with a spooky twist—faster than a full cake, but with the same soul-soothing satisfaction. Perfect for impressing guests without the stress, or turning a simple weeknight into something memorable.
What Ingredients You Will Need
This recipe uses simple, pantry-friendly ingredients to deliver that deep, fudgy flavor and the perfect canvas for your spiderweb design. No special Halloween shopping required.
- Unsalted butter, ½ cup (113g), melted and slightly cooled. I use Kerrygold for its rich flavor, but any good unsalted butter works. Melting it first gives the brownies that dense, fudgy texture.
- Granulated sugar, 1 cup (200g). This provides sweetness and helps create that thin, crackly top crust.
- Large eggs, 2, at room temperature. Room temperature eggs emulsify better, giving you a smoother batter. If you forget, just place them in a bowl of warm water for 5 minutes.
- Vanilla extract, 1 teaspoon. Pure vanilla is best, but imitation works fine here. It deepens the chocolate flavor.
- All-purpose flour, ¾ cup (95g). Spoon and level it into your measuring cup to avoid packing it down, which can make the brownies cakey.
- Unsweetened cocoa powder, ¼ cup (25g). I prefer Dutch-processed for a darker, richer color, but natural cocoa works too. (If you like a stronger chocolate hit, try adding an extra tablespoon.)
- Salt, ¼ teaspoon. A little salt balances the sweetness and enhances the chocolate.
- Powdered sugar, 1 cup (120g), sifted. For the spiderweb icing. Sifting prevents lumps so your webs are smooth.
- Milk, 2-3 tablespoons. Use whole milk for a richer icing, or any dairy-free milk like oat or almond. The key is adding it slowly until the icing is thick but pipeable.
- Dark chocolate, 2 tablespoons, melted (optional). For drawing the web lines. You can also use a store-bought chocolate syrup in a squeeze bottle.
Equipment Needed
You don’t need a lot of fancy tools for these spiderweb Halloween brownies. Here’s what I use:
- 8×8-inch baking pan. A metal pan gives a crisper edge, while glass works fine too. Line it with parchment paper for easy lifting—I always leave an overhang on two sides.
- Mixing bowls. One large, one small. Nothing fancy.
- Whisk. A sturdy whisk is better than an electric mixer here; you don’t want to aerate the batter too much.
- Spatula. For folding and scraping every last bit of batter.
- Piping bag or zip-top bag. A small piping bag with a fine round tip is ideal, but a zip-top bag with a tiny corner snipped off works perfectly. I’ve used both.
- Toothpick. The most important tool! A plain wooden toothpick is perfect for dragging the chocolate through the icing.
- Cooling rack. Essential for letting the brownies cool completely before decorating. Patience here is key.
Preparation Method
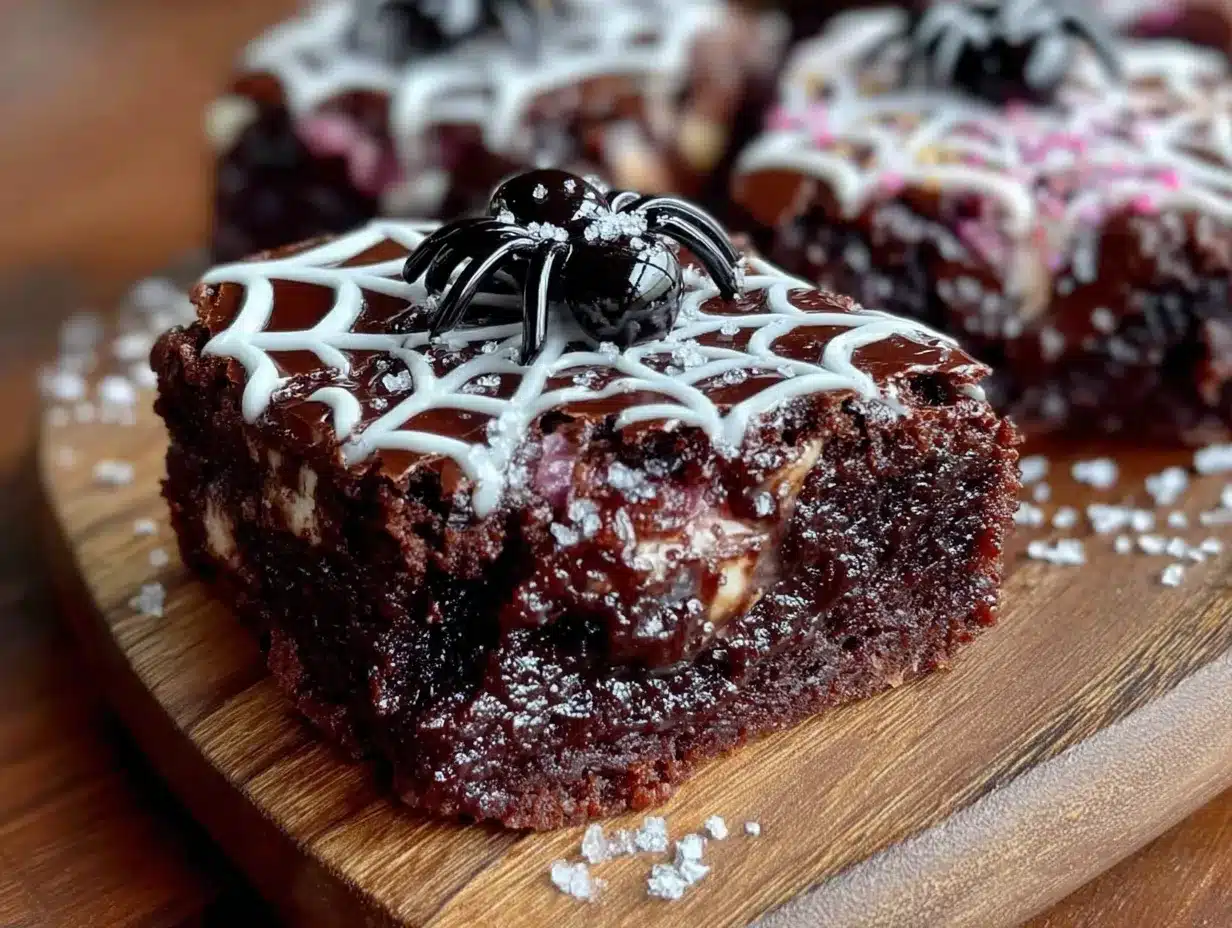
Let’s get spooky. This process is straightforward, but each step matters. Follow along, and you’ll have perfect spiderwebs in no time.
- Preheat and Prep: Preheat your oven to 350°F (175°C). Line your 8×8-inch pan with parchment paper, leaving an overhang on two opposite sides. This makes lifting the brownies out a breeze.
- Melt the Butter: In a large microwave-safe bowl, melt the ½ cup of butter in 30-second bursts. Let it cool for a minute—you don’t want it hot enough to cook the eggs.
- Mix Sugar and Butter: Whisk the 1 cup of granulated sugar into the melted butter until combined. It will look grainy, and that’s fine. Whisk for about a minute; this helps create that shiny, crackly top.
- Add Eggs and Vanilla: Add the 2 room-temperature eggs, one at a time, whisking well after each. Then add the 1 teaspoon of vanilla. The batter should look smooth and glossy.
- Combine Dry Ingredients: In a small bowl, whisk together the ¾ cup of flour, ¼ cup of cocoa powder, and ¼ teaspoon of salt. This ensures the cocoa is evenly distributed.
- Fold in Dry Ingredients: Add the dry ingredients to the wet mixture. Use your spatula to fold gently. Stop as soon as you no longer see streaks of flour. Over-mixing will make the brownies tough.
- Bake: Pour the batter into your prepared pan and spread it evenly. Bake for 20-25 minutes. The top should look set and slightly crackly, but a toothpick inserted into the center should come out with a few moist crumbs. For fudgy brownies, err on the side of under-baking. Start checking at 20 minutes.
- Cool Completely: Let the brownies cool in the pan on a wire rack for at least 1 hour. Then, use the parchment to lift them out and let them cool completely. This is crucial—warm brownies will melt your icing.
Now for the spiderwebs:
- Make the Icing: In a small bowl, whisk together the 1 cup of sifted powdered sugar and 2 tablespoons of milk. Add the third tablespoon only if needed. You want a thick, smooth paste that holds its shape when you lift the whisk. It should be slightly thicker than a typical glaze.
- Create the Base: Spread a thin, even layer of the white icing over the cooled brownies. This is your web base. Don’t make it too thick, or the web lines will get lost.
- Pipe the Chocolate: Melt your 2 tablespoons of dark chocolate (or use chocolate syrup). Fill your piping bag or zip-top bag and snip a very tiny tip off the corner. Starting from the center of the brownie, pipe 3-4 concentric circles of chocolate. Don’t worry if they’re not perfect—the toothpick will do the work.
- Create the Web: Here’s the magic. Take a toothpick and start from the center circle. Drag the toothpick straight out towards the edge of the brownie. Then, move to the next section and drag again. Repeat all the way around, spacing the lines evenly. You’ll see the web pattern appear instantly. Wipe the toothpick clean after each drag for the cleanest lines.
- Set and Serve: Let the icing set for about 15 minutes before slicing. Use a sharp knife, and wipe it clean between cuts for those perfect, Instagram-worthy squares.
Cooking Tips & Techniques
I’ve made my share of ugly webs, so let me save you the trouble. The biggest mistake is using a runny icing. If your icing is too thin, it will pool on the brownie and the chocolate lines will bleed into a messy blob. Aim for a consistency that’s like thick toothpaste. You should be able to spread it without it dripping off the spatula.
Another tip: let the brownies cool completely. I know it’s hard to wait, but trust me. I once decorated a slightly warm pan, and the icing melted into a sad, white puddle. The brownies were still delicious, but the spiderwebs looked more like ghosts.
When you pipe the chocolate circles, don’t overthink it. Even if the circles are wobbly, the toothpick drag will straighten them out. The key is to drag the toothpick from the very center circle all the way to the edge in one smooth motion. If you stop halfway, the line will be broken.
Finally, for the cleanest slices, chill the decorated brownies in the fridge for 15 minutes before cutting. A warm knife also helps—run it under hot water, dry it, then slice. Wipe the blade between each cut.
Variations & Adaptations
These spiderweb Halloween brownies are endlessly adaptable. Here are a few ways to switch them up:
- Gluten-Free Version: Swap the all-purpose flour with a 1:1 gluten-free baking blend. I’ve used Bob’s Red Mill with great results. The texture will be slightly more tender, but the fudgy center remains.
- Vegan Option: Use a flax egg (1 tablespoon ground flaxseed + 3 tablespoons water) for each egg and a vegan butter stick. For the icing, use a plant-based milk. The brownies will be a bit more cakey, but still delicious.
- Peppermint Twist: Add ½ teaspoon of peppermint extract to the brownie batter for a minty Halloween treat. It pairs beautifully with the chocolate.
- Orange Chocolate: Zest one orange into the sugar and butter mixture. The citrus cuts through the richness and feels very festive for fall.
- White Chocolate Webs: Instead of dark chocolate for the web lines, use melted white chocolate. It creates a ghostly, pale web that looks eerie against a dark brownie.
I once tried a version with a pinch of cayenne pepper in the batter for a spicy kick. It was surprisingly good—the heat sneaks up on you after the sweetness. Just be careful not to overdo it.
Serving & Storage Suggestions
These brownies are best served at room temperature or slightly chilled. The icing stays firm, and the fudgy center is at its peak. I like to cut them into 16 small squares for a party, or 9 larger ones for a more generous portion.
For a spooky presentation, arrange them on a black platter or a wooden board. Add a few plastic spiders or candy eyeballs around the edges for extra flair. They pair wonderfully with a cold glass of milk, a scoop of vanilla ice cream, or a warm cup of coffee.
Storage: Store the brownies in an airtight container at room temperature for up to 3 days. If your kitchen is warm, the icing might soften, so I prefer to keep them in the fridge. They actually get fudgier as they sit.
Freezing: These freeze beautifully. Place the undecorated brownies in a freezer-safe container for up to 3 months. When you’re ready to serve, thaw them in the fridge overnight, then decorate with the icing and chocolate. The icing doesn’t freeze well, so always add it fresh.
Flavor-wise, the brownies deepen after a day. The chocolate becomes richer and more complex. Honestly, I think they taste even better on day two.
Nutritional Information & Benefits
Let’s be real—these are a treat, not a health food. But here’s the breakdown for one square (based on 16 servings):
- Calories: Approximately 210
- Fat: 11g
- Carbohydrates: 28g
- Protein: 3g
- Sugar: 20g
The cocoa powder is the star here. It’s packed with antioxidants called flavonoids, which can help reduce inflammation and improve heart health. Dark chocolate, in moderation, is actually good for you. The butter provides a small amount of vitamin A, and the eggs add a bit of protein.
If you’re watching your sugar intake, you can reduce the granulated sugar to ¾ cup. The brownies will be slightly less sweet and won’t have that signature crackly top, but the fudgy texture will remain.
These brownies are not gluten-free or vegan as written, but the substitutions above work well for those dietary needs. They do contain dairy and eggs, so keep that in mind for allergies.
Conclusion
These spiderweb Halloween brownies are the kind of recipe that makes you feel like a kitchen wizard. They’re fudgy, rich, and surprisingly simple to decorate. The spiderweb trick looks like advanced pastry work, but it’s just a toothpick and a steady hand. I love making them because they bring a little bit of spooky fun to the table without any stress.
I encourage you to play around with the variations. Add some orange zest, throw in a handful of chocolate chips, or use a different colored icing for the webs. Make it your own. That’s the beauty of a simple brownie base—it’s a blank canvas for your Halloween creativity.
I’d love to see your spiderwebs! Leave a comment below telling me how yours turned out, or share a photo on Pinterest. Did you try a wild variation? Let me know. And if you’re looking for more cozy fall treats, don’t miss my gooey pecan pie bars or these mint brownies for another twist. Happy Halloween, and happy baking!
Frequently Asked Questions
Can I use a boxed brownie mix for this recipe?
Absolutely. If you’re short on time, a boxed mix works fine. Just bake it according to the package directions for an 8×8 pan, let it cool completely, and then follow the spiderweb decorating steps. The homemade version is richer, but the boxed mix is a great shortcut.
My spiderweb icing is too runny. What did I do wrong?
You likely added too much milk. The icing should be thick, like a paste. To fix it, add more sifted powdered sugar, one tablespoon at a time, until it thickens up. You want it to hold its shape when you lift the whisk.
Can I make these brownies ahead of time for a party?
Yes! Bake the brownies up to 2 days in advance and store them in an airtight container. Decorate them the morning of your party or the night before. The icing sets best when it’s fresh, but it will hold for about 24 hours in the fridge.
How do I get clean, sharp lines when cutting the brownies?
Chill the decorated brownies in the fridge for 15 minutes. Then, use a sharp knife and wipe it clean with a damp paper towel between each cut. A warm knife (run under hot water and dried) also helps slice through the icing without dragging it.
My chocolate circles look messy when I pipe them. Any tips?
Don’t stress about perfect circles. Even wobbly lines will look great once you drag the toothpick through them. The key is to use a very small piping tip or a tiny snip on your zip-top bag. If the chocolate is too thick, warm it for 5 seconds in the microwave. If it’s too thin, let it cool for a minute to thicken up.
Pin This Recipe!
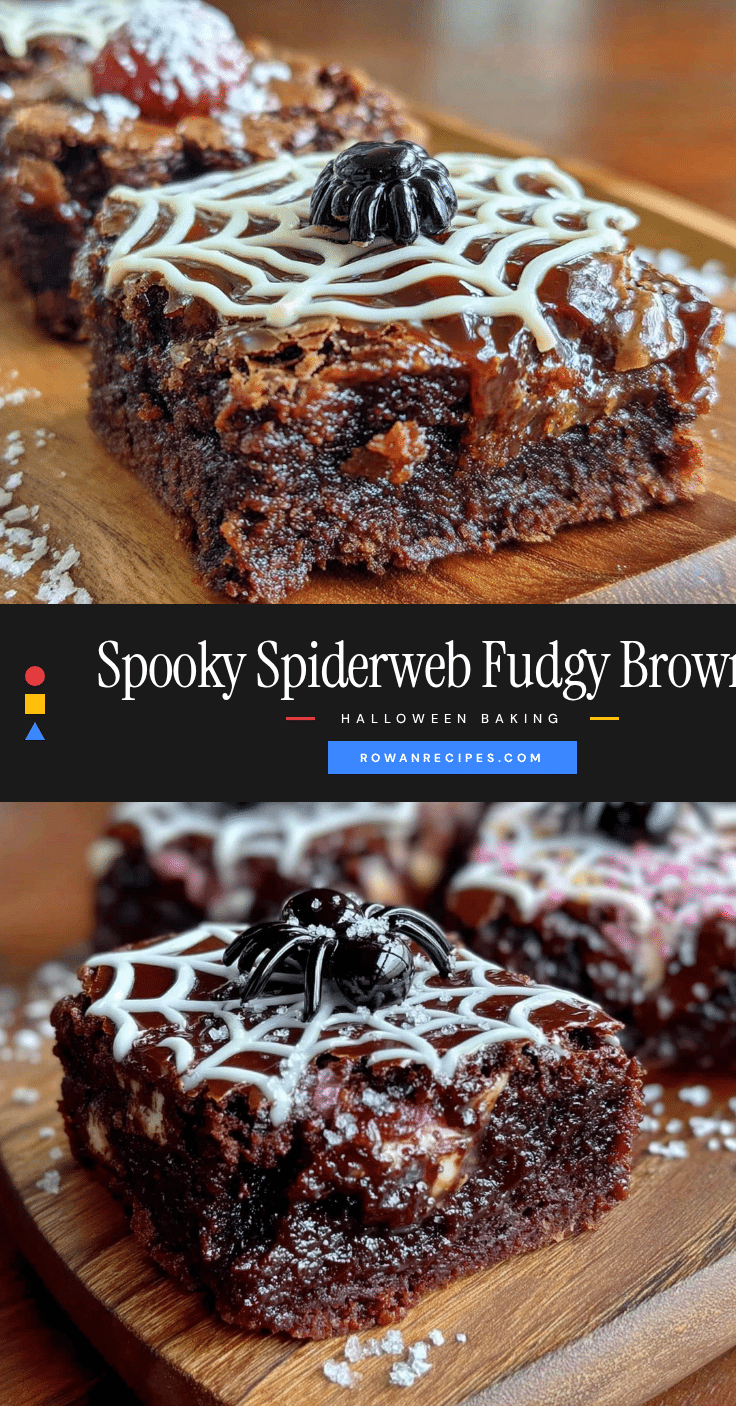
Spiderweb Halloween Brownies: Easy Fudgy & Spooky Treat
These fudgy and spooky brownies are the kind of Halloween treat that doesn’t need fancy molds or scary decorations. They rely on a simple, rich brownie base and a clever icing trick that looks way harder than it actually is.
- Prep Time: 15 minutes
- Cook Time: 25 minutes
- Total Time: 40 minutes
- Yield: 16 servings 1x
- Category: Dessert
- Cuisine: American
Ingredients
- ½ cup (113g) unsalted butter, melted and slightly cooled
- 1 cup (200g) granulated sugar
- 2 large eggs, at room temperature
- 1 teaspoon vanilla extract
- ¾ cup (95g) all-purpose flour
- ¼ cup (25g) unsweetened cocoa powder (Dutch-processed preferred)
- ¼ teaspoon salt
- 1 cup (120g) powdered sugar, sifted
- 2–3 tablespoons milk (whole milk or dairy-free)
- 2 tablespoons dark chocolate, melted (or chocolate syrup)
Instructions
- Preheat oven to 350°F (175°C). Line an 8×8-inch baking pan with parchment paper, leaving overhang on two sides.
- In a large microwave-safe bowl, melt the butter in 30-second bursts. Let cool for a minute.
- Whisk the granulated sugar into the melted butter until combined. Whisk for about a minute.
- Add the eggs one at a time, whisking well after each. Add vanilla and whisk until smooth and glossy.
- In a small bowl, whisk together flour, cocoa powder, and salt.
- Add dry ingredients to wet mixture. Fold gently with a spatula until just combined. Do not overmix.
- Pour batter into prepared pan and spread evenly. Bake for 20-25 minutes, until top is set and a toothpick inserted in center comes out with moist crumbs.
- Cool brownies in pan on a wire rack for at least 1 hour. Then lift out and cool completely.
- For the icing: In a small bowl, whisk together sifted powdered sugar and 2 tablespoons milk. Add more milk if needed to achieve a thick, smooth paste that holds its shape.
- Spread a thin, even layer of white icing over the cooled brownies.
- Melt dark chocolate (or use chocolate syrup). Fill a piping bag or zip-top bag with a tiny corner snipped off. Pipe 3-4 concentric circles of chocolate starting from the center.
- Using a toothpick, start from the center circle and drag straight out to the edge. Repeat all around, spacing lines evenly. Wipe toothpick clean after each drag.
- Let icing set for about 15 minutes before slicing. Use a sharp knife, wiping clean between cuts.
Notes
Let brownies cool completely before decorating to prevent icing from melting. For clean slices, chill decorated brownies for 15 minutes and use a warm knife wiped clean between cuts.
Nutrition
- Serving Size: 1 square (based on 1
- Calories: 210
- Sugar: 20
- Sodium: 95
- Fat: 11
- Saturated Fat: 6
- Carbohydrates: 28
- Fiber: 1
- Protein: 3
Keywords: Halloween brownies, spiderweb brownies, fudgy brownies, easy Halloween dessert, spooky treats


