By the seventh time I made these Uncrustable-style freezer sandwiches in two weeks, my husband stopped asking questions. He just opened the freezer, grabbed one, and walked out the door. That was the moment I knew I’d cracked something—a lunch solution that actually worked without me having to think about it at 6 AM. The first batch was a happy accident, born from a half-empty jar of peanut butter and a desperate need to use up bread before it went stale. But the second, third, and fourth batches? Those were intentional. I kept tweaking—the bread type, the spread thickness, the sealing method—until the texture came out just right.
What got me was how simple it really is. You don’t need a fancy gadget or a special bread cutter. Just your hands, some patience, and a fork. The filling stays put, the bread stays soft, and the whole thing thaws in about an hour. Honestly, it’s the kind of recipe that feels too easy to be this good. But here we are.
These sandwiches have become my go-to for busy mornings, lunchbox packing, and those days when I just don’t have the energy to assemble anything. They’re the reason I’ve stopped buying store-bought frozen sandwiches altogether. And once you make a batch, you’ll probably feel the same way.
Why You’ll Love This Recipe
Let me tell you why this one’s a keeper. I’ve tested it with different breads, spreads, and fillings, and every time, it delivers.
- Quick & Easy: You can whip up a whole batch in under 15 minutes. No cooking, no complicated steps.
- Simple Ingredients: You probably already have everything in your pantry. Bread, peanut butter, jelly—that’s it.
- Perfect for Meal Prep: Make a dozen on Sunday, and you’ve got lunches sorted for the week. Great for school, work, or road trips.
- Budget-Friendly: Homemade versions cost a fraction of the store-bought ones. Plus, you control the quality.
- Customizable: Swap the fillings based on what you have or what your family likes. Nutella, cream cheese, honey—go wild.
- Kid-Approved & Adult-Friendly: Let’s face it—everyone loves a good PB&J. These are just neater and more portable.
What makes this recipe different from the rest? It’s the sealing technique. Instead of using a special press, you use a fork to crimp the edges. It creates a tight seal that keeps the filling from leaking, and it’s way easier to clean up. I learned this trick after ruining my first batch with a glass that didn’t seal properly. Lesson learned.
There’s something deeply satisfying about pulling a perfectly sealed sandwich out of the freezer, knowing you made it yourself. It’s comfort food reimagined—simpler, faster, and completely under your control.
What Ingredients You Will Need
This recipe uses simple, pantry-friendly ingredients to create a lunchbox staple that’s both delicious and convenient. No fancy shopping trips required—just the basics done right.
- 8 slices soft sandwich bread (white, whole wheat, or brioche—I prefer Sara Lee or Pepperidge Farm for softness)
- ½ cup creamy peanut butter (or any nut butter; natural works but may require stirring before spreading)
- ½ cup strawberry jam or jelly (grape, raspberry, or your favorite flavor; avoid preserves with large fruit chunks for easier spreading)
- 1 tablespoon butter, softened (optional, for toasting the exterior if you want a warm version later)
Ingredient Tips from My Kitchen:
- For the best texture, use bread that’s fresh but not too airy. Thick-cut brioche holds up well, but standard white bread works perfectly too.
- If you’re using natural peanut butter, stir it well before spreading. The oil separation can make the filling too runny if you don’t mix it properly.
- I recommend Smucker’s jam for consistent sweetness, but any brand works. Just avoid jelly with large fruit chunks—they can make sealing tricky.
- For a healthier twist, try almond butter and sugar-free jam. The texture holds up just as well.
Substitution Guidance:
- Use sunflower seed butter for a nut-free option (perfect for school lunchboxes).
- Swap jam with honey or Nutella for a different flavor profile.
- Gluten-free bread works, but it’s more delicate—freeze the sandwiches for 30 minutes before sealing to prevent tearing.
Equipment Needed
You don’t need much for this recipe, which is part of the beauty. Here’s what you’ll need:
- Rolling pin (or a clean wine bottle—I’ve used both)
- Round cookie cutter or glass (about 3-4 inches in diameter; a drinking glass works in a pinch)
- Fork (for crimping the edges)
- Baking sheet (for freezing the sandwiches flat)
- Parchment paper or wax paper (to prevent sticking)
- Freezer-safe bags or containers (for storage)
Personal Experience: I started with a glass that was too small, and my first batch looked like sad little hockey pucks. A 3-inch round cutter is the sweet spot. If you don’t have one, a wide-mouth mason jar lid works perfectly. For the rolling pin, I’ve used a wine bottle more times than I’d like to admit—it gets the job done.
Budget-Friendly Tip: Don’t rush out to buy a special sandwich sealer. A fork and a glass are all you need. Save your money for better ingredients.
Preparation Method

- Prepare your workspace: Lay out all your ingredients and equipment. This goes fast once you start, so having everything within reach helps. Line a baking sheet with parchment paper.
- Flatten the bread: Take one slice of bread and gently roll it with a rolling pin until it’s about ¼-inch thick. Don’t press too hard—you want it flat, not compressed into a cracker. Repeat with all 8 slices. This step is crucial for a good seal later.
- Spread the peanut butter: Take 4 slices of flattened bread and spread about 1 tablespoon of peanut butter on each. Leave a ½-inch border around the edges—this helps the seal stick. If you spread too close to the edge, the filling will ooze out when you press.
- Add the jam: Spread about 1 tablespoon of jam on top of the peanut butter on the same 4 slices. Again, keep that border clear. The jam should be evenly spread but not too thick—about ⅛ inch is perfect.
- Top with remaining bread: Place the other 4 slices of flattened bread on top of the filled ones. Press down gently around the edges to start forming the seal.
- Cut into rounds: Using your round cutter or glass, press down firmly in the center of each sandwich to cut out a circle. The crusts will be discarded (or saved for breadcrumbs!). Make sure you cut through both layers of bread cleanly.
- Crimp the edges: This is the magic step. Take a fork and press down along the edges of each round sandwich. Work your way around the entire circle, pressing firmly to seal the two bread layers together. The fork marks should be visible and deep—this creates a tight seal that keeps the filling inside during freezing and thawing.
- Flash freeze: Place the sealed sandwiches on the prepared baking sheet in a single layer. Make sure they’re not touching. Pop the sheet in the freezer for 1-2 hours, or until the sandwiches are solid. This prevents them from sticking together when you bag them.
- Package for storage: Once frozen solid, transfer the sandwiches to a freezer-safe bag or container. Squeeze out as much air as possible before sealing. Label with the date—they’ll keep for up to 3 months.
- Thaw and enjoy: To eat, simply take a sandwich out of the freezer and let it sit at room temperature for about 1 hour. The bread will soften, and the filling will be perfectly spreadable. For a warm treat, microwave for 10-15 seconds.
Sensory Cues: When you crimp the edges with the fork, you should feel the bread compressing and sealing. The fork marks should be distinct, not faint. If the edges feel loose, press again. When you cut the rounds, the layers should stay together without slipping apart.
Troubleshooting Tip: If your sandwiches are leaking during thawing, your seal wasn’t tight enough. Next time, press the fork edges more firmly and make sure the bread is flattened evenly.
Cooking Tips & Techniques
Here are some lessons I learned the hard way, so you don’t have to.
- Flatten the bread evenly: If one side is thicker than the other, the seal won’t hold. Roll in one direction, then turn the bread 90 degrees and roll again. This ensures uniform thickness.
- Don’t overfill: I know it’s tempting to pile on the peanut butter and jelly, but too much filling makes the sandwiches burst. Stick to 1 tablespoon of each—it’s the perfect amount for a balanced bite.
- Freeze before bagging: This step is non-negotiable. If you put unfrozen sandwiches in a bag, they’ll stick together and tear when you try to separate them. Flash freezing keeps them individual and intact.
- Use room temperature spreads: Cold peanut butter is hard to spread and can tear the bread. Let it sit out for 10 minutes before starting. Same goes for jam—if it’s straight from the fridge, it’s too thick.
- Save the crusts: Don’t throw them away! Pulse them in a food processor to make breadcrumbs, or toast them with butter and cinnamon for a quick snack. I’ve made crispy homemade chicken nuggets with these breadcrumbs before—it’s a game-changer.
- Batch size matters: Make at least 8 sandwiches at a time. It takes the same amount of effort as making 2, and you’ll thank yourself later when you’re running late.
Common Mistake to Avoid: Using bread that’s too fresh and soft. It sounds counterintuitive, but slightly stale bread actually holds up better during the rolling and sealing process. Day-old bread is ideal.
Variations & Adaptations
This recipe is a blank canvas. Here are some ways to switch it up.
- Nut-Free Version: Use sunflower seed butter or WowButter instead of peanut butter. Both spread well and freeze beautifully. Perfect for nut-free schools.
- Chocolate Lover’s Twist: Swap the jam for Nutella and use a pinch of flaky sea salt on top before sealing. It’s like a dessert sandwich that’s acceptable for lunch.
- Healthy Swap: Use whole wheat bread, almond butter, and sugar-free raspberry jam. Add a thin layer of mashed banana for extra sweetness and potassium.
- Savory Option: Who says these have to be sweet? Fill with cream cheese and sliced strawberries, or try a savory version with ham and cheese (though those are best eaten fresh, not frozen).
- Honey Cinnamon: Spread a thin layer of honey instead of jam, and sprinkle a pinch of cinnamon over the peanut butter. It tastes like a warm hug.
- Seasonal Fruit: In summer, use fresh strawberry slices instead of jam. In fall, try apple butter and a dash of pumpkin pie spice.
Personal Variation I Love: I once made a batch using brioche bread, Nutella, and sliced bananas. I sealed them and froze them, then toasted them in a pan with butter before serving. It was like a gourmet dessert sandwich. My kids still talk about it.
Serving & Storage Suggestions
These sandwiches are designed for convenience, but a little presentation goes a long way.
- Serving Temperature: Thaw at room temperature for 1 hour, or microwave for 10-15 seconds for a slightly warm center. If you want a grilled effect, pan-fry in butter for 2 minutes per side after thawing.
- Presentation Ideas: Cut the thawed sandwich in half diagonally for a classic lunchbox look. Serve with apple slices, baby carrots, or a handful of pretzels for a complete meal.
- Complementary Dishes: Pair with a fresh garden grazing board for a fun lunch spread, or serve alongside a cup of tomato soup for a cozy meal.
- Storage Instructions: Keep frozen in an airtight bag or container for up to 3 months. Squeeze out excess air to prevent freezer burn. Label with the date and filling type—trust me, you won’t remember later.
- Reheating Methods: For a soft sandwich, thaw naturally. For a crispy exterior, thaw first, then toast in a toaster oven or pan-fry. Avoid microwaving for more than 15 seconds—the bread can become rubbery.
- Flavor Development: These sandwiches taste best within the first month of freezing. After that, the bread may start to dry out slightly. Still edible, just not as fresh.
Pro Tip: Pack a frozen sandwich in a lunchbox in the morning, and it will be perfectly thawed by lunchtime. No ice pack needed—the sandwich acts as its own coolant.
Nutritional Information & Benefits
Here’s an approximate breakdown per sandwich (using white bread, peanut butter, and strawberry jam):
- Calories: 280-320
- Protein: 8-10g
- Carbohydrates: 35-40g
- Fat: 12-15g
- Fiber: 2-3g
- Sugar: 12-15g
Health Benefits: Peanut butter provides healthy fats and protein for sustained energy. Whole wheat bread adds fiber, while fruit jam offers a small dose of vitamins. This sandwich strikes a good balance between satisfaction and nutrition, especially for kids who need fuel for school.
Dietary Considerations:
- Can be made nut-free with sunflower seed butter
- Use sugar-free jam and whole wheat bread for a lower-sugar option
- Gluten-free bread works with careful handling
- Not suitable for low-carb or keto diets due to bread content
Allergen Note: Contains peanuts, gluten, and potentially tree nuts (depending on your bread). Always check labels for cross-contamination risks.
Personal Perspective: I love that I can control the sugar content in these homemade versions. Store-bought freezer sandwiches often have added preservatives and high-fructose corn syrup. Here, I know exactly what’s going into my family’s lunchboxes.
Conclusion
These Easy Uncrustable-Style Freezer Sandwiches are more than just a lunch hack—they’re a time-saving, budget-friendly solution that actually tastes good. No more soggy bread, no more leaking jelly, no more last-minute sandwich assembly at 6 AM. Just grab, thaw, and go.
I love that this recipe is endlessly customizable. Whether you’re packing lunches for school, heading out on a road trip, or just want a quick snack on hand, these sandwiches deliver. And honestly, the satisfaction of pulling out a homemade sandwich that looks just like the store-bought version? Priceless.
Give them a try, and let me know how they turn out. Did you try a fun filling combination? Did your kids love them? Drop a comment below—I’d love to hear your variations. And don’t forget to pin this recipe for later! Happy lunch prepping!
Frequently Asked Questions
Can I use any type of bread for these freezer sandwiches?
Yes, but softer breads like white, whole wheat, or brioche work best. Very crusty or dense breads (like sourdough) don’t seal as well and can crack during freezing.
How long do these sandwiches last in the freezer?
They stay fresh for up to 3 months when stored in an airtight bag or container. For best texture, try to eat them within the first month.
Do I need a special sandwich sealer to make these?
No! A round cookie cutter or drinking glass works perfectly for cutting, and a fork is all you need for sealing. No special equipment required.
Can I make these with Nutella or other spreads?
Absolutely. Nutella, almond butter, sunflower seed butter, or even cream cheese all work well. Just make sure the spread isn’t too runny, or it might leak during thawing.
How do I thaw the sandwiches without them getting soggy?
Thaw at room temperature for about 1 hour. Avoid microwaving for too long (max 15 seconds) to prevent the bread from becoming rubbery. The natural thawing process keeps the texture perfect.
Pin This Recipe!
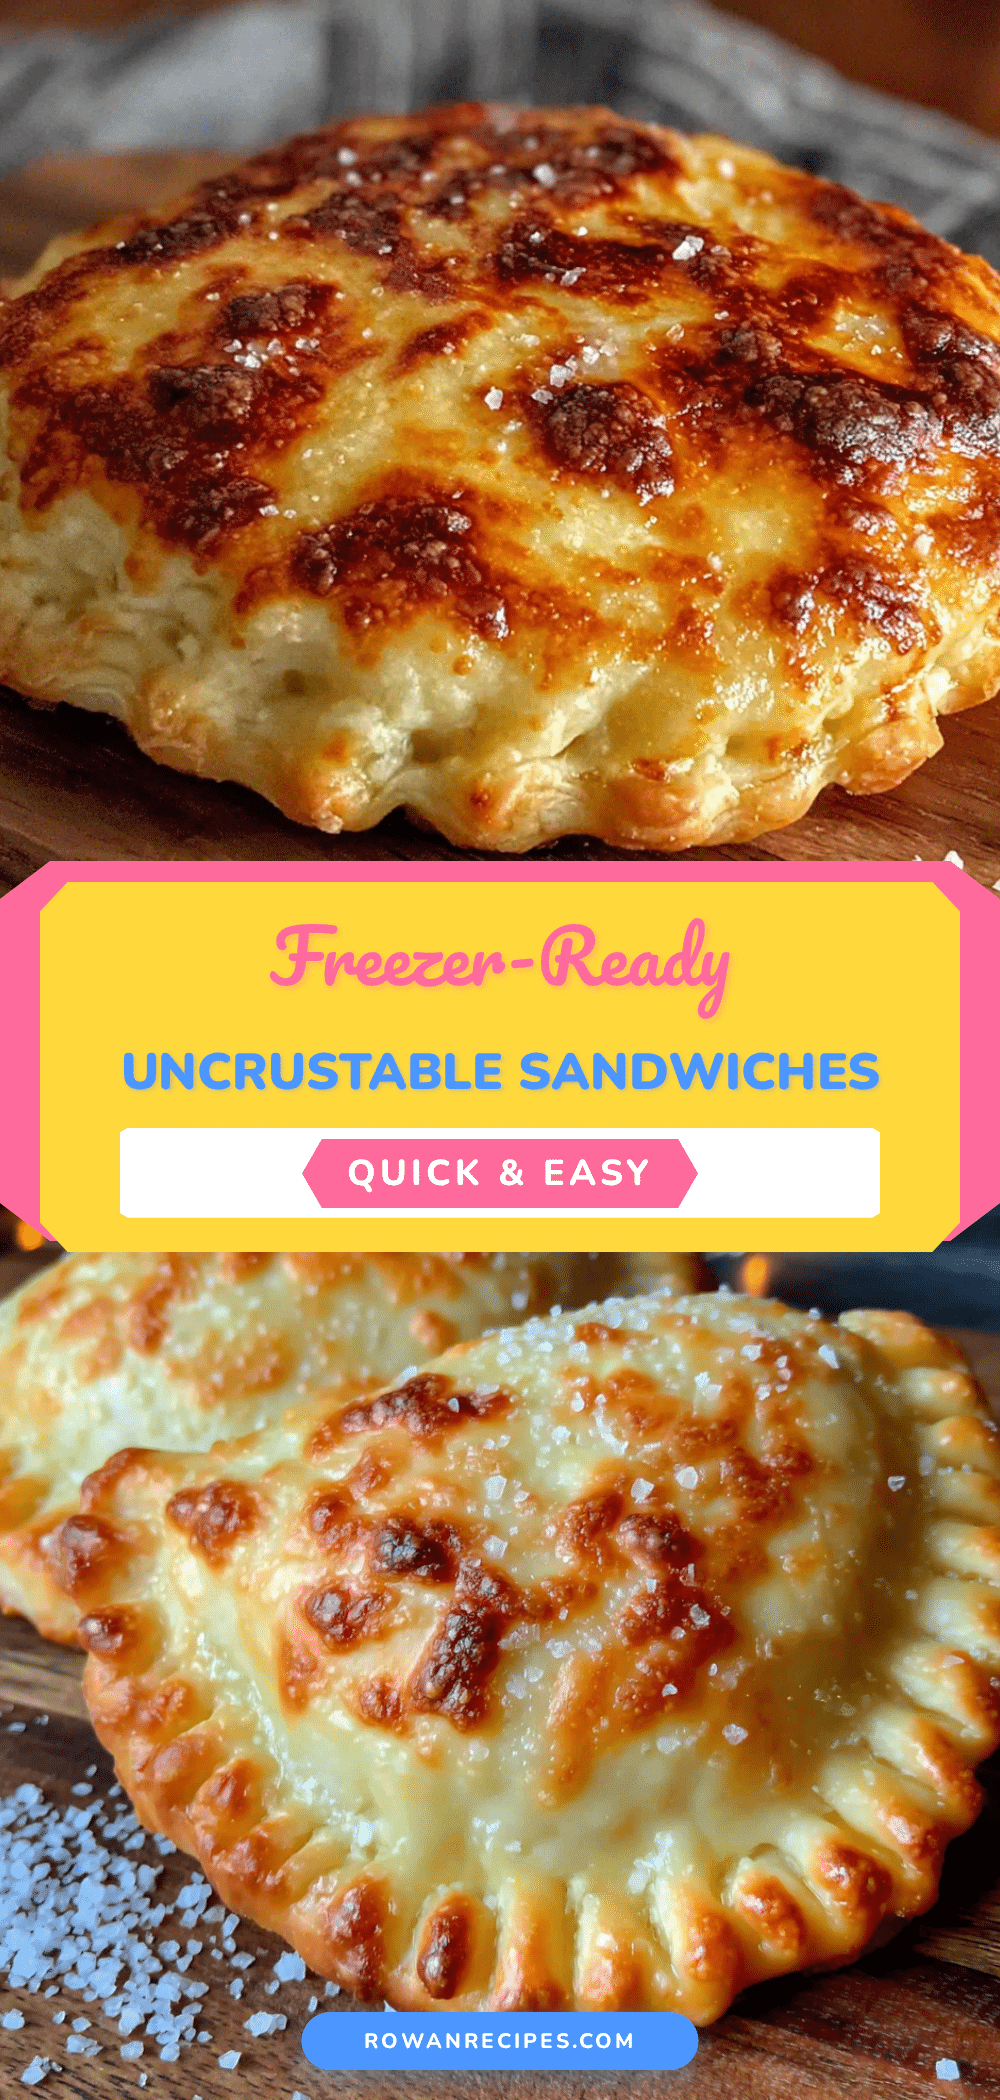
Easy Uncrustable-Style Freezer Sandwiches

These homemade freezer sandwiches are a quick, budget-friendly lunch solution that thaws perfectly in about an hour. With a simple fork-crimping technique, you can make a batch in under 15 minutes using basic pantry ingredients.
- Prep Time: 15 minutes
- Cook Time: 0 minutes
- Total Time: 1 hour 15 minutes (including freezing time)
- Yield: 4 servings 1x
- Category: Lunch
- Cuisine: American
Ingredients
- 8 slices soft sandwich bread (white, whole wheat, or brioche)
- ½ cup creamy peanut butter (or any nut butter)
- ½ cup strawberry jam or jelly (or your favorite flavor)
- 1 tablespoon butter, softened (optional, for toasting)
Instructions
- Prepare your workspace: Lay out all ingredients and equipment. Line a baking sheet with parchment paper.
- Flatten the bread: Gently roll each slice of bread with a rolling pin until about ¼-inch thick. Repeat with all 8 slices.
- Spread the peanut butter: On 4 slices of flattened bread, spread about 1 tablespoon of peanut butter each, leaving a ½-inch border around the edges.
- Add the jam: Spread about 1 tablespoon of jam on top of the peanut butter on the same 4 slices, keeping the border clear.
- Top with remaining bread: Place the other 4 slices of flattened bread on top of the filled ones. Press down gently around the edges.
- Cut into rounds: Using a round cookie cutter or glass (about 3-4 inches in diameter), press down firmly in the center of each sandwich to cut out a circle. Discard or save the crusts.
- Crimp the edges: Use a fork to press down along the edges of each round sandwich, working your way around the entire circle to create a tight seal.
- Flash freeze: Place the sealed sandwiches on the prepared baking sheet in a single layer, not touching. Freeze for 1-2 hours until solid.
- Package for storage: Transfer frozen sandwiches to a freezer-safe bag or container, squeeze out excess air, seal, and label with the date. Store for up to 3 months.
- Thaw and enjoy: To eat, let a sandwich sit at room temperature for about 1 hour. For a warm treat, microwave for 10-15 seconds.
Notes
Flatten bread evenly for a good seal. Use room temperature spreads to avoid tearing bread. Flash freeze before bagging to prevent sticking. Slightly stale bread works best. Save crusts for breadcrumbs.
Nutrition
- Serving Size: 1 sandwich
- Calories: 300
- Sugar: 13.5
- Sodium: 200
- Fat: 13.5
- Saturated Fat: 2.5
- Carbohydrates: 37.5
- Fiber: 2.5
- Protein: 9
Keywords: freezer sandwiches, uncrustable, homemade, meal prep, peanut butter and jelly, lunchbox, easy recipe


