Tuesday afternoon, 2:47 PM, and the only thing my three-year-old wants is a snack she can build herself. Not just eat—build. The nap had been short, the playdough was a crumbly mess, and I was this close to handing her a bag of crackers just to buy five minutes of quiet. But then I remembered the celery in the crisper drawer, the peanut butter that was almost empty, and that little bag of raisins I’d stashed for baking. And just like that, the ants on a log idea landed in my head, soft and familiar, like an old friend showing up exactly when you need them.
I didn’t grow up eating ants on a log, actually. My mom wasn’t big on celery—she said it was mostly water and crunch with no real payoff. So I discovered this snack as a grown-up, scrolling through lunch ideas for picky toddlers, feeling a little desperate and a lot tired. The first time I made it for my daughter, she looked at the celery like I’d handed her a stick of broccoli. But then she saw the raisins. And the peanut butter. And suddenly, she was arranging them one by one, muttering a story about ants marching to a picnic. Honestly, that moment felt like a tiny victory—the kind you don’t brag about but quietly hold onto.
These Easy Preschool Ants on a Log Snack Cups take that same simple idea and make it even easier. No cutting boards to wash. No sticky fingers all over the kitchen counter. Just a few ingredients, a little prep, and a snack that feels like an activity all on its own. It’s the kind of recipe that doesn’t try to impress anyone—it just works. And for a tired parent on a random Tuesday, that’s exactly what you need.
Why You’ll Love This Recipe
I’ve tested this snack about a dozen times now—with different nut butters, different dried fruits, even different vessels for the “log.” And I can tell you with confidence: these snack cups are a game-changer for busy mornings, afternoon slumps, and even lunchbox packing. Here’s why they’ve earned a permanent spot in my weekly rotation.
- Quick & Easy: Comes together in under 10 minutes, perfect for those moments when you need a snack now and don’t have the energy for anything complicated.
- Simple Ingredients: You probably already have celery, peanut butter (or any nut-free alternative), and raisins in your pantry. No fancy grocery trips needed.
- Perfect for Little Hands: This is a snack preschoolers can actually help make. Filling celery, placing raisins—it builds fine motor skills without the mess of a full baking project.
- Crowd-Pleaser: I’ve served these at playdates and watched kids who “don’t like celery” gobble them up. Something about the fun presentation changes the game.
- Unbelievably Customizable: Swap raisins for dried cranberries, use sunflower seed butter for nut-free classrooms, or add a sprinkle of cinnamon for extra flavor. It’s a snack that adapts to you.
What makes this recipe different from every other ants-on-a-log tutorial out there? It’s the cup format. Instead of handing a toddler a long, wobbly celery stick that drips peanut butter everywhere, you pre-cut the celery into bite-sized pieces and arrange them in a small cup. It’s portable, less messy, and somehow more fun. I’m not saying it’s rocket science—but it is the kind of small tweak that makes a big difference when you’re wrestling a wiggly preschooler into a car seat.
This snack isn’t just good—it’s the kind that makes you feel like you’ve got your act together, even when you definitely don’t. It’s a tiny win in the middle of a chaotic day, and honestly, we all need more of those.
What Ingredients You Will Need
This recipe uses simple, wholesome ingredients to deliver a fun, satisfying snack without any fuss. Most of these are pantry staples, and I’ve included notes on substitutions so you can adapt based on what you have or any dietary needs.
- Celery stalks – Fresh, crisp celery is the backbone of this snack. Look for stalks that are firm, bright green, and free from cracks or limp spots. I prefer organic celery when I can find it, but conventional works just fine. Wash and dry thoroughly before cutting.
- Creamy peanut butter – Smooth, natural peanut butter works best here. I like brands like Justin’s or Smucker’s Natural for their simple ingredient lists. If you’re making this for a nut-free classroom or daycare, swap in sunflower seed butter (like SunButter) or WowButter. Almond butter works too, but it’s a bit thinner and can drip more.
- Raisins – The “ants” in this recipe! Standard dark raisins are classic, but golden raisins add a milder sweetness. You can also use dried cranberries, dried cherries, or even mini chocolate chips for a treat. Just make sure they’re small enough for little fingers to pick up easily.
- Optional: Cream cheese or Greek yogurt – For a different texture or a dairy-based option, you can substitute the peanut butter with whipped cream cheese or thick Greek yogurt. It’s less sticky but still holds the raisins in place.
- Optional: Cinnamon or honey – A light sprinkle of cinnamon adds warmth, while a tiny drizzle of honey (for kids over 1) can boost sweetness if your peanut butter is unsalted or natural.
One thing I’ve learned the hard way: don’t use chunky peanut butter for this. The nut pieces make it harder for little hands to press the raisins in evenly, and they tend to fall off more easily. Stick with smooth for the best results. Also, if your peanut butter is super thick and hard to spread, microwave it for about 10 seconds to soften it slightly—just don’t let it get hot.
For the celery, I recommend cutting the stalks into 2-inch pieces. This size is perfect for small hands and fits neatly into snack cups or lunchbox containers. You can also cut them slightly shorter for younger toddlers. And if you’re prepping ahead, store the cut celery in a bowl of cold water in the fridge—it stays crisp for up to 24 hours.
Equipment Needed
You don’t need anything fancy for this recipe, which is part of the beauty. Here’s what you’ll need:
- Cutting board and sharp knife – A standard chef’s knife or a serrated knife works well for cutting celery. A kid-safe knife works great if your preschooler wants to help.
- Small mixing bowl – For stirring the peanut butter if you’re adding cinnamon or honey.
- Butter knife or small spatula – For spreading the peanut butter into the celery grooves. A small offset spatula is my favorite tool for this—it fits perfectly in the celery curve.
- Snack cups or small containers – I use 4-ounce silicone cups or small mason jars. You can also use a standard muffin tin lined with silicone cups. The goal is something that holds the celery pieces upright.
- Measuring spoons – For evenly portioning the peanut butter if you’re making a big batch.
- Paper towels or clean dish towel – For drying the celery thoroughly after washing. Wet celery makes the peanut butter slide off.
If you don’t have snack cups, don’t stress. You can arrange the celery pieces on a plate or in a bento-style lunchbox. The cup format just makes them more portable and fun for little ones. I found my silicone cups at a dollar store, and they’ve held up through dozens of washes. Budget-friendly options are everywhere.
Preparation Method
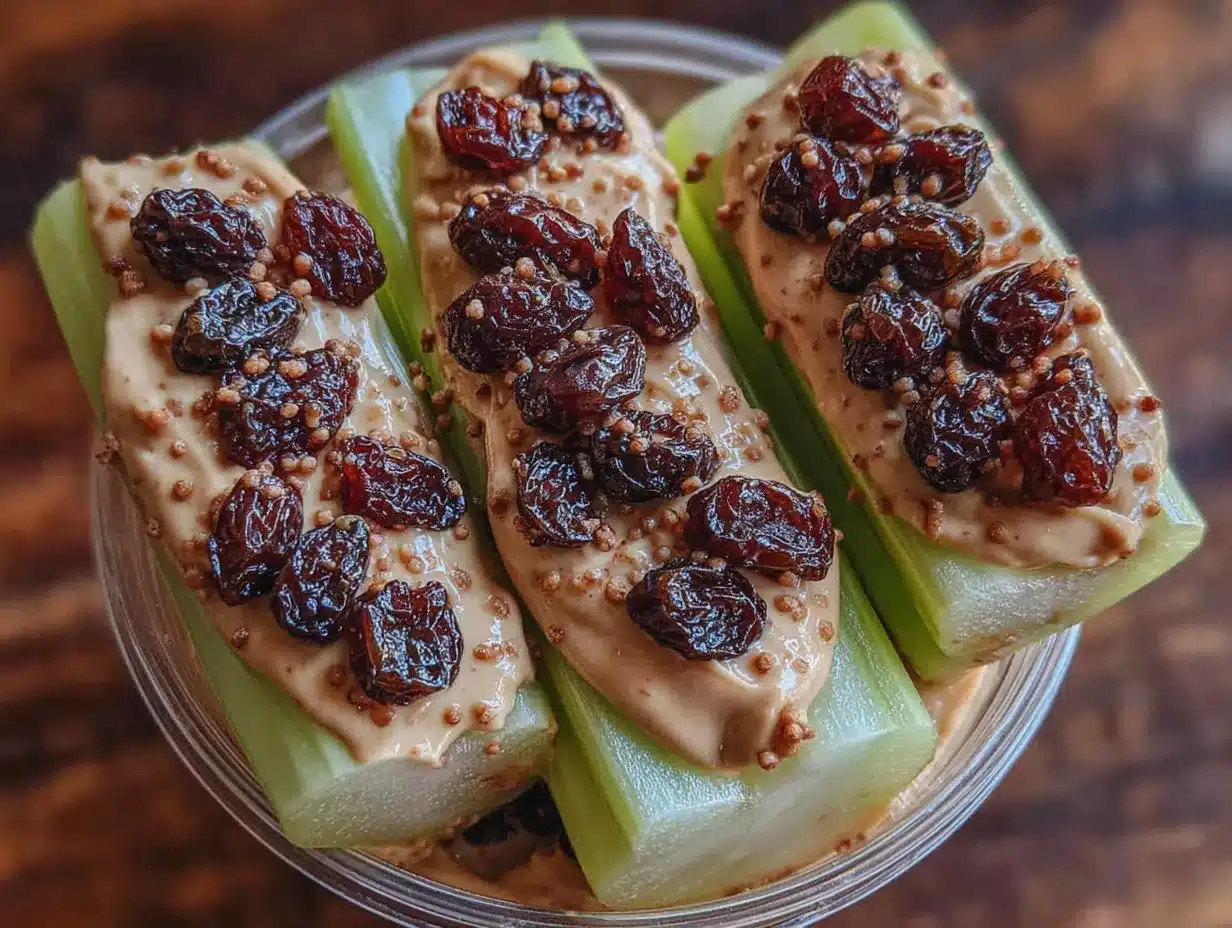
Let’s get to the fun part. This method is simple enough that your preschooler can help with most of the steps—just supervise the cutting part.
- Wash and dry the celery – Rinse 4-5 celery stalks under cold running water, scrubbing gently to remove any dirt. Pat them completely dry with a clean towel. This is important—any moisture left on the celery will make the peanut butter slide right off. Pro tip: If your celery is a little limp, soak it in ice water for 10 minutes to crisp it up.
- Cut the celery into pieces – Using a sharp knife, trim off the leafy tops and the white base. Cut the stalks into 2-inch pieces. You should get about 4-5 pieces per stalk, depending on length. For younger toddlers, you can cut them into 1-inch pieces instead. Sensory cue: The celery should make a clean, crisp snap when you cut it—if it bends, it’s past its prime.
- Prepare the peanut butter – If your peanut butter is thick and natural (with oil separation), stir it well in the jar or transfer to a small bowl and mix until smooth. If you want to add a pinch of cinnamon or a teaspoon of honey, stir it in now. Personal tip: I microwave my peanut butter for 8 seconds if it’s too stiff to spread easily.
- Fill the celery grooves – Using a butter knife or small spatula, spread about 1 teaspoon of peanut butter into the groove of each celery piece. Don’t overfill—you want a thin, even layer that will hold the raisins without dripping. Time estimate: This takes about 2 minutes for a batch of 20 pieces.
- Add the raisins – Place 3-5 raisins on top of the peanut butter in each celery piece. Press them down gently so they stick. Let your child do this part—it’s great for fine motor skills and makes them feel like a real chef. Troubleshooting tip: If the raisins keep falling off, your peanut butter layer might be too thin. Add a tiny bit more.
- Arrange in snack cups – Stand the filled celery pieces upright in small snack cups or containers. You can fit 4-5 pieces in a standard 4-ounce cup. If you’re packing for lunch, arrange them snugly so they don’t tip over during transport.
- Serve immediately or refrigerate – These are best enjoyed right away while the celery is still crisp. You can make them up to 4 hours ahead and store in the fridge—just cover the cups with plastic wrap or a lid to prevent the celery from drying out.
One thing I’ve learned from making these dozens of times: don’t skip the drying step. I once made a batch in a hurry, barely patted the celery dry, and within 10 minutes the peanut butter had slid off every single piece. My daughter was not impressed. A dry groove is a happy groove.
Cooking Tips & Techniques
I’ve made enough ants on a log to fill a small army’s worth of snack time, and I’ve picked up a few tricks along the way. These tips will help you avoid the mistakes I’ve already made.
Keep the celery crisp. The biggest enemy of a good ants on a log is soggy celery. If you’re prepping these ahead of time, store the cut, filled celery pieces in an airtight container with a paper towel at the bottom. The paper towel absorbs excess moisture and keeps everything crunchy. I learned this after one particularly sad lunch where the celery had gone limp and sad by noon.
Use room-temperature peanut butter. Cold peanut butter straight from the fridge is a nightmare to spread. It tears the celery and leaves clumpy patches. Let your peanut butter sit out for 15-20 minutes before you start, or give it a quick 10-second zap in the microwave. The texture becomes silky and much easier to work with.
Let the kids do the raisins. This is not just a time-saver tip—it’s a sanity tip. Hand your preschooler a small bowl of raisins and let them place each one onto the peanut butter. It keeps them occupied, builds their confidence, and gives you a few minutes to wash the cutting board. My daughter takes this job very seriously, narrating each raisin’s journey like a tiny documentary.
Double up for busy weeks. I often make a double batch on Sunday afternoon. One batch goes into snack cups for the week, and the other gets frozen. Wait—can you freeze these? Yes, but with a caveat. Freeze the filled celery pieces on a baking sheet for an hour, then transfer to a freezer bag. The texture won’t be quite as crisp when thawed, but they’re perfect for throwing into a lunchbox where they’ll thaw by snack time.
Watch out for sticky fingers. Peanut butter and little hands are a messy combination. Keep a damp paper towel nearby for quick cleanups, or have your child wash their hands immediately after the raisin-placing step. I’ve learned to embrace the mess, but I also know my limits.
Variations & Adaptations
One of the best things about this snack is how endlessly adaptable it is. Here are some of my favorite variations, tested and approved by my picky preschooler.
Nut-Free Classroom Version – Swap the peanut butter for sunflower seed butter or WowButter. These spread just as easily and taste surprisingly similar. Just be aware that sunflower seed butter can turn green when combined with baking soda (not an issue here since there’s no baking), but it’s safe to eat. I use SunButter for my daughter’s daycare and no one has complained yet.
Dairy-Free Cream Cheese Logs – Use dairy-free cream cheese (like Kite Hill or Miyoko’s) instead of peanut butter. It’s tangy, creamy, and holds the raisins beautifully. This is also a great option if your child has a peanut allergy and you want a different flavor profile.
Sweet Cinnamon Version – Mix 1/4 teaspoon of cinnamon into the peanut butter before spreading. The warmth of the cinnamon pairs perfectly with the raisins and makes the snack feel slightly more special. I sometimes add a tiny drizzle of honey for an extra treat, but only for kids over 1 year old.
Savory Cream Cheese Logs – Use plain cream cheese mixed with a pinch of everything bagel seasoning. Top with raisins or dried cranberries. This sounds weird, I know, but the salty-sweet combo is surprisingly addictive. My husband steals these from the fridge all the time.
Apple Slice “Logs” – If you’re out of celery or just want a change, use thick apple slices (cut horizontally) as the base. Spread with peanut butter and top with raisins. It’s sweeter and softer, but just as fun. My daughter calls these “apple boats.”
Serving & Storage Suggestions
These snack cups are best served cold or at room temperature. The celery stays crispest when it’s chilled, so I usually serve them straight from the fridge. For a lunchbox, pack them with an ice pack to keep everything fresh until snack time.
Presentation ideas: Arrange the celery pieces standing upright in a small cup or mason jar. You can also lay them flat in a bento box with compartments. For a fun party platter, arrange them on a plate in a spiral pattern with a small bowl of extra raisins in the center. Kids love the visual appeal of seeing the “ants” marching in a circle.
What to serve alongside: These pair beautifully with apple slices, cheese sticks, or a small cup of yogurt. For a complete snack plate, add some whole-grain crackers and a few baby carrots. If you’re serving these at a playdate, they’re great alongside crispy homemade chicken nuggets with honey mustard for a fun, kid-friendly spread.
Storage instructions: Store assembled snack cups in an airtight container in the refrigerator for up to 24 hours. After that, the celery starts to soften and the peanut butter can separate. I don’t recommend leaving them at room temperature for more than 2 hours, especially if you’re using natural peanut butter or cream cheese.
Reheating? These are meant to be eaten cold, so no reheating needed. If you’ve frozen them, thaw in the refrigerator overnight or let them sit at room temperature for about 30 minutes before serving. The texture won’t be as crisp, but they’re still perfectly edible.
Flavor development: Honestly, these are best fresh. The magic is in that first crunchy bite with the creamy peanut butter and sweet raisins. If you make them more than a few hours ahead, the celery releases moisture and the peanut butter can get a little slippery. But they’re still good—just not as perfect.
For a heartier meal, I sometimes serve these alongside cozy stuffed pepper soup for a balanced lunch. The soup adds warmth and veggies, while the ants on a log provide that fun, hands-on element kids crave.
Nutritional Information & Benefits
This snack is surprisingly nutritious for something that feels like a treat. Here’s a rough breakdown per serving (about 5 celery pieces with peanut butter and raisins):
| Nutrient | Amount per Serving |
|---|---|
| Calories | 180-220 |
| Protein | 7-9g |
| Carbohydrates | 18-22g |
| Fiber | 4-5g |
| Fat | 10-14g |
| Sugar | 10-12g (mostly from raisins) |
Health benefits: Celery is packed with water and fiber, making it hydrating and great for digestion. Peanut butter provides healthy fats and protein that help keep little tummies full between meals. Raisins offer natural sweetness along with iron and potassium. It’s a well-rounded snack that actually fuels their bodies—not just fills them up.
Dietary considerations: This recipe is naturally gluten-free and dairy-free (if you skip the cream cheese option). For a nut-free version, use sunflower seed butter. For a lower-sugar option, reduce the raisins or swap for unsweetened dried cranberries. Always check labels if you’re serving children with allergies.
Potential allergens: Peanuts and tree nuts (if using peanut butter or almond butter). Celery is generally safe but can cause reactions in some people with oral allergy syndrome. Raisins are safe for most, but always supervise young children to prevent choking on small, round foods.
Conclusion
Look, I’m not going to tell you that ants on a log will change your life. But I will tell you this: in the middle of a chaotic afternoon, when your preschooler is hungry and bored and you’re running on fumes, having a snack cup ready that they can actually help make—that changes the moment. It turns a potential meltdown into a tiny moment of connection. And that’s worth something.
These Easy Preschool Ants on a Log Snack Cups are forgiving, flexible, and almost impossible to mess up. Use whatever nut butter you have. Swap raisins for dried cranberries. Let your kid go wild with the raisin placement. It’s not about perfection—it’s about making snack time a little more fun and a little less stressful. I’d love to hear how yours turn out. Did your child come up with a new variation? Did they eat the raisins before they made it onto the celery? (Mine does that every time.) Drop a comment below and share your story. And if you’re looking for more easy snack ideas, check out my crispy mini corn dog muffins or these peanut butter cup rice krispie treats—both are huge hits with my little one.
Happy snacking, friend. You’ve got this.
Frequently Asked Questions
Can I make these ants on a log snack cups ahead of time?
Yes, you can assemble them up to 24 hours in advance. Store them in an airtight container in the refrigerator with a paper towel at the bottom to absorb moisture. The celery will stay crisp for about a day, but they’re best within 8 hours of making.
What can I use instead of peanut butter for a nut-free classroom?
Sunflower seed butter (like SunButter) or WowButter are excellent nut-free alternatives. They spread just like peanut butter and taste similar. You can also use cream cheese or dairy-free cream cheese for a different flavor and texture.
My celery is limp—can I still use it?
Absolutely! Soak limp celery stalks in a bowl of ice water for 10-15 minutes. They’ll crisp right up. Pat them dry thoroughly before using, and they’ll work perfectly for this recipe.
How do I keep the raisins from falling off?
Make sure your peanut butter layer is thick enough—about 1/4 inch deep in the celery groove. Press the raisins in gently but firmly. If they still fall off, your peanut butter might be too runny. Try a thicker brand or refrigerate it for 5 minutes before spreading.
Can I freeze these snack cups?
Yes, but the texture changes slightly. Freeze the assembled pieces on a baking sheet for an hour, then transfer to a freezer bag. Thaw in the refrigerator overnight. The celery won’t be as crisp, but they’re still good for lunchboxes. I’d recommend making them fresh for the best crunch.
Pin This Recipe!
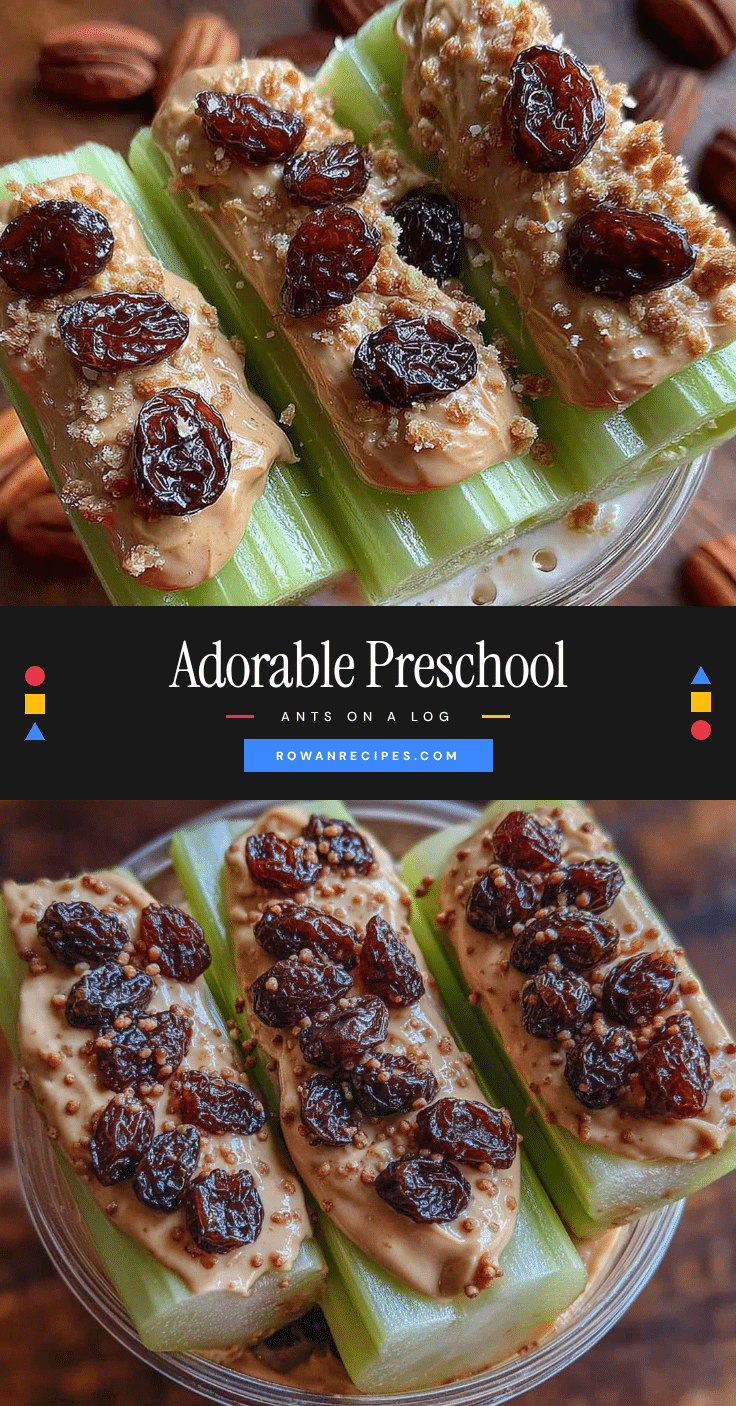
Easy Preschool Ants on a Log Snack Cups
Quick and easy snack cups with celery, peanut butter, and raisins that preschoolers can help make. Perfect for busy afternoons, lunchboxes, and playdates.
- Prep Time: 10 minutes
- Cook Time: 0 minutes
- Total Time: 10 minutes
- Yield: 4 servings 1x
- Category: Snack
- Cuisine: American
Ingredients
- 4–5 celery stalks
- 1/4 cup creamy peanut butter (or sunflower seed butter for nut-free)
- 1/4 cup raisins
- Optional: 1/4 teaspoon cinnamon
- Optional: 1 teaspoon honey (for children over 1 year)
- Optional: cream cheese or Greek yogurt for dairy-based version
Instructions
- Wash and dry the celery stalks thoroughly. Pat completely dry with a clean towel.
- Trim off the leafy tops and white base. Cut the stalks into 2-inch pieces (about 4-5 pieces per stalk).
- If peanut butter is thick, stir well or microwave for 8-10 seconds to soften. Optionally mix in cinnamon or honey.
- Using a butter knife or small spatula, spread about 1 teaspoon of peanut butter into the groove of each celery piece.
- Place 3-5 raisins on top of the peanut butter in each piece. Press gently so they stick.
- Stand the filled celery pieces upright in small snack cups or containers (4-5 pieces per cup).
- Serve immediately or refrigerate for up to 24 hours. Best enjoyed within 8 hours.
Notes
For best results, dry celery thoroughly to prevent peanut butter from sliding. Use room-temperature peanut butter for easier spreading. Let kids place the raisins to build fine motor skills. For nut-free classrooms, use sunflower seed butter. Store assembled cups in an airtight container with a paper towel to absorb moisture.
Nutrition
- Serving Size: 5 celery pieces
- Calories: 200
- Sugar: 11
- Sodium: 150
- Fat: 12
- Saturated Fat: 2
- Carbohydrates: 20
- Fiber: 4.5
- Protein: 8
Keywords: ants on a log, preschool snack, easy snack, celery snack, peanut butter snack, kid-friendly snack, lunchbox idea


