The smell hit me first. I walked into the kitchen after a long afternoon, and there they were—golden on the edges, soft in the middle, sitting on a wire rack like they’d been waiting for me. My roommate had made them without telling anyone. She just used up the bananas on the counter and some oats she found in the pantry. I grabbed one while it was still a little warm, and honestly, I didn’t stop at one. I texted her later that night asking for the recipe. She sent me a photo of a sticky note.
That was about two years ago. Since then, I’ve made these healthy peanut butter banana oat bars more times than I can count. They’ve become my go-to for busy mornings when I need something quick, for afternoon slumps when I want a snack that actually fills me up, and for those evenings when I crave something sweet but don’t want to raid the cookie jar. What started as a random pantry experiment turned into a staple in my kitchen. I tweaked the original version a bit—added a little more peanut butter, adjusted the sweetness, figured out the perfect bake time—until they were exactly what I wanted.
These bars aren’t fancy. They don’t pretend to be. But they’re exactly the kind of recipe you come back to again and again because they just work. No fuss, no weird ingredients, no complicated steps. Just three bananas, some oats, peanut butter, and a couple of pantry staples. That’s it. And somehow, that’s all it takes to make something that feels like a treat and actually does your body some good. I think that’s why I keep making them. They remind me that you don’t need a lot to make something really good.
Why You’ll Love This Recipe
Let me tell you why these bars have earned a permanent spot in my kitchen rotation. I’ve tested this recipe at least a dozen times—sometimes with riper bananas, sometimes with crunchier peanut butter, once with honey instead of maple syrup—and every single time, they turn out reliable and delicious. That’s the kind of recipe you can trust.
- Quick & Easy: From start to finish, these bars come together in about 30 minutes. That includes prep time. You don’t need a mixer or any fancy equipment. Just a bowl, a fork, and a baking dish.
- Simple Ingredients: You probably already have everything you need. Oats, bananas, peanut butter, a sweetener of your choice, and a pinch of salt. That’s the whole list. No trips to a specialty store required.
- Perfect for Meal Prep: I make a batch on Sunday and grab one every morning on my way out the door. They’re great for breakfast, a snack, or even a light dessert. They travel well too—no crumbs everywhere.
- Crowd-Pleaser: I’ve brought these to brunches, shared them with coworkers, and even packed them in my kid’s lunchbox. They disappear fast. Even people who claim they don’t like “healthy” snacks come back for seconds.
- Unbelievably Delicious: The texture is what gets me every time. Soft and chewy in the middle, slightly crisp around the edges, with that perfect combo of peanut butter and banana. It’s comfort food that happens to be good for you.
What makes these bars different from other recipes out there? For one, the ratio of oats to banana is spot on—not too dry, not too mushy. I also use a trick of mashing the bananas really well so they bind everything together naturally, which means you don’t need eggs or flour. And the peanut butter? It’s not just for flavor. It adds healthy fat and protein that keeps you full for hours. This isn’t just another healthy snack recipe. It’s the one you’ll actually want to make again and again.
What Ingredients You Will Need
This recipe relies on simple, wholesome ingredients that work together to create something greater than the sum of their parts. You don’t need a long list of specialty items—just a few pantry staples that you probably already have on hand.
- 3 ripe bananas, mashed (the riper the better—look for ones with brown spots for maximum sweetness and moisture)
- 2 cups rolled oats (old-fashioned oats work best; quick oats will work but the texture will be softer)
- ½ cup peanut butter (creamy or crunchy—I prefer natural peanut butter with no added sugar or oil for the best flavor and texture)
- ¼ cup maple syrup or honey (adjust based on your sweetness preference and dietary needs)
- ½ teaspoon vanilla extract (optional but adds a nice depth of flavor)
- ¼ teaspoon salt (don’t skip this—it balances the sweetness and brings out the peanut butter flavor)
- ¼ cup dark chocolate chips or chopped nuts (optional but highly recommended for texture and extra flavor)
I recommend using natural peanut butter from brands like Smucker’s Natural or Justin’s for the best results. The kind with just peanuts and salt works perfectly. If you use a sweetened, processed peanut butter, you might want to reduce the maple syrup slightly to avoid an overly sweet bar.
For the oats, I’ve tested this with both rolled oats and quick oats. Rolled oats give you a chewier, more substantial texture that holds together better. Quick oats work in a pinch, but the bars will be a bit softer and more delicate. If you’re gluten-sensitive, make sure to use certified gluten-free oats.
And about those bananas—this is the perfect recipe for those sad, overripe bananas sitting on your counter. The ones that are practically black? Those are ideal. They’re sweeter and easier to mash, which means you can use less added sweetener. If your bananas aren’t quite ripe enough, you can speed things up by roasting them in the oven at 300°F for about 15 minutes until the skins darken.
Equipment Needed
One of the best things about this recipe is how little equipment you need. No stand mixer, no food processor, no complicated gadgets. Just basic kitchen tools you probably already own.
- 8×8 inch baking dish (a 9×9 works too, but the bars will be slightly thinner and may bake a few minutes faster)
- Large mixing bowl
- Fork or potato masher (for mashing the bananas)
- Measuring cups and spoons
- Spatula or wooden spoon (for mixing)
- Parchment paper (highly recommended for easy removal and cleanup)
- Wire cooling rack (optional but helps the bars cool evenly)
If you don’t have an 8×8 dish, you can use a 9×5 loaf pan—just adjust the baking time by about 5 minutes and keep an eye on it. I’ve also made these as muffin-tin bites by dividing the batter into a greased muffin tin and baking for about 15 minutes. They’re adorable and perfect for portion control.
Parchment paper is honestly a game-changer here. I used to grease the pan and hope for the best, but the bars would always stick a little. Now I just line the dish with parchment, leaving a little overhang on two sides, and the bars lift right out. Worth the small effort.
Preparation Method
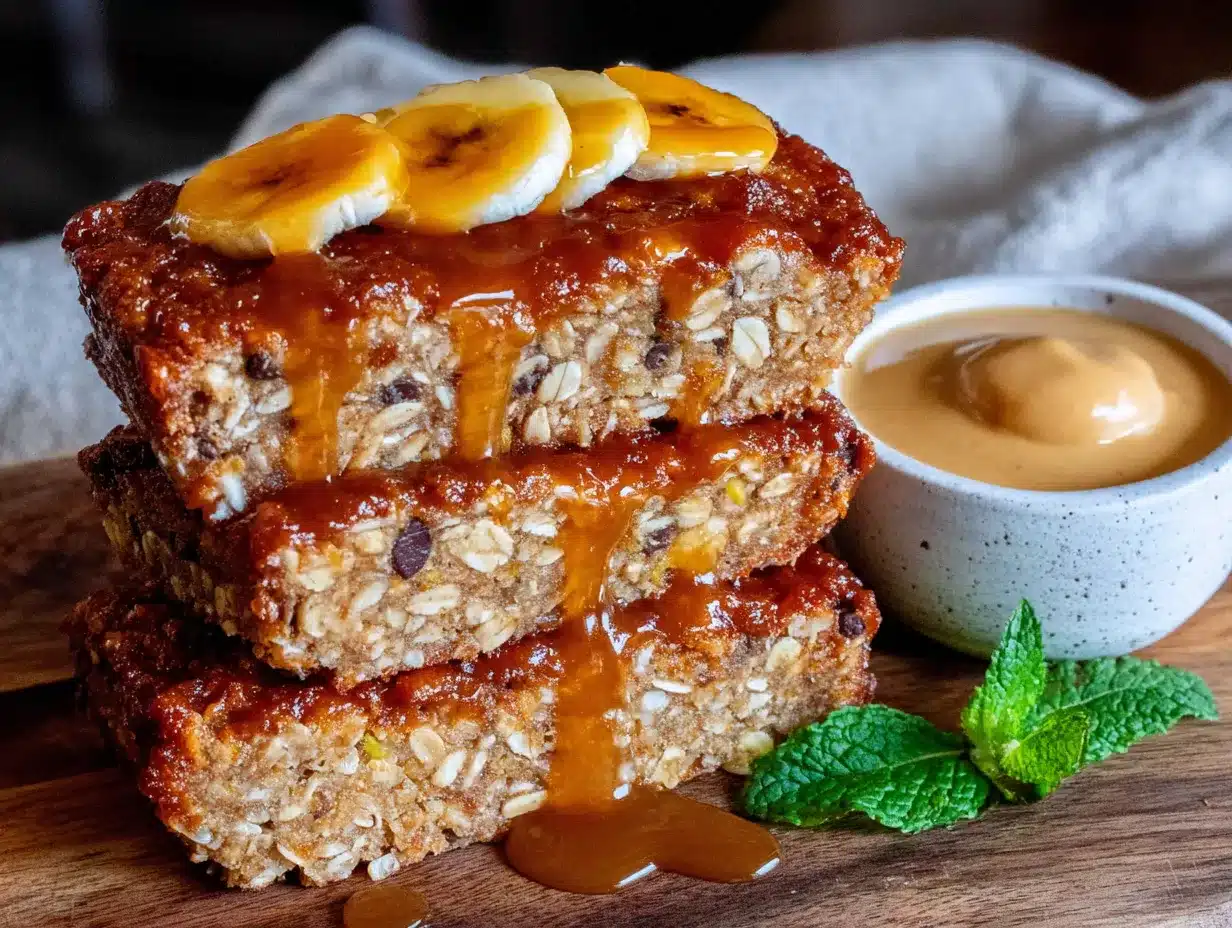
Let’s walk through this step by step. I’ll include all the little details I’ve learned from making these bars more times than I can count.
- Preheat your oven to 350°F (175°C). Line your 8×8 baking dish with parchment paper, leaving some overhang on two opposite sides. This will make lifting the bars out later super easy.
- Mash the bananas. In your large mixing bowl, add the three ripe bananas. Use a fork or potato masher to mash them until they’re mostly smooth with just a few small lumps. You want them to be almost liquid—this helps bind the bars together without needing eggs. If your bananas are really ripe, they’ll mash easily. If they’re a bit firmer, give them some extra elbow grease.
- Add the wet ingredients. To the mashed bananas, add the peanut butter, maple syrup (or honey), and vanilla extract. Stir everything together until it’s well combined. The mixture should be smooth and uniform. Don’t worry if it looks a little thin—that’s normal. Taste it here if you want. You can adjust the sweetness now if needed.
- Add the dry ingredients. Pour in the rolled oats and salt. Stir until all the oats are evenly coated with the banana-peanut butter mixture. Every oat should be moistened. If you’re adding chocolate chips or nuts, fold them in now. The batter will be thick and sticky—almost like a cookie dough consistency.
- Press into the pan. Transfer the mixture to your prepared baking dish. Use a spatula or your hands (lightly wet your fingers to prevent sticking) to press it down evenly. Make sure it’s compact and level. The more evenly you press it, the more uniform your bars will bake.
- Bake. Place the dish in the preheated oven and bake for 18-22 minutes. At the 18-minute mark, start checking. The edges should be golden brown and slightly firm to the touch. The center will still feel a little soft—that’s okay. It will firm up as it cools. If you prefer crispier bars, let them go another 2-3 minutes.
- Cool completely. This is the hardest part, I know. But don’t skip it. Let the bars cool in the pan for about 10 minutes, then use the parchment overhang to lift them out and transfer to a wire rack. Let them cool completely before cutting—about 30 minutes. If you cut them while they’re warm, they’ll crumble. Trust me, I’ve learned this the hard way.
- Cut and enjoy. Once cooled, use a sharp knife to cut into 9 or 16 squares, depending on how big you want them. I usually go for 9 for a heartier snack or breakfast portion. Wipe the knife clean between cuts for neater edges.
Here’s a tip I wish someone had told me earlier: if your mixture seems too dry and crumbly, add another tablespoon of peanut butter or a splash of milk (dairy or non-dairy). If it seems too wet and sticky, add a tablespoon more oats. The right consistency should hold together when you press it between your fingers but shouldn’t be runny.
Cooking Tips & Techniques
Over the years, I’ve made every mistake you can imagine with these bars. Let me save you some trouble.
The biggest mistake people make is using bananas that aren’t ripe enough. Green or yellow bananas without spots won’t mash well and won’t provide enough natural sweetness or moisture. Your bars will turn out dry and bland. Wait until those bananas are practically begging to be used—brown spots everywhere, soft to the touch. That’s when they’re perfect.
Another common issue is overbaking. These bars continue to set as they cool, so take them out when the edges are golden but the center still looks a tiny bit underdone. I once left them in for 25 minutes because I wanted them “extra crispy,” and they turned into hockey pucks. Learn from my mistake.
For consistent results every time, measure your oats correctly. Don’t scoop directly from the bag with your measuring cup—that packs the oats down and gives you more than you need. Instead, spoon the oats into the measuring cup and level it off with a knife. This simple step makes a big difference.
If you’re making these for meal prep, consider doubling the batch. They freeze beautifully, so you can have a stash ready for busy weeks. I’ll talk more about storage in a bit, but just know that these bars are freezer-friendly and taste just as good thawed.
One technique I’ve developed over time is toasting the oats first. Spread them on a baking sheet and toast at 350°F for about 5-7 minutes until they smell nutty and are lightly golden. This adds a deeper, more complex flavor to the bars. It’s an extra step, but if you have the time, it’s totally worth it.
And here’s a timing strategy: While the oven is preheating, mash your bananas and mix the wet ingredients. By the time the oven is ready, you’re ready too. The whole process takes less than 10 minutes of active prep. It’s one of those recipes that feels almost too easy.
Variations & Adaptations
One of the reasons I love this recipe is how adaptable it is. You can change it up based on what you have in your pantry or what you’re craving.
Peanut Butter Alternatives: Not a fan of peanut butter? Swap in almond butter, cashew butter, or sunflower seed butter. Each one gives the bars a slightly different flavor profile. Sunflower seed butter will turn the bars a greenish color (a natural reaction with baking soda if you add it), but they’ll still taste great.
Add-Ins and Mix-Ins: The basic recipe is a blank canvas. Try adding:
– ¼ cup shredded coconut for tropical vibes
– 2 tablespoons flax seeds or chia seeds for extra fiber and omega-3s
– ¼ cup dried cranberries or raisins for bursts of sweetness
– 1 tablespoon cocoa powder for a chocolate-peanut butter version
– ½ teaspoon cinnamon or pumpkin pie spice for warmth
Vegan Option: This recipe is already vegan if you use maple syrup instead of honey. Make sure your chocolate chips are dairy-free if you’re adding them.
Gluten-Free Adaptation: Simply use certified gluten-free rolled oats. That’s the only change needed. Everything else is naturally gluten-free.
Lower Sugar Version: If your bananas are very ripe and sweet, you can reduce the maple syrup to 2 tablespoons or even omit it entirely. The bars will be less sweet but still delicious. You can also use mashed banana as the only sweetener.
Protein-Packed Version: Add a scoop of your favorite protein powder. You’ll need to increase the liquid slightly—add an extra tablespoon of peanut butter or a splash of milk—to compensate for the dryness of the powder. Vanilla or chocolate protein powder works best.
I once made a batch with almond butter, dried cherries, and dark chocolate chips. They were gone in two days. That’s the beauty of this recipe—it’s a template you can make your own.
Serving & Storage Suggestions
These bars are incredibly versatile when it comes to serving. I’ve eaten them for breakfast, as a post-workout snack, and even crumbled over yogurt for a quick dessert.
For serving: I like them at room temperature best. The texture is just right—chewy but not too soft. You can warm them in the microwave for about 10-15 seconds if you want that just-baked feel. They’re also delicious cold straight from the fridge, especially on a warm day.
Pairing ideas: Serve one bar with a glass of cold milk, a cup of coffee, or a smoothie for a complete breakfast. They also pair beautifully with fresh fruit—sliced strawberries or apple wedges balance the richness of the peanut butter. If you’re feeling fancy, drizzle a little extra peanut butter or melted chocolate on top before serving.
Storage: Place the bars in an airtight container at room temperature for up to 3 days. If your kitchen is warm, I recommend storing them in the fridge—they’ll last up to a week. Layer them with parchment paper between stacks to prevent sticking.
Freezing: These bars freeze like a dream. Wrap each bar individually in plastic wrap, then place them in a freezer-safe bag or container. They’ll keep for up to 3 months. When you want one, just let it thaw at room temperature for about 30 minutes, or pop it in the microwave for 20-30 seconds. The texture stays remarkably good.
Flavor development: Here’s something interesting—these bars actually taste better the next day. The flavors meld together overnight, and the texture becomes more cohesive. So if you can resist eating them all right away, you’ll be rewarded on day two.
Nutritional Information & Benefits
Let’s talk about why these bars are good for you, not just delicious.
Estimated nutrition per bar (based on 9 servings):
– Calories: 210
– Protein: 7g
– Carbohydrates: 32g
– Fiber: 5g
– Sugar: 14g (from natural sources)
– Fat: 8g (mostly healthy unsaturated fats)
– Iron: 1.5mg
– Potassium: 300mg
Key health benefits: Bananas are packed with potassium, which supports heart health and muscle function. Oats provide soluble fiber that helps lower cholesterol and keeps you full longer. Peanut butter adds protein and healthy fats that stabilize blood sugar. Together, these ingredients make a snack that fuels your body without the crash you get from processed sweets.
Dietary considerations: This recipe is naturally dairy-free, egg-free, and can easily be made gluten-free and vegan. It’s also nut-free if you use sunflower seed butter. The only potential allergen is peanuts (or nuts depending on your choice of butter), so keep that in mind if you’re serving a crowd.
My personal take: I love that these bars give me energy without weighing me down. They’re not a sugar bomb disguised as health food. They’re genuinely nutritious, made from whole ingredients, and they actually taste good. That’s a win in my book.
Conclusion
These healthy peanut butter banana oat bars have become more than just a recipe in my kitchen. They’re the snack I turn to when I need something reliable, something that makes me feel good about what I’m eating. They’re proof that you don’t need a long ingredient list or complicated techniques to make something truly satisfying.
I hope you give them a try. Play around with the add-ins, adjust the sweetness to your liking, and make them your own. That’s the beauty of a simple recipe—it leaves room for your personal touch. Maybe you’ll discover a combination you love even more than the original.
If you make these bars, I’d love to hear about it. Drop a comment below and let me know how they turned out, what variations you tried, or if you have any questions. Your feedback helps me create better recipes for all of us. And if you’re looking for more easy, wholesome snacks, check out these peanut butter cup rice krispie treats or this cozy pecan pie bars recipe for another sweet treat. Happy baking, friends!
Frequently Asked Questions
Can I use quick oats instead of rolled oats?
Yes, you can. Quick oats will work, but the texture will be softer and less chewy. Rolled oats give the bars a better structure and more satisfying bite. If you only have quick oats, reduce the baking time by a couple of minutes and check for doneness early.
Why did my bars turn out crumbly?
Crumbly bars usually mean the mixture was too dry. This can happen if your bananas weren’t ripe enough (they provide moisture and binding), if you used too many oats, or if you overbaked them. Next time, make sure your bananas are very ripe and measure your oats correctly. Adding an extra tablespoon of peanut butter can also help.
Can I make these bars without peanut butter?
Absolutely. You can substitute almond butter, cashew butter, sunflower seed butter, or even tahini. Each will change the flavor slightly, but the bars will still hold together. If you’re using a thinner nut butter, you might need to add a tablespoon more oats to compensate.
How do I make these bars sweeter?
If you prefer a sweeter bar, increase the maple syrup or honey to ⅓ cup. You can also add 2 tablespoons of coconut sugar or brown sugar to the mixture. Adding chocolate chips or dried fruit will also boost the sweetness without making the bars overly sugary.
Can I add eggs to this recipe?
You can, but it’s not necessary. The bananas and peanut butter provide enough binding on their own. If you want to add an egg for extra protein or structure, reduce the maple syrup by 1 tablespoon and add the egg along with the wet ingredients. The bars will be slightly more cake-like in texture.
Pin This Recipe!
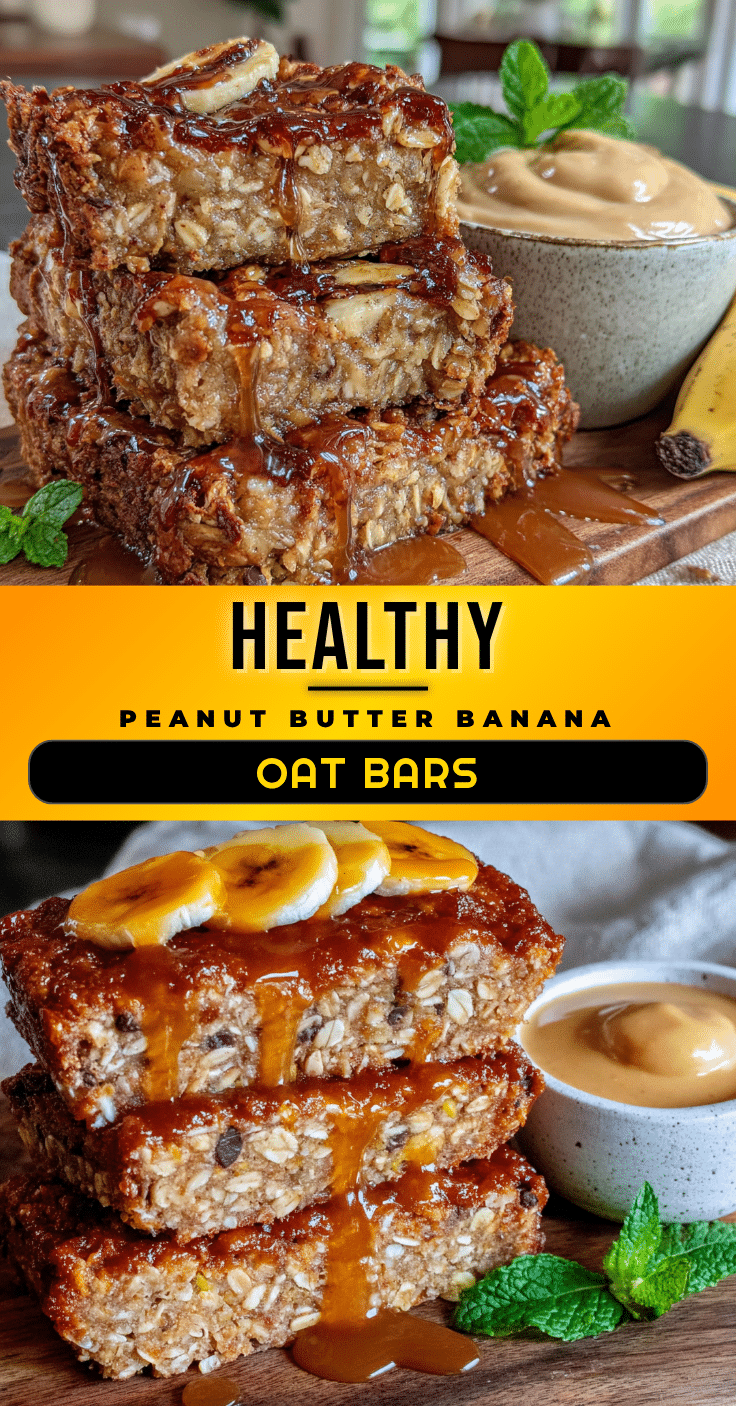
Healthy Peanut Butter Banana Oat Bars: Easy 5-Ingredient Recipe
These healthy peanut butter banana oat bars are a quick, easy, and delicious snack made with just a few simple ingredients. Perfect for meal prep, they’re soft, chewy, and naturally sweetened.
- Prep Time: 10 minutes
- Cook Time: 20 minutes
- Total Time: 30 minutes
- Yield: 9 servings 1x
- Category: Snack
- Cuisine: American
Ingredients
- 3 ripe bananas, mashed
- 2 cups rolled oats
- ½ cup peanut butter (creamy or crunchy)
- ¼ cup maple syrup or honey
- ½ teaspoon vanilla extract (optional)
- ¼ teaspoon salt
- ¼ cup dark chocolate chips or chopped nuts (optional)
Instructions
- Preheat your oven to 350°F (175°C). Line an 8×8 inch baking dish with parchment paper, leaving some overhang on two opposite sides.
- In a large mixing bowl, mash the bananas with a fork or potato masher until mostly smooth with a few small lumps.
- Add the peanut butter, maple syrup (or honey), and vanilla extract to the mashed bananas. Stir until well combined and smooth.
- Add the rolled oats and salt. Stir until all oats are evenly coated. If using, fold in chocolate chips or nuts.
- Transfer the mixture to the prepared baking dish. Press it down evenly with a spatula or lightly wet hands to compact it.
- Bake for 18-22 minutes, until the edges are golden brown and the center is slightly soft. For crispier bars, bake 2-3 minutes longer.
- Cool in the pan for 10 minutes, then lift out using the parchment overhang and transfer to a wire rack. Cool completely before cutting (about 30 minutes).
- Cut into 9 or 16 squares with a sharp knife. Wipe the knife clean between cuts for neat edges.
Notes
Use very ripe bananas for maximum sweetness and moisture. For a vegan version, use maple syrup instead of honey. Toasting the oats before mixing adds a deeper flavor. Bars can be stored at room temperature for up to 3 days, in the fridge for up to a week, or frozen for up to 3 months.
Nutrition
- Serving Size: 1 bar
- Calories: 210
- Sugar: 14
- Sodium: 150
- Fat: 8
- Saturated Fat: 1.5
- Carbohydrates: 32
- Fiber: 5
- Protein: 7
Keywords: peanut butter banana oat bars, healthy snack, easy recipe, gluten-free, vegan, meal prep


