It was 10:47 PM on a random Wednesday in late September, and I had a very specific, almost aggressive craving for something sweet, crunchy, and ridiculously festive. The problem? I didn’t have a single Halloween-themed baking ingredient in the house. No spooky sprinkles, no pre-made cookie mix, not even a stray pumpkin-shaped marshmallow. But I had a box of Rice Krispies cereal that was about to expire, a bag of marshmallows that were a little stale, and a bag of candy corn I’d bought on a whim two weeks ago because the orange and yellow colors just looked so happy on the shelf. And then it hit me—a weird, sleepy, 11 PM kind of idea. What if I just… threw them all together?
Honestly, I wasn’t expecting much. I figured it would either be a glorious mess or a total disaster. I melted the butter in my favorite slightly-scratched nonstick pot—the one I’ve had since college that has seen better days—and dumped in the marshmallows. They hissed and bubbled, and I stirred with a wooden spoon that has a permanent crack in the handle. When the marshmallows were a gooey, stretchy cloud, I tossed in the Rice Krispies and, without thinking too hard, a generous handful of candy corn. The colors swirled together like a sunset in a bowl, and I felt a little jolt of late-night genius. I pressed the mixture into a pan with a spatula that was definitely not meant for this, and I didn’t even wait for it to cool completely before cutting a wonky corner piece off.
That first bite? Let me tell you, it was a moment. The chewy marshmallow, the crispy cereal, and that waxy, super-sweet candy corn crunch—it was weirdly perfect. It tasted like a carnival and a childhood birthday party had a baby. I stood there in my pajamas, eating a misshapen square at midnight, and I knew I had stumbled onto something. Maybe you’ve been there—that late-night kitchen experiment that turns out way better than it has any right to. This is that recipe. It’s the one I keep making because it’s so easy, so fun, and honestly, it just makes me smile.
Why You’ll Love This Recipe
I’ve tested this recipe about six times since that first late-night experiment, tweaking the ratio of cereal to candy corn, testing different brands of marshmallows, and even trying it with salted butter (which, by the way, is a game-changer). As a recipe developer who has made hundreds of batches of Rice Krispies treats over the years, I can tell you this version is special. It’s not just another Halloween dessert—it’s the one that disappears first at every party.
- Quick & Easy: From start to finish, you’re looking at about 15 minutes of active time. No baking, no complicated steps, and no fancy equipment. It’s perfect for a last-minute Halloween treat or a classroom party.
- Simple Ingredients: You only need five ingredients—butter, marshmallows, Rice Krispies cereal, candy corn, and a pinch of salt. Chances are, you already have most of them in your pantry right now.
- Perfect for Halloween: These treats are basically edible Halloween decorations. The orange and yellow candy corn peeking through the crispy squares is just so festive. They’re great for parties, trick-or-treat bags, or just for snacking while watching scary movies.
- Crowd-Pleaser: I’ve brought these to potlucks, office parties, and family gatherings, and they always get rave reviews. Kids love the candy corn, and adults love the nostalgic crunch. It’s a win-win.
- Unbelievably Delicious: The texture is what gets me every time. You have the soft, chewy marshmallow base, the crisp cereal, and then these little bursts of super-sweet, slightly waxy candy corn. It’s a flavor and texture combo that just works.
What makes this recipe different from all the other Halloween treats out there? It’s the balance. Most candy corn desserts are either way too sweet or the candy corn gets lost in the mix. I’ve perfected the ratio so that every bite has a little piece of candy corn, but it’s not overwhelming. Plus, I add a pinch of flaky sea salt on top—trust me on this one. It cuts through the sweetness and makes the whole thing taste more sophisticated than a five-ingredient treat has any right to be. This isn’t just another version of Rice Krispies treats; it’s the best version for Halloween.
What Ingredients You Will Need
This recipe uses simple, pantry-friendly ingredients to create a Halloween treat that’s both nostalgic and exciting. The magic is in how these five humble components come together. Here’s what you’ll need and why each one matters.
- Unsalted Butter (3 tablespoons): Butter is the foundation of any good Rice Krispies treat. It adds richness and helps the marshmallows melt into a silky, smooth sauce. I prefer unsalted so I can control the salt level, but if you only have salted butter, just skip the extra pinch of salt later. (I’ve used Kerrygold and Land O’Lakes—both work beautifully, but Kerrygold gives a slightly richer flavor.)
- Marshmallows (10 ounces, or about 40 regular marshmallows): This is the glue that holds everything together. I recommend using standard, full-size marshmallows rather than mini ones, as they melt more evenly. Jet-Puffed is my go-to brand because they have a consistent texture. For a slightly different flavor, you can use vanilla-flavored marshmallows, but plain is just fine. (Pro tip: if your marshmallows are a little stale, they’ll actually melt better because they’ve lost some moisture.)
- Rice Krispies Cereal (5 cups): The crispy, airy base of the whole operation. I’ve tried generic versions, and honestly, they don’t hold up as well. The name-brand Rice Krispies have that signature snap that stays crunchy even after being mixed with the marshmallow mixture. If you can’t find Rice Krispies, look for a similar puffed rice cereal with a good crunch.
- Candy Corn (1 cup, plus more for topping): The star of the show for this Halloween version. Candy corn adds sweetness, a slightly waxy texture, and those iconic orange and yellow stripes. I’ve tested this with Brach’s and with store-brand candy corn. Brach’s is definitely the standard—it holds its shape better and has that classic flavor. Store-brand candy corn tends to be softer and can melt into the mixture a bit more, which is fine too, but you lose some of the visual pop.
- Flaky Sea Salt (½ teaspoon, plus more for garnish): This is my secret weapon. A pinch of salt in the marshmallow mixture balances the intense sweetness, and a sprinkle on top adds a little crunch and a savory note that makes the whole thing taste more complex. I use Maldon sea salt flakes, but any flaky salt will do. Don’t skip this—it’s not just for decoration.
Optional additions: If you want to get a little fancy, you can add ½ teaspoon of vanilla extract with the marshmallows, or stir in a handful of mini chocolate chips after the cereal is mixed in. Chocolate and candy corn are surprisingly good together!
Equipment Needed
You don’t need a professional kitchen to make these treats. Here’s what I use every time I make a batch.
- Large Pot or Dutch Oven: You need a pot big enough to hold all the cereal and marshmallow mixture without spilling over. I use a 5-quart Dutch oven, and it’s perfect. A regular stockpot works too.
- Wooden Spoon or Silicone Spatula: A wooden spoon is great for stirring the hot marshmallow mixture because it doesn’t conduct heat. I have a favorite spoon with a crack in the handle that I’ve been using for years—it’s practically a family heirloom at this point. A high-heat silicone spatula works well too.
- 9×13-Inch Baking Pan: This is the standard size for a batch of Rice Krispies treats. If you want thicker treats, you can use an 8×8-inch pan, but you’ll need to adjust the cooking time slightly. I like the 9×13 because it gives a nice ratio of crispy edge to gooey center.
- Parchment Paper: Lining your pan with parchment paper is a game-changer. It makes lifting the treats out of the pan so much easier, and cleanup is a breeze. Leave a little overhang on two sides so you can use them as handles.
- Sharp Knife: A sharp chef’s knife is best for cutting clean squares. A dull knife will squish the treats and make a mess. I also recommend spraying the knife with a little nonstick cooking spray between cuts to prevent sticking.
Budget-friendly tip: If you don’t have a 9×13 pan, a rimmed baking sheet works in a pinch. The treats will be thinner, but they’ll still taste great. And if you don’t have parchment paper, you can grease the pan generously with butter or nonstick spray.
Preparation Method
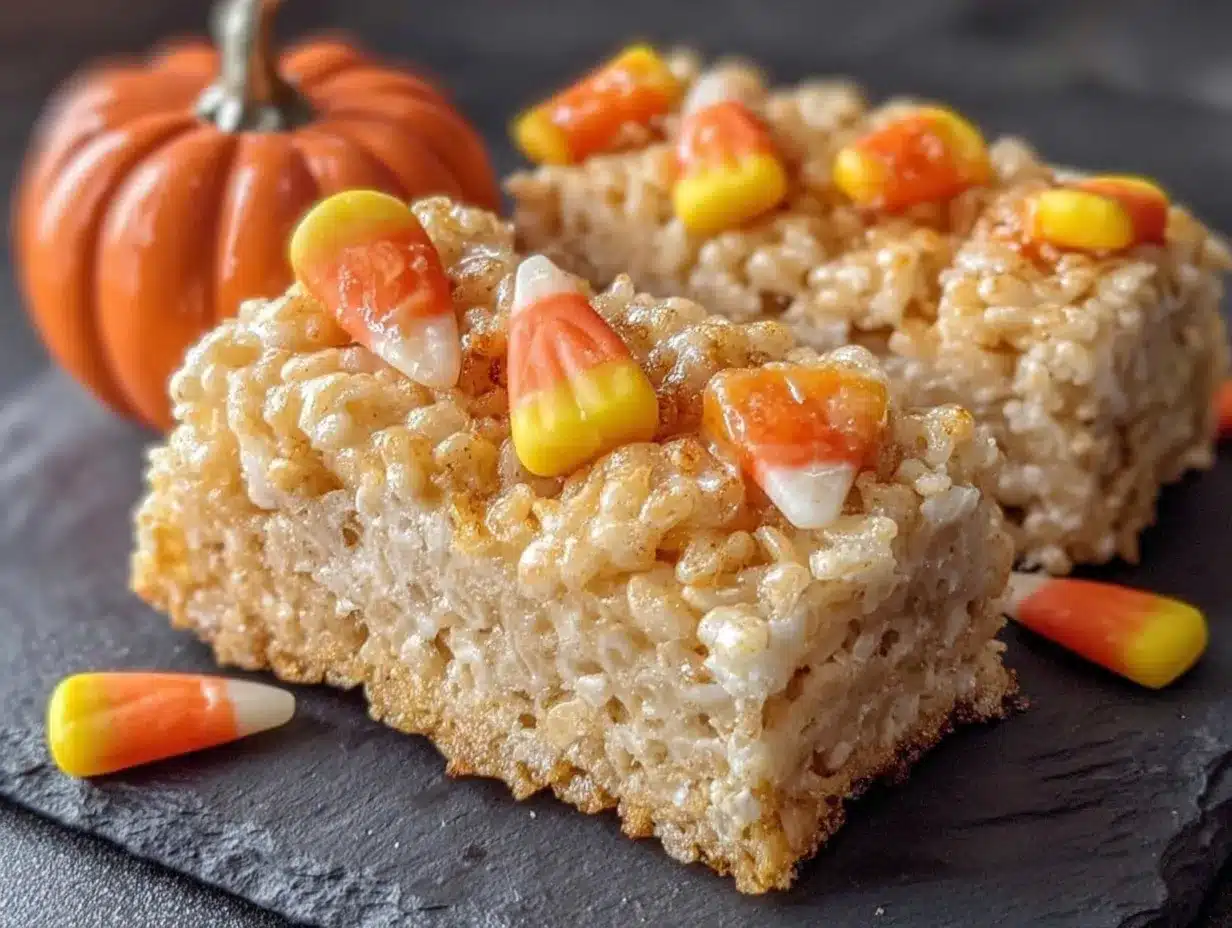
This recipe comes together in about 15 minutes, but there are a few key moments where paying attention makes all the difference. Here’s my step-by-step method, perfected through many late-night batches.
- Prep your pan (2 minutes): Line a 9×13-inch baking pan with parchment paper, leaving about 2 inches of overhang on the long sides. This will act as handles later. Lightly grease the parchment paper with a little butter or nonstick spray. Set the pan aside.
- Melt the butter (2 minutes): Place your large pot over medium-low heat and add the 3 tablespoons of unsalted butter. Let it melt slowly, swirling the pot occasionally. You want the butter to be fully melted and just starting to bubble, but not browning. If it starts to turn golden, your heat is too high—turn it down. (I learned this the hard way after a few batches of accidentally brown-butter-flavored treats. Delicious, but not what we’re going for here.)
- Add the marshmallows (3-4 minutes): Once the butter is melted, add the 10 ounces of marshmallows to the pot. Stir constantly with your wooden spoon or spatula. The marshmallows will start to puff up and then collapse into a gooey, stretchy mass. Keep stirring until they are completely melted and the mixture is smooth. This should take about 3-4 minutes. Don’t walk away—burnt marshmallow is a tragedy. The mixture should be a pale, creamy white.
- Season the mixture (30 seconds): Remove the pot from the heat. Add the ½ teaspoon of flaky sea salt and stir to combine. If you’re using vanilla extract, add it now. The heat will help the flavors meld. Give it a quick taste—it should be sweet but with a little savory balance from the salt.
- Add the cereal (2 minutes): Pour the 5 cups of Rice Krispies cereal into the pot. Gently fold the cereal into the marshmallow mixture using a folding motion—lift the mixture from the bottom and fold it over the top. Be careful not to crush the cereal too much. You want to incorporate it evenly without breaking all the pieces into dust. It’s okay if a few pieces escape—just keep folding gently.
- Add the candy corn (1 minute): Once the cereal is mostly coated, add 1 cup of candy corn. Fold it in gently, distributing it as evenly as possible. The candy corn will start to soften slightly from the heat, which is perfect. You want it to be visible but integrated. Don’t overmix, or the candy corn will melt completely and you’ll lose those beautiful orange and yellow specks.
- Press into the pan (2 minutes): Transfer the mixture to your prepared pan. Using a spatula or your hands (lightly greased with butter or nonstick spray), press the mixture into an even layer. Be gentle but firm—you want the treats to hold together without being compressed into a brick. If you’re using your hands, be careful, the mixture will be warm. I usually use a piece of parchment paper to press down, which prevents sticking and keeps my hands clean.
- Add the topping (1 minute): While the mixture is still warm, sprinkle the extra candy corn on top, pressing them in gently so they stick. Then, finish with a light sprinkle of flaky sea salt. This final touch adds a little crunch and a savory counterpoint to all that sweetness.
- Cool and cut (30 minutes minimum): Let the treats cool at room temperature for at least 30 minutes. This allows them to set properly. If you try to cut them too soon, they’ll be a sticky mess. Once cool, use the parchment paper handles to lift the whole block out of the pan. Place it on a cutting board. Using a sharp knife (sprayed with nonstick spray), cut into squares. I usually get 12-16 squares, depending on how big you like them.
Sensory cue: When you press the mixture into the pan, it should feel warm and pliable, not hot. The candy corn should be visible as distinct pieces, not melted blobs. The top should look speckled with orange and yellow, like a festive confetti.
Cooking Tips & Techniques
Over the years, I’ve made every mistake in the book when it comes to Rice Krispies treats. I’ve burnt the marshmallows, I’ve crushed the cereal into dust, and I’ve ended up with treats so hard they could double as hockey pucks. Here’s what I’ve learned so you don’t have to suffer the same fate.
The low-and-slow method is non-negotiable. I know it’s tempting to crank up the heat to melt the marshmallows faster, but don’t do it. High heat will scorch the marshmallows, giving them a bitter, burnt flavor that ruins the whole batch. Keep the heat on medium-low and be patient. The marshmallows will melt in about 4 minutes, and the result will be silky and sweet. I once tried to rush this step when I was making a batch for a Halloween party, and I ended up with a pot of brown, acrid goo. I had to start over, and I was 15 minutes late to the party. Lesson learned.
Don’t overmix the cereal. Once you add the cereal, you want to fold it in just until it’s coated. Overmixing crushes the cereal, which means you lose that signature crunch. Your treats will end up dense and chewy instead of light and crispy. I like to use a gentle folding motion, like I’m folding egg whites into a batter. It takes a little more time, but it’s worth it.
Wet your hands or spatula. The marshmallow mixture is incredibly sticky. To press it into the pan without everything turning into a sticky mess, lightly grease your hands or your spatula with butter or nonstick spray. You can also use a piece of parchment paper to press down, which is my preferred method. It’s less messy and gives you a nice, even surface.
Timing is everything. These treats are best eaten the same day they’re made, when the cereal is still crunchy and the marshmallows are soft and chewy. If you’re making them for a party, try to make them no more than 24 hours in advance. After that, the cereal starts to absorb moisture from the marshmallows and gets a little soft. They’re still delicious, but they lose that fresh-made magic.
Use a sharp knife for clean cuts. A dull knife will squish the treats and make the edges ragged. I use a chef’s knife and spray it with nonstick spray between cuts. Wipe the blade clean with a damp paper towel after every few cuts to prevent sticky buildup. For perfectly clean squares, you can also use a pizza cutter—it’s surprisingly effective.
Variations & Adaptations
One of the best things about this recipe is how easy it is to adapt. I’ve tried several variations over the past few weeks, and here are my favorites.
Chocolate Drizzle: Melt ½ cup of dark or milk chocolate chips with a teaspoon of coconut oil, then drizzle it over the cooled treats. The chocolate adds a rich, bitter note that balances the sweetness of the candy corn. I tried this for a Halloween movie night, and it was a huge hit. The chocolate also makes the treats look extra fancy, like something from a bakery.
Peanut Butter Swirl: Before adding the cereal, stir in ¼ cup of creamy peanut butter into the marshmallow mixture. It melts right in and adds a nutty, savory depth that pairs beautifully with the candy corn. This is my personal favorite variation—it tastes like a grown-up version of a childhood classic. If you have a peanut allergy, you can use sunflower seed butter or almond butter instead.
Spooky Sprinkle Mix: Swap half of the candy corn for Halloween-themed M&Ms or candy eyeballs. The M&Ms add a chocolatey crunch, and the candy eyeballs make the treats look adorably spooky. I made this version for a kids’ Halloween party, and they were a total hit. The kids loved picking out the eyeballs and eating them first.
Gluten-Free Option: Rice Krispies are naturally gluten-free (check the box to be sure, as some brands use malt flavoring that contains gluten). If you need a certified gluten-free option, look for a brand like One Degree Organic Foods or Nature’s Path. The recipe works exactly the same way.
Vegan Adaptation: Use vegan butter (like Earth Balance) and vegan marshmallows (like Dandies). The texture will be slightly different—vegan marshmallows tend to be a little firmer—but the flavor is still delicious. I tested this for a friend who is vegan, and she gave it two thumbs up.
Serving & Storage Suggestions
These treats are best served at room temperature, which is when the texture is just right—crispy on the outside, chewy on the inside. I like to arrange them on a platter or a cake stand, which makes them look festive and inviting. For a Halloween party, you can serve them on a bed of orange and black sprinkles or next to a bowl of caramel apples.
For storage, place the treats in an airtight container at room temperature. They’ll stay fresh for up to 3 days, though the texture is best within the first 24 hours. If you stack them, place a piece of parchment paper between the layers to prevent sticking. Do not refrigerate them—the cold air will make the cereal stale and the marshmallows tough.
You can also freeze these treats for up to 2 months. Wrap each square individually in plastic wrap, then place them in a freezer-safe bag or container. To thaw, let them sit at room temperature for about 30 minutes. The texture won’t be quite as good as fresh, but they’re still a great option for make-ahead Halloween treats. I’ve done this for a few parties, and no one has ever complained.
If you’re serving these at a party, I recommend cutting them into smaller, bite-sized squares. They’re easier to grab and eat, and they look more polished on a platter. I also like to add a small flag or a Halloween-themed pick to each square for a fun touch.
Nutritional Information & Benefits
Let’s be honest—these are a treat, not a health food. But that doesn’t mean they can’t fit into a balanced lifestyle. Here’s the estimated nutritional breakdown for one square (based on 12 servings).
| Nutrient | Amount per Serving |
|---|---|
| Calories | 210 |
| Total Fat | 6g |
| Saturated Fat | 3.5g |
| Carbohydrates | 38g |
| Sugar | 22g |
| Protein | 2g |
| Sodium | 150mg |
While these treats are definitely on the sweeter side, they do offer a small amount of iron from the fortified cereal. The butter provides a little vitamin A, and the marshmallows are surprisingly low in fat. The key is portion control—one or two squares is a perfectly reasonable Halloween indulgence. I like to serve them alongside a plate of fresh fruit or veggie sticks to balance out the sugar rush.
If you’re watching your sugar intake, you can reduce the amount of candy corn or use a sugar-free marshmallow alternative. But honestly, part of the joy of Halloween is letting loose a little. These treats are meant to be fun, festive, and a little bit indulgent. Enjoy them in moderation, and don’t stress about the numbers.
Conclusion
These Easy Halloween Rice Krispies Treats with Candy Corn are the kind of recipe that feels like a happy accident. They came together in my kitchen late at night, born from a craving and a handful of odds and ends, and they’ve become one of my most-requested treats. They’re simple, they’re fun, and they capture the spirit of Halloween without any fuss or stress.
I hope you’ll give them a try. Feel free to customize them to your liking—add chocolate, swap in different candies, or drizzle with caramel. The recipe is a starting point, and I’d love to hear how you make it your own. Leave a comment below and let me know how your batch turned out, or tag me on social media with your photos. I can’t wait to see your spooky creations!
Happy Halloween, and happy snacking. Remember, the best recipes are the ones you make with a little bit of joy and a whole lot of butter.
Frequently Asked Questions
Can I use mini marshmallows instead of regular ones?
Yes, you can. Mini marshmallows melt faster and more evenly, so you might need to reduce the melting time by about a minute. Just keep an eye on them and stir constantly to prevent burning.
How do I prevent the candy corn from melting completely?
The key is to let the marshmallow mixture cool slightly before adding the candy corn. Remove the pot from the heat and let it sit for about 30 seconds before folding in the candy corn. This prevents the heat from melting the candy corn into a puddle.
Can I make these treats ahead of time?
Absolutely. You can make them up to 24 hours in advance. Store them in an airtight container at room temperature. If you need to make them further ahead, freeze them as directed and thaw before serving.
My treats turned out too hard. What went wrong?
This usually happens when the marshmallow mixture is overcooked or when the treats are pressed too firmly into the pan. Cook the marshmallows just until melted, and press the mixture into the pan gently. You want them to hold together, not be compressed into a brick.
Can I use a different cereal?
Yes, you can experiment with other crispy cereals like Cocoa Krispies, Froot Loops, or even a generic puffed rice cereal. Keep in mind that different cereals have different textures and sweetness levels, so the final result may vary. Cocoa Krispies would make a delicious chocolate version!
Pin This Recipe!
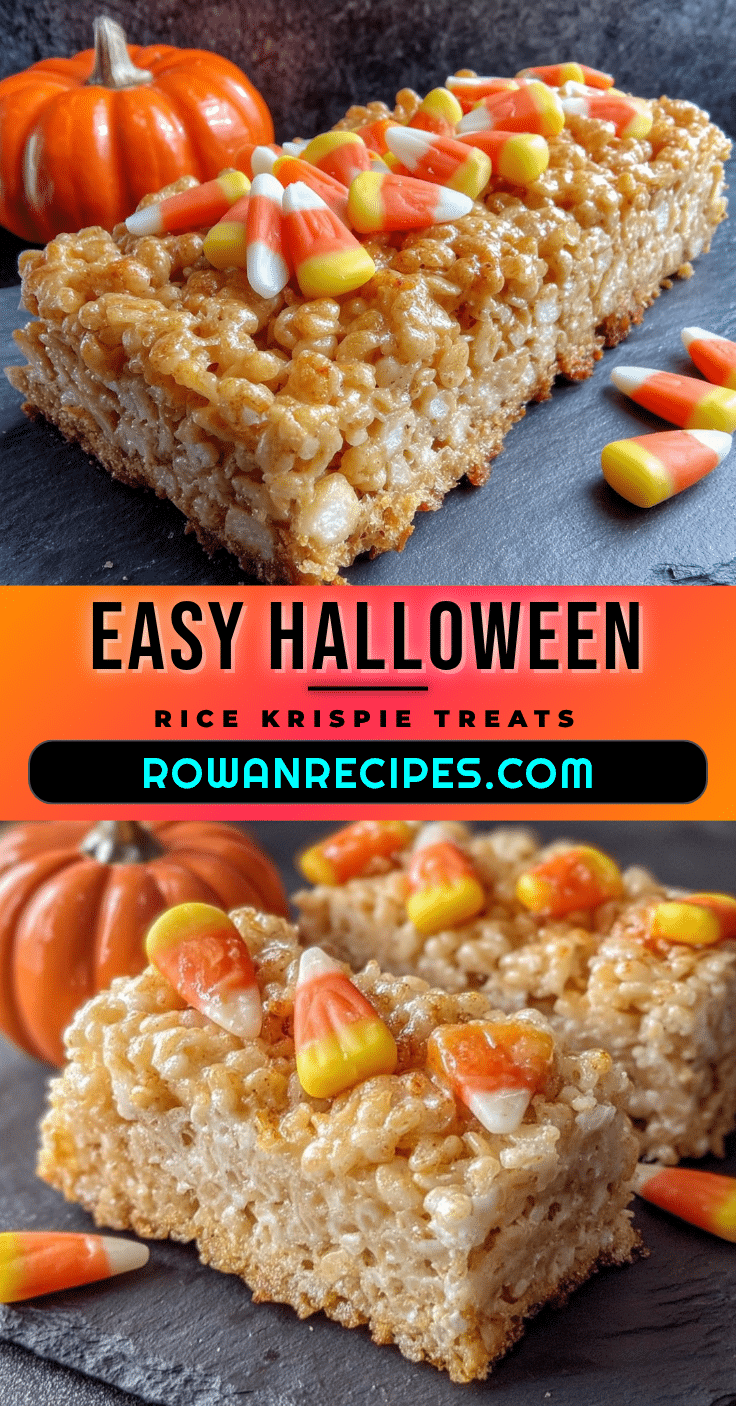
Easy Halloween Rice Krispie Treats with Candy Corn
These Easy Halloween Rice Krispie Treats with Candy Corn are a quick, 5-ingredient dessert that’s perfect for parties. They combine crispy cereal, gooey marshmallows, and sweet candy corn for a festive and delicious treat.
- Prep Time: 15 minutes
- Cook Time: 5 minutes
- Total Time: 50 minutes
- Yield: 12-16 servings 1x
- Category: Dessert
- Cuisine: American
Ingredients
- 3 tablespoons unsalted butter
- 10 ounces marshmallows (about 40 regular marshmallows)
- 5 cups Rice Krispies cereal
- 1 cup candy corn, plus more for topping
- ½ teaspoon flaky sea salt, plus more for garnish
Instructions
- Line a 9×13-inch baking pan with parchment paper, leaving about 2 inches of overhang on the long sides. Lightly grease the parchment paper with butter or nonstick spray. Set aside.
- Place a large pot over medium-low heat and add the butter. Let it melt slowly, swirling occasionally, until fully melted and just starting to bubble (do not let it brown).
- Add the marshmallows to the pot and stir constantly with a wooden spoon or silicone spatula until completely melted and smooth, about 3-4 minutes. Remove from heat.
- Stir in the flaky sea salt until combined.
- Pour the Rice Krispies cereal into the pot and gently fold until evenly coated, being careful not to crush the cereal.
- Add 1 cup of candy corn and fold gently to distribute evenly. Do not overmix.
- Transfer the mixture to the prepared pan. Using a greased spatula or parchment paper, press into an even layer.
- While still warm, sprinkle extra candy corn on top and press gently to adhere. Finish with a light sprinkle of flaky sea salt.
- Let cool at room temperature for at least 30 minutes. Use the parchment paper handles to lift the block out of the pan. Cut into squares with a sharp knife (sprayed with nonstick spray).
Notes
For best texture, serve the same day. Store in an airtight container at room temperature for up to 3 days. Do not refrigerate. To freeze, wrap individually in plastic wrap and store in a freezer-safe bag for up to 2 months. Thaw at room temperature for 30 minutes.
Nutrition
- Serving Size: 1 square
- Calories: 210
- Sugar: 22
- Sodium: 150
- Fat: 6
- Saturated Fat: 3.5
- Carbohydrates: 38
- Protein: 2
Keywords: Halloween treats, Rice Krispie treats, candy corn, easy dessert, no-bake, 5 ingredients


