This was supposed to be red velvet cake. I had the buttermilk out, the cocoa powder measured, and a whole vision of a deep crimson crumb for my neighbor’s Halloween party. But somewhere between answering the door for a package and trying to find where my kid hid the remote, I grabbed the black cocoa powder instead of the natural kind. You know that moment when you realize you’ve already poured the wrong thing in and there’s no going back? Yeah, that was me, staring at a bowl of what looked like charcoal sludge, wondering if I should just order pizza and call it a night.
I almost dumped the whole thing. Honestly, I had the sink running. But something stopped me—maybe stubbornness, maybe just not wanting to waste a whole stick of butter. I baked them anyway, figuring they’d at least look dramatic for a Halloween party, even if they tasted like regret. What came out of that oven was nothing like the plan. The texture was impossibly tender, the flavor had this deep, almost dark chocolate richness with a hint of something mysterious, and the color? Pure black velvet. My neighbor took one bite at the party and asked for the recipe before I could even explain the disaster that birthed it.
I’ve made these black velvet cupcakes every October since. They’ve become the thing I’m asked to bring, the dish that disappears first from the dessert table. There’s a quiet vindication in that—knowing that my distracted, chaotic moment in the kitchen turned into something people genuinely crave. Maybe you’ve had one of those kitchen accidents that worked out better than the original plan. If not, let me tell you, this is the one worth trying. These cupcakes are dark, dramatic, and absolutely delicious—the perfect trick-or-treat for your Halloween spread.
Why You’ll Love This Recipe
I’ve tested this black velvet cupcake recipe more times than I care to count, tweaking ratios and baking times until it was absolutely foolproof. What I ended up with is a cupcake that delivers on every level—flavor, texture, and that show-stopping visual that makes guests do a double-take. Here’s why this one stands out:
- Quick & Easy: From start to finish, these come together in about 35 minutes. The batter mixes up in one bowl, no stand mixer required, which means less cleanup and more time for decorating.
- Simple Ingredients: You likely have most of these in your pantry right now. No weird extracts or hard-to-find specialty items—just good, basic baking staples with one special twist.
- Perfect for Halloween Parties: These are made for gatherings. They look dramatic on a dessert table, they travel well, and they’re easy to grab and eat while mingling. Plus, they’re the kind of thing people photograph before they eat.
- Crowd-Pleaser: I’ve served these to kids, adults, and even my picky aunt who “doesn’t do dark desserts.” Every single time, they get rave reviews. The flavor is rich but not overwhelming.
- Unbelievably Delicious: The combination of black cocoa powder and buttermilk creates a tender crumb with a deep, slightly earthy chocolate flavor. It’s not sweet in a cloying way—it’s balanced, sophisticated, and absolutely addictive.
What makes these different from other black cupcakes you’ve tried is the texture. Using black cocoa powder can sometimes result in a dry, crumbly cupcake, but I’ve cracked the code with a specific ratio of oil to butter and a buttermilk soak that keeps them moist for days. This isn’t just another Halloween novelty—it’s genuinely one of the best chocolate cupcakes I’ve ever baked, and I don’t say that lightly.
These cupcakes are the kind that make you close your eyes after the first bite. They’re comfort food reimagined for a spooky celebration—richer, darker, but with the same soul-soothing satisfaction as a classic chocolate cake. Perfect for impressing your Halloween guests without spending all day in the kitchen, or turning a simple get-together into something memorable.
What Ingredients You Will Need
This recipe uses simple, mostly pantry-staple ingredients to deliver that signature black velvet color and tender crumb. The key player here is black cocoa powder—it’s what gives these cupcakes their dramatic color and deep flavor without any artificial food coloring.
For the Cupcakes
- 1 ½ cups all-purpose flour (spooned and leveled)—provides structure without making the cupcakes dense
- ½ cup black cocoa powder (I recommend King Arthur or Hershey’s Special Dark for best color)—this is the star ingredient; regular cocoa won’t give you that true black color
- 1 teaspoon baking soda—helps the cupcakes rise and reacts with the buttermilk for a tender crumb
- ½ teaspoon salt—balances the sweetness and enhances the chocolate flavor
- ¾ cup granulated sugar—adds sweetness and helps with browning (even though we want them black!)
- ½ cup packed light brown sugar—adds moisture and a hint of molasses that complements the dark cocoa
- ½ cup vegetable oil (or melted coconut oil)—keeps the cupcakes incredibly moist; oil works better than butter here for texture
- 2 large eggs, room temperature—helps create structure and richness
- 1 teaspoon vanilla extract—rounds out the chocolate flavor
- 1 cup buttermilk, room temperature—reacts with the baking soda for lift and adds tanginess that cuts through the richness
- 1 tablespoon white vinegar—enhances the reaction with the baking soda for extra fluffiness
For the Cream Cheese Frosting
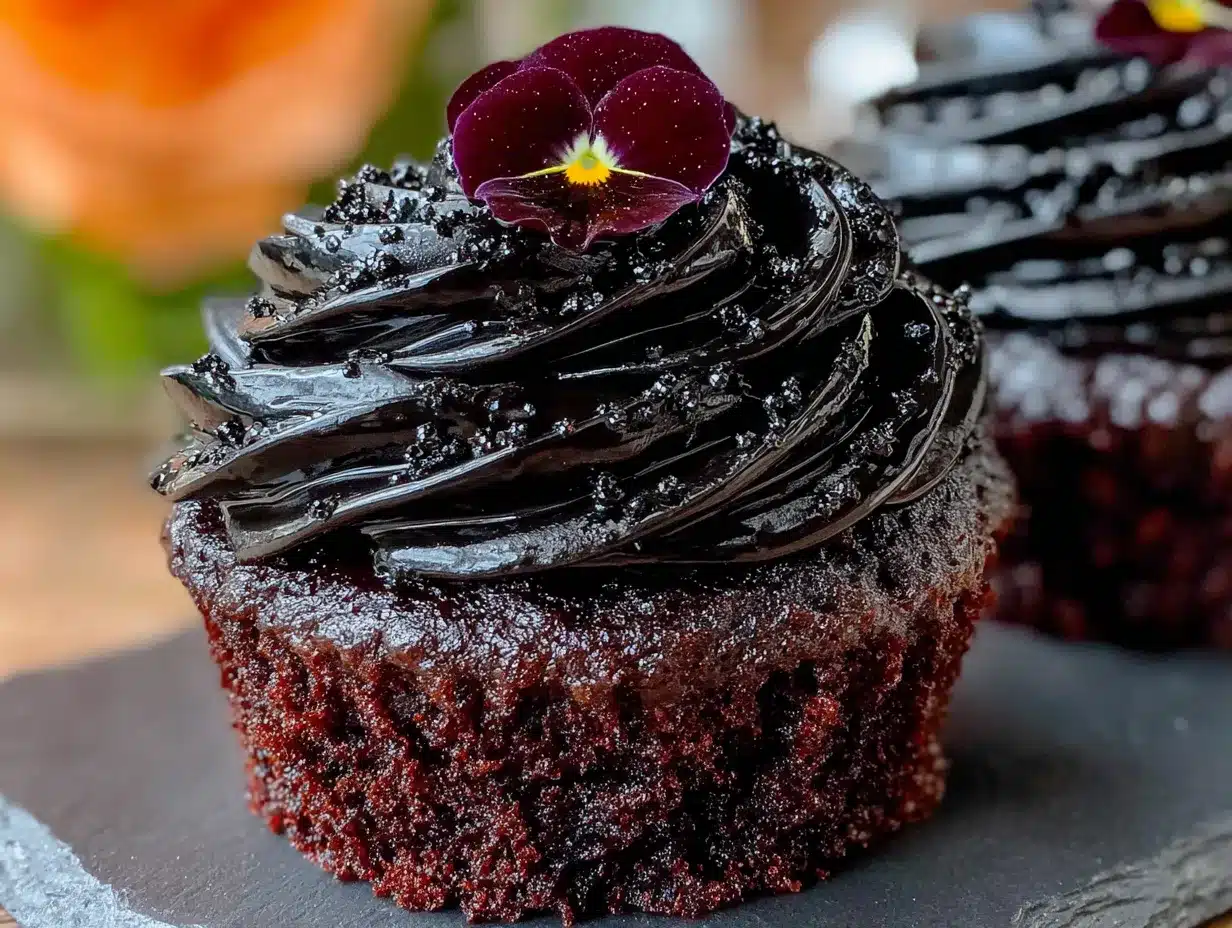
- 8 oz cream cheese, softened (full-fat recommended for best texture)—provides that tangy, creamy base that pairs perfectly with dark chocolate
- ½ cup unsalted butter, softened—adds stability and richness to the frosting
- 3 cups powdered sugar, sifted—sweetens and thickens the frosting without graininess
- 1 teaspoon vanilla extract—adds warmth and depth
- Pinch of salt—balances the sweetness
For Decoration (Optional but Fun)
- Black sprinkles or edible glitter—adds a spooky sparkle
- Mini plastic spiders or Halloween-themed toppers—makes them party-ready
- Orange food coloring—to tint a small amount of frosting for a pop of color
Substitution Tip: If you can’t find black cocoa powder, you can use Dutch-process cocoa powder and add a few drops of black gel food coloring. The flavor won’t be quite as deep, but the color will still be impressive. For a dairy-free version, swap the buttermilk with 1 cup of milk mixed with 1 tablespoon of lemon juice, and use dairy-free cream cheese and butter in the frosting.
Equipment Needed
You don’t need a fancy kitchen to pull these off, but having the right tools makes the process smoother. Here’s what you’ll need:
- Muffin tin (standard 12-cup)—this is non-negotiable; I prefer a non-stick pan for easy release
- Paper cupcake liners—black or orange ones add to the Halloween vibe, but any will work
- Large mixing bowl and whisk—for combining dry ingredients; a hand mixer works too but isn’t necessary
- Electric hand mixer or stand mixer—for the frosting; you can do it by hand, but your arm will thank you for the mixer
- Cooling rack—essential for even cooling so the frosting doesn’t melt
- Piping bag with a star tip (like Wilton 1M)—for that bakery-style swirl; a zip-top bag with the corner snipped works in a pinch
- Measuring cups and spoons—accuracy matters in baking, especially with cocoa powder
- Spatula—for scraping every bit of batter and frosting
If you don’t have a piping bag, no worries. I’ve frosted these with a butter knife more times than I can count, and they still look gorgeous. The key is letting the cupcakes cool completely before you even think about frosting them—learned that one the hard way after a melted frosting disaster.
Preparation Method
Let’s get baking! This recipe comes together quickly, so I like to have all my ingredients measured and ready before I start. Trust me, it makes the process so much smoother, especially when you’re juggling multiple things in the kitchen.
- Preheat your oven to 350°F (175°C). Line your muffin tin with 12 paper liners. This recipe makes exactly 12 standard-sized cupcakes—no weird half-batches to deal with.
- In a large bowl, whisk together the dry ingredients: flour, black cocoa powder, baking soda, and salt. Make sure there are no lumps in the cocoa powder—I like to sift it in if it looks clumpy. This step takes about 30 seconds but makes a big difference in the final texture.
- In a separate medium bowl, whisk together the sugars, oil, eggs, and vanilla until smooth and well combined. It should look glossy and slightly thicker than when you started. This is where the magic begins—the sugar starts dissolving into the oil, creating that tender crumb.
- Pour the wet ingredients into the dry ingredients and stir gently with a spatula until just combined. Don’t overmix here—a few streaks of flour are okay. Overmixing develops gluten and makes cupcakes tough, and nobody wants a tough cupcake.
- Add the buttermilk and vinegar and fold them in gently. The batter will look thin—almost like a thick milkshake—and that’s exactly what you want. The vinegar reacts with the baking soda to create bubbles that give you a light, airy crumb. You should see tiny bubbles forming on the surface as you stir.
- Divide the batter evenly among the 12 liners. I use a ¼-cup measure or a cookie scoop for even distribution. Each liner should be about ⅔ full—any more and they’ll overflow, any less and you’ll get flat tops. The batter is dark and almost looks like black ink, which is pretty cool honestly.
- Bake for 18-20 minutes, or until a toothpick inserted into the center comes out clean or with a few moist crumbs. The tops should spring back when lightly touched. Don’t overbake—these can go from perfect to dry in about 60 seconds. I start checking at 16 minutes because every oven runs a little differently.
- Let the cupcakes cool in the pan for 5 minutes, then transfer them to a wire rack to cool completely. This step is crucial—if you try to frost them while they’re even slightly warm, the frosting will slide right off. I’ve made that mistake exactly once and ended up with a sad, melted mess.
- While the cupcakes cool, make the frosting. In a large bowl, beat the softened cream cheese and butter together until smooth and creamy, about 2-3 minutes. Scrape down the sides of the bowl halfway through. The mixture should be light and fluffy with no lumps.
- Gradually add the powdered sugar, ½ cup at a time, beating on low speed until incorporated. Once all the sugar is in, add the vanilla and salt, then beat on medium-high for 2 minutes until the frosting is light, airy, and spreadable. If it seems too soft, pop it in the fridge for 10 minutes to firm up.
- Frost the completely cooled cupcakes. I like to use a piping bag with a star tip for that dramatic swirl, but a generous dollop spread with a knife looks just as inviting. Top with black sprinkles or Halloween toppers for extra flair.
Cooking Tips & Techniques
After making these black velvet cupcakes more times than I can count, I’ve picked up a few tricks that make the process smoother and the results more consistent. Here’s what I’ve learned—sometimes the hard way.
Room temperature ingredients matter more than you think. I know, it’s tempting to use cold eggs and buttermilk straight from the fridge, but cold ingredients don’t emulsify properly. The batter ends up lumpy and the cupcakes bake unevenly. Take the eggs and buttermilk out 30 minutes before you start baking. If you forget (I do, constantly), place the eggs in a bowl of warm water for 5 minutes and microwave the buttermilk for 15 seconds—it works in a pinch.
Black cocoa powder is different from regular cocoa. It’s less acidic and more alkaline, which means it doesn’t react the same way with baking soda. That’s why I add the extra vinegar—it boosts the reaction and gives you a lighter crumb. If you use regular cocoa powder, you’ll get a brown cupcake, not a black one. The flavor is also milder and less bitter, which is why these cupcakes taste more like a subtle dark chocolate than an intense fudge.
Don’t overmix the batter. I cannot stress this enough. Mix until the flour just disappears into the wet ingredients, then stop. Overmixing develops gluten, and gluten makes cupcakes tough and rubbery. You want them tender and velvety—hence the name. A few small lumps in the batter are perfectly fine; they’ll bake out in the oven.
Use a cookie scoop for even portions. This is my favorite baking hack. A ¼-cup cookie scoop gives you perfectly even cupcakes every time, which means they all bake at the same rate. No more one burnt cupcake and one underdone one. Plus, it’s way less messy than pouring batter from a bowl.
Let the frosting soften slightly before piping. If you refrigerate the frosting to firm it up, let it sit at room temperature for 10-15 minutes before piping. Cold frosting is stiff and hard to pipe smoothly. You want it soft enough to flow through the tip but firm enough to hold its shape. It’s a delicate balance, but you’ll get a feel for it after a batch or two.
Variations & Adaptations
One of the best things about this black velvet cupcake recipe is how adaptable it is. I’ve played around with different variations over the years, and here are some of my favorites that you can try depending on your crowd or occasion.
Gluten-Free Version: Swap the all-purpose flour with a 1:1 gluten-free baking blend that contains xanthan gum. I’ve had great results with King Arthur’s Measure for Measure blend. The texture is slightly more delicate, so handle the batter gently and don’t overbake. Everything else stays the same—the cocoa powder and buttermilk do the heavy lifting for flavor.
Vegan Adaptation: Replace the eggs with flax eggs (2 tablespoons ground flaxseed mixed with 6 tablespoons water, let sit for 5 minutes). Use a plant-based buttermilk by mixing 1 cup of unsweetened almond or oat milk with 1 tablespoon of lemon juice. For the frosting, use vegan cream cheese and butter—I’ve found Miyoko’s brand works beautifully. The cupcakes are slightly denser but still incredibly delicious.
Spicy Ghost Cupcakes: Add ½ teaspoon of cayenne pepper and ¼ teaspoon of cinnamon to the dry ingredients. The heat sneaks up on you after the first bite, which is perfect for a Halloween party. I made these for a costume party last year and they were a huge hit—people kept coming back for “just one more” to figure out what that warmth was.
Mini Cupcake Version: Use a mini muffin tin and bake for 10-12 minutes instead of 18-20. This yields about 36 mini cupcakes, which are perfect for parties where people want to sample multiple desserts. Just keep an eye on them—mini cupcakes go from done to overdone fast.
Chocolate Ganache Filling: For an extra indulgent version, core the center of each cooled cupcake and pipe in a chocolate ganache filling (1:1 ratio of heavy cream to dark chocolate chips, melted together). Top with the cream cheese frosting. It’s a bit extra, but for a special occasion, it’s absolutely worth the effort.
Serving & Storage Suggestions
These black velvet cupcakes are best served at room temperature, which lets the frosting soften slightly and the crumb stay tender. If you’ve refrigerated them, take them out 30 minutes before serving to let them come to room temperature. The flavor actually deepens as they sit—the black cocoa powder mellows out and the buttermilk tang becomes more pronounced.
For a Halloween party, I like to arrange them on a black cake stand or a dark wooden board for maximum visual impact. Scatter some candy corn, mini pumpkins, or fake spider webs around the base for a spooky tablescape. If you’re serving them as part of a dessert spread, they pair beautifully with warm apple cider or a rich hot chocolate—the contrast between the dark cupcake and the warm drink is chef’s kiss.
Storage Instructions: Store unfrosted cupcakes in an airtight container at room temperature for up to 3 days. Frosted cupcakes should be stored in the refrigerator in an airtight container for up to 5 days. The frosting firms up in the fridge, which actually makes them easier to transport if you’re bringing them to a party.
Freezer Tips: These cupcakes freeze beautifully. Freeze unfrosted cupcakes in a single layer on a baking sheet, then transfer to a freezer-safe bag for up to 3 months. Thaw at room temperature before frosting. You can also freeze the frosting in a piping bag—just thaw it in the refrigerator overnight and bring to room temperature before piping. I always make a double batch and freeze half for last-minute gatherings.
Reheating Note: I don’t recommend microwaving these cupcakes—it makes the texture gummy. If you want a warm cupcake, let it sit at room temperature for an hour, then pop it in a 300°F oven for 5 minutes. The frosting will get slightly melty, which is honestly pretty delicious in its own way.
Nutritional Information & Benefits
Let’s be real—these are cupcakes, not health food. But I believe in knowing what you’re eating, so here’s the breakdown per cupcake (with frosting): approximately 380 calories, 18g fat, 52g carbohydrates, 4g protein, and 35g sugar. The black cocoa powder is actually rich in antioxidants, and the buttermilk provides calcium and probiotics. So there’s that.
Dietary Considerations: This recipe contains gluten, dairy, and eggs. For gluten-free and vegan options, check the variations section above. The cream cheese frosting is not dairy-free unless you use substitutions, but the cupcakes themselves can be made dairy-free with a simple buttermilk swap.
Potential Allergens: Wheat (flour), dairy (buttermilk, cream cheese, butter), eggs. If you’re serving these at a party, I recommend labeling them clearly so guests with allergies can make informed choices. I always keep a small card next to mine that lists the main allergens—it’s a small gesture that guests really appreciate.
My personal perspective? I think it’s okay to enjoy treats like this in moderation. These cupcakes are for celebrations, for Halloween parties, for those moments when you want something special. They’re not an everyday thing, and that’s what makes them so satisfying when you do have them. Life’s too short to skip dessert, especially when it looks this good.
Conclusion
These black velvet Halloween cupcakes are more than just a pretty face—they’re genuinely delicious, surprisingly easy to make, and guaranteed to be the star of your Halloween dessert table. That accidental swap of cocoa powder turned into one of my most-requested recipes, and I have a feeling it’ll become one of yours too.
I love that this recipe proves you don’t need artificial food coloring or complicated techniques to get a dramatic black cupcake. Just good ingredients, a little patience, and the willingness to lean into a kitchen accident. There’s something deeply satisfying about pulling a tray of perfectly black cupcakes out of the oven and watching people’s faces light up when they see them.
I’d love to hear how yours turn out! Did you try any of the variations? Did your guests go wild for them? Drop a comment below and let me know—I read every single one and I’m always looking for new twists to try. And if you snap a photo, tag me on social media so I can see your spooky creations. Happy baking, and have a wonderfully haunted Halloween!
Frequently Asked Questions
Can I use regular cocoa powder instead of black cocoa powder?
You can, but the cupcakes won’t be black—they’ll be a dark brown. The flavor will also be different; regular cocoa is more acidic and bitter, while black cocoa is milder and smoother. If you want that dramatic black color without black cocoa powder, add about 1-2 teaspoons of black gel food coloring to the batter.
Why did my cupcakes turn out dry?
Dry cupcakes usually mean one of two things: you overbaked them, or you overmixed the batter. Check your oven temperature with an oven thermometer—many ovens run hot. Start checking for doneness at 16 minutes. Also, make sure you’re measuring your flour correctly by spooning it into the measuring cup and leveling it off, not scooping directly from the bag.
Can I make these cupcakes ahead of time for a party?
Absolutely! Bake the cupcakes up to 3 days ahead and store them unfrosted in an airtight container at room temperature. Make the frosting up to 2 days ahead and keep it refrigerated. Frost the cupcakes the morning of your party or the night before. They actually taste better after a day or two—the flavors meld together beautifully.
How do I get that perfect black color without food coloring?
The key is using high-quality black cocoa powder. Brands like King Arthur Flour and Hershey’s Special Dark give the best results. Make sure you’re not substituting with regular Dutch-process cocoa—it won’t give you the same deep color. The vinegar in the recipe also helps enhance the color by reacting with the baking soda.
Can I freeze these cupcakes with the frosting on?
I don’t recommend it. The cream cheese frosting can become grainy and separate when thawed after freezing. It’s much better to freeze the cupcakes unfrosted and make fresh frosting when you’re ready to serve them. If you absolutely must freeze frosted cupcakes, place them in a single layer in an airtight container and thaw in the refrigerator overnight, then let them come to room temperature before serving.
Pin This Recipe!
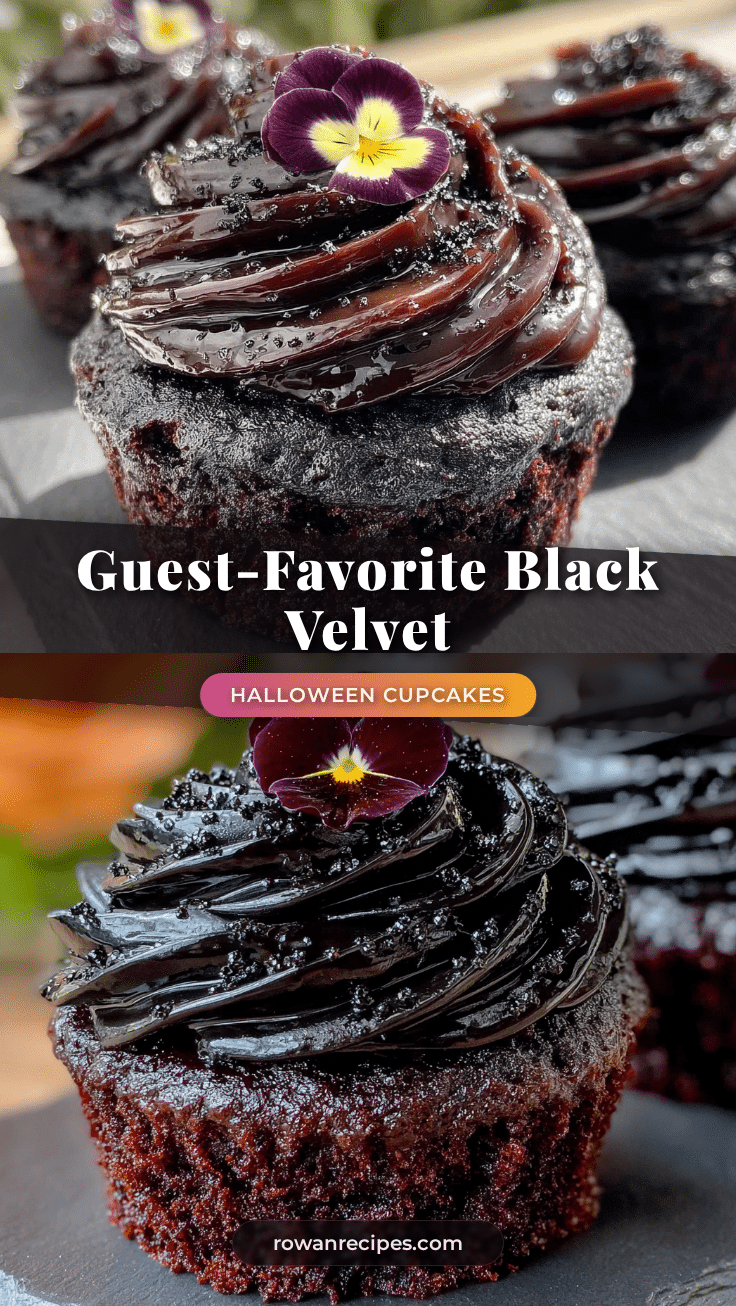
Best Homemade Black Velvet Cupcakes – Easy Halloween Recipe
These black velvet cupcakes are dark, dramatic, and absolutely delicious—the perfect treat for your Halloween spread. Made with black cocoa powder and buttermilk, they deliver a tender crumb and deep chocolate flavor without any artificial food coloring.
- Prep Time: 15 minutes
- Cook Time: 20 minutes
- Total Time: 35 minutes
- Yield: 12 cupcakes 1x
- Category: Dessert
- Cuisine: American
Ingredients
- 1 ½ cups all-purpose flour (spooned and leveled)
- ½ cup black cocoa powder (recommended: King Arthur or Hershey’s Special Dark)
- 1 teaspoon baking soda
- ½ teaspoon salt
- ¾ cup granulated sugar
- ½ cup packed light brown sugar
- ½ cup vegetable oil (or melted coconut oil)
- 2 large eggs, room temperature
- 1 teaspoon vanilla extract
- 1 cup buttermilk, room temperature
- 1 tablespoon white vinegar
- 8 oz cream cheese, softened (full-fat recommended)
- ½ cup unsalted butter, softened
- 3 cups powdered sugar, sifted
- 1 teaspoon vanilla extract
- Pinch of salt
- Black sprinkles or edible glitter (optional)
- Mini plastic spiders or Halloween-themed toppers (optional)
- Orange food coloring (optional)
Instructions
- Preheat your oven to 350°F (175°C). Line your muffin tin with 12 paper liners.
- In a large bowl, whisk together the dry ingredients: flour, black cocoa powder, baking soda, and salt. Sift the cocoa powder if clumpy.
- In a separate medium bowl, whisk together the sugars, oil, eggs, and vanilla until smooth and well combined.
- Pour the wet ingredients into the dry ingredients and stir gently with a spatula until just combined. A few streaks of flour are okay.
- Add the buttermilk and vinegar and fold them in gently. The batter will be thin, like a thick milkshake.
- Divide the batter evenly among the 12 liners, filling each about ⅔ full.
- Bake for 18-20 minutes, or until a toothpick inserted into the center comes out clean or with a few moist crumbs. Start checking at 16 minutes.
- Let the cupcakes cool in the pan for 5 minutes, then transfer them to a wire rack to cool completely.
- While the cupcakes cool, make the frosting: In a large bowl, beat the softened cream cheese and butter together until smooth and creamy, about 2-3 minutes.
- Gradually add the powdered sugar, ½ cup at a time, beating on low speed until incorporated. Add the vanilla and salt, then beat on medium-high for 2 minutes until light and airy. If too soft, refrigerate for 10 minutes.
- Frost the completely cooled cupcakes using a piping bag with a star tip or a knife. Top with black sprinkles or Halloween toppers if desired.
Notes
Room temperature ingredients are crucial for proper emulsification. Black cocoa powder is less acidic than regular cocoa, so the extra vinegar boosts the reaction for a lighter crumb. Do not overmix the batter. Use a cookie scoop for even portions. Let frosting soften slightly before piping if refrigerated. Store unfrosted cupcakes at room temperature for up to 3 days; frosted cupcakes in the refrigerator for up to 5 days. Freeze unfrosted cupcakes for up to 3 months.
Nutrition
- Serving Size: 1 cupcake
- Calories: 380
- Sugar: 35
- Sodium: 280
- Fat: 18
- Saturated Fat: 8
- Carbohydrates: 52
- Fiber: 2
- Protein: 4
Keywords: black velvet cupcakes, Halloween cupcakes, black cocoa cupcakes, cream cheese frosting, easy Halloween dessert


