It was 11:47 PM on a random Tuesday in late September, and I had a very specific, slightly ridiculous craving. I wanted something that tasted like autumn but also like a county fair—buttery, sweet, and studded with those little kernels of pure nostalgia. I didn’t have any pumpkin puree left, and I was honestly too tired to deal with a layered cake situation. But I did have a bag of candy corn left over from last year (don’t judge, it was unopened) and a box of white chocolate chips I’d stashed for “emergencies.” The idea that arrived was simple: what if I just threw them both into a blondie? It felt wrong and right at the same time—like a late-night science experiment where the only rule was that it had to be delicious. I mean, who says candy corn belongs in a jar and not in a warm, gooey bar? The odd hours definitely loosened my usual rules. I wasn’t thinking about food blogs or perfect photography; I was just a tired person with a sweet tooth and a hunch. That first pan came out of the oven at 12:30 AM, and I stood there in the dark kitchen, eating a corner piece straight from the pan. It tasted like fall in a way I hadn’t expected—warm, buttery, with those little bursts of chewy sweetness. Maybe you’ve been there, standing in front of an open fridge at night, trying to invent a dessert that matches your mood. This is that recipe. I keep making it because it feels like a secret—a little quirky, a little nostalgic, and honestly, the best thing I’ve made all season.
Why You’ll Love This Recipe
These Fall Candy Corn Blondies aren’t just another dessert bar—they’re a celebration of everything cozy and fun about the season. Let me tell you why they’ve become my go-to for autumn gatherings.
- Quick & Easy: From mixing bowl to oven in under 15 minutes. Perfect for those evenings when you need a treat, fast.
- Simple Ingredients: You probably have most of these in your pantry right now. No fancy extracts or hard-to-find flours.
- Perfect for Fall Parties: Great for Halloween gatherings, Thanksgiving potlucks, or just a cozy Tuesday night with a cup of tea.
- Crowd-Pleaser: Kids love the candy corn, adults love the buttery blondie base. It’s a win-win.
- Unbelievably Delicious: The combination of soft, chewy blondie with the slight crunch of white chocolate and the chewy-sweet candy corn is pure magic.
What makes this recipe different from the rest? It’s the way the candy corn melts just slightly into the batter, creating little pockets of soft, sugary goodness. I’ve tested this with different ratios and baking times, and this version hits the sweet spot every single time. It’s not just another blondie—it’s your new favorite fall tradition. Trust me, that first bite will make you close your eyes.
What Ingredients You Will Need
This recipe uses simple, wholesome ingredients to deliver that perfect blondie texture—chewy edges, soft centers, and just the right amount of sweetness. Most of these are pantry staples, which makes this an easy last-minute dessert.
For the Blondie Base
- 1/2 cup (1 stick) unsalted butter, melted and slightly cooled (I like using Land O’Lakes for consistent results)
- 1 cup light brown sugar, packed (this gives the blondies their deep, caramel-like flavor)
- 1 large egg, room temperature (helps create a tender crumb)
- 1 teaspoon vanilla extract (use pure, not imitation, for the best flavor)
- 1 cup all-purpose flour (spooned and leveled for accuracy)
- 1/2 teaspoon baking powder (for a little lift)
- 1/4 teaspoon salt (balances the sweetness)
For the Mix-Ins
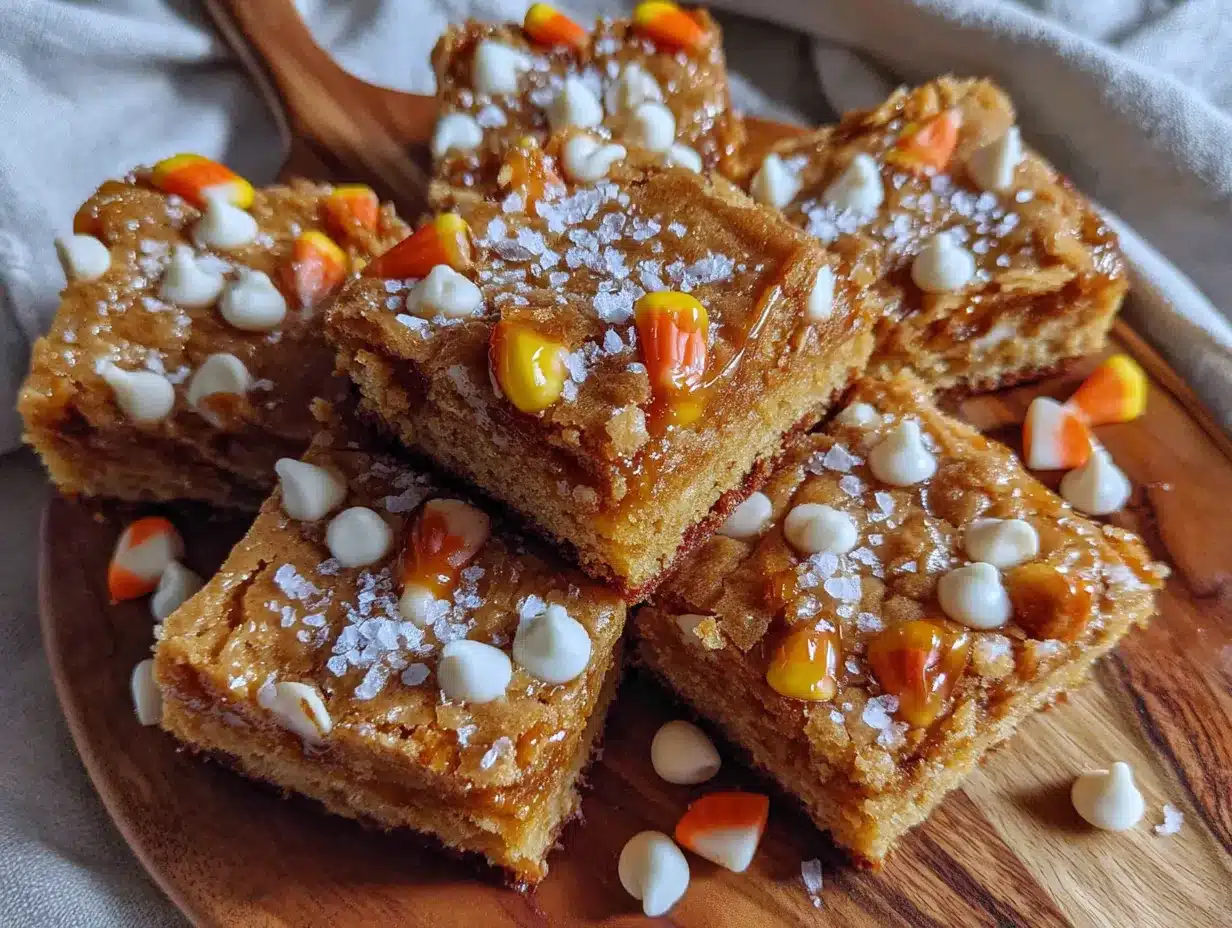
- 3/4 cup candy corn (the classic fall candy—look for fresh bags for the best chewiness)
- 1/2 cup white chocolate chips (I recommend Ghirardelli or Guittard for quality melting)
Ingredient Tips
For the best texture, make sure your egg is at room temperature. If you’re in a hurry, place the egg in a bowl of warm water for 5 minutes. If you want to use salted butter, just reduce the added salt to a pinch. And here’s a little secret: if your candy corn has been sitting in the pantry for a while and feels hard, you can soften it by spreading it on a baking sheet and warming it in a 200°F oven for 2-3 minutes. Let it cool completely before mixing into the batter.
Equipment Needed
You don’t need a professional kitchen to make these blondies. Here’s what you’ll need:
- 8×8-inch baking pan (glass or metal both work; I prefer metal for even browning)
- Parchment paper (for easy removal and cleanup—trust me on this)
- Large mixing bowl
- Whisk (for combining wet ingredients)
- Rubber spatula (for folding in the mix-ins)
- Measuring cups and spoons
- Cooling rack
If you don’t have an 8×8 pan, you can use a 9×9—just reduce the baking time by about 3-5 minutes. A glass pan will also work, but you might need to add a couple of extra minutes to the bake time. I’ve made these in a disposable foil pan before for a potluck, and they turned out just fine. The most important tool? Patience. Let them cool completely before cutting for clean edges.
Preparation Method
Ready to make the best fall dessert of the season? Follow these steps carefully, and you’ll be rewarded with perfectly chewy, buttery blondies.
- Preheat and Prepare: Preheat your oven to 350°F (175°C). Line your 8×8-inch baking pan with parchment paper, leaving some overhang on two sides. This makes lifting the blondies out so much easier later. Lightly grease the parchment with non-stick spray.
- Melt the Butter: In a large microwave-safe bowl, melt the butter in 20-second intervals until just melted. Don’t let it boil—you want it melted, not hot. Let it cool for about 2 minutes. You want it warm, not hot, so it doesn’t cook the egg when you add it.
- Mix the Wet Ingredients: Add the packed brown sugar to the melted butter. Whisk vigorously for about 30 seconds until the mixture looks like wet sand and is well combined. Add the egg and vanilla extract, and whisk again until smooth and glossy. The mixture should look thick and shiny.
- Add the Dry Ingredients: Sprinkle the flour, baking powder, and salt over the wet mixture. Fold gently with a rubber spatula until just combined. Be careful not to overmix—a few streaks of flour are okay. Overmixing will make your blondies tough instead of tender.
- Fold in the Mix-Ins: Gently fold in the candy corn and white chocolate chips. Reserve about 2 tablespoons of each to sprinkle on top later—this makes for a prettier presentation. The batter will be thick and slightly sticky. That’s perfect.
- Transfer to Pan: Scrape the batter into the prepared pan and spread it evenly using the spatula. It will be thick, so take your time to push it into the corners. Sprinkle the reserved candy corn and white chocolate chips on top, pressing them in gently.
- Bake: Bake for 22-25 minutes, or until the edges are golden brown and the center looks set but still slightly soft. A toothpick inserted into the center should come out with a few moist crumbs, not wet batter. The top will be a light golden color. Don’t overbake—they continue to cook as they cool.
- Cool Completely: Place the pan on a cooling rack and let the blondies cool completely in the pan. This is crucial. If you cut them while warm, they’ll fall apart. I know it’s hard to wait, but trust the process. Once completely cool, use the parchment overhang to lift the entire block out onto a cutting board.
- Slice and Serve: Cut into 16 squares (4×4 grid) or 9 larger bars if you’re feeling generous. For the cleanest cuts, use a sharp knife and wipe it clean between each slice.
Cooking Tips & Techniques
Over the years, I’ve learned a few things about making perfect blondies. Here are my best tips, learned through plenty of trial and error.
Don’t Overmix the Batter: This is the number one mistake I see. Once you add the flour, mix only until it disappears. Overmixing develops gluten, which leads to tough, cakey blondies instead of the chewy, fudgy texture we’re after. I’ve made this mistake more times than I’d like to admit.
Room Temperature Ingredients Matter: I know it’s tempting to use a cold egg straight from the fridge, but it really does make a difference. A cold egg can seize the butter and create a lumpy batter. Let your egg sit on the counter for 30 minutes, or warm it in a bowl of warm water for 5 minutes. Your blondies will thank you.
The Toothpick Test: For blondies, you want a few moist crumbs on your toothpick, not clean. If the toothpick comes out clean, you’ve overbaked them. The residual heat will finish cooking the center as they cool. I pulled a batch too early once and they were a little gooey, but honestly? Still delicious.
Let Them Cool: I cannot stress this enough. Warm blondies are fragile and will crumble when you try to cut them. Patience is the hardest part of this recipe. If you absolutely must have a warm one, cut one corner piece after about 30 minutes of cooling and save the rest for later.
Use Parchment Paper: I used to grease the pan and hope for the best. Now I always line with parchment. It makes lifting the entire batch out so easy, and cleanup is a breeze. It’s a small step that saves a lot of frustration.
Variations & Adaptations
One of the best things about this recipe is how easy it is to adapt. Here are some of my favorite variations.
Chocolate Lover’s Version: Swap the white chocolate chips for semi-sweet or dark chocolate chips. The bitterness of the dark chocolate balances the sweetness of the candy corn beautifully. I tried this last year for a friend who “doesn’t do white chocolate,” and she ate half the pan.
Nutty Addition: Add 1/2 cup of chopped pecans or walnuts along with the mix-ins. Toast them first for extra flavor—just spread them on a baking sheet at 350°F for 5-7 minutes. The crunch adds a lovely texture contrast.
Gluten-Free Option: Substitute the all-purpose flour with a 1:1 gluten-free baking flour blend. I’ve used Bob’s Red Mill with great results. Just make sure your blend contains xanthan gum for structure. The texture will be slightly more delicate, but still delicious.
Fall Spice Twist: Add 1 teaspoon of pumpkin pie spice or cinnamon to the flour mixture. This gives the blondies a warm, aromatic flavor that pairs perfectly with the candy corn. I did this on a whim one rainy afternoon, and it’s now my husband’s favorite version.
Dairy-Free Adaptation: Use a plant-based butter stick (like Earth Balance) and dairy-free white chocolate chips. The texture might be slightly different, but the flavor is still fantastic.
Serving & Storage Suggestions
These blondies are versatile and can be served in so many ways. Here’s how I like to enjoy them.
Serving Temperature: They’re delicious at room temperature, but I also love them slightly warm. Pop a blondie in the microwave for 10-15 seconds, and serve with a scoop of vanilla ice cream. The warm blondie with cold ice cream is pure heaven.
Presentation Ideas: For Halloween parties, cut them into small squares and arrange on a platter with some extra candy corn scattered around. For a more elegant presentation, dust with a little powdered sugar just before serving. I once served these on a cake stand at a fall brunch, and they were the first thing to disappear.
Storage Instructions: Store leftover blondies in an airtight container at room temperature for up to 5 days. Place a piece of bread in the container to help keep them soft—the bread absorbs excess moisture and the blondies stay chewy. Replace the bread every couple of days.
Freezing Instructions: These blondies freeze beautifully. Wrap individual squares tightly in plastic wrap, then place them in a freezer-safe bag or container. They’ll keep for up to 3 months. To thaw, let them sit at room temperature for about 30 minutes, or microwave for 15-20 seconds.
Flavor Development: Honestly, these blondies taste even better the next day. The flavors meld together overnight, and the texture becomes even more fudgy. If you can resist eating them all on day one, you’re in for a treat.
Nutritional Information & Benefits
Let’s be real—these are a treat, not a health food. But here’s the estimated nutritional breakdown for one blondie (based on 16 servings).
| Nutrient | Amount per Serving |
|---|---|
| Calories | 185 |
| Total Fat | 8g |
| Saturated Fat | 5g |
| Cholesterol | 25mg |
| Sodium | 85mg |
| Total Carbohydrates | 28g |
| Sugars | 20g |
| Protein | 2g |
These blondies are a fun, indulgent treat perfect for special occasions and holiday celebrations. They contain dairy, eggs, and gluten. If you’re looking for a slightly lighter option, you can reduce the sugar by using a sugar substitute, but I haven’t tested that myself. My philosophy? Enjoy the treat, savor every bite, and balance it out with a healthy meal later. Life is too short for sad desserts.
Conclusion
These Fall Candy Corn Blondies with White Chocolate Chips are more than just a dessert—they’re a little slice of autumn joy. They’re quick enough for a weeknight craving, special enough for a holiday party, and fun enough to make with kids. The combination of buttery blondie, sweet candy corn, and creamy white chocolate is honestly addictive.
I love this recipe because it reminds me that cooking doesn’t have to be complicated to be memorable. Sometimes the best ideas come from a late-night craving and a willingness to try something a little different. I hope you’ll give these blondies a try and make them your own. Maybe add some cinnamon, swap the chocolate, or just enjoy them exactly as written.
I’d love to hear how yours turn out! Leave a comment below and let me know if you tried any variations, or tag me in your photos on social media. Happy baking, and here’s to a cozy, delicious fall season!
Frequently Asked Questions
Can I use salted butter instead of unsalted?
Yes, you can! Just reduce the added salt in the recipe to a pinch. The blondies will still be delicious, though they might be slightly saltier. I’ve done it many times when I was out of unsalted butter.
Why did my blondies turn out cakey instead of chewy?
This usually happens from overmixing the batter after adding the flour. Mix only until the flour disappears. Another culprit is too much flour—make sure to spoon and level it, not scoop directly from the bag. Using melted butter instead of creamed butter also helps keep them chewy.
Can I use fresh candy corn or does it need to be stale?
Fresh candy corn works perfectly! In fact, it’s better because it’s softer and chewier. Stale candy corn can be hard and crunchy, which isn’t ideal in blondies. If yours is a bit hard, you can soften it slightly in a warm oven as mentioned in the tips section.
How do I get clean, neat cuts?
Let the blondies cool completely before cutting. Use a sharp knife and wipe it clean with a damp paper towel between each cut. For the cleanest edges, you can even chill the blondies in the fridge for 30 minutes before slicing.
Can I double this recipe for a 9×13 pan?
Absolutely! Double all the ingredients and bake in a greased 9×13-inch pan. The baking time will increase to about 30-35 minutes. Keep an eye on them and use the toothpick test to check for doneness. You might need to rotate the pan halfway through for even baking.
Pin This Recipe!
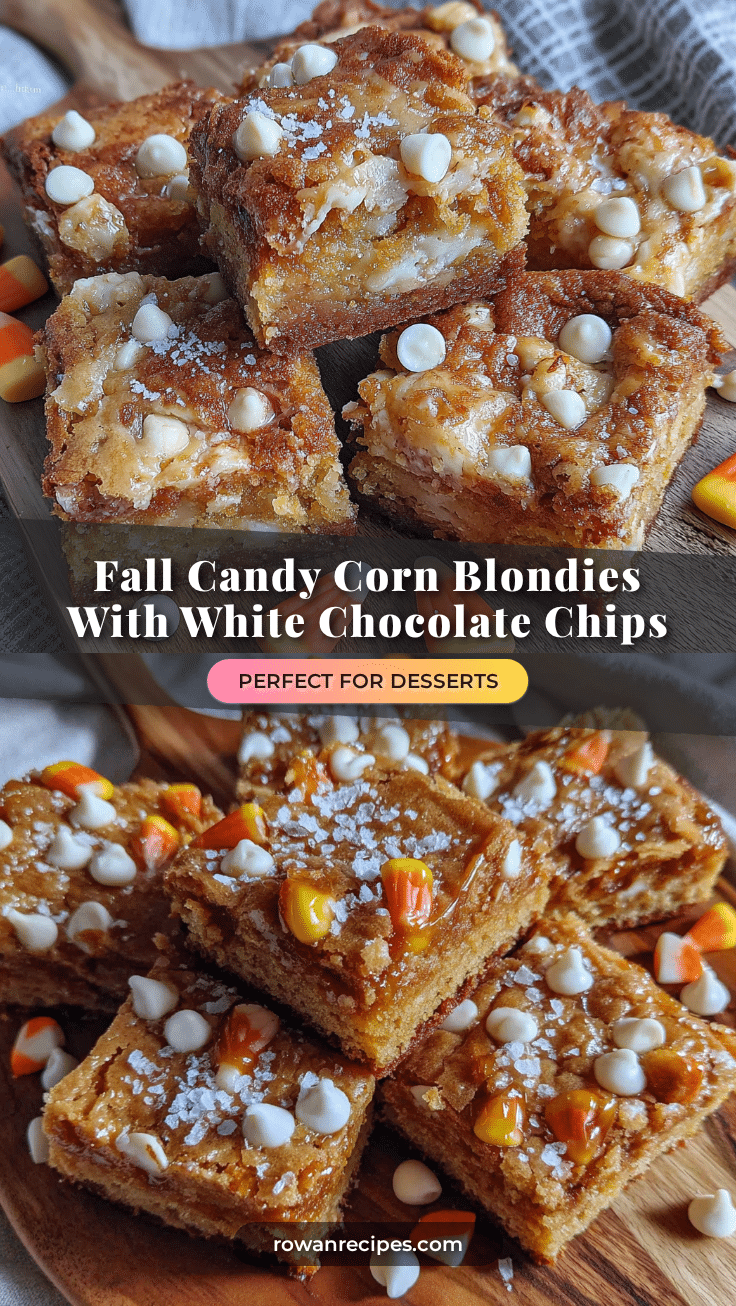
Easy Fall Candy Corn Blondies: Best White Chocolate Recipe
These buttery, chewy blondies are studded with candy corn and white chocolate chips, creating a nostalgic and delicious fall treat that’s quick and easy to make. Perfect for Halloween parties, Thanksgiving potlucks, or a cozy night in.
- Prep Time: 15 minutes
- Cook Time: 25 minutes
- Total Time: 40 minutes
- Yield: 16 servings 1x
- Category: Dessert
- Cuisine: American
Ingredients
- 1/2 cup (1 stick) unsalted butter, melted and slightly cooled
- 1 cup light brown sugar, packed
- 1 large egg, room temperature
- 1 teaspoon vanilla extract (pure)
- 1 cup all-purpose flour, spooned and leveled
- 1/2 teaspoon baking powder
- 1/4 teaspoon salt
- 3/4 cup candy corn
- 1/2 cup white chocolate chips
Instructions
- Preheat your oven to 350°F (175°C). Line an 8×8-inch baking pan with parchment paper, leaving overhang on two sides. Lightly grease the parchment with non-stick spray.
- In a large microwave-safe bowl, melt the butter in 20-second intervals until just melted. Let it cool for about 2 minutes.
- Add the packed brown sugar to the melted butter. Whisk vigorously for about 30 seconds until well combined. Add the egg and vanilla extract, and whisk again until smooth and glossy.
- Sprinkle the flour, baking powder, and salt over the wet mixture. Fold gently with a rubber spatula until just combined. Do not overmix.
- Gently fold in the candy corn and white chocolate chips. Reserve about 2 tablespoons of each to sprinkle on top later.
- Scrape the batter into the prepared pan and spread it evenly. Sprinkle the reserved candy corn and white chocolate chips on top, pressing them in gently.
- Bake for 22-25 minutes, or until the edges are golden brown and the center looks set but still slightly soft. A toothpick inserted into the center should come out with a few moist crumbs.
- Place the pan on a cooling rack and let the blondies cool completely in the pan.
- Once completely cool, use the parchment overhang to lift the entire block out onto a cutting board. Cut into 16 squares (4×4 grid) or 9 larger bars.
Notes
For the best texture, make sure your egg is at room temperature. If your candy corn is hard, soften it by spreading on a baking sheet and warming in a 200°F oven for 2-3 minutes, then cool completely before using. Do not overmix the batter to avoid tough blondies. Let blondies cool completely before cutting for clean edges. Store in an airtight container at room temperature for up to 5 days. These blondies freeze well for up to 3 months.
Nutrition
- Serving Size: 1 blondie (based on
- Calories: 185
- Sugar: 20
- Sodium: 85
- Fat: 8
- Saturated Fat: 5
- Carbohydrates: 28
- Protein: 2
Keywords: candy corn blondies, fall blondies, white chocolate blondies, easy blondie recipe, Halloween dessert, fall dessert bars


