The sound of the blender humming in the background, mixed with the faint chill of the evening air, was oddly comforting. I was juggling dinner chaos, with a hungry toddler tugging at my leg and a stack of dishes looming in the sink. Honestly, the thought of firing up the oven for dessert felt like a cruel joke. Then, out of nowhere, a little voice beside me said, “Can we have something sweet but quick, please?” That’s when these Easy No-Bake Berry Cheesecake Cups came to life—totally unplanned but exactly what we needed.
I remember skeptically eyeing the berries and cream cheese, wondering if something so simple could actually satisfy a sweet tooth after a long day. But as I layered the creamy filling with juicy berries and a crunchy crumb base, the kitchen filled with the kind of inviting aroma that promises comfort without fuss. No oven, no stress, just a few ingredients coming together effortlessly.
Since that first accidental win, these berry cheesecake cups have become my go-to for summer desserts. They’re light, fresh, and perfect for those moments when you want something special without the usual baking marathon. Plus, they’re easy to make ahead, so they quietly wait in the fridge, ready to turn any chaotic day into a little celebration. That quiet realization—that dessert doesn’t have to be complicated—made this recipe stick with me. And I have a feeling it might do the same for you.
Why You’ll Love This Recipe
After testing this Easy No-Bake Berry Cheesecake Cups recipe multiple times, I can tell you it hits all the right notes. Whether you’re pressed for time or just not in the mood for turning on the oven, these cups offer an effortless way to impress with minimal effort.
- Quick & Easy: Ready in under 20 minutes, perfect for busy weeknights or unexpected guests.
- Simple Ingredients: Pantry staples and fresh berries combine for a fuss-free dessert—no special trips required.
- Perfect for Summer: The fresh berry topping and cool cheesecake filling make it an ideal treat when it’s hot outside.
- Crowd-Pleaser: Kids love the sweet creaminess, and adults appreciate how light and refreshing it is.
- Unbelievably Delicious: The texture balance between smooth cheesecake, crumbly base, and juicy berries is honestly next-level comfort food.
What sets this recipe apart is the no-bake method combined with a quick chilling time, so you don’t have to wait around all day. The secret? Whipping the cream cheese just right to get that ultra-smooth texture and layering it with a buttery graham cracker crumb that holds up without sogginess. Also, mixing in a touch of vanilla and lemon zest gives it a subtle brightness that makes you close your eyes with the first bite. This isn’t your everyday cheesecake cup; it’s the perfect fusion of ease, flavor, and summer vibes.
Honestly, it’s become my shortcut dessert when I want something that feels special but demands zero fuss, unlike some of my other favorites like the No-Bake Strawberry Cheesecake Delight which takes a little longer to chill.
What Ingredients You Will Need
This recipe uses simple, wholesome ingredients to deliver bold flavor and satisfying texture without the fuss. Most of these are pantry staples, with the star being fresh or frozen berries, which you can swap depending on what’s in season.
- For the crust:
- 1 1/2 cups (150g) graham cracker crumbs (you can use digestive biscuits as a substitute)
- 6 tablespoons (85g) unsalted butter, melted (use dairy-free butter if needed)
- 2 tablespoons granulated sugar (optional, for a touch of sweetness)
- For the cheesecake filling:
- 16 oz (450g) cream cheese, softened (I prefer Philadelphia brand for smoothness)
- 1/2 cup (120ml) heavy whipping cream, cold
- 1/2 cup (60g) powdered sugar, sifted
- 1 teaspoon pure vanilla extract
- Zest of 1 lemon (adds bright freshness)
- For the topping:
- 2 cups (300g) mixed berries (fresh or frozen, such as strawberries, blueberries, raspberries)
- 1-2 tablespoons honey or maple syrup (optional, to sweeten the berries)
- Fresh mint leaves for garnish (optional)
Seasonal note: In the summer, I like swapping in fresh local berries, but frozen works just as well (just thaw and drain excess liquid). For a gluten-free version, almond flour or gluten-free graham crumbs can replace the standard crumbs without losing that buttery crunch.
Equipment Needed
- Mixing bowls – at least two, one for the crust and one for the filling.
- Hand mixer or stand mixer – essential for whipping the cream cheese and heavy cream smooth and fluffy.
- Measuring cups and spoons – for accuracy, especially with sugar and zest.
- Spatula – to fold ingredients without deflating the cream.
- Serving glasses or small mason jars – these cups look so inviting when served in clear containers, but any small bowls will do.
- Optional: Food processor – if you want to crush the graham crackers quickly, though placing them in a ziplock bag and crushing with a rolling pin works just fine.
Honestly, I’ve made these with just a hand whisk and a fork when the mixer was out of reach, but a mixer really speeds things up and delivers that silky filling texture. If you’re on a budget, a simple hand mixer like the Hamilton Beach model does the trick without breaking the bank. Keeping your cream cheese at room temperature before mixing also makes the process smoother and less frustrating.
Preparation Method
- Prepare the crust: Combine 1 1/2 cups (150g) graham cracker crumbs, 6 tablespoons (85g) melted butter, and 2 tablespoons sugar in a mixing bowl. Stir until all crumbs are evenly coated and the mixture feels like wet sand. This usually takes about 3 minutes.
Press the crumb mixture firmly into the bottom of your serving cups or jars, creating an even layer about 1/2 inch (1.25 cm) thick. Use the back of a spoon or your fingers for this. Chill in the fridge while you prepare the filling. - Make the cheesecake filling: In a large bowl, beat 16 oz (450g) softened cream cheese with 1/2 cup (60g) powdered sugar and 1 teaspoon vanilla extract until smooth and creamy—about 3-4 minutes on medium speed.
Add the zest of 1 lemon for a fresh twist. In a separate bowl, whip 1/2 cup (120ml) cold heavy cream until soft peaks form, which usually takes around 2-3 minutes.
Gently fold the whipped cream into the cream cheese mixture using a spatula, taking care to keep it light and airy. - Assemble the cups: Spoon or pipe the cheesecake filling over the chilled crust layer, filling each cup up to about 3/4 full. Smooth the tops with a spatula.
Refrigerate the cups for at least 2 hours to let the filling set properly. If you’re in a rush, 1 hour can work, but longer chilling yields a better texture. - Prepare the berry topping: Just before serving, toss 2 cups (300g) mixed berries with 1-2 tablespoons honey or maple syrup if you like them sweeter. Spoon the berries generously over each cheesecake cup.
Garnish with a sprig of fresh mint for a pop of color and aroma. - Serve and enjoy: These are best served chilled straight from the fridge. The filling should be creamy but set, the crust crisp but buttery, and the berries fresh and juicy.
If you notice the crust sogging a bit after sitting too long, try pressing the crumbs a bit firmer before chilling next time. Also, don’t overmix the whipped cream into the cream cheese or the filling can turn dense. Trust me, I’ve learned that the hard way after a few failed batches!
Cooking Tips & Techniques
One trick I swear by is letting the cream cheese soften fully before starting. Cold cream cheese can turn lumpy and make the filling grainy, which nobody wants. I usually leave mine out for about 30 minutes before mixing.
When whipping the heavy cream, stop as soon as soft peaks form, not stiff peaks. Folding it gently into the cream cheese keeps the texture light and fluffy—if you overmix here, it gets too dense and loses that dreamy mouthfeel.
Pressing the crust firmly into the cups helps avoid crumbly messes when serving. I like to use the bottom of a small glass or measuring cup to pack it down evenly.
Another tip: If your berries are watery, drain them slightly before topping the cups to keep the crust from getting soggy. Tossing them in a little cornstarch is an old trick I’ve tried, but honestly, just draining works fine.
Finally, multitasking helps. While the filling chills, I usually prep a quick dinner like the honey mustard chicken sheet pan—easy and hands-off, so I can focus on dessert later.
Variations & Adaptations
Want to mix things up? Here are some ways to customize these cheesecake cups:
- Dietary swaps: Use dairy-free cream cheese and coconut whipped cream for a vegan-friendly version. Almond flour crust works well if you need gluten-free.
- Flavor twists: Swap berries for tropical fruits like mango and pineapple, or try a chocolate crust with crushed Oreos for a richer treat.
- Seasonal adaptations: In fall, top with cinnamon-spiced apple compote instead of berries. In winter, try pomegranate seeds with a drizzle of dark chocolate.
- Cooking method: While this is a no-bake dessert, you can toast the crust crumbs briefly in a skillet for a nuttier flavor before assembling.
- Personally, I once added a layer of lemon curd between the crust and filling for an extra zing—totally worth the extra step if you want a tart surprise.
Serving & Storage Suggestions
These Easy No-Bake Berry Cheesecake Cups are best served chilled, straight from the fridge. The cool temperature keeps the filling creamy and the berries fresh. I like to serve them in clear glasses or mason jars so the layers are visible — it’s a simple but pretty presentation.
Pair these cups with a cup of iced tea or a crisp white wine for an effortless summer dessert experience. They also make a charming addition to brunch spreads alongside dishes like creamy garlic butter Tuscan shrimp pasta, balancing savory with sweet.
Store leftovers covered tightly in the refrigerator for up to 3 days. The crust can soften over time, so if you prefer crunch, assemble just before serving. These cups freeze well too—freeze before adding the berry topping, then thaw overnight in the fridge and add berries fresh before serving.
Flavors tend to meld more the longer they chill, giving a richer, creamier experience by day two. So if you can resist, they’re even better the next day!
Nutritional Information & Benefits
Each serving of these cheesecake cups provides a modest calorie count, roughly 250-300 calories depending on portion size and toppings. The recipe is rich in calcium and protein thanks to the cream cheese and heavy cream.
Berries add a healthy punch of antioxidants, vitamins C and K, and fiber—making these cups feel like a treat with a side of nutrition. Using real butter and cream means this dessert is indulgent but still made with wholesome, recognizable ingredients.
For those watching carbs, swapping out the crust for almond flour and using a sugar substitute can make this dessert lower-carb friendly. Just keep in mind the dairy content if you have specific allergies.
From a wellness perspective, I appreciate that this dessert feels both satisfying and fresh, without the heavy sugar overload that some other sweets bring. It’s a feel-good indulgence that fits nicely into a balanced lifestyle.
Conclusion
Easy No-Bake Berry Cheesecake Cups became a staple in my kitchen because they deliver big on flavor with hardly any fuss. They’re the kind of dessert that feels thoughtful and homemade but doesn’t leave you exhausted or overwhelmed.
The beauty is in how customizable and forgiving this recipe is, letting you play with flavors or adapt for dietary needs without losing that creamy, dreamy texture. Whether you’re hosting a casual get-together or just craving a quick sweet treat after dinner, these cups are a reliable, delicious choice.
Give this recipe a try and make it your own—add your favorite fruits, experiment with crusts, or whip up a batch for a crowd. I’d love to hear how you tweak it or what moments these cheesecake cups become part of in your kitchen. There’s something quietly special about a dessert that brings a little joy with so little effort.
FAQs
- Can I make these cheesecake cups ahead of time?
Yes! Prepare them up to 24 hours in advance and keep refrigerated. Add the berry topping just before serving for the freshest look and taste. - What can I use instead of graham cracker crumbs?
Digestive biscuits, crushed vanilla wafers, or gluten-free almond flour work well as alternatives for the crust. - Can I substitute the heavy cream with something lighter?
You can try using whipped coconut cream for a dairy-free option, but the texture will be slightly different. - Why is my cheesecake filling grainy?
This often happens if the cream cheese isn’t softened or the sugar isn’t sifted. Make sure both are properly prepared before mixing. - How long should I chill the cheesecake cups?
At least 2 hours in the fridge is ideal to let the filling set, but if you’re in a hurry, 1 hour can suffice.
Pin This Recipe!
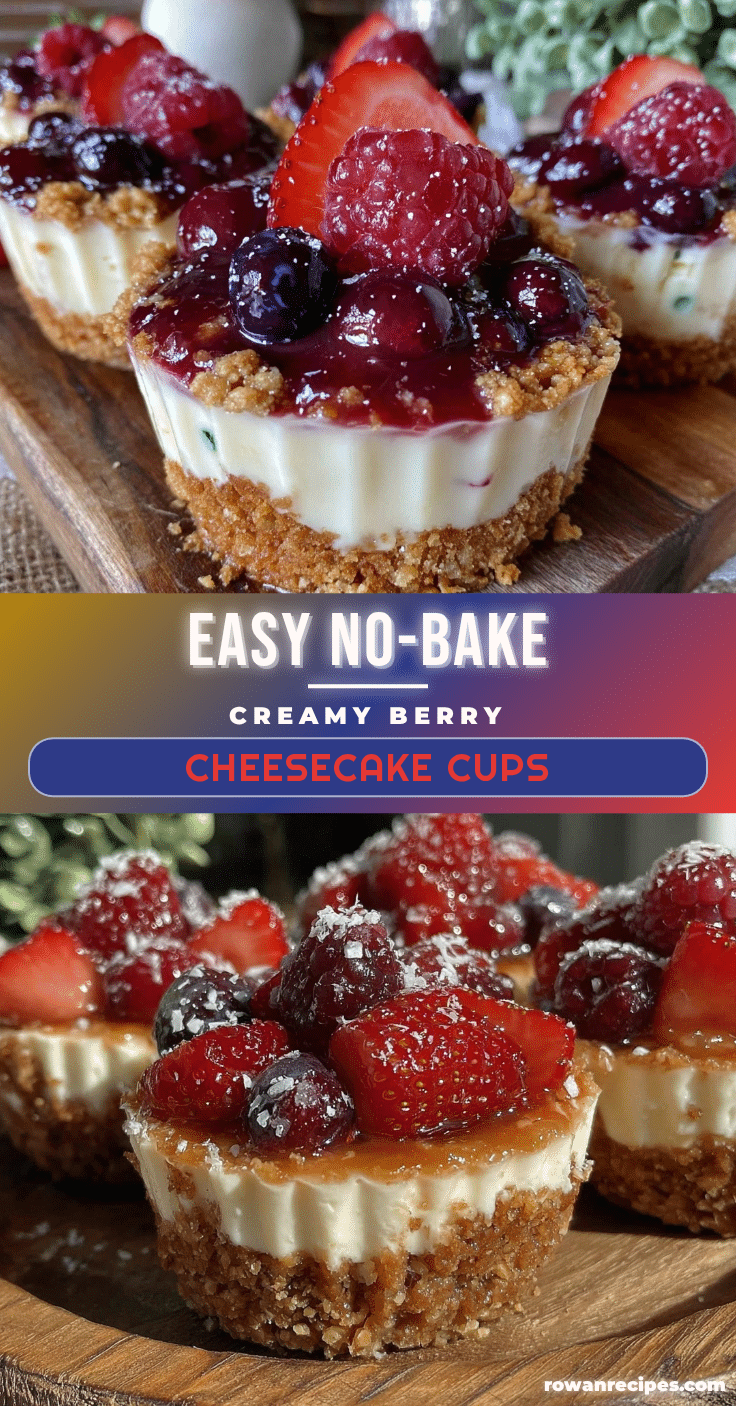
Easy No-Bake Berry Cheesecake Cups
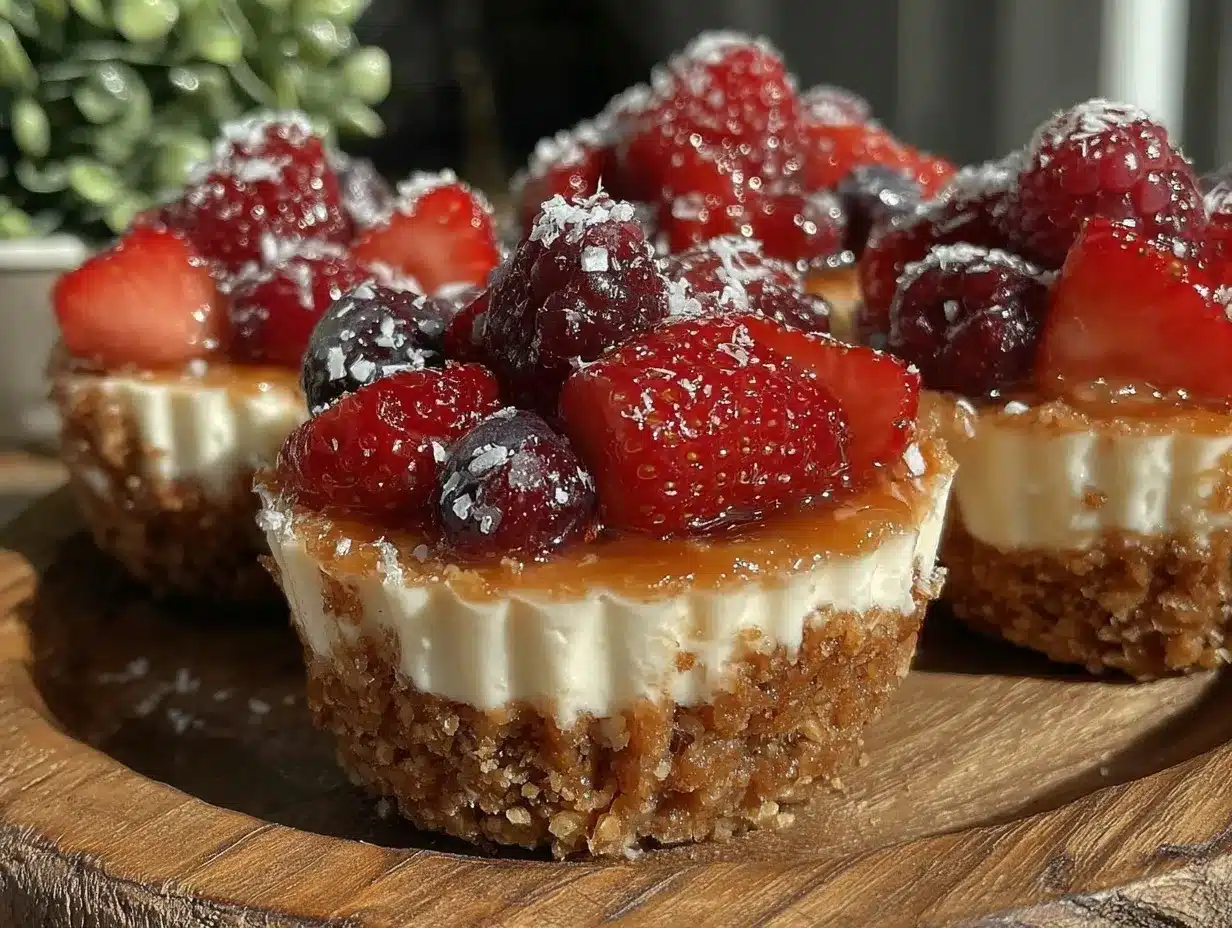
A quick and easy no-bake dessert featuring creamy cheesecake filling layered over a buttery graham cracker crust and topped with fresh mixed berries. Perfect for summer and ready in under 20 minutes.
- Prep Time: 15 minutes
- Cook Time: 0 minutes
- Total Time: 2 hours 15 minutes
- Yield: 6 servings 1x
- Category: Dessert
- Cuisine: American
Ingredients
- 1 1/2 cups (150g) graham cracker crumbs (or digestive biscuits as a substitute)
- 6 tablespoons (85g) unsalted butter, melted (dairy-free butter optional)
- 2 tablespoons granulated sugar (optional)
- 16 oz (450g) cream cheese, softened
- 1/2 cup (120ml) heavy whipping cream, cold
- 1/2 cup (60g) powdered sugar, sifted
- 1 teaspoon pure vanilla extract
- Zest of 1 lemon
- 2 cups (300g) mixed berries (fresh or frozen; strawberries, blueberries, raspberries)
- 1–2 tablespoons honey or maple syrup (optional)
- Fresh mint leaves for garnish (optional)
Instructions
- Prepare the crust: Combine graham cracker crumbs, melted butter, and sugar in a mixing bowl until mixture feels like wet sand. Press firmly into the bottom of serving cups to form an even 1/2 inch layer. Chill in the fridge.
- Make the cheesecake filling: Beat softened cream cheese with powdered sugar and vanilla extract until smooth. Add lemon zest. Whip cold heavy cream until soft peaks form, then gently fold into cream cheese mixture.
- Assemble the cups: Spoon or pipe cheesecake filling over chilled crust, filling cups about 3/4 full. Smooth tops and refrigerate for at least 2 hours to set.
- Prepare the berry topping: Toss mixed berries with honey or maple syrup if desired. Spoon berries over cheesecake cups just before serving and garnish with fresh mint leaves.
- Serve chilled directly from the fridge.
Notes
Let cream cheese soften fully before mixing to avoid grainy texture. Whip heavy cream to soft peaks only and fold gently to keep filling light and airy. Press crust firmly to avoid crumbling. Drain watery berries before topping to prevent soggy crust. Can be made ahead and chilled up to 24 hours; add berries just before serving.
Nutrition
- Serving Size: 1 cheesecake cup
- Calories: 275
- Sugar: 14
- Sodium: 180
- Fat: 20
- Saturated Fat: 12
- Carbohydrates: 18
- Fiber: 2
- Protein: 5
Keywords: no-bake cheesecake, berry cheesecake cups, summer dessert, easy dessert, quick dessert, no oven dessert, creamy cheesecake, graham cracker crust