“You want me to make sushi rice with eggs? Really?” my friend asked, eyeing the bowl skeptically as I whisked the bright yolks. Honestly, I shared their doubt at first. I’d always thought sushi rice meant a fancy process reserved for sushi bars and chefs with special knives. But then, during a late Tuesday night when the fridge was looking a little bare and the thought of ordering takeout felt like cheating on myself, I gave this easy fluffy beginner tamago egg sushi rice bowl a shot—oyakodon style, no less.
What started as a simple experiment quickly turned into a comforting ritual. The soft, silky eggs cooked gently over steaming rice, with just the right touch of soy and mirin, created this surprisingly satisfying bowl that felt both familiar and special. It’s funny how the most unassuming ingredients—rice, eggs, a splash of seasoning—can come together to feel like a warm hug after a long day. I found myself making this dish multiple times in the same week, often tweaking the balance of flavors, until it hit that perfect spot between fluffy, savory, and utterly comforting.
This easy fluffy tamago egg sushi rice bowl recipe isn’t just beginner-friendly; it’s a quiet little winner that sneaks up on you with its simplicity and charm. No need for fancy sushi tools or hours of prep—just a few pantry staples and a bit of patience. It’s the kind of recipe that sticks around because it rewards you with flavor and comfort without demanding too much. Honestly, it’s become my go-to when I need to reset and find a little calm in the kitchen.
Why You’ll Love This Recipe
After testing this recipe over and over (and yes, I mean multiple times in a week, no shame), here’s why it’s stood out as a favorite:
- Quick & Easy: Ready in under 30 minutes, perfect for busy nights or when you just want a fuss-free meal.
- Simple Ingredients: Uses everyday pantry staples—rice, eggs, soy sauce, and a few seasonings—no special trips needed.
- Perfect for Cozy Dinners: Brings that warm, comforting vibe of Japanese home cooking, ideal for chilly evenings or winding down.
- Crowd-Pleaser: It’s a hit with everyone I’ve made it for, from sushi skeptics to egg lovers.
- Unbelievably Delicious: The eggs turn out fluffy and tender, gently melding with the perfectly cooked sushi rice for a balance that feels indulgent but not heavy.
What really sets this recipe apart is the gentle cooking technique I use for the eggs, inspired by traditional tamago but simplified for beginners. Instead of rolling or layering in a pan, this method yields a soft, custardy egg topping that’s easy to master and pairs beautifully with the seasoned sushi rice. Plus, the subtle hint of sweetness from mirin plus umami from soy sauce makes the whole bowl sing.
Honestly, it’s comfort food reimagined—simple, fast, and with a touch of Japanese soul that’s perfect whether you’re a newbie in the kitchen or just need a no-fuss dinner that feels like a treat. If you’ve enjoyed cozy dishes like a one-pot lemon chicken and rice or crave the satisfying warmth of a creamy cheesy taco pasta, this tamago egg sushi rice bowl will fit right into your weeknight lineup.
What Ingredients You Will Need
This recipe uses simple, wholesome ingredients to deliver bold flavor and satisfying texture without the fuss. Almost everything here is probably already hanging out in your kitchen, making it super approachable for beginners and busy cooks.
- Sushi Rice (1 cup / 200g): Short-grain Japanese rice is key for that sticky, fluffy texture. I recommend brands like Nishiki or Kokuho Rose for the best results.
- Water (1 1/4 cups / 300ml): For cooking the rice perfectly.
- Rice Vinegar (2 tablespoons / 30ml): Adds the classic sushi rice tang and shine.
- Sugar (1 tablespoon / 12g): Balances the acidity in the rice vinegar.
- Salt (1 teaspoon / 5g): Enhances all the flavors in the rice.
- Large Eggs (3): Room temperature eggs give that fluffy, custardy texture when gently cooked.
- Soy Sauce (2 tablespoons / 30ml): Use low-sodium if preferred; it adds savory depth.
- Mirin (1 tablespoon / 15ml): Sweet Japanese cooking wine that rounds out the egg flavor.
- Dashi Stock (optional, 1/4 cup / 60ml): Adds umami if you want to go a step further. You can substitute with vegetable broth or water if you don’t have it.
- Green Onions (2, thinly sliced): For fresh garnish and mild onion crunch.
- Toasted Sesame Seeds (1 teaspoon): Optional but adds a nice nutty touch.
Substitution tips: If you can’t find sushi rice, short-grain white rice will work, but the texture won’t be quite the same. For a gluten-free version, check soy sauce labels or use tamari. Mirin can be swapped with a mix of sake and sugar if needed.
Equipment Needed
- Rice Cooker or Medium Saucepan: For cooking sushi rice evenly. I use a basic rice cooker that’s easy to clean and consistent. No rice cooker? A heavy-bottomed pot with a tight lid works fine.
- Nonstick Skillet: Essential for gently cooking the eggs without sticking or burning. A 8-inch pan is perfect.
- Mixing Bowls: For whisking eggs and mixing sushi rice seasoning.
- Wooden Spoon or Rice Paddle: Helps fluff the rice without mashing it.
- Measuring Cups and Spoons: Accurate measurement makes a difference here, especially for the rice vinegar seasoning.
If you’re on a budget, most of these are basic kitchen staples. I recommend investing in a good nonstick pan if you plan to make egg dishes often—it’s a game changer. Also, keep your rice cooker clean by wiping the inner pot after every use to prevent rice buildup.
Preparation Method
- Rinse the Rice: Measure 1 cup (200g) sushi rice and rinse under cold water until the water runs clear. This removes excess starch and prevents clumping. Drain well. (5 minutes)
- Cook the Rice: Combine rinsed rice with 1 1/4 cups (300ml) water in your rice cooker or pot. Cook according to your rice cooker’s instructions or bring to a boil in the pot, then lower heat, cover, and simmer for 15 minutes. Let it rest covered for 10 more minutes off heat. (25 minutes total)
- Prepare Sushi Rice Seasoning: In a small bowl, mix 2 tablespoons (30ml) rice vinegar, 1 tablespoon (12g) sugar, and 1 teaspoon (5g) salt until dissolved. Warm slightly if needed to dissolve sugar. (3 minutes)
- Season the Rice: Transfer cooked rice to a large bowl. Gently fold in the vinegar mixture with a wooden spoon or rice paddle while fanning the rice to cool it quickly and give that shiny finish. Set aside. (5 minutes)
- Whisk the Eggs: Crack 3 large eggs into a bowl. Add 2 tablespoons (30ml) soy sauce, 1 tablespoon (15ml) mirin, and optional 1/4 cup (60ml) dashi stock or water. Whisk gently to combine without creating too many bubbles. (2 minutes)
- Cook the Eggs: Heat a nonstick skillet over medium-low heat. Pour in the egg mixture and cook gently, stirring slowly with a spatula to form soft curds. The goal is a fluffy, custard-like texture, not scrambled eggs. When mostly set but still slightly runny, remove from heat. (7-8 minutes)
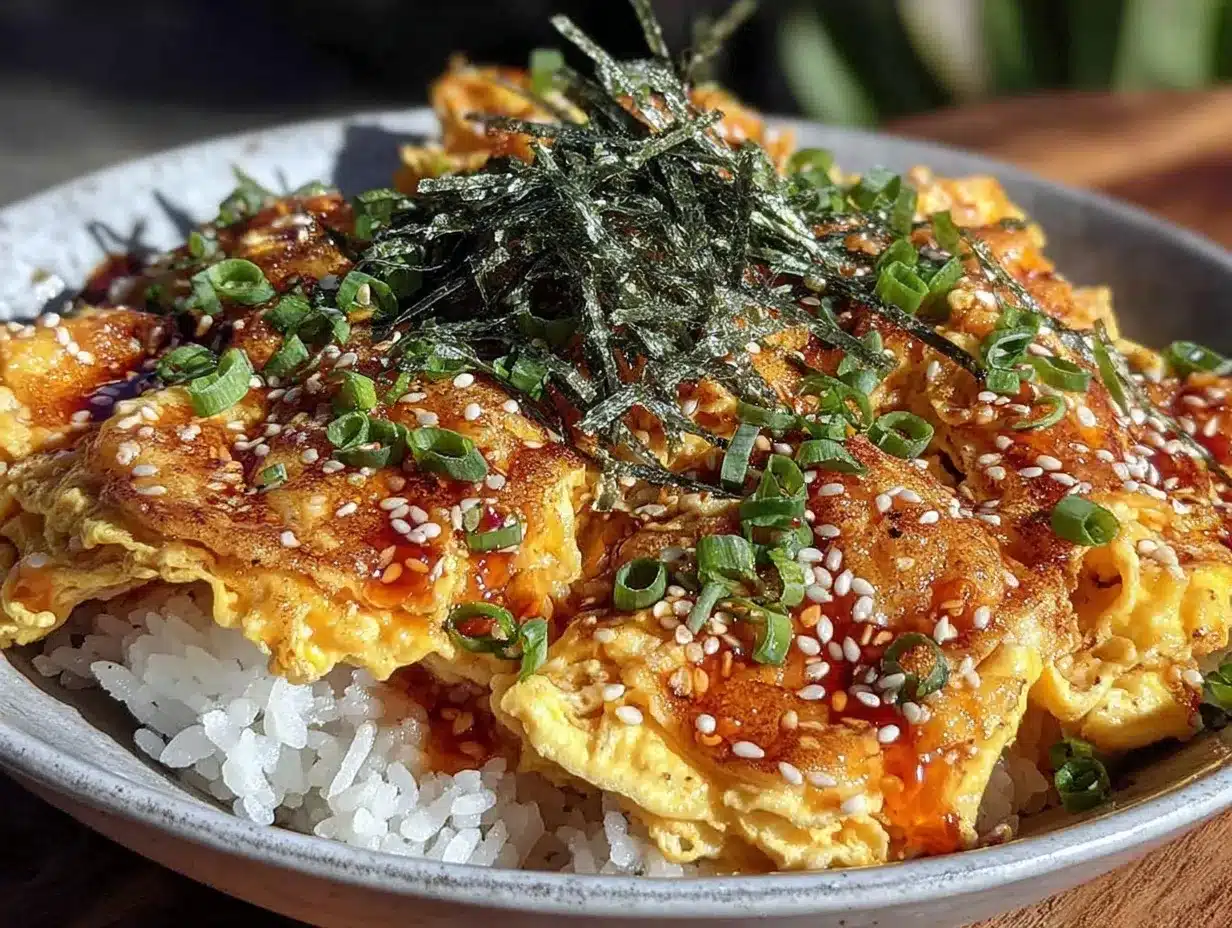
- Assemble the Bowl: Spoon the seasoned sushi rice into serving bowls. Gently layer the fluffy tamago egg mixture over the rice. Garnish with sliced green onions and toasted sesame seeds if using. (3 minutes)
Tip: Keep the heat low when cooking eggs to avoid browning or drying out. If the eggs cook too fast, the texture won’t be delicate and creamy. Also, folding the rice with care avoids crushing the grains and keeps the bowl light.
Cooking Tips & Techniques
Cooking this easy fluffy tamago egg sushi rice bowl well comes down to patience and attention to detail. A few things I’ve learned the hard way:
- Rice Rinsing Is Key: Don’t skip rinsing the rice. Starch left on the grains makes the rice gummy instead of fluffy.
- Low and Slow Eggs: Cooking eggs over medium-low heat is essential. I once rushed it on higher heat and ended up with dry, rubbery eggs—no thanks.
- Seasoning Balance: Tweak the soy sauce and mirin to your taste. Too much soy can overwhelm, but too little leaves the eggs bland.
- Rice Cooling: Fanning the rice while mixing in the vinegar seasoning helps cool it quickly and gives that slight glossy texture classic to sushi rice.
- Use Fresh Eggs: Fresh eggs have a better texture and richer flavor, which makes this bowl taste that much better.
Multitasking tip: While the rice is cooking, whisk and prep your eggs so you can move smoothly to the next step. This keeps the whole process under 30 minutes and stress-free. If you want to try a variation, consider making a quick miso soup alongside—something similar to my favorite easy crispy sheet pan Italian sausage and peppers for a complete meal.
Variations & Adaptations
This recipe is wonderfully flexible, so feel free to make it your own based on your preferences or what you have at home.
- Vegetarian Version: Skip dashi or replace with vegetable broth. Add sautéed shiitake mushrooms or spinach for extra umami and texture.
- Spicy Kick: Sprinkle some shichimi togarashi (Japanese seven-spice) on top or mix a bit of sriracha into the egg mixture for a subtle heat.
- Protein Boost: Add cooked chicken thigh strips or tofu cubes on top to bulk it up. This turns it into a heartier meal.
- Low-Carb Option: Swap rice for cauliflower rice lightly sautéed with a splash of rice vinegar and sesame oil.
- Seasonal Twist: In spring or summer, fresh edamame or blanched snap peas add a nice pop of color and crunch.
I personally love trying a version with a tiny drizzle of truffle oil on the finished bowl now and then—totally indulgent but so good for a special treat.
Serving & Storage Suggestions
This tamago egg sushi rice bowl is best served warm, right after cooking when the eggs are still silky and the rice is fluffy. For presentation, a small sprinkle of green onions and sesame seeds adds freshness and visual appeal.
Pair it with a simple side like pickled ginger or a crisp cucumber salad to cut through the richness. A light green tea or chilled sake complements the flavors beautifully if you’re feeling fancy.
Leftovers can be stored in an airtight container in the refrigerator for up to 2 days. Reheat gently in a microwave or in a skillet over low heat to avoid drying out the eggs. Expect the texture to soften a bit after storage, but the flavors usually deepen and taste even better the next day.
If you want to meal prep, keep the rice and egg mixture separate until serving to preserve texture. You can also freeze the cooked egg mixture in portions—just thaw slowly in the fridge before reheating.
Nutritional Information & Benefits
One bowl provides a balanced mix of carbohydrates, protein, and a modest amount of fat. Sushi rice gives you energy-sustaining carbs, while eggs provide high-quality protein and essential vitamins like B12 and D.
The use of mirin and soy sauce adds flavor without excessive calories, making this a reasonable choice for a light dinner or lunch. Using dashi or vegetable broth adds umami without sodium overload.
Diet-wise, this recipe is naturally gluten-free if you use tamari instead of regular soy sauce, and can be adjusted for low-carb diets by swapping the rice as mentioned earlier.
From a wellness perspective, it’s comfort food that doesn’t weigh you down—a nice middle ground between indulgence and nutrition, which is why it’s become my go-to when I want to feel nourished and cozy.
Conclusion
This easy fluffy tamago egg sushi rice bowl oyakodon style has earned a special place in my kitchen and heart. It’s proof that simple ingredients, treated with care, can create a dish that’s both comforting and satisfying, even if you’re a beginner cook.
The recipe invites customization, whether you want to add veggies, spice it up, or keep it classic. It’s approachable enough to become a weekly staple while still feeling like a little culinary joy.
I hope it finds a spot in your rotation as it has in mine—quietly reliable, delicious, and just the right kind of cozy. Got your own twists or questions about this dish? I’d love to hear about them in the comments below. Sharing your kitchen stories makes this community feel like home.
Here’s to many happy bowls ahead!
FAQs
- Can I use regular long-grain rice instead of sushi rice?
You can, but sushi rice’s stickiness helps the bowl hold together better. Long-grain rice will be less sticky and may change the texture. - What if I don’t have mirin?
Swap mirin with a mix of 1 tablespoon sugar and 1 tablespoon sake or white wine for similar sweetness and depth. - How do I prevent the eggs from overcooking?
Cook eggs on low heat and remove the pan from heat when they’re still slightly runny—they will continue to cook in residual heat. - Is this recipe suitable for meal prep?
Yes! Store rice and eggs separately in airtight containers and combine just before eating to maintain texture. - Can I add other proteins to this dish?
Absolutely. Cooked chicken, tofu, or shrimp work well and make it more filling.
Pin This Recipe!
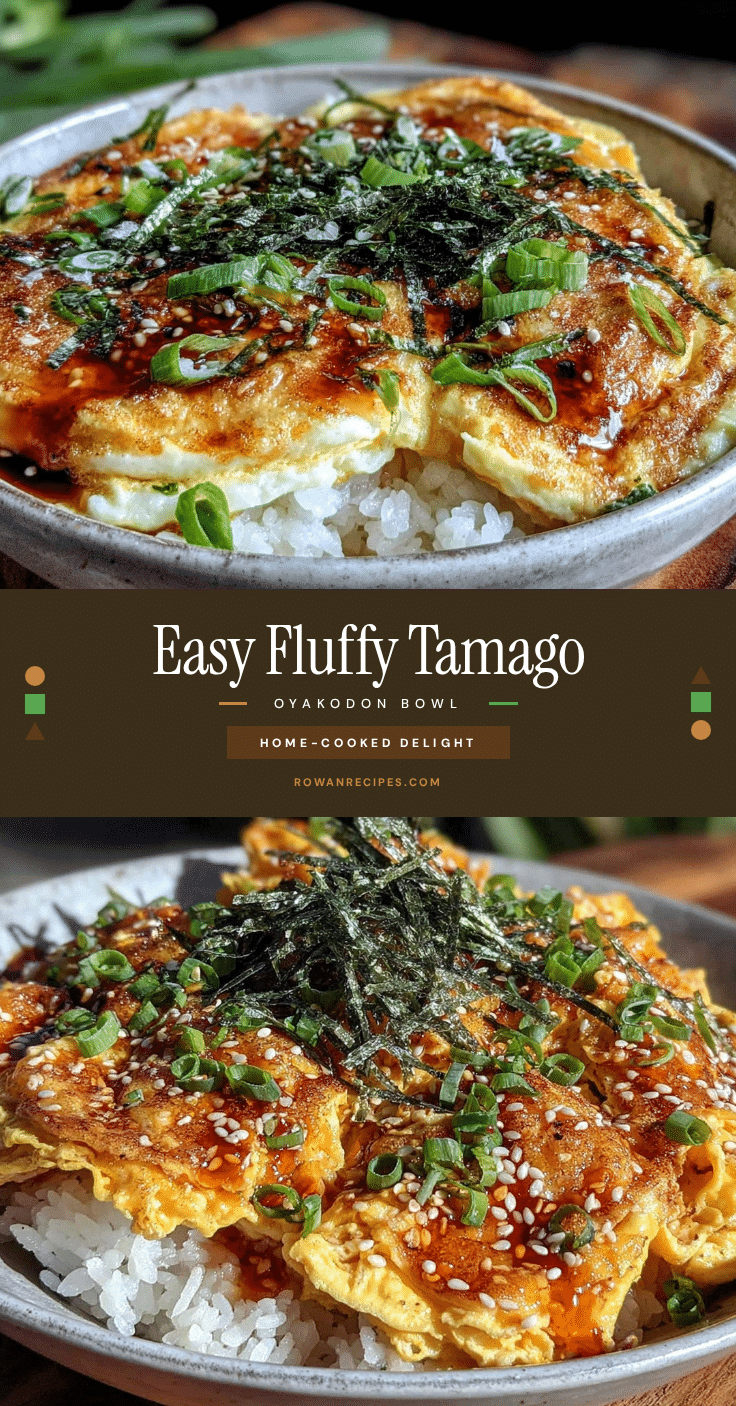
Easy Fluffy Tamago Egg Sushi Rice Bowl Recipe for Beginners Oyakodon Style

A comforting and beginner-friendly Japanese-inspired rice bowl featuring fluffy tamago-style eggs gently cooked over seasoned sushi rice, perfect for a quick and cozy meal.
- Prep Time: 10 minutes
- Cook Time: 25 minutes
- Total Time: 35 minutes
- Yield: 2 servings 1x
- Category: Main Course
- Cuisine: Japanese
Ingredients
- 1 cup (200g) sushi rice (short-grain Japanese rice)
- 1 1/4 cups (300ml) water
- 2 tablespoons (30ml) rice vinegar
- 1 tablespoon (12g) sugar
- 1 teaspoon (5g) salt
- 3 large eggs, room temperature
- 2 tablespoons (30ml) soy sauce (low-sodium preferred)
- 1 tablespoon (15ml) mirin
- 1/4 cup (60ml) dashi stock (optional, can substitute with vegetable broth or water)
- 2 green onions, thinly sliced
- 1 teaspoon toasted sesame seeds (optional)
Instructions
- Rinse 1 cup (200g) sushi rice under cold water until the water runs clear to remove excess starch. Drain well. (5 minutes)
- Cook the rinsed rice with 1 1/4 cups (300ml) water in a rice cooker or medium saucepan. If using a pot, bring to a boil, then lower heat, cover, and simmer for 15 minutes. Let rest covered off heat for 10 minutes. (25 minutes total)
- In a small bowl, mix 2 tablespoons (30ml) rice vinegar, 1 tablespoon (12g) sugar, and 1 teaspoon (5g) salt until dissolved. Warm slightly if needed. (3 minutes)
- Transfer cooked rice to a large bowl. Gently fold in the vinegar mixture with a wooden spoon or rice paddle while fanning the rice to cool it quickly and give a shiny finish. Set aside. (5 minutes)
- Crack 3 large eggs into a bowl. Add 2 tablespoons (30ml) soy sauce, 1 tablespoon (15ml) mirin, and optional 1/4 cup (60ml) dashi stock or water. Whisk gently to combine without creating too many bubbles. (2 minutes)
- Heat a nonstick skillet over medium-low heat. Pour in the egg mixture and cook gently, stirring slowly with a spatula to form soft curds. Aim for a fluffy, custard-like texture, not scrambled eggs. When mostly set but still slightly runny, remove from heat. (7-8 minutes)
- Spoon the seasoned sushi rice into serving bowls. Gently layer the fluffy tamago egg mixture over the rice. Garnish with sliced green onions and toasted sesame seeds if using. (3 minutes)
Notes
Keep heat low when cooking eggs to avoid browning or drying out; remove eggs from heat when slightly runny as they will continue cooking with residual heat. Rinse rice thoroughly to prevent gummy texture. Use fresh eggs for best flavor and texture. For gluten-free, use tamari instead of soy sauce. Variations include adding sautéed mushrooms, spinach, or proteins like chicken or tofu.
Nutrition
- Serving Size: 1 bowl
- Calories: 350
- Sugar: 6
- Sodium: 700
- Fat: 12
- Saturated Fat: 3
- Carbohydrates: 40
- Fiber: 1
- Protein: 15
Keywords: tamago, egg sushi bowl, oyakodon style, sushi rice, Japanese comfort food, easy dinner, beginner recipe, fluffy eggs, rice bowl