Stacking three layers of red velvet cake while the timer ticks down and the kids are clamoring for snacks was a wild juggling act. Flour dusting the counter, frosting smudged on my sleeve, and a half-empty bottle of red food coloring threatening to run dry — that’s the kind of chaos that birthed this Best Red Velvet Flag Cake with Cream Cheese Buttercream Frosting. Honestly, it wasn’t planned; the idea hit when I realized the usual boxed cake mix wouldn’t cut it for our family’s July 4th celebration. I needed something spectacular but fuss-free, something that could stand out on the picnic table without making me lose my mind in the kitchen.
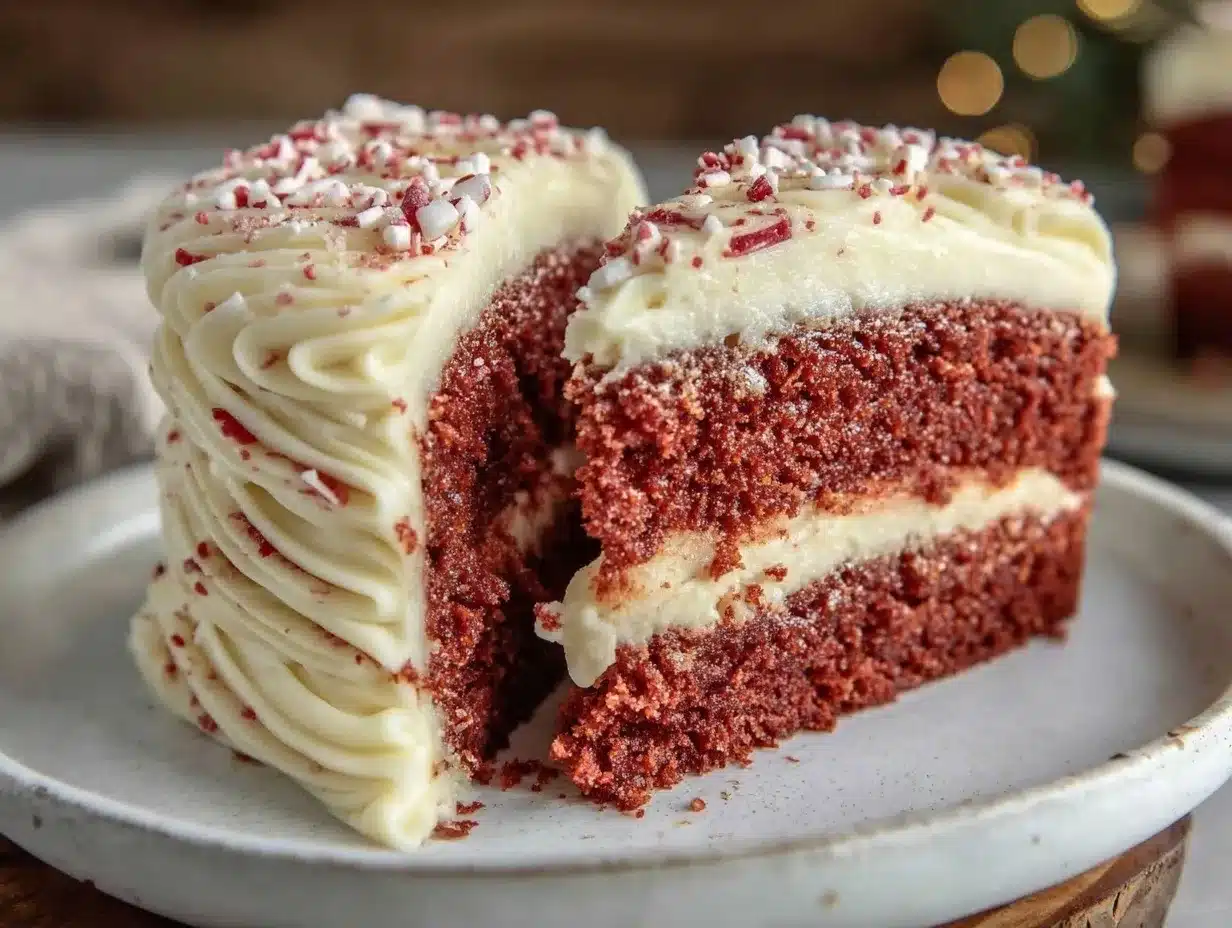
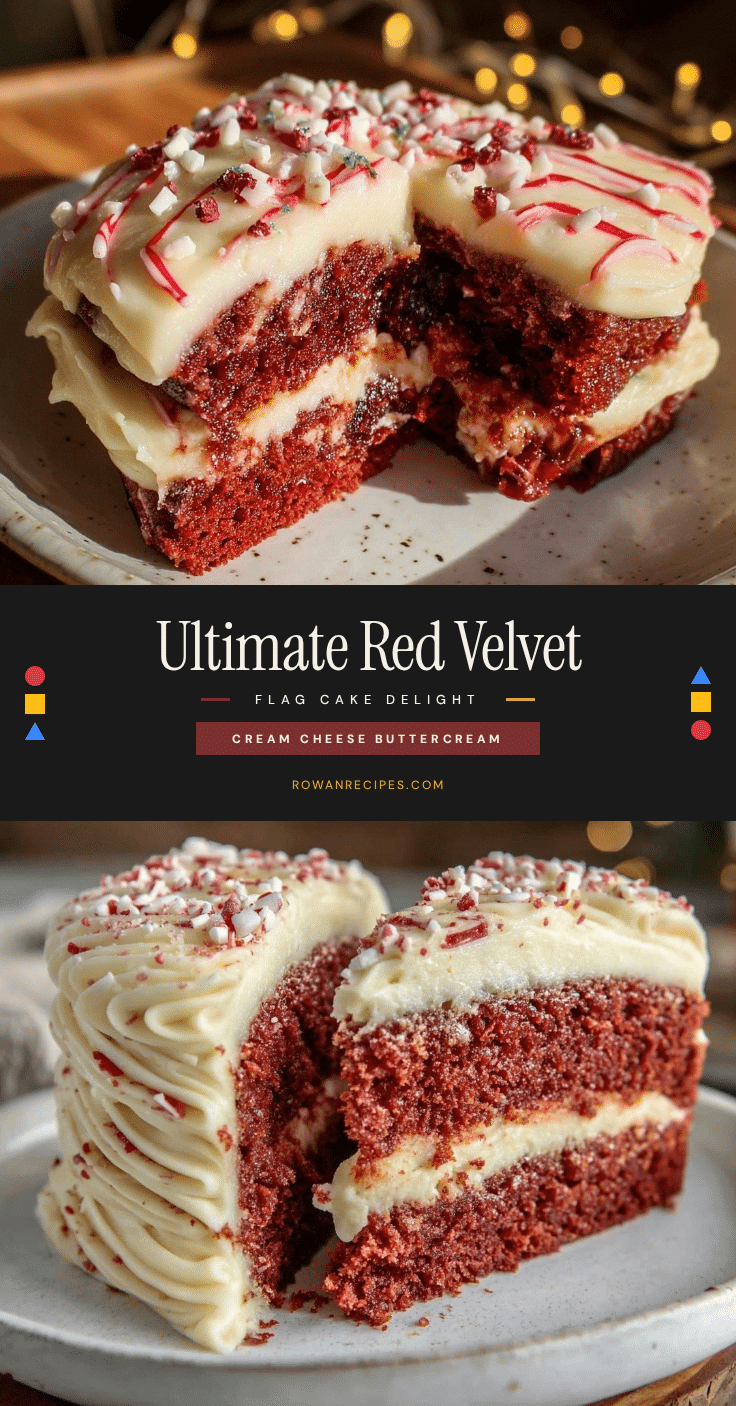
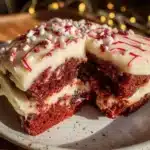
The rich crimson layers came together with a velvety crumb, and the cream cheese buttercream? Oh, that was the real game changer — smooth, tangy, and just sweet enough to balance the cake’s subtle cocoa undertones. And the flag pattern inside? That little surprise made everyone’s eyes light up. It’s the kind of dessert that feels festive and homemade but won’t leave you scrambling at the last minute. I remember slicing into it and seeing those red, white, and blue stripes — a quiet moment of pride amid the mess and madness.
This cake stuck with me not just because it tastes amazing but because it’s proof you can pull off a showstopper with a little patience and a lot of love (and maybe a splash of food coloring). You don’t have to be a pro baker; just someone who’s willing to get a bit messy for something memorable.
Why You’ll Love This Recipe
After testing this recipe several times between busy family dinners and holiday gatherings, I can confidently say this is the Best Red Velvet Flag Cake you’ll find anywhere. Here’s why it has become a staple in my kitchen:
- Quick & Easy: Takes less than 90 minutes from start to finish, perfect if you’re juggling dinner plans and dessert prep like I often am.
- Simple Ingredients: No oddball or expensive items — just pantry staples and a few dairy basics you probably already have on hand.
- Perfect for Celebrations: Whether it’s a Fourth of July barbecue, birthday party, or just a cozy weekend treat, this cake brings a festive vibe to the table.
- Crowd-Pleaser: Kids love the vibrant colors and adults can’t get enough of the rich cream cheese frosting.
- Unbelievably Delicious: The moist, tender crumb paired with the tangy, buttery frosting is a classic combo that never disappoints.
This isn’t just any red velvet cake — the flag pattern inside comes from carefully layering the batter with a touch of food coloring artistry. Plus, the cream cheese buttercream frosting is whipped to light perfection, making it easier to spread and pipe than your typical cream cheese frosting. If you’ve enjoyed recipes like the creamy cheesy taco pasta or the easy crispy sheet pan honey mustard chicken, you’ll appreciate how this cake combines straightforward ingredients with a bit of culinary showmanship.
What Ingredients You Will Need
This recipe uses simple, wholesome ingredients to deliver bold flavor and that iconic red velvet texture without much fuss. Most of these are pantry staples or common baking ingredients, and I’ve included substitutions when needed.
- For the Cake Layers:
- All-purpose flour — 2 ½ cups (315 g), sifted for better crumb
- Cocoa powder — 2 tbsp (unsweetened, Dutch-processed preferred for deeper flavor)
- Baking soda — 1 tsp (helps the cake rise evenly)
- Salt — ½ tsp
- Granulated sugar — 1 ½ cups (300 g)
- Buttermilk — 1 cup (240 ml), room temperature (adds tang and moisture)
- Vegetable oil — 1 cup (240 ml), neutral flavor
- Large eggs — 2, room temperature
- Vanilla extract — 1 tsp (pure extract is best)
- White vinegar — 1 tsp (reacts with baking soda for lift)
- Red food coloring — 1 oz (2 tbsp or 60 ml), gel or liquid (gel gives richer color without thinning batter)
- For the Cream Cheese Buttercream Frosting:
- Cream cheese — 8 oz (225 g), softened (I prefer full-fat for creaminess)
- Unsalted butter — ½ cup (115 g), softened (adds richness)
- Powdered sugar — 4 cups (480 g), sifted for smooth frosting
- Vanilla extract — 1 tsp
- Pinch of salt (balances sweetness)
If you need a gluten-free option, try substituting the flour with a trusted gluten-free all-purpose blend. For dairy-free, swap buttermilk with almond milk plus 1 tbsp lemon juice, and use dairy-free cream cheese and butter alternatives. For the frosting, using a brand like Philadelphia cream cheese makes a noticeable difference in texture and flavor.
Equipment Needed
- Three 9-inch (23 cm) round cake pans — essential for the flag layers to bake evenly. If you only have two, bake in batches but keep batter chilled.
- Electric hand mixer or stand mixer — makes whipping the frosting a breeze and ensures the cake batter combines smoothly.
- Mixing bowls — at least two, for wet and dry ingredients.
- Measuring cups and spoons — accuracy matters for baking success.
- Rubber spatula — for scraping down bowls and folding batter.
- Cooling racks — so the cakes cool evenly without sogginess.
- Offset spatula or butter knife — to spread frosting smoothly.
- Piping bag (optional) — if you want to pipe decorative borders or stars with the frosting.
If you don’t have a stand mixer, a sturdy hand mixer will do just fine. For budget-friendly cake pans, non-stick aluminum ones work well and clean up easily. Keep your pans greased and lined with parchment paper to avoid sticking — trust me, it saves a lot of frustration.
Preparation Method
- Preheat the oven: Set to 350°F (175°C). Grease and line your three 9-inch cake pans with parchment paper.
- Mix dry ingredients: In a large bowl, sift together 2 ½ cups flour, 2 tbsp cocoa powder, 1 tsp baking soda, and ½ tsp salt. Set aside.
- Whisk wet ingredients: In another bowl, beat 1 ½ cups sugar and 1 cup vegetable oil until combined. Add 2 large eggs, one at a time, mixing well after each. Stir in 1 tsp vanilla extract.
- Combine wet and dry: Alternately add the dry ingredients and 1 cup buttermilk (room temp) to the wet mixture, beginning and ending with the dry. Mix until just combined; don’t overmix or the cake could be dense.
- Add vinegar and food coloring: Stir in 1 tsp white vinegar, then gradually add 1 oz red food coloring, folding gently until the batter is a vibrant red. Remember, gel coloring gives the best color without thinning batter.
- Divide batter for flag layers: Pour 2/3 of the batter evenly into the three pans — these will be your red velvet cake layers.
- Prepare white and blue layers: For the flag’s white and blue stripes, reserve the remaining 1/3 batter. Leave half plain (white) and tint the rest with blue food coloring (use gel for vivid color). Pour these into separate small pans or bake as thin layers on parchment-lined sheets. Bake at 350°F (175°C) for 25-30 minutes or until a toothpick comes out clean.
- Cool cakes completely: Let all layers cool on wire racks for at least 45 minutes before assembling.
- Make the cream cheese buttercream: Beat 8 oz softened cream cheese with ½ cup softened butter until smooth. Gradually add 4 cups powdered sugar, then 1 tsp vanilla and a pinch of salt. Whip until fluffy, about 3-5 minutes.
- Assemble the flag cake: Place one red velvet layer on your serving plate. Spread a thin layer of frosting, then add strips or layers of white and blue cake to form the stripes and star section of the flag. Repeat with remaining layers, finishing with red velvet on top.
- Frost the outside: Cover the entire cake with the cream cheese buttercream using an offset spatula. Smooth the sides and top, then chill for 30 minutes to set.
- Optional decoration: Pipe stars or stripes with remaining frosting or use edible decorations to enhance the flag look.
Pro tip: If your batter looks too thick when adding color, gently fold in a tablespoon of buttermilk to loosen it without losing texture. Also, cooling layers completely before frosting is key to prevent melting or sliding.
Cooking Tips & Techniques
Getting that iconic red velvet crumb and creamy frosting balance took a few tries. Here are some tips that saved me from baking disasters:
- Don’t skip sifting: Sifting the flour and cocoa powder ensures no lumps and a tender crumb.
- Room temperature ingredients: Eggs, buttermilk, and buttercream ingredients mix better and create a smoother texture when they’re not cold.
- Gel food coloring is your friend: It gives vibrant color without watering down the batter, unlike liquid dyes.
- Timing the layers: Bake thinner white and blue layers separately so they don’t overwhelm the red velvet base. Use a ruler or pan liners to keep layers even.
- Frosting consistency: Whip the cream cheese and butter well before adding sugar to avoid graininess. If the frosting feels too soft, pop it in the fridge for 10 minutes before spreading.
- Multitasking: While the cakes bake, whip up the frosting so you’re ready when the layers cool.
One flop I had was mixing the vinegar too early — it started reacting with baking soda before baking, resulting in a flatter cake. Adding it last and mixing gently keeps the rise just right. Also, be patient when assembling. The flag pattern takes a bit of finesse but wins big wow points.
Variations & Adaptations
This red velvet flag cake is flexible, so feel free to mix it up depending on your occasion or dietary needs:
- Gluten-Free: Swap the all-purpose flour with a 1:1 gluten-free baking flour blend. Be sure to check the blend has xanthan gum for structure.
- Vegan Version: Use flax eggs (1 tbsp flaxseed meal + 3 tbsp water per egg), dairy-free cream cheese and butter, and plant-based milk with vinegar for buttermilk substitute.
- Flavor Twist: Add a teaspoon of espresso powder to the batter to deepen the cocoa flavor without adding coffee taste.
- Blueberry Stars: Instead of blue food coloring, bake mini blueberry cakes or use fresh blueberries embedded in the white layer for a natural star effect.
- Mini Flag Cakes: Make this recipe in cupcake form for individual servings that still show the flag pattern when cut.
One time, I swapped the cream cheese buttercream for a whipped mascarpone frosting for a lighter, tangier finish — it was a hit but less stable for piping. Feel free to experiment with frostings based on what you like best.
Serving & Storage Suggestions
This cake is best served chilled or at room temperature. The cream cheese buttercream tastes heavenly when slightly cool but soft enough to melt in your mouth. For a festive touch, slice the cake just before serving to reveal the vibrant flag layers inside.
Pair the cake with fresh berries or a simple vanilla bean ice cream to complement the rich flavors. It also goes surprisingly well with a cup of hot coffee or iced tea, balancing the sweetness.
Store leftovers tightly wrapped in the refrigerator for up to 4 days. The cream cheese frosting keeps the cake moist, and flavors actually meld beautifully overnight. For longer storage, freeze the cake (unfrosted, wrapped well) for up to 3 months — thaw in the fridge overnight before frosting.
Reheat slices gently in the microwave for 10-15 seconds if you prefer it warm, but honestly, it’s just as good cold or at room temp.
Nutritional Information & Benefits
One slice (1/12th of cake) roughly contains:
| Nutrient | Amount |
|---|---|
| Calories | 350-400 kcal |
| Fat | 18-22 g |
| Carbohydrates | 45-50 g |
| Protein | 4-6 g |
| Sugar | 30-35 g |
This cake is a treat, but it does bring some benefits from key ingredients:
- Cocoa powder: Contains antioxidants and a hint of magnesium.
- Buttermilk: Adds calcium and probiotics.
- Cream cheese: Provides protein and vitamin A.
While not low in sugar or fat, this cake is a fun occasional indulgence that brings joy and celebration. For those with allergies, the recipe can be modified to be gluten-free or dairy-free as noted above.
Conclusion
This Best Red Velvet Flag Cake with Cream Cheese Buttercream Frosting is a recipe that not only looks stunning but has a story baked into every slice. It’s proof that a bit of kitchen chaos and patience can result in a dessert that wows without overwhelming. Whether you’re making it for a holiday, birthday, or just because, it’s flexible enough to suit your tastes and skill level.
I love how this cake brings a splash of color and a burst of flavor to any table, and how it makes those special moments feel even sweeter. If you try it, tweak the layers or frosting to your liking — that’s part of the fun! And when you do, I’d love to hear how it turned out in the comments or if you’ve put your own spin on it.
Happy baking, and here’s to making memories one slice at a time!
Frequently Asked Questions
What makes red velvet cake different from regular chocolate cake?
Red velvet cake uses a small amount of cocoa powder combined with buttermilk and vinegar, which creates a tender crumb and subtle tang. The red food coloring adds its signature color, unlike traditional chocolate cakes that are richer and darker.
Can I make this cake ahead of time?
Yes! You can bake the layers a day ahead and keep them wrapped tightly in the fridge. Assemble and frost on the day you plan to serve for the freshest look and taste.
What if I don’t have buttermilk?
Simply mix 1 cup milk with 1 tablespoon lemon juice or white vinegar. Let it sit for 5 minutes to curdle, then use as a buttermilk substitute.
How do I get the cream cheese buttercream to be smooth?
Make sure the cream cheese and butter are fully softened before mixing. Beat them well until creamy, then add powdered sugar gradually. Sifting the powdered sugar helps prevent lumps.
Can I freeze the assembled cake?
It’s best to freeze the cake layers separately and frost after thawing. If freezing the whole cake, wrap it tightly and thaw in the fridge overnight before serving.
Pin This Recipe!
Best Red Velvet Flag Cake Recipe with Easy Cream Cheese Frosting
A festive and moist red velvet cake with a surprise flag pattern inside, topped with smooth and tangy cream cheese buttercream frosting. Perfect for celebrations and easy enough for home bakers.
- Prep Time: 30 minutes
- Cook Time: 30 minutes
- Total Time: 90 minutes
- Yield: 12 servings 1x
- Category: Dessert
- Cuisine: American
Ingredients
- 2 ½ cups (315 g) all-purpose flour, sifted
- 2 tbsp unsweetened cocoa powder (Dutch-processed preferred)
- 1 tsp baking soda
- ½ tsp salt
- 1 ½ cups (300 g) granulated sugar
- 1 cup (240 ml) buttermilk, room temperature
- 1 cup (240 ml) vegetable oil, neutral flavor
- 2 large eggs, room temperature
- 1 tsp vanilla extract
- 1 tsp white vinegar
- 1 oz (2 tbsp or 60 ml) red food coloring, gel or liquid
- For the Cream Cheese Buttercream Frosting:
- 8 oz (225 g) cream cheese, softened
- ½ cup (115 g) unsalted butter, softened
- 4 cups (480 g) powdered sugar, sifted
- 1 tsp vanilla extract
- Pinch of salt
Instructions
- Preheat the oven to 350°F (175°C). Grease and line three 9-inch cake pans with parchment paper.
- In a large bowl, sift together flour, cocoa powder, baking soda, and salt. Set aside.
- In another bowl, beat sugar and vegetable oil until combined. Add eggs one at a time, mixing well after each. Stir in vanilla extract.
- Alternately add dry ingredients and buttermilk to the wet mixture, beginning and ending with dry. Mix until just combined; do not overmix.
- Stir in white vinegar, then gradually fold in red food coloring until batter is vibrant red. If batter is too thick, fold in 1 tbsp buttermilk.
- Pour 2/3 of the batter evenly into the three pans for the red velvet layers.
- Reserve remaining 1/3 batter; leave half plain (white) and tint the rest with blue food coloring. Pour into separate small pans or bake as thin layers on parchment-lined sheets.
- Bake all layers at 350°F (175°C) for 25-30 minutes or until a toothpick inserted comes out clean.
- Cool all cake layers completely on wire racks for at least 45 minutes.
- Make the cream cheese buttercream by beating cream cheese and butter until smooth. Gradually add powdered sugar, vanilla, and salt. Whip until fluffy, about 3-5 minutes.
- Assemble the cake by placing one red velvet layer on a serving plate. Spread a thin layer of frosting, then add strips or layers of white and blue cake to form the flag pattern. Repeat with remaining layers, finishing with red velvet on top.
- Frost the outside of the cake with the cream cheese buttercream using an offset spatula. Smooth sides and top, then chill for 30 minutes to set.
- Optional: Pipe stars or stripes with remaining frosting or use edible decorations to enhance the flag look.
Notes
Use gel food coloring for vibrant color without thinning the batter. Sift dry ingredients for a tender crumb. Ensure all ingredients are at room temperature for best texture. Cool layers completely before frosting to prevent melting. If batter is too thick after adding color, fold in a tablespoon of buttermilk. For gluten-free or dairy-free options, substitute ingredients as noted in the recipe.
Nutrition
- Serving Size: 1 slice (1/12th of c
- Calories: 375
- Sugar: 32
- Sodium: 300
- Fat: 20
- Saturated Fat: 8
- Carbohydrates: 48
- Fiber: 2
- Protein: 5
Keywords: red velvet cake, flag cake, cream cheese frosting, Fourth of July dessert, festive cake, layered cake, easy red velvet