“Are you sure these are cookies?” my friend texted me as I sent a snap of my freshly baked witch finger breadstick cookies, complete with eerie almond nails. Honestly, I wasn’t sold at first either. I had stumbled upon this recipe while rummaging through some old Halloween party ideas, partially hoping to find something quick but spooky. I was half-expecting a mess or something overly complicated.
The moment I pulled those crisp, elongated breadstick cookies from the oven, the scent of buttery, toasted dough mixed with a hint of garlic (yes, garlic!) filled the kitchen in the most unexpected way. I remember poking at one, skeptically biting into the crunchy exterior, and then being hooked by the salty, slightly savory, and sweet twist—the perfect combo for Halloween. The almond nails gave them this delightfully creepy look that was just the right touch for a party snack, without being too sweet or heavy.
That night, as the house filled with the chatter of friends and the occasional “wow, what is this?!” these crispy witch finger breadstick cookies became the unexpected star. They weren’t just a novelty—they were fun to make and even more fun to eat. Since then, I’ve baked them multiple times, tweaking the seasoning here and there, but the core crispy texture and those almond nails stay, because that’s the charm.
Looking back, it’s funny how a simple idea turned into a Halloween tradition for me, one that’s easy enough for last-minute guests or when you want something a little different from the usual spooky sweets. Plus, they pair surprisingly well with dips or alongside other favorites—like the easy crispy sheet pan honey mustard chicken I’ve made for weeknight dinners.
So if you’re up for a treat that’s a little off the beaten path but guaranteed to impress (and maybe even scare) your guests, these witch finger breadstick cookies are worth a try. They’ve stuck with me because they’re playful, crispy, and honestly, just the right kind of weird for Halloween.
Why You’ll Love This Crispy Witch Finger Breadstick Cookies Recipe
After testing this recipe several times (and having friends sneak bites before the party even starts), I can confidently say these crispy witch finger breadstick cookies hold their own as a Halloween treat. Here’s why they stand out:
- Quick & Easy: Ready in under 45 minutes, perfect for those last-minute Halloween plans or unexpected guests.
- Simple Ingredients: Uses pantry staples like flour, butter, and sliced almonds—no need for fancy or hard-to-find items.
- Perfect for Halloween Parties: The spooky finger shape with almond nails is a fun and memorable snack that kids and adults enjoy alike.
- Crowd-Pleaser: Crisp and buttery with a hint of savory seasoning, everyone reaches for seconds (and thirds).
- Unbelievably Delicious: Unlike overly sweet Halloween treats, these cookies balance crispy texture with just enough seasoning, creating a unique flavor profile.
What makes this recipe different? It’s not just a cookie—it’s a crispy breadstick cookie with a subtle garlic and herb twist that gives it an edge. The almond nails aren’t just decoration; they add a pleasing crunch and authentic “witch finger” vibe. I also found that brushing the dough lightly with egg wash before baking enhances the golden color and crispiness, which is a neat little trick I picked up from making other breadstick recipes like the easy crispy sheet pan Italian sausage and peppers.
It’s the kind of recipe that feels festive without being over the top, letting you enjoy Halloween vibes without the sugar crash. Plus, it’s a fun way to get hands busy shaping those creepy fingers—kids especially get a kick out of it.
What Ingredients You Will Need
This recipe uses simple, wholesome ingredients to create a crispy, flavorful breadstick cookie that’s both fun and approachable. Most of these are pantry staples, and substitutions are easy if needed.
- All-purpose flour (2 cups / 250 grams) – The base for the dough. I prefer King Arthur for consistent texture.
- Baking powder (1 tsp) – Helps give the cookies a slight lift without making them cakey.
- Salt (1 tsp) – Balances the flavors and enhances the seasoning.
- Unsalted butter (1/2 cup / 115 grams), softened – Adds richness and crispness when baked.
- Granulated sugar (1/4 cup / 50 grams) – Just enough to give a touch of sweetness.
- Garlic powder (1/2 tsp) – Adds a subtle savory note that works surprisingly well.
- Onion powder (1/4 tsp) – Complements the garlic for depth.
- Egg (1 large, room temperature) – Binds the dough and provides structure.
- Almond slices (about 1/2 cup / 50 grams) – For the “nails.” Use thin, slivered almonds for best effect.
- Egg wash: 1 egg beaten with 1 tbsp water – For brushing to get that golden crispy finish.
- Optional: A pinch of smoked paprika or cayenne for a subtle spicy warmth if you want a little extra kick.
Feel free to swap almond slices with pumpkin seeds or pecans if you want a different “nail” look. For a dairy-free version, use vegan butter or coconut oil, and substitute the egg with a flax egg (1 tbsp ground flaxseed + 3 tbsp water).
Equipment Needed
- Mixing bowls: At least one large bowl for mixing dough.
- Electric mixer or sturdy spoon: For creaming butter and sugar.
- Baking sheets: Standard size, lined with parchment paper or silicone baking mats to prevent sticking.
- Measuring cups and spoons: For precision (especially for baking powder and spices).
- Pastry brush: To apply egg wash evenly over the fingers.
- Cooling rack: To let cookies cool properly and stay crispy.
If you don’t have a pastry brush, a clean spoon or your fingers work just fine for spreading the egg wash. I’ve also used a silicone baking mat to great effect, which makes cleanup a breeze and keeps the bottoms from browning too fast.
Preparation Method

- Preheat your oven: Set it to 350°F (175°C) and line your baking sheets with parchment paper or silicone mats. This step ensures even baking and easy cleanup.
- Mix dry ingredients: In a bowl, whisk together 2 cups (250g) all-purpose flour, 1 tsp baking powder, 1 tsp salt, 1/2 tsp garlic powder, and 1/4 tsp onion powder. This blend gives the cookies their signature subtle savory flavor.
- Cream butter and sugar: Using an electric mixer or spoon, beat 1/2 cup (115g) softened unsalted butter with 1/4 cup (50g) granulated sugar until light and fluffy, about 2-3 minutes. This step incorporates air for a lighter texture.
- Add egg: Mix in 1 large egg at room temperature until fully combined. The dough will start to come together here.
- Combine wet and dry: Gradually add the dry ingredients to the butter mixture and stir until a soft dough forms. Avoid overmixing to keep the cookies tender but crispy.
- Shape the fingers: Pinch off about 1 tablespoon (15g) of dough and roll it into a finger shape roughly 4 inches (10 cm) long and about 1/2 inch (1.3 cm) thick. Press lightly to create knuckle indentations using the back of a knife or your fingernail. This gives them that creepy finger look.
- Attach almond nails: Place a slivered almond at one end of each finger, pressing gently so it sticks. The almonds will bake into the dough, creating the “nail.”
- Arrange on baking sheet: Place fingers 1 inch (2.5 cm) apart to allow for slight spreading.
- Brush with egg wash: Lightly brush each finger with the egg wash (1 egg beaten with 1 tbsp water). This step is key for that shiny, golden finish.
- Bake: Bake at 350°F (175°C) for 15-18 minutes, or until the edges are golden and crisp. Keep an eye after 12 minutes to avoid burning.
- Cool: Transfer cookies to a cooling rack. They will crisp up further as they cool, so don’t be tempted to eat them hot or soft.
Tip: If the dough feels sticky, pop it in the fridge for 15 minutes before shaping. This makes rolling and shaping much easier without losing the delicate texture.
Cooking Tips & Techniques
Making these crispy witch finger breadstick cookies is straightforward, but a few tips can help you nail the texture and spooky look every time.
- Butter temperature: Use softened butter, not melted. Melted butter can cause the cookies to spread too much and lose their finger shape.
- Shaping technique: Don’t rush the knuckle indentations. Using the back of a butter knife or your fingertip to gently press dimple marks adds character that really sells the creepy vibe.
- Egg wash matters: This is the secret to a beautifully golden finish. Brush just enough for shine without saturating the dough.
- Baking sheet choice: Light-colored baking sheets reflect heat better and prevent the bottoms from burning, keeping the cookies crisp but not burnt.
- Watch the oven: Oven temperatures vary. Start checking at 15 minutes and remove as soon as the edges turn golden for the best texture.
- Almond nails placement: If the almonds pop off during baking, try pressing them in a bit deeper or brushing with egg wash before placing. I learned this the hard way when a batch lost half their nails!
One time, I accidentally swapped garlic powder for garlic salt and the cookies were a bit too salty, but that led me to experiment with smoked paprika in smaller amounts, which gave a nice warmth without overpowering the finger concept.
Variations & Adaptations
Want to switch things up? Here are a few ways to customize these witch finger breadstick cookies:
- Sweet Version: Skip the garlic and onion powders, and instead add 1 tsp cinnamon and 1/4 cup sugar to the dough. Use slivered almonds dipped in red food coloring for bloodied nails.
- Gluten-Free: Substitute all-purpose flour with a 1:1 gluten-free baking flour blend. The texture will be slightly different but still delicious and crispy.
- Vegan Adaptation: Use vegan butter and replace the egg with a flax egg (1 tbsp ground flaxseed + 3 tbsp water, mixed and rested). Almond nails can stay, or swap for vegan-friendly seeds.
- Spicy Twist: Add 1/4 tsp cayenne pepper to the dry mix for an unexpected heat that pairs well with the buttery dough.
- Savory Herb Variation: Incorporate 1 tsp dried rosemary or thyme for a fragrant, earthy note. Great for serving alongside hearty dishes like the honey mustard chicken.
Personally, I once tried making mini witch fingers using the leftover dough for a kid’s party. They were just as fun and disappeared fast, especially when paired with a tangy marinara dip.
Serving & Storage Suggestions
These crispy witch finger breadstick cookies are best served at room temperature, allowing their texture to shine through. They make a fantastic snack on their own, but I like to serve them with a small bowl of marinara or cheesy dip for a savory Halloween spread.
Pairing them with a cozy dinner like the creamy cheesy taco pasta also works surprisingly well when you want to add a little festive finger food to dinner.
Storage is easy: keep them in an airtight container at room temperature for up to 5 days. If you want to keep them longer, freeze the baked cookies in a sealed bag for up to 3 months. To re-crisp after freezing, pop them in a 325°F (160°C) oven for 5-7 minutes.
Over time, the flavors deepen a bit, especially the garlic and herbs, making them even more savory the next day. Just don’t store near super moist foods or they lose their crispiness.
Nutritional Information & Benefits
Each crispy witch finger breadstick cookie contains approximately:
| Calories | 110 |
|---|---|
| Fat | 7g |
| Carbohydrates | 11g |
| Protein | 2g |
These cookies offer a moderate source of energy without excessive sugar, making them a lighter option compared to traditional Halloween sweets. The almonds provide healthy fats and a bit of protein, while the garlic powder adds antioxidants and potential immune benefits.
They are naturally gluten-containing but can be adapted for gluten-free diets. Note that almonds are a common allergen, so substitutions may be needed for nut-free households.
From a wellness perspective, these crispy witch finger breadstick cookies satisfy that craving for something crunchy and flavorful without the overload of sugar or artificial ingredients, making them a balanced treat when enjoyed in moderation.
Conclusion
Making these crispy witch finger breadstick cookies with almond nails has become one of my favorite Halloween rituals. They’re easy to whip up, playful in presentation, and bring that perfect crispy texture I crave in a savory snack. Plus, shaping the fingers is oddly therapeutic once you get going (and fun for kids too!).
Feel free to tweak the seasoning or try different nuts—this recipe is forgiving and versatile. I’d love to hear how you make them your own, whether you add a spicy kick or turn them sweet for the season.
Next time you’re craving something unique for a Halloween treat, give these a try. I promise they’ll be a hit—no tricks, just tasty crispy witch finger breadstick cookies. And if you want to keep the Halloween vibes going, you might enjoy the spooky twist on comfort food like the creamy garlic butter Tuscan shrimp pasta I made recently.
Happy baking and may your Halloween be delightfully delicious!
FAQs about Crispy Witch Finger Breadstick Cookies
Can I make these cookies ahead of time?
Yes! You can bake them a day or two in advance and store in an airtight container at room temperature. Re-crisp in the oven for a few minutes before serving.
What can I use instead of almond slices for the nails?
Slivered pumpkin seeds, pecans, or even small pieces of dried fruit work well as alternatives to almonds for a similar look and texture.
Are these cookies suitable for kids?
Absolutely! They’re fun to shape and not overly sweet, which many kids enjoy. Just be cautious with nut allergies if serving to a group.
Can I freeze the dough?
You can freeze the shaped fingers on a baking sheet, then transfer to a freezer bag once firm. Bake from frozen, adding a couple extra minutes to the baking time.
Do these cookies taste more savory or sweet?
They’re slightly savory with a hint of sweetness from the sugar. The garlic and onion powders give them a unique flavor that’s different from typical sweet cookies.
Pin This Recipe!
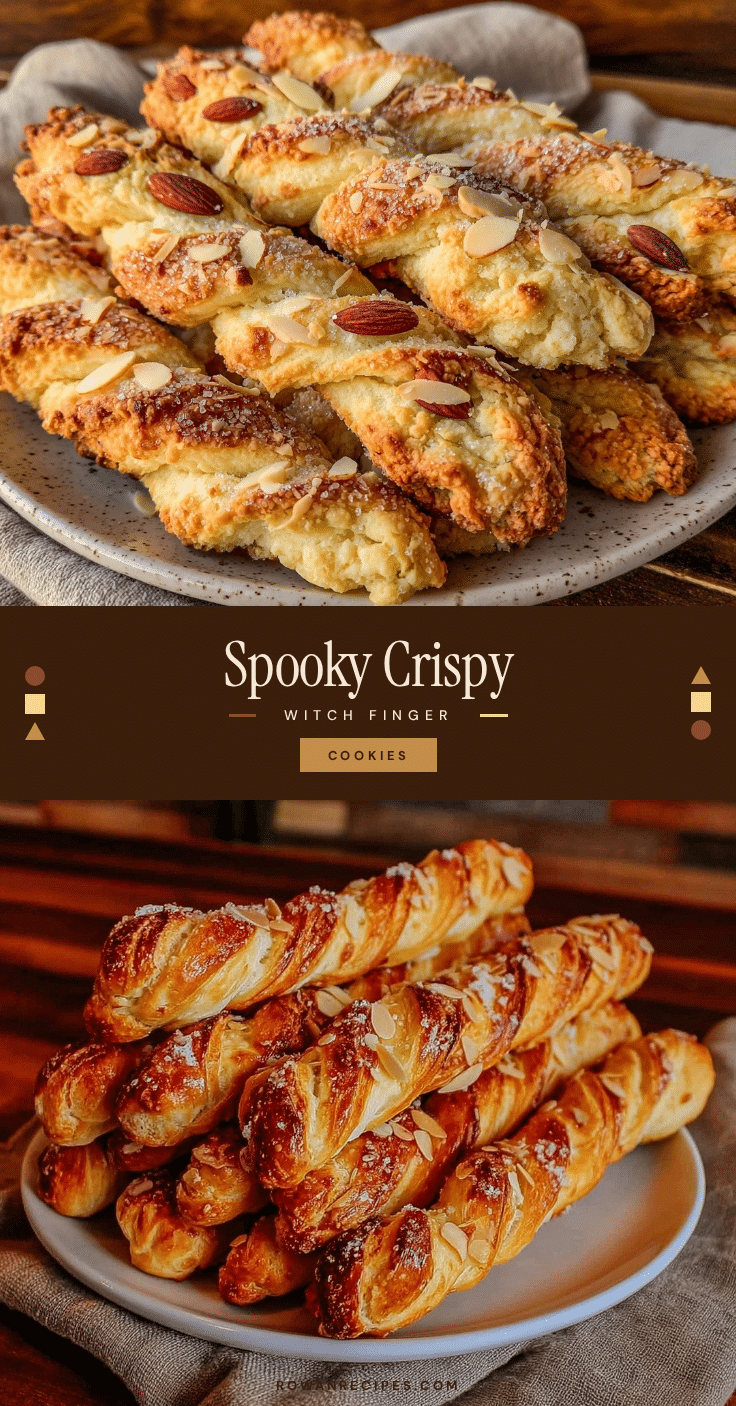
Crispy Witch Finger Breadstick Cookies

These crispy witch finger breadstick cookies are a perfect Halloween treat with a unique savory twist, featuring buttery, toasted dough and eerie almond nails for a spooky look.
- Prep Time: 15 minutes
- Cook Time: 15-18 minutes
- Total Time: 35 minutes
- Yield: 24 cookies 1x
- Category: Snack
- Cuisine: American
Ingredients
- 2 cups (250 grams) all-purpose flour
- 1 tsp baking powder
- 1 tsp salt
- 1/2 cup (115 grams) unsalted butter, softened
- 1/4 cup (50 grams) granulated sugar
- 1/2 tsp garlic powder
- 1/4 tsp onion powder
- 1 large egg, room temperature
- About 1/2 cup (50 grams) almond slices
- Egg wash: 1 egg beaten with 1 tbsp water
- Optional: pinch of smoked paprika or cayenne pepper
Instructions
- Preheat your oven to 350°F (175°C) and line baking sheets with parchment paper or silicone mats.
- In a bowl, whisk together flour, baking powder, salt, garlic powder, and onion powder.
- Cream the softened butter and granulated sugar using an electric mixer or spoon until light and fluffy, about 2-3 minutes.
- Mix in the egg until fully combined.
- Gradually add the dry ingredients to the butter mixture and stir until a soft dough forms, avoiding overmixing.
- Pinch off about 1 tablespoon (15 grams) of dough and roll into a finger shape about 4 inches (10 cm) long and 1/2 inch (1.3 cm) thick. Press lightly to create knuckle indentations.
- Attach a slivered almond at one end of each finger, pressing gently to stick.
- Arrange fingers 1 inch (2.5 cm) apart on the baking sheet.
- Lightly brush each finger with the egg wash.
- Bake for 15-18 minutes or until edges are golden and crisp, checking after 12 minutes to avoid burning.
- Transfer cookies to a cooling rack to crisp up further before serving.
Notes
Use softened butter, not melted, to prevent spreading. Chill dough for 15 minutes if sticky. Brush egg wash lightly for a golden finish. Use light-colored baking sheets to avoid burning bottoms. Press almond nails firmly or brush with egg wash before placing to prevent falling off. Cookies crisp up more as they cool. Store in airtight container up to 5 days or freeze up to 3 months.
Nutrition
- Serving Size: 1 cookie
- Calories: 110
- Fat: 7
- Carbohydrates: 11
- Protein: 2
Keywords: Halloween cookies, witch finger cookies, breadstick cookies, savory cookies, almond nails, spooky treats