I did not trust the freezer with my eggs. That was my hard line in the sand for years. I had been burned before—soggy reheated scrambles, rubbery whites, that weird watery separation that turns a good breakfast into a sad, salty regret. So when my sister showed up at my door with a gallon-sized bag full of these tiny rolled things and said, “Breakfast for a month,” I smiled politely and mentally prepared to toss them the second she left. But then I was running late on a Tuesday, and she had a point. I grabbed one, microwaved it, and took a bite standing over my kitchen sink. The tortilla was soft. The eggs were fluffy. The cheese pulled like it was fresh. I texted her a photo of the empty wrapper with a single question mark. She sent back a laughing emoji and the recipe. Honestly, I have not had a morning without one in my freezer since.
These Easy Freezer-Friendly Mini Breakfast Burritos are the kind of recipe that feels like cheating. They are small, portable, and built to survive the deep freeze without turning into a mushy mess. I spent a good month tweaking the ratios—too much egg and they get dense, too little cheese and they lack that gooey pull. But this version? It works. Every single time. Whether you are feeding a crowd on a camping trip or just trying to get out the door without hangry vibes, these little guys have your back. And the best part? You can stuff them with whatever you have lying around. Sausage, bacon, black beans, sautéed peppers—it all fits.
Why You’ll Love This Recipe
I have tested this recipe through three different freezers, two different microwaves, and one very skeptical husband who now packs two for his morning commute. Here is why I keep coming back to it:
- Quick & Easy: These come together in about 30 minutes of active prep time, and then you have breakfast ready for weeks. No more scrambling eggs while your coffee gets cold.
- Simple Ingredients: You probably already have most of these in your kitchen. Eggs, cheese, tortillas, and your favorite fillings. No weird specialty items required.
- Perfect for Busy Mornings: Grab one from the freezer, microwave it for 60 seconds, and you are out the door. It is that simple.
- Crowd-Pleaser: I have made these for brunch, road trips, and post-workout refuels. Kids love them. Adults love them. Even my picky eater nephew asked for seconds.
- Unbelievably Delicious: The texture after freezing is what sold me. The eggs stay tender, the cheese stays melty, and the tortilla does not get that sad, chewy texture you expect from frozen breakfast wraps.
What makes these different from every other freezer burrito recipe out there is the technique. I par-cook the fillings just enough so they finish perfectly when reheated. I let the scrambled eggs cool completely before assembling—this is the secret to avoiding soggy tortillas. And I wrap each burrito individually in parchment paper before bagging them, which locks in moisture without trapping steam. It is a small step that makes a huge difference.
These burritos are not just convenient—they are the kind of breakfast that makes you feel like you have your life together. And honestly, on a chaotic Wednesday morning, that feeling is priceless.
What Ingredients You Will Need
This recipe uses simple, wholesome ingredients that come together to deliver bold flavor and satisfying texture without the fuss. Most of these are pantry staples, which makes this a great recipe for using up leftovers.
- Large eggs (12 eggs) – The backbone of the filling. Use fresh, good-quality eggs for the best texture. I prefer pasture-raised when I can find them.
- Whole milk (¼ cup) – Adds moisture and fluffiness to the scrambled eggs. You can use any milk you have on hand, including plant-based options.
- Sharp cheddar cheese (2 cups, shredded) – Melts beautifully and adds that classic breakfast flavor. I recommend shredding your own from a block—it melts better than pre-shredded (which has anti-caking agents).
- Breakfast sausage (1 lb) – I use mild pork sausage, but spicy or turkey sausage works great too. Cook it until browned and crumbled before adding to the filling.
- Small flour tortillas (20 tortillas, about 6-inch size) – The smaller size makes these perfect for grab-and-go breakfasts. Corn tortillas work for a gluten-free option, but they can crack when rolled.
- Unsalted butter (2 tablespoons) – For scrambling the eggs. It adds richness and prevents sticking.
- Salt (½ teaspoon) – Enhances all the flavors. Do not skip it.
- Black pepper (¼ teaspoon) – Freshly ground is best.
- Optional fillings – Cooked black beans, sautéed bell peppers and onions, crumbled bacon, diced ham, or roasted potatoes. Keep the total volume of add-ins to about 1 cup so the burritos roll easily.
I recommend using a brand like Johnsonville for the sausage or Applegate for a cleaner ingredient list. For the tortillas, I have had the best luck with Guerrero or Mission—they are pliable enough to roll without tearing. If you are using add-ins like peppers or onions, make sure they are cooked and cooled completely before mixing them into the eggs. Excess moisture is the enemy of a good freezer burrito.
You can swap the cheddar for Monterey Jack, pepper jack, or a Mexican blend. For a dairy-free version, use a plant-based cheddar shreds and omit the milk or use unsweetened almond milk.
Equipment Needed
- Large nonstick skillet (12-inch) – For scrambling the eggs and cooking the sausage. A good nonstick surface makes cleanup a breeze.
- Spatula – A silicone spatula is gentle on your pan and works great for folding eggs.
- Large mixing bowl – For combining the cooled eggs, cheese, and fillings.
- Cutting board and sharp knife – For prepping any fresh vegetables or herbs.
- Parchment paper – This is key for wrapping the burritos. It prevents sticking and makes reheating easy (you can microwave them right in the paper).
- Freezer-safe zip-top bags (gallon size) – For storing the assembled burritos. Squeeze out as much air as possible before sealing.
- Baking sheet (optional) – If you want to flash-freeze the burritos before bagging them, a baking sheet lined with parchment paper works perfectly.
If you do not have parchment paper, you can use wax paper or aluminum foil. I prefer parchment because it does not tear easily and it is microwave-safe. For a budget-friendly option, reusable silicone bags work great for freezer storage.
Preparation Method
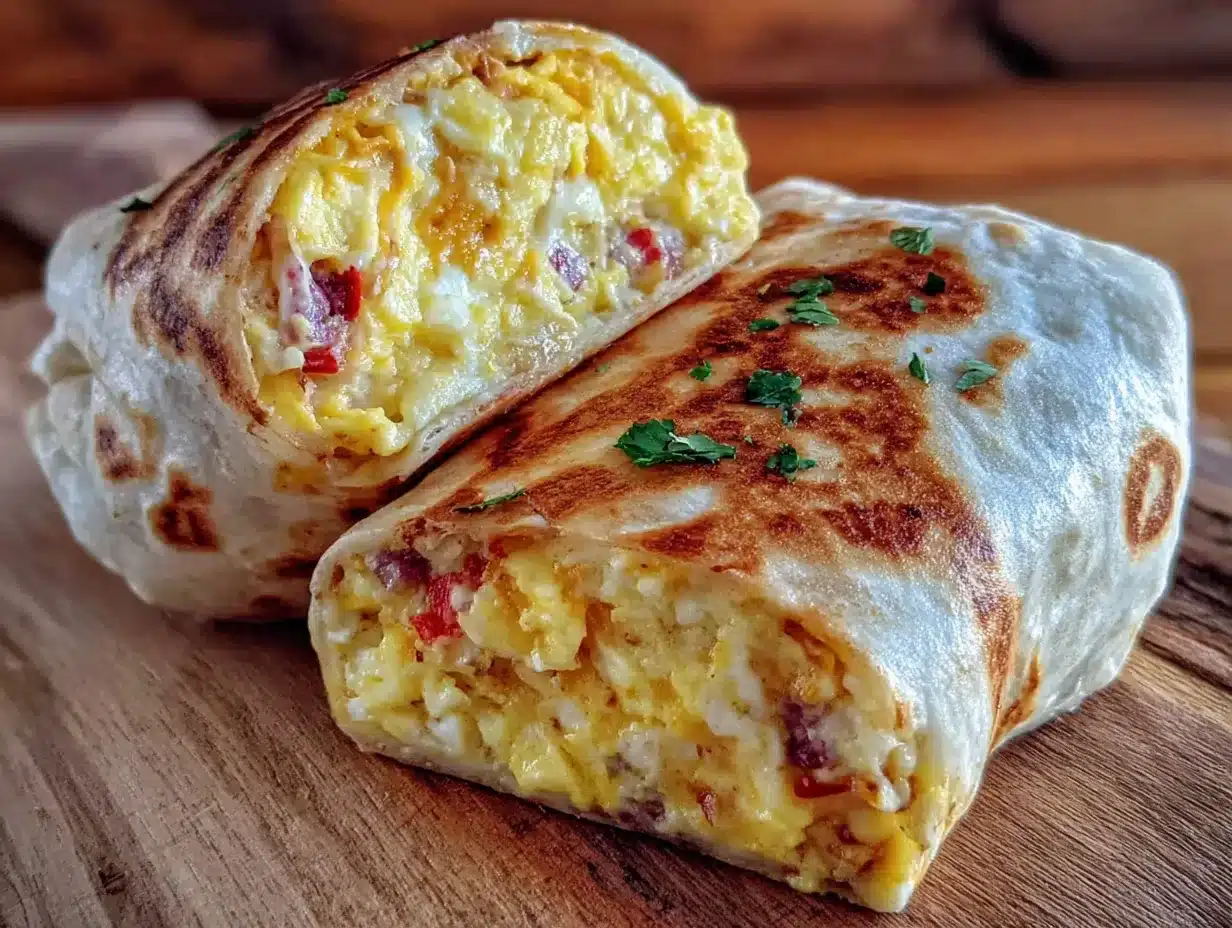
- Cook the sausage. Heat a large nonstick skillet over medium-high heat. Add the breakfast sausage and cook, breaking it apart with a spatula, until browned and cooked through—about 6 to 8 minutes. Transfer the cooked sausage to a plate lined with paper towels to drain excess grease. Let it cool completely while you prepare the eggs.
- Scramble the eggs. In a large bowl, whisk together the 12 eggs, ¼ cup milk, ½ teaspoon salt, and ¼ teaspoon pepper until the mixture is uniform and slightly frothy. Wipe out the skillet you used for the sausage, then return it to medium-low heat. Add the 2 tablespoons of butter and let it melt, swirling the pan to coat the surface. Pour in the egg mixture and let it sit undisturbed for about 30 seconds. Using a silicone spatula, gently push the cooked edges toward the center, tilting the pan to let the uncooked egg flow to the edges. Repeat this process until the eggs are just set but still soft and slightly glossy—about 4 to 5 minutes. Remove the pan from the heat immediately. Overcooking the eggs at this stage will make them dry after freezing.
- Cool the filling completely. Spread the scrambled eggs on a large plate or baking sheet in an even layer. Let them cool at room temperature for 10 to 15 minutes. This step is non-negotiable—warm fillings create steam inside the tortillas, which leads to soggy burritos after freezing. If you are in a hurry, pop the plate in the refrigerator for 5 minutes.
- Combine the filling. In a large mixing bowl, combine the cooled scrambled eggs, cooled sausage, and 2 cups of shredded cheddar cheese. Mix gently until everything is evenly distributed. Taste a small spoonful and adjust salt and pepper if needed.
- Assemble the burritos. Lay one small tortilla flat on a clean work surface. Spoon about ¼ cup of the filling mixture into the center of the tortilla, spreading it into a log shape. Fold the sides of the tortilla inward over the filling, then roll tightly from the bottom up, tucking the filling in as you go. The goal is a snug, compact roll—not too tight that the tortilla tears, but tight enough that nothing falls out. Repeat with the remaining tortillas and filling. You should get about 20 mini burritos.
- Wrap each burrito. Cut a piece of parchment paper about 8 inches long for each burrito. Place the burrito seam-side down in the center of the parchment, then roll it up like a candy wrapper, twisting the ends to secure. This keeps the burrito closed and prevents freezer burn.
- Freeze the burritos. Place the wrapped burritos in a single layer on a baking sheet and freeze for 1 to 2 hours, or until firm. This flash-freezing step prevents them from sticking together in the bag. Once frozen solid, transfer the burritos to a gallon-sized freezer-safe zip-top bag. Squeeze out as much air as possible before sealing. Label the bag with the date and contents.
A few visual cues to watch for: the eggs should look soft and curdy, not dry and crumbly. When you roll the burritos, the tortilla should feel pliable but not warm. If the tortillas crack, they are either too dry (try warming them briefly in the microwave) or you are overstuffing them.
Cooking Tips & Techniques
I learned the hard way that not all freezer burritos are created equal. My first batch was a disaster—soggy tortillas, dry eggs, and cheese that turned into a weird rubbery layer. Here is what I changed to get it right.
The biggest mistake people make is using hot fillings. I get it—you are in a rhythm, everything is cooked, and you just want to roll and be done. But warm eggs release steam, and that steam gets trapped inside the tortilla. By the time you reheat it, you have a soggy, sad breakfast. Let the eggs and sausage cool completely. I usually make the filling the night before and assemble the burritos the next morning. It makes the process feel less rushed.
Another trick I swear by is using room-temperature tortillas. Cold tortillas straight from the fridge are brittle and prone to cracking. If you forget to take them out ahead of time, stack them on a plate and microwave them for 15 to 20 seconds. They will be soft and pliable, which makes rolling much easier.
For the best texture after freezing, do not overfill the burritos. I know it is tempting to pack as much filling as possible, but a ¼ cup is the sweet spot. Any more and the burrito will be difficult to roll and may burst open during reheating.
When reheating, wrap the burrito in a damp paper towel before microwaving. This adds a little steam, which helps the tortilla soften without drying out. Microwave on high for 60 to 90 seconds, flipping halfway through. If you are reheating from frozen, add about 15 seconds. If you have time, you can also reheat them in a skillet over medium heat for 3 to 4 minutes per side—this gives the tortilla a nice crispy exterior.
For a fun twist on breakfast meal prep, try pairing these with my Easy Cheesy Crescent Roll Breakfast Casserole for a weekend brunch spread that covers all bases.
Variations & Adaptations
- Vegetarian version: Swap the sausage for 1 cup of cooked black beans or refried beans. Add a handful of sautéed bell peppers and onions for extra flavor and texture. The beans add protein and keep the filling moist.
- Spicy version: Use spicy breakfast sausage and add ½ cup of diced pickled jalapeños to the filling. You can also mix in a tablespoon of hot sauce or a pinch of cayenne pepper for extra heat.
- Low-carb version: Use low-carb tortillas or large collard green leaves (blanched and dried) as the wrap. The filling itself is naturally low in carbs if you skip the beans and potatoes.
- Bacon and egg version: Replace the sausage with 8 slices of cooked, crumbled bacon. The smoky flavor pairs beautifully with the cheddar cheese.
- Southwest version: Add ½ cup of corn kernels (fresh or frozen), ½ cup of diced roasted green chiles, and a handful of fresh cilantro to the filling. Serve with salsa or sour cream after reheating.
I once tried a version with crumbled tofu and nutritional yeast for a vegan friend. It was not my favorite, but she loved it. The key with any adaptation is keeping the total moisture content low—wet fillings like raw tomatoes or too much salsa will make the tortillas soggy.
If you are looking for another easy make-ahead breakfast idea, my Easy Cheesy Tater Tot Breakfast Casserole is a crowd favorite that also freezes beautifully.
Serving & Storage Suggestions
These mini breakfast burritos are best served warm, straight from the microwave or skillet. I like to serve them with a side of salsa, sour cream, or sliced avocado. For a heartier breakfast, pair two burritos with a handful of fresh fruit or a small smoothie.
The burritos will keep in the freezer for up to 3 months. I usually make a double batch and stash them in the freezer for those mornings when I know I will not have time to cook. They are also great for camping trips—just pack them in a cooler and reheat over a camp stove or campfire.
For storage, make sure the burritos are fully cooled before wrapping and freezing. If you skip the flash-freezing step, the burritos will stick together in the bag. I learned this the hard way when I tried to pull one out and ended up with a clump of six.
To reheat from frozen: unwrap the burrito from the parchment paper, wrap it in a damp paper towel, and microwave on high for 60 to 90 seconds. Let it rest for 30 seconds before eating—the filling will be very hot. If you are reheating multiple burritos, add 15 to 20 seconds per additional burrito.
The flavors actually meld together beautifully after a few days in the freezer. The cheese and eggs seem to marry in a way that makes the burrito taste even better than the day you made it. I have never had one last longer than a month in my house, but I imagine they would still be good at the 3-month mark.
Nutritional Information & Benefits
Each mini breakfast burrito (using pork sausage, cheddar cheese, and whole milk) contains approximately:
- Calories: 210
- Protein: 12g
- Fat: 13g
- Carbohydrates: 14g
- Fiber: 1g
- Sugar: 1g
- Sodium: 420mg
These burritos are a great source of protein, which helps keep you full and satisfied throughout the morning. The eggs provide high-quality protein and essential nutrients like vitamin D and choline, which support brain health. The cheese adds calcium for strong bones and teeth.
For a lower-sodium option, use low-sodium sausage and reduce the added salt. For a lower-fat option, use turkey sausage and reduced-fat cheese. The burritos are naturally gluten-free if you use corn tortillas, though they may crack more easily during rolling.
I personally love that these burritos give me a balanced breakfast without any added sugars or preservatives. It is real food, made ahead, and ready when I need it.
Conclusion
These Easy Freezer-Friendly Mini Breakfast Burritos have genuinely changed my mornings. What started as a skeptical experiment has become a staple in my freezer—and honestly, in the freezers of everyone I have shared them with. They are proof that meal prep does not have to be boring or time-consuming. With a little planning and about 30 minutes of active work, you can have breakfast ready for weeks.
I love that this recipe is endlessly adaptable. You can make it your own based on what you have in your fridge or what your family craves. And the best part? You do not have to sacrifice flavor for convenience. These burritos taste fresh, even after weeks in the freezer.
I would love to hear how yours turn out. Did you try a fun variation? Discover a new favorite filling? Drop a comment below and let me know. And if you are looking for another easy weeknight meal that delivers big on flavor, check out my Easy Crispy Sheet Pan Honey Mustard Chicken—it is another one of those recipes that makes you feel like a kitchen pro with almost no effort.
Happy cooking, and may your mornings be a little less chaotic and a lot more delicious.
Frequently Asked Questions
Can I use egg whites instead of whole eggs?
Yes, you can substitute 2 cups of liquid egg whites for the 12 whole eggs. The texture will be slightly less rich, but the burritos will still freeze and reheat well. Add an extra tablespoon of milk to help keep the egg whites moist.
How do I keep the tortillas from getting soggy?
The key is making sure all your fillings are completely cool before assembling the burritos. Warm fillings release steam, which gets trapped inside the tortilla and creates sogginess. I also recommend using a light hand with any wet ingredients like salsa or hot sauce—save those for serving.
Can I cook these in an air fryer instead of a microwave?
Absolutely. Preheat your air fryer to 350°F. Place the frozen burrito (unwrap it first) in the basket and cook for 6 to 8 minutes, flipping halfway through. The tortilla gets beautifully crispy on the outside. This is my preferred method when I have an extra few minutes in the morning.
How long do these last in the freezer?
Properly stored in an airtight freezer bag with all the air squeezed out, these burritos will stay fresh for up to 3 months. I recommend labeling the bag with the date so you can keep track. After 3 months, the quality starts to decline, though they are still safe to eat.
Can I add potatoes to the filling?
Yes, but make sure the potatoes are fully cooked and cooled before adding them to the mix. I recommend using frozen hash browns that have been cooked until crispy, or leftover roasted potatoes diced into small pieces. Avoid raw potatoes, as they will not cook through properly during reheating.
Pin This Recipe!

Easy Freezer-Friendly Mini Breakfast Burritos Recipe

These Easy Freezer-Friendly Mini Breakfast Burritos are small, portable, and built to survive the deep freeze without turning into a mushy mess. With a little planning and about 30 minutes of active work, you can have breakfast ready for weeks.
- Prep Time: 30 minutes
- Cook Time: 15 minutes
- Total Time: 45 minutes
- Yield: 20 servings 1x
- Category: Breakfast
- Cuisine: American
Ingredients
- 12 large eggs
- ¼ cup whole milk
- 2 cups sharp cheddar cheese, shredded
- 1 lb breakfast sausage (mild pork, spicy, or turkey)
- 20 small flour tortillas (about 6-inch size)
- 2 tablespoons unsalted butter
- ½ teaspoon salt
- ¼ teaspoon black pepper, freshly ground
- Optional fillings: cooked black beans, sautéed bell peppers and onions, crumbled bacon, diced ham, or roasted potatoes (keep total volume to about 1 cup)
Instructions
- Cook the sausage: Heat a large nonstick skillet over medium-high heat. Add the breakfast sausage and cook, breaking it apart with a spatula, until browned and cooked through—about 6 to 8 minutes. Transfer to a plate lined with paper towels to drain excess grease. Let cool completely.
- Scramble the eggs: In a large bowl, whisk together the 12 eggs, ¼ cup milk, ½ teaspoon salt, and ¼ teaspoon pepper until uniform and slightly frothy. Wipe out the skillet, return to medium-low heat, add 2 tablespoons butter and let melt. Pour in egg mixture, let sit undisturbed for 30 seconds. Using a silicone spatula, gently push cooked edges toward center, tilting pan to let uncooked egg flow to edges. Repeat until eggs are just set but still soft and slightly glossy—about 4 to 5 minutes. Remo…
- Cool the filling completely: Spread scrambled eggs on a large plate or baking sheet in an even layer. Let cool at room temperature for 10 to 15 minutes (or refrigerate for 5 minutes if in a hurry).
- Combine the filling: In a large mixing bowl, combine cooled scrambled eggs, cooled sausage, and 2 cups shredded cheddar cheese. Mix gently until evenly distributed. Adjust salt and pepper if needed.
- Assemble the burritos: Lay one small tortilla flat on a clean work surface. Spoon about ¼ cup of filling mixture into the center, spreading into a log shape. Fold sides inward over filling, then roll tightly from bottom up, tucking filling in as you go. Repeat with remaining tortillas and filling (makes about 20 mini burritos).
- Wrap each burrito: Cut a piece of parchment paper about 8 inches long for each burrito. Place burrito seam-side down in center of parchment, then roll up like a candy wrapper, twisting ends to secure.
- Freeze the burritos: Place wrapped burritos in a single layer on a baking sheet and freeze for 1 to 2 hours, or until firm. Transfer to a gallon-sized freezer-safe zip-top bag, squeeze out as much air as possible, and seal. Label with date and contents.
Notes
Let fillings cool completely before assembling to avoid soggy tortillas. Use room-temperature tortillas for easier rolling. For reheating, wrap burrito in a damp paper towel and microwave on high for 60-90 seconds, flipping halfway. For a crispy exterior, reheat in a skillet over medium heat for 3-4 minutes per side. Burritos keep in the freezer for up to 3 months.
Nutrition
- Serving Size: 1 mini burrito
- Calories: 210
- Sugar: 1
- Sodium: 420
- Fat: 13
- Saturated Fat: 5
- Carbohydrates: 14
- Fiber: 1
- Protein: 12
Keywords: breakfast burritos, freezer-friendly, mini burritos, meal prep, easy breakfast, make-ahead breakfast