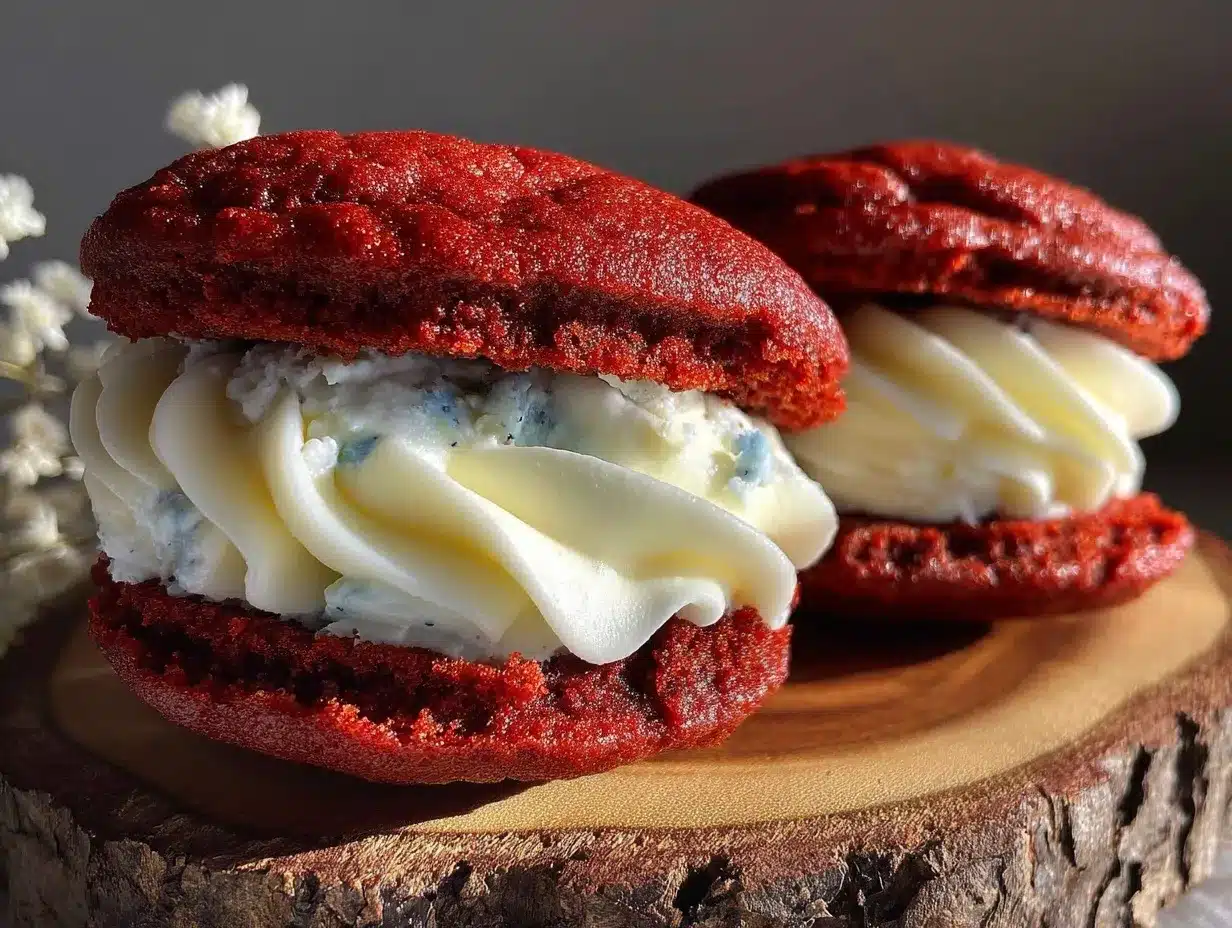
I figured red velvet whoopie pies would be straightforward—just two soft cakes and a classic cream filling. It took about three attempts before I realized the blue cream filling was the real game-changer here. Honestly, I wasn’t even sure if blue cream would look right with that rich red crumb. But somehow, the vibrant blue against the deep red created this playful contrast that made the whole treat pop, both visually and flavor-wise.
That first batch came out a bit uneven—the cakes were either too cakey or slightly dense, and the cream was a little too buttery. But with a few tweaks, I landed on a recipe that’s irresistibly moist, tender, and just the right amount of sweet. The blue cream turned out smoother and lighter than I expected, with a subtle tang that balanced the cocoa in the red velvet perfectly.
Making these whoopie pies reminded me of those afternoons when I’d bake with a friend, experimenting without a strict plan—just mixing, tasting, laughing over the little missteps. It’s that kind of recipe that feels like a cozy, slightly imperfect kitchen adventure.
What keeps me coming back to this recipe is how it manages to be both fancy enough for a special occasion and laid-back enough for an afternoon snack. The blue cream filling isn’t just a pretty face; it adds that unexpected twist that makes you pause and savor each bite. It’s the kind of recipe that quietly steals the spotlight at any gathering, and I can tell you, it soon became my go-to sweet fix when I wanted something a little different but totally comforting.
Why You’ll Love This Recipe
- Quick & Easy: Comes together in under 45 minutes, which works perfectly for those moments when you want a homemade treat without hours in the kitchen.
- Simple Ingredients: Most are pantry staples—flour, cocoa powder, buttermilk, and cream cheese—nothing fancy or hard to find.
- Perfect for Celebrations: Whether it’s a birthday, holiday, or just a weekend indulgence, these whoopie pies add a fun splash of color and flavor to any dessert table.
- Crowd-Pleaser: Kids adore the bright blue filling, and adults appreciate the classic red velvet flavor with a fresh twist.
- Unbelievably Delicious: The combination of moist red velvet cake and that silky, tangy blue cream filling is pure comfort food magic.
- Distinctive Twist: Using blue food coloring in the cream filling isn’t just for show—it balances the sweetness and gives the whoopie pies a cheerful vibe that’s hard to resist.
- Trusted Recipe: Tested multiple times in my kitchen, this recipe avoids the dry cake and overly sweet filling pitfalls that plague many red velvet desserts.
Honestly, this recipe isn’t just another red velvet whoopie pie. It’s the one that makes you pause, close your eyes, and savor that perfect bite—moist, creamy, and just a little unexpected. If you’ve ever made traditional red velvet, you’ll appreciate how this version feels like a fresh, fun upgrade without losing that classic charm.
What Ingredients You Will Need
This recipe uses simple, wholesome ingredients to deliver bold flavor and a satisfying texture without the fuss. Most of these you probably have on hand, and the rest are easy to find at any grocery store.
- For the Red Velvet Cake:
- All-purpose flour, 2 cups (240g) – for that tender, soft crumb
- Cocoa powder, 2 tablespoons (unsweetened) – adds subtle chocolate flavor
- Baking soda, 1 teaspoon – helps the cakes rise nicely
- Salt, ½ teaspoon – balances sweetness
- Unsalted butter, ½ cup (113g), softened – for richness and moisture
- Granulated sugar, 1 cup (200g) – sweetens and tenderizes
- Large eggs, 2, room temperature – binds everything together
- Buttermilk, 1 cup (240ml), room temperature – adds tang and keeps cakes moist (substitute with milk + vinegar if needed)
- Vanilla extract, 1 teaspoon – enhances flavor depth
- Red food coloring, 2 tablespoons – the signature hue you want bright but natural-looking (I prefer gel food coloring for vibrant color without thinning batter)
- White vinegar, 1 teaspoon – reacts with baking soda for lift
- For the Blue Cream Filling:
- Cream cheese, 8 ounces (225g), softened – gives a tangy richness
- Unsalted butter, ½ cup (113g), softened – smooths and lightens the filling
- Powdered sugar, 3 cups (360g), sifted – sweetens and thickens
- Vanilla extract, 1 teaspoon – adds warmth
- Blue food coloring, 1 teaspoon gel – for that striking blue shade
- Heavy cream, 2 tablespoons (30ml) – optional, to loosen filling if needed
Tip: For the cream cheese, I recommend a trusted brand like Philadelphia for smooth texture and consistent flavor. Also, if you want a dairy-free version, swap cream cheese and butter with plant-based alternatives and use coconut milk instead of heavy cream.
Seasonal variation: If you’re feeling adventurous, adding a teaspoon of orange zest to the filling can add a fresh twist that pairs beautifully with the cocoa notes.
Equipment Needed
- Mixing bowls (medium and large) – for combining wet and dry ingredients separately
- Electric mixer or stand mixer – makes creaming butter and sugar way easier and smoother
- Measuring cups and spoons – precision helps, especially with baking soda and vinegar
- Rubber spatula – for scraping down the sides without losing batter
- Baking sheets – lined with parchment paper or silicone mats to prevent sticking
- Cooling racks – to cool the cakes evenly and avoid sogginess
- Small offset spatula or butter knife – for spreading the blue cream filling
No fancy gadgets needed here, but a stand mixer will save you some elbow grease—though I’ve made these by hand plenty of times. If you don’t have parchment paper, a well-greased baking sheet works fine, but the cleanup will be a bit messier.
Pro tip: Keep your cream cheese and butter soft but not melting—room temp for about 30 minutes does the trick for that dreamy filling texture.
Preparation Method
- Preheat the oven to 350°F (175°C). Line two baking sheets with parchment paper or silicone mats.
- Mix dry ingredients: In a medium bowl, sift together 2 cups (240g) all-purpose flour, 2 tablespoons cocoa powder, 1 teaspoon baking soda, and ½ teaspoon salt. Set aside.
- Cream butter and sugar: In a large bowl, beat ½ cup (113g) softened unsalted butter with 1 cup (200g) granulated sugar using an electric mixer on medium speed until light and fluffy (about 3 minutes). This step is key for a tender crumb.
- Add eggs: Beat in 2 large eggs, one at a time, mixing well after each addition.
- Combine wet ingredients: In a small bowl or measuring cup, whisk 1 cup (240ml) buttermilk, 1 teaspoon vanilla extract, 1 teaspoon white vinegar, and 2 tablespoons red food coloring until smooth.
- Alternate adding dry and wet ingredients: Gradually add the dry mixture to the creamed butter mixture in three additions, alternating with the wet mixture in two additions. Start and end with the dry. Mix on low speed just until combined—overmixing will toughen the cakes.
- Portion the batter: Using a tablespoon or cookie scoop, drop rounded spoonfuls (about 2 tablespoons or 30g each) onto the prepared baking sheets, spaced about 2 inches apart. The batter spreads slightly, so don’t crowd them.
- Bake for 10-12 minutes: The cakes should spring back lightly when touched and a toothpick inserted in the center comes out clean. Don’t overbake or they’ll dry out.
- Cool completely: Let the cakes cool on the baking sheets for 5 minutes, then transfer to wire racks to cool fully before filling.
- Prepare the blue cream filling: Beat 8 ounces (225g) softened cream cheese with ½ cup (113g) softened unsalted butter until smooth and creamy (about 2-3 minutes). Gradually add 3 cups (360g) sifted powdered sugar, mixing on low until incorporated, then increase speed to beat until fluffy.
- Add flavor and color: Stir in 1 teaspoon vanilla extract and 1 teaspoon blue gel food coloring. If the filling is too thick, add up to 2 tablespoons (30ml) heavy cream, one teaspoon at a time, to loosen.
- Assemble the whoopie pies: Pair cakes of similar size. Spread about 2 tablespoons of blue cream filling on the flat side of one cake and sandwich with the other, pressing gently to spread the filling evenly to the edges.
- Final chill (optional): Refrigerate assembled pies for 30 minutes to firm up the filling and make handling easier.
Keep an eye on the baking time—oven temps can vary, and those whoopie pies can turn from perfect to dry in a minute or two. Also, if your batter looks too runny or thick, a quick tweak with flour or buttermilk usually helps.
When spreading the filling, I like to use a small offset spatula for clean edges—it makes the pies look polished without being fussy.
Cooking Tips & Techniques
Here’s what I learned after a few rounds of trial and error with these red velvet whoopie pies. First off, don’t skip sifting the cocoa and flour. It really makes the cakes lighter and stops clumps from forming in the batter.
When creaming butter and sugar, patience is your friend. Whipping it well traps air, giving you that soft, tender crumb that’s essential for whoopie pies.
Mix buttermilk and vinegar with the red food coloring separately before adding to the batter. It helps the color distribute evenly and prevents streaks, which can look a bit amateurish.
One common mistake is overbaking the cakes. They should feel just set and springy, not dry. If you’re unsure, pull one out a minute early and let it cool—it firms up as it cools.
For the blue cream filling, don’t rush the creaming step. Beat the cream cheese and butter until silky before adding powdered sugar to avoid lumps. Also, using gel food coloring instead of liquid prevents the filling from becoming too soft.
If you want a cleaner look, chill the filling slightly before spreading. It’s easier to manage and holds shape better when you sandwich the cakes.
To save time, you can bake the whoopie pies ahead and freeze them unfilled. When ready, thaw and fill just before serving for fresh texture.
Variations & Adaptations
- Flavor Variations: Swap cocoa powder with carob powder for a milder chocolate flavor. Add a teaspoon of espresso powder to deepen the red velvet taste.
- Filling Twists: Try swapping the cream cheese filling for marshmallow fluff mixed with butter and powdered sugar for a lighter, fluffier texture.
- Dietary Adaptations: Use almond flour instead of all-purpose flour for a gluten-free alternative, and substitute dairy with vegan cream cheese and butter.
- Seasonal Variations: Mix fresh or frozen raspberries into the filling for a fruity pop, or add a pinch of cinnamon and nutmeg for warming fall vibes.
- Cooking Method: While baking is classic, you can experiment with air frying the whoopie pies at 320°F (160°C) for 8-10 minutes for a slightly crispier edge.
Personally, I once added a swirl of blueberry jam to the blue cream filling—it was a fun surprise that added a fruity burst and made the color even more vibrant.
Serving & Storage Suggestions
Serve these whoopie pies slightly chilled or at room temperature. The blue cream filling tastes best when it’s not too cold, so let them sit out for 10-15 minutes before serving.
They look fantastic stacked on a dessert platter or wrapped individually in parchment paper for parties or lunchboxes. Pair with a cup of coffee or a glass of cold milk for the ultimate indulgence.
Store leftovers in an airtight container in the refrigerator for up to 5 days. They can also be frozen for up to 3 months—just thaw in the fridge overnight and bring to room temp before eating.
Reheat gently in the microwave for 10-15 seconds if you want a warmer treat, but don’t overdo it or the filling might melt.
The flavors develop nicely after a day, with the cocoa and cream melding beautifully. Honestly, they taste almost better the next day—if you can resist eating them all at once.
Nutritional Information & Benefits
Each red velvet whoopie pie (with blue cream filling) contains approximately 280 calories, 14g fat, 35g carbohydrates, and 3g protein.
The cream cheese adds a dose of calcium and protein, while the cocoa powder provides antioxidants that are good for heart health. Using buttermilk instead of plain milk contributes beneficial probiotics and tangy flavor without extra fat.
This recipe is gluten-friendly by default but can be adapted for gluten-free diets by swapping flours. It’s vegetarian but not vegan unless you substitute dairy ingredients.
While these treats aren’t daily health food, they fit nicely into a balanced diet when enjoyed in moderation. Plus, that homemade touch means you control the ingredients, avoiding unnecessary preservatives.
Conclusion
These irresistible red velvet whoopie pies with blue cream filling bring together classic flavors with a fun, unexpected twist that makes baking and eating them a joy. The balance of moist, tender cake and silky, tangy filling is the kind of combo that sticks with you long after the last bite.
Feel free to customize the filling or cake flavors based on what you love or what you have on hand—this recipe is forgiving and perfect for experimenting. I’ve made them for casual get-togethers and fancy celebrations alike, and they never fail to impress.
Honestly, this recipe is my sweet secret weapon when I want to surprise friends or just treat myself to something special without fussing over complicated steps.
Give it a try, and I’d love to hear how you make it your own. Share your tweaks or questions in the comments below—I’m always up for swapping kitchen stories and tips.
FAQs
Can I make red velvet whoopie pies ahead of time?
Yes! You can bake the cakes a day in advance and store them in an airtight container. Assemble with the filling just before serving for optimal freshness.
What if I don’t have buttermilk?
No worries. Mix 1 tablespoon of white vinegar or lemon juice with 1 cup of milk, let it sit for 5 minutes, and use as a buttermilk substitute.
How do I prevent the blue cream filling from being too runny?
Use gel food coloring instead of liquid to avoid thinning the filling. If it’s still loose, chill it in the fridge for 30 minutes before spreading.
Can I freeze assembled whoopie pies?
It’s better to freeze the cakes separately and add the filling after thawing to keep the texture fresh. If freezing assembled pies, wrap tightly and thaw in the fridge overnight.
What’s a good way to get even-sized whoopie pies?
Use a cookie scoop or tablespoon to portion the batter evenly on the baking sheet. Matching pairs after baking also helps keep sizes consistent.
If you enjoyed the texture and flavor of these whoopie pies, you might appreciate the soft crumb and comforting flavors in my creamy cheesy taco pasta, or the cozy vibes from cozy stuffed pepper soup, both easy recipes that bring warmth and satisfaction to the table.
Pin This Recipe!
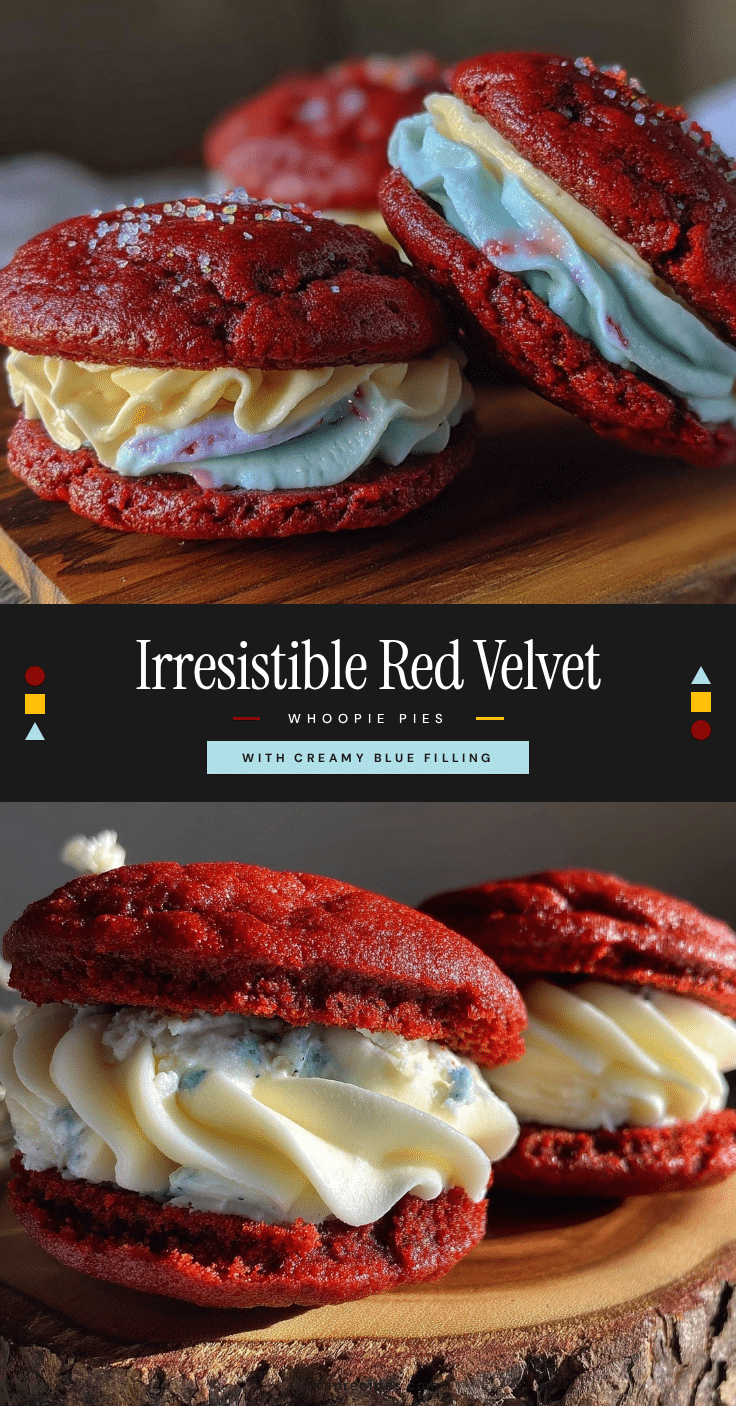
Red Velvet Whoopie Pies with Blue Cream Filling

These red velvet whoopie pies feature moist, tender cakes paired with a silky, tangy blue cream filling that adds a playful twist to a classic dessert. Perfect for celebrations or an indulgent snack, they come together quickly with simple pantry ingredients.
- Prep Time: 15 minutes
- Cook Time: 12 minutes
- Total Time: 27 minutes
- Yield: 12 servings 1x
- Category: Dessert
- Cuisine: American
Ingredients
- 2 cups (240g) all-purpose flour
- 2 tablespoons unsweetened cocoa powder
- 1 teaspoon baking soda
- ½ teaspoon salt
- ½ cup (113g) unsalted butter, softened
- 1 cup (200g) granulated sugar
- 2 large eggs, room temperature
- 1 cup (240ml) buttermilk, room temperature (or milk + 1 tbsp vinegar as substitute)
- 1 teaspoon vanilla extract
- 2 tablespoons red food coloring (gel preferred)
- 1 teaspoon white vinegar
- 8 ounces (225g) cream cheese, softened
- ½ cup (113g) unsalted butter, softened
- 3 cups (360g) powdered sugar, sifted
- 1 teaspoon vanilla extract
- 1 teaspoon blue gel food coloring
- 2 tablespoons (30ml) heavy cream (optional, to loosen filling)
Instructions
- Preheat the oven to 350°F (175°C). Line two baking sheets with parchment paper or silicone mats.
- In a medium bowl, sift together the flour, cocoa powder, baking soda, and salt. Set aside.
- In a large bowl, beat the softened butter and granulated sugar with an electric mixer on medium speed until light and fluffy, about 3 minutes.
- Beat in the eggs one at a time, mixing well after each addition.
- In a small bowl or measuring cup, whisk together the buttermilk, vanilla extract, white vinegar, and red food coloring until smooth.
- Gradually add the dry ingredients to the creamed butter mixture in three additions, alternating with the wet mixture in two additions, starting and ending with the dry. Mix on low speed just until combined.
- Using a tablespoon or cookie scoop, drop rounded spoonfuls (about 2 tablespoons or 30g each) onto the prepared baking sheets, spaced about 2 inches apart.
- Bake for 10-12 minutes until the cakes spring back lightly when touched and a toothpick inserted in the center comes out clean. Do not overbake.
- Let the cakes cool on the baking sheets for 5 minutes, then transfer to wire racks to cool completely.
- To prepare the blue cream filling, beat the cream cheese and softened butter together until smooth and creamy, about 2-3 minutes.
- Gradually add the sifted powdered sugar, mixing on low until incorporated, then increase speed and beat until fluffy.
- Stir in the vanilla extract and blue gel food coloring. If the filling is too thick, add heavy cream one teaspoon at a time until desired consistency is reached.
- Pair cakes of similar size. Spread about 2 tablespoons of blue cream filling on the flat side of one cake and sandwich with the other, pressing gently to spread the filling evenly to the edges.
- Optional: Refrigerate assembled whoopie pies for 30 minutes to firm up the filling before serving.
Notes
Use gel food coloring to avoid thinning the batter and filling. Do not overbake the cakes to keep them moist and tender. Chill the filling slightly before spreading for easier handling. You can bake the cakes ahead and freeze unfilled for convenience. For a dairy-free version, substitute cream cheese and butter with plant-based alternatives and use coconut milk instead of heavy cream.
Nutrition
- Serving Size: 1 whoopie pie
- Calories: 280
- Sugar: 25
- Sodium: 220
- Fat: 14
- Saturated Fat: 8
- Carbohydrates: 35
- Fiber: 1
- Protein: 3
Keywords: red velvet, whoopie pies, blue cream filling, easy dessert, homemade, celebration dessert, colorful dessert