There was this sudden knock on the door—my cousin, unannounced, standing there with that mischievous grin. No fancy dinner plans, no time to run to the store. All I had was a bag of graham crackers, a jar of marshmallow fluff, and some chocolate chips left from a forgotten baking spree. Honestly, it felt like a kitchen disaster waiting to happen.
But then, that’s when the idea of these Easy No-Bake S’mores Brownie Bars began to take shape. I mean, who needs an oven or hours of prep when you can whip up a dessert that tastes like a campfire classic, but faster and mess-free? The marshmallow fluff melted just right, the chocolate chips brought out the gooey richness, and the graham crackers added that signature crunch. It was almost like magic in a pan.
What surprised me most was how this recipe, born out of pure improvisation and a near-empty fridge, turned into a Labor Day favorite. Not just for me, but for every unexpected guest or last-minute get-together since. It’s the kind of treat that makes you pause, smile, and quietly appreciate how sometimes, the best recipes come from the most chaotic moments.
Why You’ll Love This Recipe
Honestly, Easy No-Bake S’mores Brownie Bars have become my go-to dessert for those lazy summer afternoons or last-minute holiday gatherings like Labor Day. Here’s why you’ll want to keep this recipe handy:
- Quick & Easy: From start to finish, this recipe takes under 20 minutes, perfect when you’re juggling a million things (or just craving something sweet immediately).
- Simple Ingredients: No need for a special grocery run—just pantry staples you probably already have on hand.
- Perfect for Labor Day and Beyond: These bars fit right in at barbecues, picnics, or casual hangouts, delivering that nostalgic s’mores flavor without the fire.
- Crowd-Pleaser: Kids, adults, picky eaters—they all seem to vanish these bars in minutes.
- Unbelievably Delicious: The texture is just right—crispy, gooey, and rich, like campfire s’mores but in a neat, handheld form.
What sets this recipe apart? It’s all about layering flavors and textures without baking. Instead of melted chocolate bars, I use chocolate chips melted gently with butter, combined with marshmallow fluff for that ultra-smooth, gooey top. The graham crackers provide crunch without getting soggy, and the whole thing comes together in a no-fuss pan that you can slice and serve straight away.
This recipe isn’t just a dessert; it’s a little moment of comfort that’s easy to make and even easier to enjoy. It’s the kind of treat that brings back memories of summer nights, minus the smoke and mess. For a fuss-free, irresistible dessert, these bars have your name on them.
What Ingredients You Will Need
This Easy No-Bake S’mores Brownie Bars recipe uses a handful of straightforward ingredients that play together perfectly to mimic that classic campfire treat without any baking. You’ll find these are mostly pantry staples, with a couple of easy-to-find items to make the magic happen.
- Graham Crackers – Crushed into crumbs for the base layer. I usually use plain, honey-flavored crackers for that subtle sweetness.
- Unsalted Butter – Melted to bind the graham cracker crust and add richness.
- Powdered Sugar – Adds just the right amount of sweetness to the crust.
- Chocolate Chips (semi-sweet or milk chocolate) – Melted with butter to create the fudgy brownie-like layer. I prefer Ghirardelli or Nestlé for smooth melting.
- Marshmallow Fluff – The secret to that gooey, sticky top layer. If you can’t find marshmallow fluff, mini marshmallows work too but require a little melting.
- Vanilla Extract – Just a splash to round out the flavors.
- Salt – A pinch to balance the sweetness.
Tip: Feel free to swap the graham crackers for gluten-free alternatives if needed, or use dairy-free butter to make this recipe vegan-friendly. In summer, fresh berries or even a sprinkle of sea salt on top can add a twist.
Equipment Needed
One of the best things about this recipe is it doesn’t require much special equipment. Here’s what you’ll want to gather before you start:
- 8×8-inch Baking Pan – Preferably glass or metal for even setting. If you don’t have an 8×8, a 9×9 will work, just expect a thinner layer.
- Mixing Bowls – One large bowl for the crust and another for melting chocolate.
- Saucepan or Microwave-Safe Bowl – To melt butter and chocolate chips. I often use the microwave for quick melting, but a double boiler works well too to avoid burning.
- Spoon or Rubber Spatula – For mixing and spreading layers evenly.
- Measuring Cups and Spoons – Accuracy helps, especially with powdered sugar and butter.
If you only have a loaf pan or a square cake pan, that’s fine—just line it well with parchment paper for easy removal. For budget-conscious cooks, using a microwave-safe glass bowl for melting chocolate is a lifesaver, and cleanup is a breeze.
Preparation Method
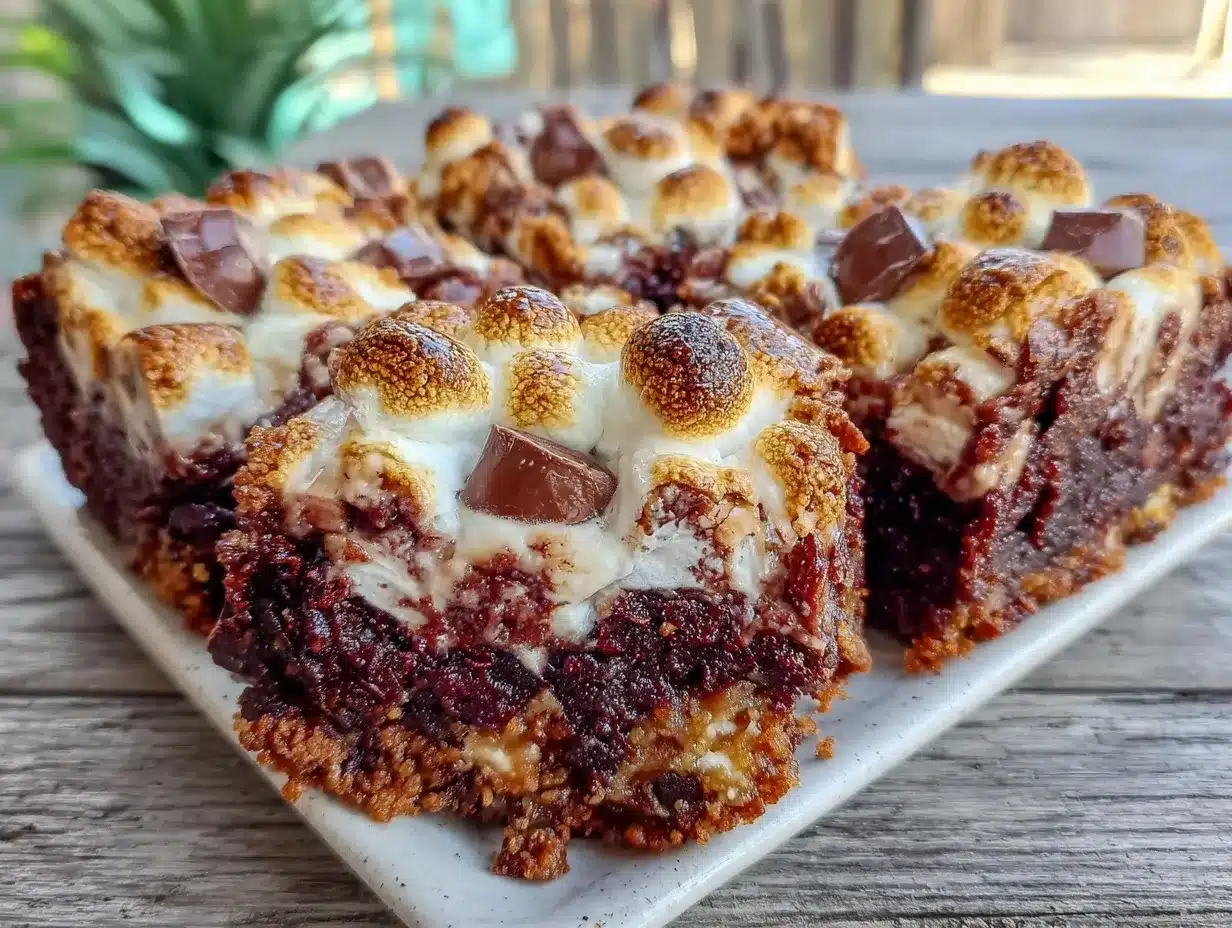
- Prepare the crust: Start by crushing 1 1/2 cups (about 150g) of graham crackers into fine crumbs. You can do this by placing them in a sealed plastic bag and crushing with a rolling pin or pulsing in a food processor.
- Melt the butter: In a microwave-safe bowl, melt 6 tablespoons (85g) of unsalted butter until fully liquid (about 30 seconds). Stir to cool slightly.
- Mix crust ingredients: Combine the graham cracker crumbs, melted butter, and 1/4 cup (30g) powdered sugar in a bowl. Stir until the mixture resembles wet sand.
- Press the crust: Transfer the mixture into an 8×8-inch pan lined with parchment paper. Press firmly and evenly into the bottom using the back of a spoon or your fingers. This forms the sturdy base for your bars. Chill in the refrigerator for 10 minutes to set.
- Melt the chocolate layer: In a clean microwave-safe bowl, combine 1 cup (175g) chocolate chips with 2 tablespoons (30g) butter. Microwave in 20-second intervals, stirring well between each, until smooth and glossy. Add 1/2 teaspoon vanilla extract and a pinch of salt, stirring to combine.
- Layer the chocolate: Pour the melted chocolate mixture evenly over the chilled crust. Use a spatula to spread smoothly. Return to the fridge for another 10 minutes so the chocolate firms up slightly but stays soft.
- Add marshmallow topping: Spread 1 cup (240g) marshmallow fluff evenly over the chocolate layer. If you want a toasted effect, you can briefly use a kitchen torch or pop under a broiler for a few seconds—watch closely!
- Final chill: Refrigerate the entire pan for at least 1 hour to let all layers set properly. This ensures clean slices and the perfect texture.
- Slice and serve: Once set, lift the bars out using the parchment paper edges. Cut into squares with a sharp knife, wiping it clean between cuts for neat edges.
Pro tip: If the marshmallow fluff feels too sticky to spread, microwave it for 10 seconds to soften. Also, don’t rush the chilling steps—patience here pays off with bars that hold their shape and texture perfectly.
Cooking Tips & Techniques
Making these Easy No-Bake S’mores Brownie Bars foolproof is all about a few small techniques I’ve picked up after some gooey mishaps and crumbly failures.
- Crushing the graham crackers: Aim for a fine, even crumb. Big chunks can make the crust fall apart. I usually blitz mine in a food processor for a few quick pulses.
- Melting chocolate and butter: Use short microwave bursts to avoid scorching. Stirring frequently helps create a smooth, glossy finish that’s essential for the fudgy layer.
- Pressing the crust firmly: This step is key so the base holds together. Don’t be shy about using some muscle or the bottom of a flat glass to compact the crumbs.
- Spreading marshmallow fluff: It can be sticky! Warming it slightly makes it easier to spread without tearing the chocolate layer underneath.
- Chilling times: Don’t skip or shorten them. The bars won’t slice cleanly and will be messy otherwise.
When I first tried this recipe, I ignored the chilling times and ended up with a sticky, unmanageable mess. Lesson learned: good things take a little time, especially when you’re skipping the oven.
Also, multitasking helps here—while the crust chills, I prep my next meal or clean up. It’s a great way to stay efficient, especially on busy holiday weekends like Labor Day.
Variations & Adaptations
These Easy No-Bake S’mores Brownie Bars are a great base to customize depending on your mood, dietary needs, or what’s in the pantry.
- Peanut Butter Twist: Swirl 1/4 cup creamy peanut butter into the melted chocolate before layering for a nutty surprise.
- Vegan Version: Use dairy-free butter, vegan chocolate chips, and a plant-based marshmallow fluff alternative. The texture is just as indulgent.
- Seasonal Fruit Addition: Add a layer of sliced fresh strawberries or raspberries between the chocolate and marshmallow layers for a fresh burst of flavor.
- Toasted Coconut: Sprinkle toasted shredded coconut over the marshmallow layer before chilling for extra crunch and flavor.
- Mini Marshmallow Swap: Instead of marshmallow fluff, melt 1 1/2 cups mini marshmallows with 2 tablespoons butter over low heat, then spread for a more traditional texture.
Last summer, I tried the peanut butter version at a picnic, and it was a hit—especially paired alongside some creamy cheesy taco pasta for a full spread of easy, crowd-friendly eats.
Serving & Storage Suggestions
These bars are best served chilled or at room temperature, which makes them perfect for outdoor Labor Day picnics or casual get-togethers without worrying about melting messes.
For serving, slice into neat squares and arrange on a platter. They pair wonderfully with a cold glass of milk, iced coffee, or even a summery lemonade to balance the sweetness.
Store leftover bars in an airtight container in the refrigerator for up to 5 days. They keep their texture surprisingly well, but if you like the marshmallow a bit softer, let them sit at room temperature for 10 minutes before eating.
For longer storage, these bars freeze beautifully. Wrap individual squares tightly in plastic wrap, then place in a freezer-safe bag. Thaw overnight in the fridge before serving.
Fun fact: the flavors meld even better after a day or two, so they’re great to make ahead for a party. Just don’t blame me if they disappear fast!
Nutritional Information & Benefits
Each bar contains a comforting mix of carbs and fats, mostly from graham crackers, butter, and chocolate. Here’s an approximate breakdown per serving (assuming 12 bars):
| Calories | 220-250 |
|---|---|
| Fat | 12g |
| Carbohydrates | 28g |
| Sugar | 18g |
| Protein | 2g |
This recipe isn’t exactly health food, but it does deliver a quick energy boost and satisfies sweet cravings without artificial additives. Using real butter and quality chocolate chips means you’re getting authentic flavor and a little bit of indulgence.
For those with dietary restrictions, swapping ingredients like gluten-free crackers or vegan butter makes these bars accessible to more people, so no one misses out on the fun.
Conclusion
Easy No-Bake S’mores Brownie Bars have earned a permanent spot in my Labor Day dessert lineup—and honestly, any time I need a sweet fix that doesn’t involve firing up the oven. They’re quick, forgiving, and hit every nostalgic note you want from a s’mores-inspired treat.
Feel free to tweak the recipe to suit your taste or dietary needs. Whether you add peanut butter, fresh fruit, or keep it classic, these bars always deliver that perfect balance of crispy, gooey, and chocolaty goodness.
Next time you’re looking for a no-fuss dessert after serving up something like easy crispy sheet pan honey mustard chicken, you’ll be glad these bars are just a few simple steps away. Go ahead, give it a try—you might find it’s your new favorite way to end a meal.
FAQs
Can I use regular marshmallows instead of marshmallow fluff?
Yes! Melt about 1 1/2 cups of mini marshmallows with 2 tablespoons of butter over low heat until smooth, then spread over the chocolate layer. It’s a bit more work but tastes just as great.
Do I have to refrigerate these bars?
Refrigeration helps the layers set firmly, making them easier to cut and eat. You can enjoy them at room temperature, but chilling for at least an hour is recommended.
Can this recipe be made gluten-free?
Absolutely. Just swap the graham crackers for a gluten-free alternative or crushed gluten-free cookies. The rest of the ingredients are naturally gluten-free.
How long do these bars last?
Stored in an airtight container in the fridge, they stay fresh for up to 5 days. You can also freeze them for up to 2 months—just thaw before serving.
Can I make these bars ahead of time for a party?
Yes, these bars are perfect for making a day or two ahead. The flavors actually deepen after sitting, making them even more delicious for your Labor Day celebrations or any gathering.
Pin This Recipe!
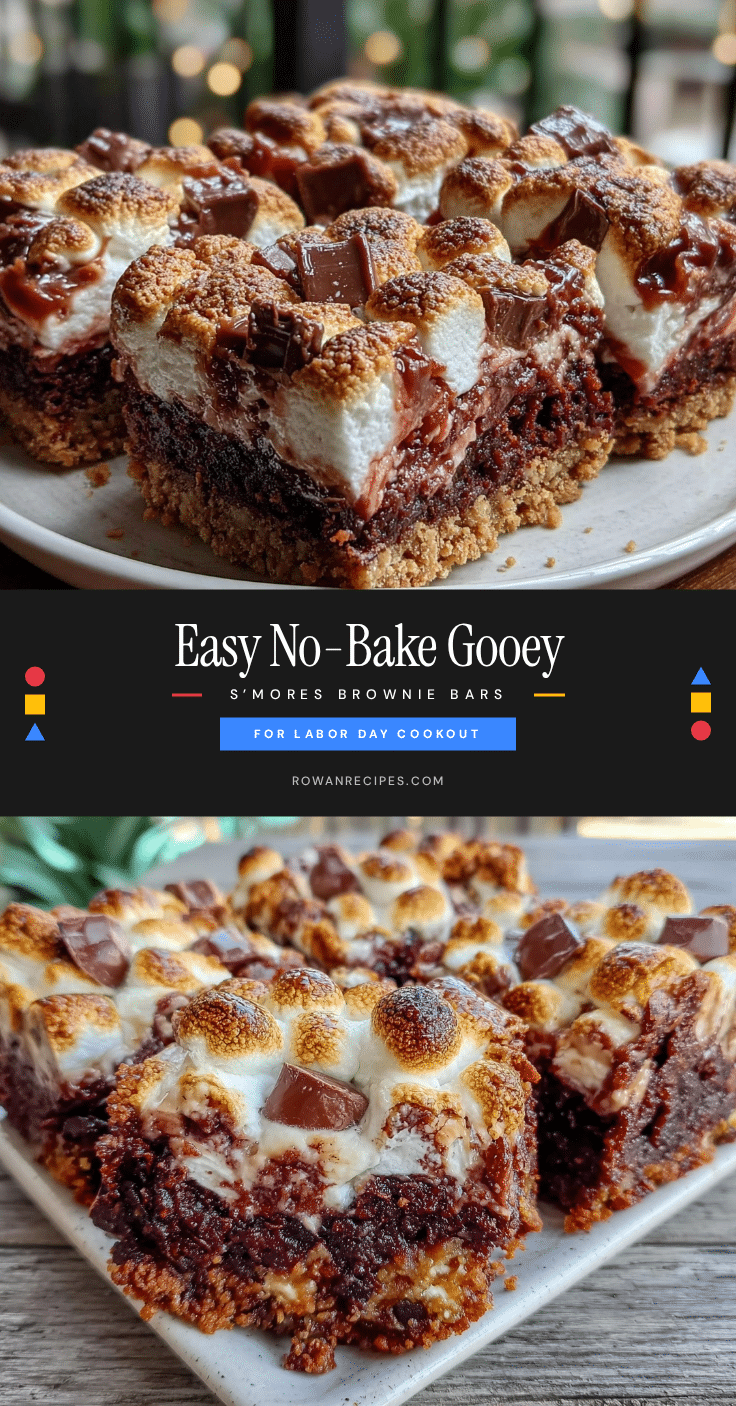
Easy No-Bake S’mores Brownie Bars Recipe Perfect for Labor Day Treats

A quick and easy no-bake dessert that mimics classic campfire s’mores with layers of graham cracker crust, melted chocolate, and marshmallow fluff. Perfect for Labor Day and last-minute gatherings.
- Prep Time: 10 minutes
- Cook Time: 0 minutes
- Total Time: 1 hour 10 minutes
- Yield: 12 servings 1x
- Category: Dessert
- Cuisine: American
Ingredients
- 1 1/2 cups graham crackers, crushed into fine crumbs
- 6 tablespoons unsalted butter, melted
- 1/4 cup powdered sugar
- 1 cup semi-sweet or milk chocolate chips
- 2 tablespoons butter (for melting with chocolate chips)
- 1 cup marshmallow fluff
- 1/2 teaspoon vanilla extract
- Pinch of salt
Instructions
- Crush 1 1/2 cups (about 150g) of graham crackers into fine crumbs using a rolling pin or food processor.
- Melt 6 tablespoons (85g) of unsalted butter in a microwave-safe bowl until fully liquid, about 30 seconds. Stir and cool slightly.
- Combine graham cracker crumbs, melted butter, and 1/4 cup (30g) powdered sugar in a bowl. Stir until mixture resembles wet sand.
- Press the crust mixture firmly and evenly into the bottom of an 8×8-inch pan lined with parchment paper. Chill in the refrigerator for 10 minutes to set.
- In a clean microwave-safe bowl, combine 1 cup (175g) chocolate chips with 2 tablespoons (30g) butter. Microwave in 20-second intervals, stirring between each, until smooth and glossy.
- Add 1/2 teaspoon vanilla extract and a pinch of salt to the melted chocolate mixture and stir to combine.
- Pour the melted chocolate evenly over the chilled crust and spread smoothly with a spatula. Return to the fridge for 10 minutes to firm up slightly.
- Spread 1 cup (240g) marshmallow fluff evenly over the chocolate layer. Optionally, toast with a kitchen torch or under a broiler for a few seconds.
- Refrigerate the entire pan for at least 1 hour to let all layers set properly.
- Lift bars out using parchment paper edges and cut into squares with a sharp knife, wiping clean between cuts.
Notes
If marshmallow fluff is too sticky to spread, microwave for 10 seconds to soften. Do not skip chilling steps to ensure bars hold their shape. For vegan or gluten-free versions, substitute dairy-free butter, vegan chocolate chips, plant-based marshmallow fluff, and gluten-free crackers as needed. Optional to toast marshmallow topping with a kitchen torch or broiler briefly.
Nutrition
- Serving Size: 1 bar (1/12th of rec
- Calories: 235
- Sugar: 18
- Sodium: 90
- Fat: 12
- Saturated Fat: 7
- Carbohydrates: 28
- Fiber: 1
- Protein: 2
Keywords: no-bake, s’mores, brownie bars, easy dessert, Labor Day treats, chocolate, marshmallow, graham crackers


