“Wait, you’re telling me this bubbly, tangy magic is just flour and water?” That was my reaction the first time I watched my sourdough starter come to life. Honestly, I thought it was some kind of kitchen sorcery or a complicated science experiment. But no—just simple ingredients, left to do their thing over a few days. I stumbled into this whole sourdough journey on an exhausted evening when I’d run out of store-bought bread and felt too drained to buy more. The idea of making bread from scratch seemed way too ambitious, but feeding a starter? That I could manage.
It started with a glass jar, some flour I had on hand, and a few swirls of water. I half-expected to fail, or worse, forget about it and end up with a kitchen mess. Instead, by day three, I was greeted with the most delightful, bubbly, slightly sour smell wafting from the counter. That little jar became my nightly ritual, a quiet moment amid life’s chaos. And soon enough, that starter was the foundation for the softest, tangiest homemade bread I’d ever tasted—all without fancy ingredients or complicated steps.
This easy beginner sourdough starter guide isn’t just about creating a bubbly jar of flour and water. It’s about discovering that homemade bread is within reach, even if you’re not a natural baker. No intimidating techniques, no weird additives—just patience, simple steps, and a touch of kitchen curiosity. If you’ve ever thought sourdough was for “experts only,” this guide will quietly prove otherwise. You might even find yourself making bread multiple times a week (trust me, it happens), turning your kitchen into a cozy bakery spot where fresh bread is always just a few days away.
So, if you’ve got a bit of flour, some filtered water, and a little space on your counter, you’re ready to start. And by the time you’re done, you’ll have a lively, bubbly starter that’s all set to make the perfect homemade bread that’s soft, tangy, and exactly what your home kitchen needed.
Why You’ll Love This Recipe
Creating your own sourdough starter might sound intimidating, but this recipe breaks it down in a way that’s approachable for anyone. After several weeks of testing and tweaking, I can tell you this guide hits the sweet spot between ease and success. Here’s why it stands out:
- Quick & Easy: The starter comes together in just 5 minutes of hands-on time each day, making it perfect for busy schedules and those who want to keep things simple.
- Simple Ingredients: No special flours or additives needed—just all-purpose flour and filtered water, both pantry staples you probably already have.
- Perfect for Beginners: Designed with newbies in mind, the instructions are clear, with troubleshooting tips to keep you confident through the process.
- Crowd-Pleaser: Homemade sourdough bread made with this starter always gets compliments from friends and family, even those who usually prefer store-bought.
- Unbelievably Delicious: The natural fermentation process gives bread a depth of flavor and texture that’s soft inside with a perfectly crisp crust—nothing like store-bought loaves.
What makes this sourdough starter different? I’ve included tips on using whole wheat flour at the start to help jumpstart the fermentation, along with the right water temperature and feeding schedule that worked best in my kitchen’s environment. These little tweaks have made a huge difference in getting a starter that’s active and reliable.
Honestly, this recipe isn’t just about bread—it’s about the joy of creating something simple yet rewarding. There’s a quiet satisfaction in watching your starter bubble and grow, knowing it’s the key to warm, fresh bread that fills your home with comfort. Whether you’re planning to impress guests or just want a reliable homemade loaf for your family dinners, this starter guide is where it all begins.
What Ingredients You Will Need
This sourdough starter recipe uses straightforward ingredients that work together to encourage natural fermentation and flavor development. Nothing fancy, just basics you can find in any kitchen.
- Unbleached All-Purpose Flour – 100 grams (3/4 cup plus 1 tablespoon). This is the main fuel for your starter. I recommend King Arthur or Bob’s Red Mill for consistent results.
- Whole Wheat Flour – 50 grams (1/3 cup). Using whole wheat at the beginning kickstarts fermentation because it’s packed with natural yeast and nutrients.
- Filtered Water – 150 milliliters (2/3 cup), lukewarm (around 75°F / 24°C). Chlorine-free water is important because tap water can inhibit the natural wild yeast.
Optional but helpful:
- Glass or Plastic Jar – A clean, wide-mouth jar to hold your starter (quart size recommended).
- Kitchen Scale – For accurate measurements (grams preferred for consistency).
- Loose Cover – A breathable cloth or paper towel secured with a rubber band to allow airflow but keep dust out.
If you want to customize, you can swap the all-purpose flour for bread flour for a higher protein content, which can help the starter rise faster. For gluten-free bakers, you can try a mix of brown rice flour and tapioca starch, but keep in mind the fermentation behavior changes. I haven’t personally tested that extensively, so your mileage may vary.
Equipment Needed
Starting a sourdough starter doesn’t require fancy tools, but having the right equipment can make the process smoother and less frustrating.
- Kitchen Scale: This is essential if you want consistent results. Measuring by weight is more accurate than by volume, especially with flour.
- Glass or Plastic Jar: A wide-mouth jar about 1-quart size works best. Glass is preferable because it doesn’t react with the acidic starter, but food-safe plastic is fine too.
- Mixing Spoon or Spatula: Use something non-reactive like wood, plastic, or silicone. Avoid metal as it can interfere with fermentation.
- Loose Cover: A breathable cloth, coffee filter, or paper towel secured with a rubber band allows airflow but keeps unwanted particles out.
- Thermometer (Optional): Handy for checking water temperature if you want to be precise.
On a budget? No worries. You can use a regular kitchen spoon and a clean glass jar from your pantry. Just remember, accuracy and cleanliness are key, so make sure to wash everything well before getting started.
Preparation Method
- Day 1: Mix the Starter (5 minutes)
In your jar, combine 50 grams (1/3 cup) whole wheat flour and 50 grams (about 1/3 cup) unbleached all-purpose flour. Add 100 milliliters (1/2 cup) lukewarm filtered water (approx. 75°F / 24°C). Stir thoroughly until no dry flour remains and the mixture resembles thick pancake batter. Scrape down the sides, loosely cover the jar, and leave it at room temperature (around 70-75°F / 21-24°C) for 24 hours. You should see very little activity at this stage—don’t worry, it’s normal. - Day 2: Feed the Starter (5 minutes)
Discard about half of the starter (roughly 100 grams) to keep the acidity balanced and make room for fresh food. To the remaining starter, add 50 grams (about 1/3 cup) unbleached all-purpose flour and 50 milliliters (1/4 cup) filtered lukewarm water. Stir well, cover loosely, and keep at room temperature for another 24 hours. You might start seeing tiny bubbles and smell a faint tang by now. - Days 3-5: Repeat Feeding Twice Daily (5 minutes each)
At this point, feed your starter every 12 hours. Each time, discard half, then add 50 grams all-purpose flour and 50 milliliters water. Stir, cover, and monitor for bubbles and rise. After a few days, the starter should double in size within 6-8 hours of feeding and smell pleasantly tangy, like ripe apples or yogurt. If your kitchen is cool, try placing the jar in a warm spot like near a heater or on top of the fridge. - Day 6: Test Your Starter (5 minutes)
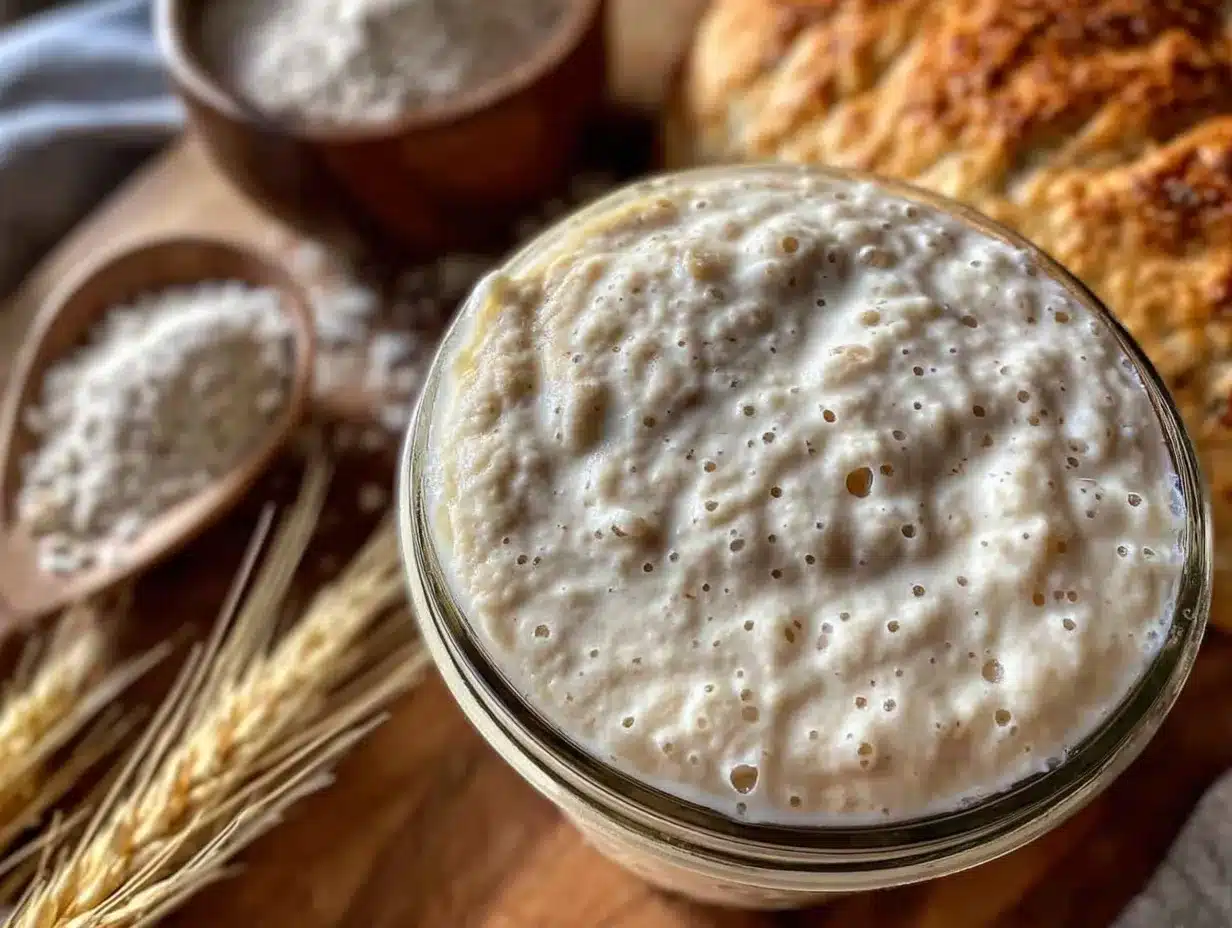
To check if your starter is ready, perform the “float test”: drop a teaspoon of starter into a glass of room-temperature water. If it floats, it’s airy and active—time to bake! If it sinks, continue feeding twice daily until it passes the test. - Maintenance: When not baking daily, store the starter in the fridge and feed once a week. Before baking, bring it back to room temperature and feed a couple of times to reactivate.
Common hiccup: If your starter develops a grayish liquid on top (“hooch”), that means it’s hungry. Pour it off, feed the starter, and it’ll bounce back. If you see pink or orange streaks, discard and start over as that signals contamination.
Personally, I found that using a kitchen scale and consistent water temperature made the biggest difference in success. Also, don’t rush the process; patience is key. This whole starter journey is as much about learning your kitchen’s rhythm as it is about the recipe itself.
Cooking Tips & Techniques
Here are some tips to keep your sourdough starter thriving and your homemade bread turning out great every time:
- Use room temperature ingredients: Water that’s too cold slows fermentation; too hot can kill the yeast. Aim for about 75°F (24°C).
- Feed consistently: Twice daily feedings in the early days build a strong starter. Set reminders if you need to—it’s worth it.
- Keep it clean: Always use clean utensils and jars to avoid unwanted bacteria or mold.
- Watch for bubbles and rise: These are signs your starter is healthy. If it’s sluggish, try warmer spots or whole wheat flour to boost activity.
- Don’t skip discards: Removing half the starter before feeding prevents over-acidification and encourages growth.
- Be patient: Sometimes starters take longer depending on your environment. Resist the urge to overfeed or add yeast—it’s all natural.
- Note your kitchen’s quirks: Humidity, temperature, and flour brand all affect your starter. Keep a small journal for adjustments.
Personally, I learned the hard way that skipping the discards led to a sluggish, sour starter that struggled to rise. Also, switching to a glass jar instead of plastic stopped some weird smells I’d get. If your starter smells off or shows discoloration, it’s better to start fresh than risk bad bread.
Variations & Adaptations
This sourdough starter recipe is flexible and can be adapted to suit different preferences and dietary needs.
- Gluten-Free Starter: Substitute all-purpose flour with brown rice flour or sorghum flour, but expect a different texture and slower fermentation.
- Whole Grain Boost: Use 100% whole wheat or rye flour for a more robust, tangy starter. Rye especially boosts fermentation speed.
- Hydration Adjustments: Some bakers prefer a stiffer starter (less water) for different bread textures. Start with equal parts water and flour, then adjust to your liking once you’re comfortable.
- Feeding Frequency: If your kitchen is cool, feed every 24 hours instead of twice daily until activity picks up.
- Personal Twist: I once added a teaspoon of pineapple juice on day one instead of water—it lowered the pH and helped jumpstart fermentation faster. Not necessary, but a neat trick if you’re in a hurry.
Serving & Storage Suggestions
Your sourdough starter is a living culture, so treating it with care will keep it healthy for years. Once active, it can be used to make all sorts of delicious breads, from crusty boules to soft sandwich loaves.
- Serving: The starter itself isn’t eaten, but it’s the secret behind your bread’s flavor and texture. Use it fresh after feeding for best rise.
- Storage: When you’re not baking daily, store your starter in the fridge with a loose lid to prevent pressure buildup. Feed once a week by discarding half and adding fresh flour and water.
- Reactivation: Before baking, take the starter out of the fridge, let it warm to room temperature, and feed it once or twice over 12-24 hours until bubbly and active.
- Flavor development: The longer you ferment your dough with this starter, the deeper and tangier the flavor. Experiment with fermentation times for your perfect loaf.
Many times I’ve baked bread in the morning using a starter fed the night before. The aroma filling the kitchen while it bakes is just unbeatable. If you enjoy hearty meals, this starter pairs beautifully with my tender slow cooker French dip sandwiches, where fresh bread makes all the difference.
Nutritional Information & Benefits
While sourdough starter itself is just flour and water, the bread made from it offers some nutritional perks:
- Lower Glycemic Index: The fermentation process breaks down starches, which can help moderate blood sugar spikes.
- Better Digestion: Natural fermentation may improve digestibility and nutrient absorption.
- Fewer Preservatives: Homemade sourdough bread contains no artificial additives or preservatives common in store-bought bread.
- Allergens: Contains gluten unless using gluten-free flours; always check your flour choice if sensitive.
From a personal wellness perspective, making your own bread with this starter feels grounding and rewarding—plus it removes the mystery of what’s inside your loaf, giving you control over ingredients and freshness.
Conclusion
This easy beginner sourdough starter guide opens the door to homemade bread that’s both delicious and deeply satisfying. It’s not some mystical process reserved for seasoned bakers, but a simple, natural way to create something nourishing with just flour, water, and a little patience. I love how this starter has become a quiet companion in my kitchen, ready to help me whip up fresh bread that everyone loves.
Feel free to adjust the flour types or feeding schedule to fit your kitchen’s rhythm and your taste buds. And if you’re looking for more easy, comforting meals to pair with your homemade bread, recipes like the easy crispy sheet pan honey mustard chicken fit right in.
Whatever your baking journey looks like, this sourdough starter will be a reliable foundation. Take your time, enjoy the process, and soon enough, you’ll be sharing warm, crusty loaves that bring smiles and a little extra comfort to your table.
FAQs
How long does it take to make a sourdough starter?
Typically, it takes about 5 to 7 days of regular feedings to develop an active, bubbly starter ready for baking.
Can I use tap water to make my starter?
It’s best to use filtered or bottled water because chlorine in tap water can slow or inhibit yeast growth.
What does it mean if my starter develops a liquid on top?
This liquid, called “hooch,” indicates your starter is hungry. Pour it off and feed the starter to revive it.
How do I know when my starter is ready to bake with?
When it doubles in size within 6 to 8 hours after feeding and passes the float test (a spoonful floats in water), it’s ready.
Can I keep my starter in the fridge?
Yes! Store your starter in the fridge with a loose lid and feed it about once a week to keep it healthy.
Pin This Recipe!
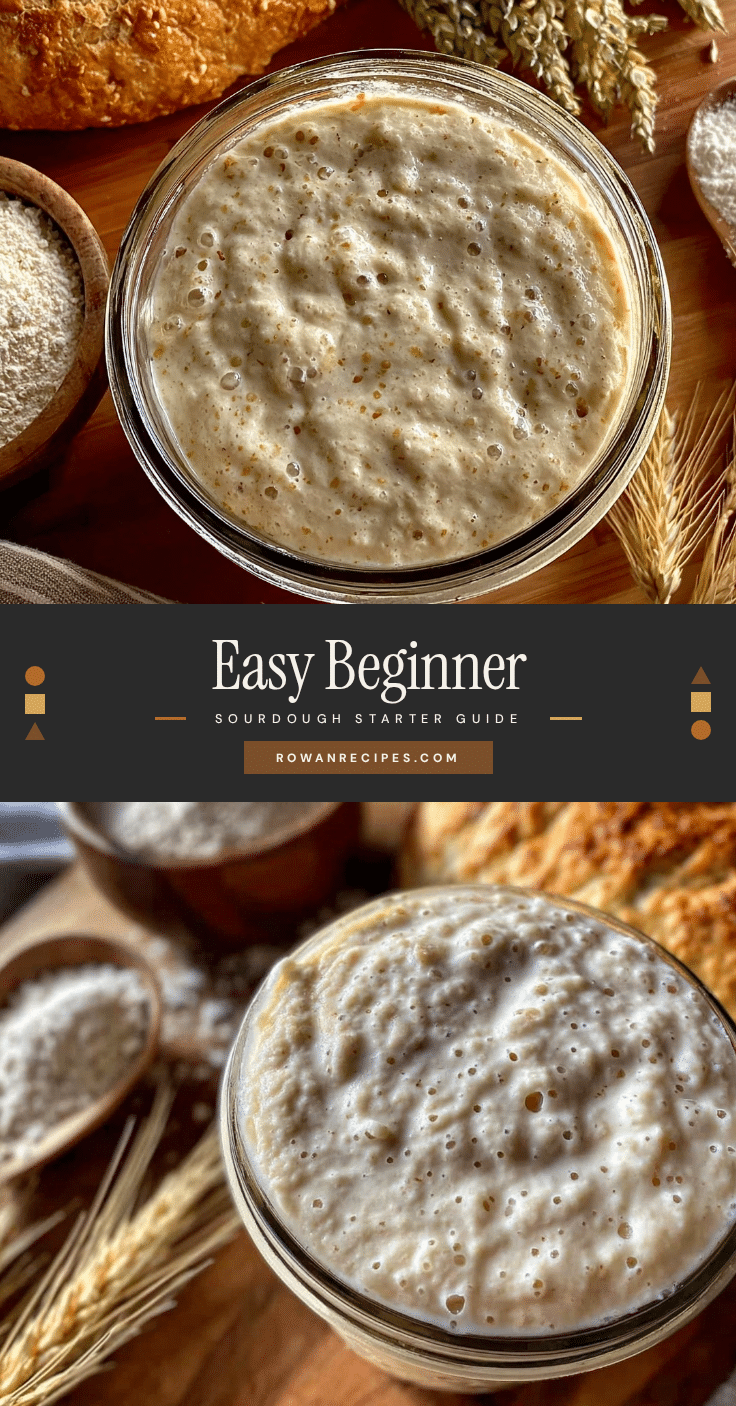
Easy Beginner Sourdough Starter Guide for Perfect Homemade Bread
This easy beginner sourdough starter guide helps you create a lively, bubbly starter with just flour and water, perfect for making soft, tangy homemade bread. Designed for beginners, it requires simple ingredients and minimal hands-on time.
- Prep Time: 5 minutes per feeding
- Cook Time: 0 minutes
- Total Time: 5 to 7 days (with daily feedings)
- Yield: 1 quart of active sourdough starter 1x
- Category: Bread Starter
- Cuisine: American
Ingredients
- 100 grams (3/4 cup plus 1 tablespoon) unbleached all-purpose flour
- 50 grams (1/3 cup) whole wheat flour
- 150 milliliters (2/3 cup) filtered lukewarm water (around 75°F / 24°C)
Instructions
- Day 1: Mix 50 grams whole wheat flour and 50 grams unbleached all-purpose flour in a clean jar. Add 100 milliliters lukewarm filtered water and stir until no dry flour remains. Loosely cover and leave at room temperature (70-75°F) for 24 hours.
- Day 2: Discard about half the starter (100 grams). Add 50 grams unbleached all-purpose flour and 50 milliliters lukewarm filtered water to the remaining starter. Stir well, cover loosely, and keep at room temperature for 24 hours.
- Days 3-5: Feed the starter twice daily every 12 hours. Each feeding, discard half the starter, then add 50 grams all-purpose flour and 50 milliliters water. Stir, cover, and monitor for bubbles and rise.
- Day 6: Perform the float test by dropping a teaspoon of starter into room-temperature water. If it floats, the starter is active and ready to bake. If it sinks, continue feeding twice daily until it floats.
- Maintenance: Store starter in the fridge when not baking daily and feed once a week. Before baking, bring to room temperature and feed once or twice to reactivate.
Notes
Use filtered or bottled water to avoid chlorine which inhibits yeast. Maintain water temperature around 75°F (24°C) for best fermentation. Discard half the starter before each feeding to keep acidity balanced. If gray liquid (hooch) appears, pour off and feed. If pink or orange streaks appear, discard starter and start over. Patience and consistency are key.
Nutrition
- Serving Size: Not applicable (star
- Calories: 150
- Fat: 0.5
- Saturated Fat: 0.1
- Carbohydrates: 30
- Fiber: 1
- Protein: 5
Keywords: sourdough starter, homemade bread, beginner sourdough, natural fermentation, bread starter recipe, easy sourdough, baking starter