“Are you sure this is going to work?” my partner asked, eyebrows raised as I nervously spooned the deep red batter into the ramekins. Honestly, I wasn’t 100% convinced myself—lava cakes always seemed like a tricky dessert, more of a fancy restaurant thing than a quick, cozy treat at home. But that night, craving something special but not wanting to slave away in the kitchen, I decided to try a red velvet twist on the classic molten chocolate cake. It felt a little indulgent, a little daring, and totally worth the experiment.
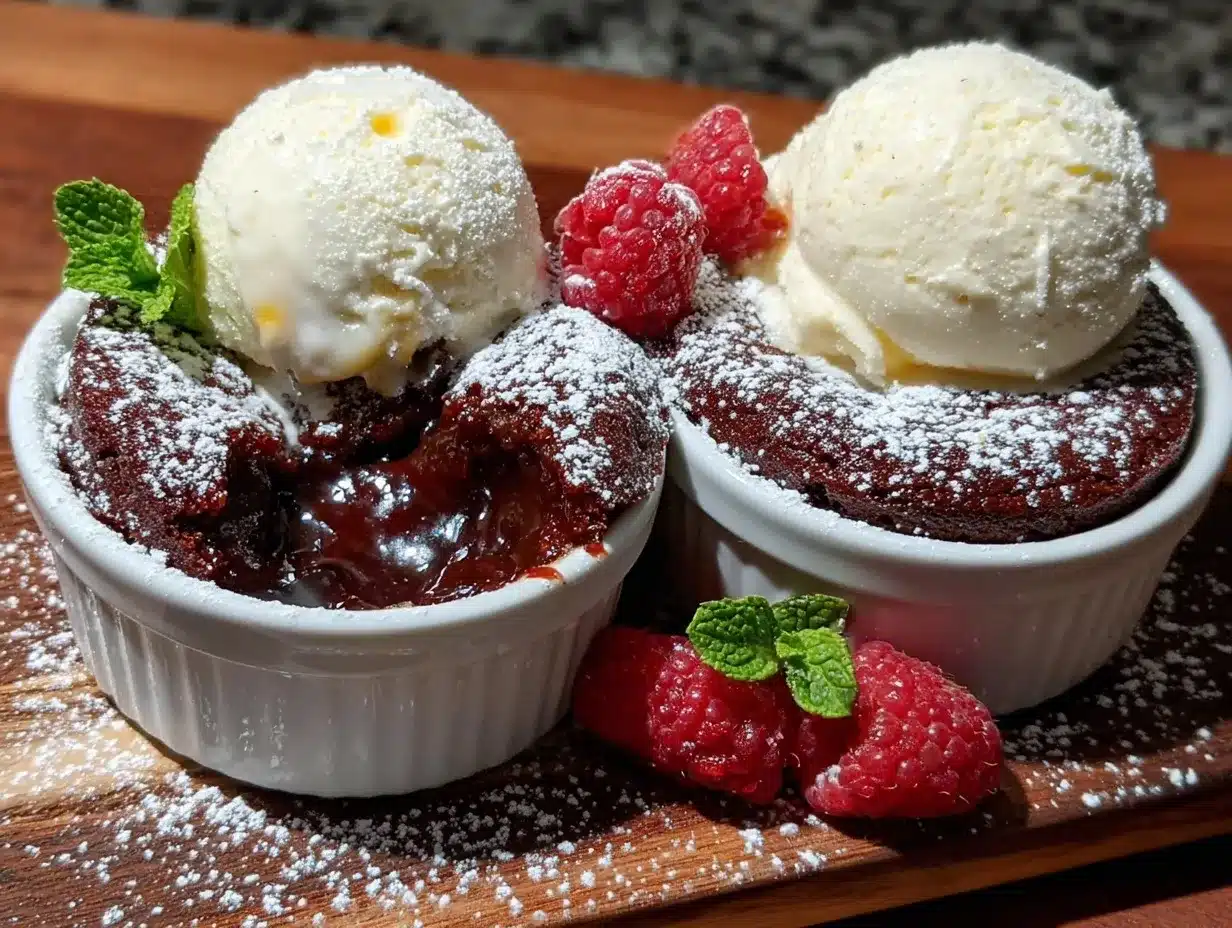
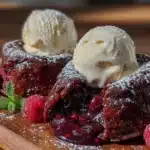
The moment those cakes came out of the oven, with their edges firm but the centers still gooey, I knew we had stumbled on something magical. The aroma of cocoa and vanilla filled the kitchen, and paired with a scoop of creamy vanilla ice cream melting slowly on top? Pure bliss. I made this decadent red velvet lava cake for two more times that week—because, well, why not?
What stuck with me wasn’t just the rich, velvety texture or the dramatic molten center, but how this little dessert turned an ordinary evening into a cozy, cherished memory. It’s simple enough for a weeknight treat, yet feels special enough to share with someone you care about. No fancy ingredients, no fuss—just that moment when you break through the cake’s surface and the lava flows out, warm and luscious.
That little dessert, paired with vanilla ice cream, quickly became my go-to when I needed a comforting reset or a sweet celebration in a snap. It’s funny how such a small thing can hold so much warmth and joy in a bite.
Why You’ll Love This Recipe
This decadent red velvet lava cake for two is one of those rare desserts that manages to be both impressively indulgent and surprisingly easy. I’ve tested this recipe multiple times, tweaking it to get that perfect molten center without the stress. Here’s why it’s become a favorite:
- Quick & Easy: You can have this dessert ready in under 30 minutes, making it perfect for busy nights or spontaneous sweet cravings.
- Simple Ingredients: No need for fancy, hard-to-find items — most are pantry staples like cocoa powder, cream cheese, and basic baking essentials.
- Perfect for Intimate Occasions: Whether it’s a date night, anniversary, or just a quiet evening, this recipe serves exactly two, so there’s no leftover temptation.
- Crowd-Pleaser: The combination of red velvet’s subtle cocoa flavor and the molten center always earns rave reviews, even from those who don’t usually go for chocolate desserts.
- Unbelievably Delicious: The texture is dreamy—moist cake on the outside, warm, gooey lava inside, balanced perfectly with a scoop of vanilla ice cream melting on top.
What sets this recipe apart is the little trick I found for that ultra-smooth, creamy lava center—using a mix of cream cheese and melted chocolate. It adds depth and a velvety feel that’s hard to beat. Plus, the red velvet flavor isn’t overpowering but just right, giving you the classic charm with a molten surprise.
If you’ve ever felt hesitant about making lava cakes at home, this recipe will change your mind. It’s straightforward, forgiving, and honestly, kind of addictive once you get the hang of it. The fact that it’s portioned for two makes it feel like a little celebration every time.
What Ingredients You Will Need
This decadent red velvet lava cake recipe uses straightforward ingredients that work together to create a rich, silky dessert with a gooey center. Most of these you probably have in your pantry or fridge already, making it super convenient for a last-minute treat.
- For the Cake Batter:
- All-purpose flour – 1/4 cup (30g)
- Cocoa powder, unsweetened – 2 tbsp (10g)
- Granulated sugar – 1/2 cup (100g)
- Unsalted butter, melted – 4 tbsp (60g) (I prefer Kerrygold for richness)
- Large egg – 1 (room temperature)
- Buttermilk – 2 tbsp (30ml) (adds tenderness; you can substitute with milk + 1 tsp vinegar)
- Vanilla extract – 1 tsp (pure vanilla gives the best aroma)
- Red food coloring – 1 tbsp (or adjust to your preferred shade)
- Salt – a pinch (balances sweetness)
- Baking powder – 1/4 tsp (helps the cake rise just enough)
- For the Lava Center:
- Cream cheese – 2 oz (60g), softened (use full-fat for best melting)
- Semi-sweet chocolate chips – 2 tbsp (30g) (I like Ghirardelli for smooth melt)
- Powdered sugar – 1 tbsp (optional, for slight sweetness)
- To Serve:
- Vanilla ice cream – 2 scoops (homemade or store-bought, your favorite brand)
These ingredients come together to make a dessert that’s rich and creamy without being overly sweet. If you want a dairy-free version, swap the butter and cream cheese for plant-based alternatives, and choose a dairy-free ice cream. For a gluten-free twist, almond flour can be used instead of all-purpose flour, though texture will be a bit different.
Equipment Needed
- Two ramekins or small oven-safe bowls (6 oz/180 ml size recommended for perfect portions)
- Mixing bowls – one for the batter, one for the lava center mix
- Whisk or electric mixer – helps blend ingredients smoothly
- Spoons or spatula – for folding and spreading batter
- Oven – preheated to 425°F (220°C)
If you don’t have ramekins, small oven-safe coffee mugs work as a substitute, just watch the baking time closely. I’ve found that silicone ramekins can be a bit tricky for removal, so greasing well is key. For best results, lightly butter and dust the ramekins with cocoa powder to prevent sticking.
Cleaning is a breeze since it’s just a few bowls and ramekins. For tools, I prefer a good quality whisk like the OXO balloon whisk—it mixes batter evenly with less effort, which means fewer lumps in your cake.
Preparation Method
- Preheat your oven to 425°F (220°C). Butter two 6-ounce ramekins generously, then dust them inside with cocoa powder, tapping out the excess. This helps the cakes release easily after baking.
- Prepare the lava center: In a small bowl, mix 2 oz (60g) softened cream cheese, 2 tbsp (30g) semi-sweet chocolate chips, and 1 tbsp powdered sugar. Stir until smooth and creamy (a few small lumps are okay). Set aside in the fridge to keep firm while you prepare the batter.
- Make the cake batter: In a medium bowl, sift together 1/4 cup (30g) all-purpose flour, 2 tbsp (10g) cocoa powder, 1/4 tsp baking powder, and a pinch of salt. Set aside.
- In another bowl, whisk 1/2 cup (100g) granulated sugar with 4 tbsp (60g) melted unsalted butter until combined but slightly grainy. Add 1 large egg, 2 tbsp (30ml) buttermilk, 1 tsp vanilla extract, and 1 tbsp red food coloring, whisking thoroughly after each addition.
- Gently fold the dry ingredients into the wet mixture using a spatula until just combined. Be careful not to overmix; a few flour streaks are fine. The batter should be smooth and thick but pourable.
- Assemble the cakes: Divide half of the batter evenly between the two ramekins. Spoon about 1 tbsp of the cream cheese lava mixture into the center of each. Cover with the remaining batter, smoothing the tops with a spatula.
- Bake immediately for 12–14 minutes. The edges should look set and slightly puffed, but the center will still jiggle when you gently shake the ramekin. Don’t overbake or the lava center will firm up, losing that molten magic.
- Cool for 1-2 minutes before carefully running a knife around the edges to loosen. Invert onto serving plates or serve straight from ramekins (I love the cozy feel of eating right from the dish!).
- Serve warm with two generous scoops of vanilla ice cream on the side or on top, letting it melt into the lava as you dig in.
If you find your lava center isn’t molten enough, try slightly reducing the baking time next round, or check your oven temperature with an oven thermometer. Also, chilling the cream cheese filling helps it hold shape better while baking.
Cooking Tips & Techniques
Getting that perfect molten center can feel intimidating, but a few tricks make it much simpler:
- Use room temperature eggs and softened butter: This helps the batter emulsify better and bake evenly.
- Don’t overmix the batter: Overmixing develops gluten, making the cake dense instead of tender.
- Butter and cocoa powder the ramekins well: This prevents sticking and helps with the smooth release of cakes.
- Keep an eye on baking time: Lava cakes can go from perfect to overdone quickly. Start checking at 12 minutes.
- Chill the lava filling: A firmer cream cheese and chocolate center melts beautifully without disappearing into the batter.
- Let the cakes rest briefly before serving: This helps the structure set just enough to hold the molten center inside.
One mistake I made early on was baking them too long, ending with a cakey center—not what you want for a true lava cake. Also, sometimes I tried to skip the cocoa powder dusting in the ramekins, which led to frustrating sticking. Lesson learned: patience and preparation pay off.
If you’re multitasking, prepare the lava filling first and chill it while mixing the batter—that way, everything comes together smoothly.
Variations & Adaptations
This red velvet lava cake is versatile enough to adjust for different preferences and occasions:
- Flavor twists: Swap the semi-sweet chocolate in the lava filling for white chocolate or dark chocolate depending on your mood.
- Seasonal additions: Stir in a teaspoon of espresso powder to the batter for a mocha vibe, or sprinkle freeze-dried raspberries on top for a tart contrast.
- Dietary swaps: Use almond flour for gluten-free, and replace butter with coconut oil for dairy-free. Coconut or soy-based cream cheeses work well in the lava center.
- Cooking method: Tried a microwave version when in a rush—less gooey but still tasty. Baking is best for that authentic molten texture.
- Personal twist: Once, I added a pinch of cinnamon and cayenne to the lava filling for a warming, spicy surprise—unexpected but delicious!
Feel free to experiment with toppings, too. A drizzle of caramel or a sprinkle of toasted nuts adds an extra layer of texture and flavor.
Serving & Storage Suggestions
Serve this decadent red velvet lava cake warm, straight from the ramekin or inverted onto a plate. The contrast between the warm cake and cold vanilla ice cream is what really makes the experience special. For a pretty presentation, dust with powdered sugar or garnish with fresh berries.
This dessert pairs wonderfully with a rich cup of coffee or a glass of sparkling rosé for a fancy touch. It’s also a sweet finish to cozy meals like a creamy garlic butter Tuscan shrimp pasta or a comforting slow cooker French dip sandwich—both easy dishes that complement the indulgence of lava cake without competing for attention.
As for leftovers, I wouldn’t expect any, but if you do have some, refrigerate covered for up to 2 days. Reheat gently in the microwave for 20-30 seconds to soften the center again. The lava effect diminishes after cooling, but the cake remains delicious.
Nutritional Information & Benefits
Each serving of this decadent red velvet lava cake with vanilla ice cream contains approximately:
| Nutrient | Amount (per serving) |
|---|---|
| Calories | 400-450 kcal |
| Fat | 25g |
| Saturated Fat | 15g |
| Carbohydrates | 45g |
| Sugar | 30g |
| Protein | 5g |
The cream cheese adds a dose of calcium and protein, while cocoa powder offers antioxidants. Although this dessert is definitely a treat rather than an everyday health food, it’s made with real ingredients and no artificial fillers.
If you’re watching sugar or carbs, consider swapping regular sugar with a natural sweetener like erythritol or using a low-sugar ice cream. Gluten-free or dairy-free substitutions can make this dessert accessible to many dietary needs.
Conclusion
This decadent red velvet lava cake for two with vanilla ice cream is a little indulgence that feels like a warm hug in dessert form. It’s simple enough to whip up on a whim but special enough to make any night feel memorable. I love how this recipe balances rich flavor with an easy method, so you don’t end up stressed in the kitchen.
Try customizing it with your favorite chocolate or a sprinkle of spice, and see how that molten center brings a moment of joy. Whether it’s a quiet night in or a celebration for two, this recipe is a sweet way to share something delicious and comforting.
Feel free to leave a comment below sharing your twists or how it turned out for you—I always love hearing from fellow dessert lovers! If you enjoy easy, comforting recipes, you might appreciate the creamy garlic butter Tuscan shrimp pasta or the tender slow cooker French dip sandwiches for your next dinner idea.
Frequently Asked Questions
Can I make this lava cake without red food coloring?
Yes! The red food coloring is mainly for the classic red velvet look. You can skip it or use natural alternatives like beet juice for color, but the flavor and texture remain delicious regardless.
How do I know when the lava cake is done baking?
Look for edges that are set and slightly puffed, but the center should still jiggle gently when you shake the ramekin. Baking too long will firm up the lava center.
Can I prepare the batter ahead of time?
It’s best to bake immediately after assembling for the molten effect. However, you can prepare the lava filling and batter separately and refrigerate for a few hours before combining and baking.
Is there a dairy-free version of this recipe?
Absolutely! Substitute butter and cream cheese with plant-based alternatives, and choose a dairy-free vanilla ice cream. The texture might vary slightly, but it’s still delicious.
What’s a good substitute if I don’t have buttermilk?
Mix 2 tbsp of milk with 1 tsp of white vinegar or lemon juice, let it sit for 5 minutes, and use as a buttermilk substitute for tender, moist cake.
Pin This Recipe!
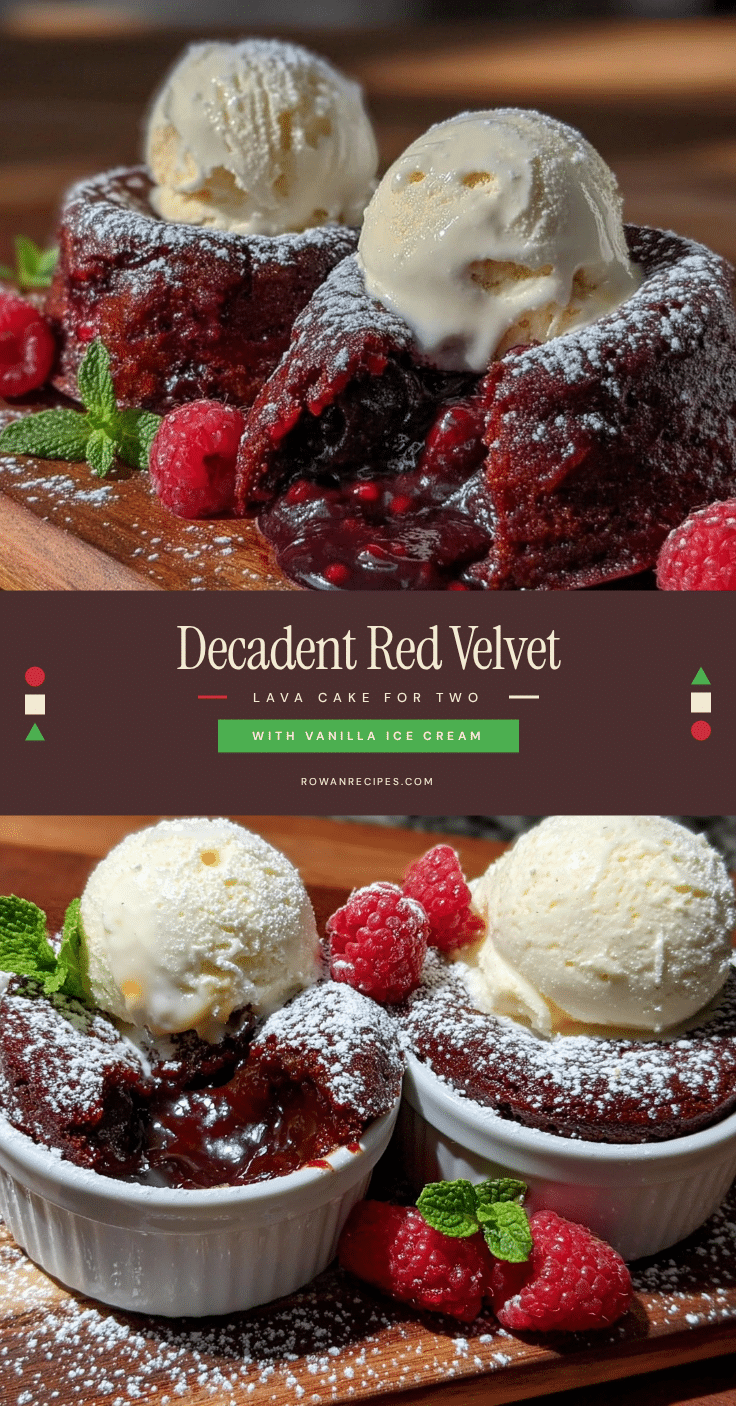
Decadent Red Velvet Lava Cake Recipe for Two
A rich and indulgent red velvet lava cake with a molten cream cheese and chocolate center, perfect for an intimate dessert for two. Easy to make with simple pantry ingredients and ready in under 30 minutes.
- Prep Time: 10 minutes
- Cook Time: 14 minutes
- Total Time: 24 minutes
- Yield: 2 servings 1x
- Category: Dessert
- Cuisine: American
Ingredients
- 1/4 cup (30g) all-purpose flour
- 2 tbsp (10g) unsweetened cocoa powder
- 1/2 cup (100g) granulated sugar
- 4 tbsp (60g) unsalted butter, melted
- 1 large egg, room temperature
- 2 tbsp (30ml) buttermilk (or milk + 1 tsp vinegar as substitute)
- 1 tsp vanilla extract
- 1 tbsp red food coloring
- Pinch of salt
- 1/4 tsp baking powder
- 2 oz (60g) cream cheese, softened
- 2 tbsp (30g) semi-sweet chocolate chips
- 1 tbsp powdered sugar (optional)
- 2 scoops vanilla ice cream
Instructions
- Preheat oven to 425°F (220°C). Butter two 6-ounce ramekins generously and dust with cocoa powder, tapping out excess.
- Prepare the lava center by mixing softened cream cheese, semi-sweet chocolate chips, and powdered sugar until smooth. Chill in fridge.
- Sift together flour, cocoa powder, baking powder, and salt in a medium bowl.
- In another bowl, whisk granulated sugar and melted butter until combined but slightly grainy. Add egg, buttermilk, vanilla extract, and red food coloring, whisking after each addition.
- Gently fold dry ingredients into wet mixture until just combined; batter should be smooth and thick but pourable.
- Divide half the batter evenly between ramekins. Spoon about 1 tbsp of lava mixture into center of each. Cover with remaining batter and smooth tops.
- Bake for 12–14 minutes until edges are set and slightly puffed but center still jiggles gently.
- Cool for 1-2 minutes, then loosen edges with a knife and invert onto plates or serve directly from ramekins.
- Serve warm with vanilla ice cream on top or on the side.
Notes
Use room temperature eggs and softened butter for better emulsification. Do not overmix batter to keep cake tender. Butter and dust ramekins with cocoa powder to prevent sticking. Chill lava filling before assembling. Watch baking time closely to maintain molten center. For dairy-free, substitute butter and cream cheese with plant-based alternatives and use dairy-free ice cream. For gluten-free, use almond flour instead of all-purpose flour.
Nutrition
- Serving Size: 1 lava cake with 1 s
- Calories: 425
- Sugar: 30
- Fat: 25
- Saturated Fat: 15
- Carbohydrates: 45
- Protein: 5
Keywords: red velvet lava cake, molten cake, dessert for two, easy lava cake, red velvet dessert, chocolate lava cake, quick dessert