Introduction
“You’ve got to try this,” my coworker said, sliding a warm, cheesy ball across the break room table. I eyed it suspiciously. Cheese bread? From Brazil? Honestly, I was skeptical. But that first bite—oh man—was a revelation. Crispy on the outside, pillowy and gooey inside, with this subtle tang from the cheese that lingered just right. It wasn’t just bread; it was pure comfort wrapped in a golden crust. I’d never made pão de queijo before, mostly because tapioca flour seemed intimidating. But after that day, I couldn’t stop thinking about how simple and satisfying this little cheese bread was.
So I set out to crack the code: a crispy easy Brazilian pão de queijo cheese bread recipe that anyone could whip up without fuss or specialty ingredients. After a few rounds of tweaking—the perfect cheese ratio, the right oven temp, and just enough tapioca flour to get that chewy bite—I landed on this version. Now, I make it whenever I want something cozy and impressively tasty but without the legwork. It’s my go-to when I need a little pick-me-up or want to bring a bit of Brazil to the kitchen. Plus, it pairs beautifully with just about anything, from a morning coffee to a relaxed dinner bite.
Honestly, this recipe stuck with me because it’s reliable, quick, and downright addictive. It’s one of those foods that feels like a hug but requires zero mastering. And if you’re wondering how to get that perfect crisp without drying it out, well, I’ve got you covered. Let’s get into the magic of Brazilian pão de queijo.
Why You’ll Love This Recipe
This crispy easy Brazilian pão de queijo cheese bread recipe isn’t just another cheesy bread. It’s the one that stayed on repeat in my kitchen for weeks, and here’s why it might just become your new favorite too:
- Quick & Easy: Ready in under 30 minutes, making it perfect for those last-minute cravings or busy weekday snacks.
- Simple Ingredients: No hunting for fancy items—you’ll find tapioca flour and cheese in most grocery stores, plus basic staples you probably have.
- Perfect for Any Occasion: Whether it’s a cozy breakfast, a party appetizer, or a comforting side for dinner, it fits right in.
- Crowd-Pleaser: Kids, adults, picky eaters—they all ask for seconds, no exaggeration.
- Unbelievably Delicious: That crispy shell with a chewy, cheesy center feels like pure magic in every bite.
What sets this recipe apart? It’s all about balance. I’ve dialed in the cheese blend to include tangy Parmesan and smooth mozzarella, giving it a flavor depth that’s richer than your average cheese bread. Plus, the method keeps the dough light and airy without being gummy, which can be a real challenge with tapioca flour. And the crispiness? Achieved with a simple high-heat bake that locks in texture without drying the inside out.
This isn’t just comfort food reworked; it’s the kind of recipe that feels authentic, approachable, and totally worth making your own. And if you’re someone who loves a cheesy snack but doesn’t want to mess around with complicated doughs, you’ll appreciate how straightforward this one is.
What Ingredients You Will Need
This recipe uses simple, wholesome ingredients that work together to create that iconic crispy exterior and chewy, cheesy inside. Most are pantry staples, and a couple might be new but are easy to find or substitute.
- Tapioca flour (also called tapioca starch) – This is the secret to that chewy, airy texture. I recommend Bob’s Red Mill for consistent results.
- Whole milk – Adds moisture and richness (can swap with unsweetened almond milk for dairy-free).
- Vegetable oil or melted butter – For tenderness and flavor; I usually go with neutral oil for a clean taste.
- Large eggs – Room temperature eggs help bind the dough and add structure.
- Grated Parmesan cheese – Provides sharp, salty depth. Freshly grated is best.
- Shredded mozzarella cheese – For gooey meltiness. Use low-moisture mozzarella for less water content.
- Salt – Enhances all the flavors.
Optional:
- Garlic powder or finely minced garlic – For a subtle savory kick.
- Chopped fresh herbs like parsley or oregano – Adds a bright note if you want a twist.
For substitutions, if you want gluten-free (which it naturally is), tapioca flour is your go-to. I don’t recommend swapping it out for regular flour here, or you’ll lose the signature chew and crisp. Mozzarella can be swapped with other melty cheeses, but the flavor balance might shift.
Equipment Needed

- Mixing bowls: A medium and a large one for combining wet and dry ingredients separately makes the process smoother.
- Whisk or wooden spoon: For mixing the batter evenly.
- Baking sheet: Standard rimmed sheet works perfectly. I like using a heavy-duty one for even heat distribution.
- Parchment paper or silicone baking mat: Prevents sticking and helps with cleanup.
- Measuring cups and spoons: Accuracy is key, especially with tapioca flour and cheese.
- Grater: For fresh Parmesan and mozzarella shredding.
Optional but helpful:
- Stand mixer with paddle attachment: Speeds up mixing if you’re making a large batch.
- Cookie scoop: For uniform pão de queijo size and quick portioning.
You don’t need any fancy gadgets for this recipe. I’ve made it many times with just basic kitchen tools, and it always turns out great. Just keep your baking sheet sturdy and your oven hot!
Preparation Method
- Preheat the oven to 400°F (200°C). Line your baking sheet with parchment paper or a silicone mat to prevent sticking. This step ensures your cheese breads get that perfect crisp crust.
- Heat the milk and oil. In a small saucepan, combine 1 cup (240 ml) whole milk and 1/3 cup (80 ml) vegetable oil. Bring to a gentle simmer over medium heat—don’t boil, just until you see steam rising and tiny bubbles forming around the edges.
- Add tapioca flour. Immediately remove the saucepan from heat and stir in 2 cups (260 g) tapioca flour all at once. It’ll look like a sticky, thick dough; keep stirring until it pulls away from the sides and forms a ball. Let it cool for about 10 minutes—hot dough will cook the eggs prematurely.
- Incorporate eggs. Crack in 2 large eggs, one at a time, mixing vigorously after each addition until the dough is smooth and elastic. It’ll feel sticky but should hold together well.
- Mix in cheese and salt. Stir in 1 cup (100 g) shredded mozzarella, 1 cup (100 g) grated Parmesan, and 1 teaspoon salt. The dough will be thick and cheesy. If you want, add 1/2 teaspoon garlic powder or fresh herbs here for extra flavor.
- Shape the dough. Using a cookie scoop or your hands, form the dough into 1 1/2-inch (4 cm) balls and place them spaced about 2 inches (5 cm) apart on the baking sheet. Don’t flatten them—keep them round to get that lovely puff.
- Bake for 20-25 minutes. Bake in the preheated oven until the tops are golden and crisp, and the bottoms are lightly browned. You’ll know they’re done when they sound hollow if tapped gently. The smell of toasted cheese will fill your kitchen.
- Cool slightly and serve. Let them rest for 5 minutes—hot cheese bubbles can be sneaky! These are best enjoyed warm, fresh from the oven.
Pro tip: If your dough feels too sticky to handle, wet your hands slightly to shape the balls without mess. And if you want extra crispiness, you can pop them under the broiler for 1-2 minutes at the end, but watch closely to avoid burning.
Cooking Tips & Techniques
Getting that crispy easy Brazilian pão de queijo cheese bread just right is mostly about balancing moisture and heat. Here’s what I’ve learned over time:
- Don’t skip the tapioca flour: This starch is what makes the bread chewy and gluten-free. Traditional wheat flour just won’t give you the same texture.
- Heat the milk-oil mixture properly: A hot liquid cooks the starch and helps form the dough’s structure. But don’t boil it or you’ll dry it out.
- Cool the dough before adding eggs: Hot dough can scramble the eggs, causing lumps. Waiting about 10 minutes keeps the batter smooth.
- Use fresh cheese: Pre-shredded cheese often contains anti-caking agents that prevent smooth melting. Freshly grated cheeses make a big difference.
- Don’t overcrowd the baking sheet: Give each ball room to expand, or they’ll stick together and won’t crisp properly.
- Watch your oven temperature: Too low and they won’t crisp; too high and they’ll burn outside while staying doughy inside.
- Experiment with cheese blends: Try mixing mozzarella with sharper cheeses like Asiago or aged cheddar for new flavor profiles.
I once baked a batch too close together and ended up with a gooey mess instead of crisp bites—lesson learned the hard way! Also, multitasking helps here; while they bake, you can prep your next dish or set the table, making this perfect for busy evenings.
Variations & Adaptations
One of the best things about Brazilian pão de queijo is how adaptable it is. Here are some ways to switch it up to suit your taste or dietary needs:
- Herb-infused: Add fresh rosemary, thyme, or oregano to the dough for an aromatic twist.
- Spicy kick: Mix in finely diced jalapeños or a pinch of cayenne pepper for a subtle heat that complements the cheese.
- Gluten-free & dairy-free: Use almond milk or coconut milk instead of dairy and swap mozzarella for a plant-based cheese alternative. Tapioca flour keeps it naturally gluten-free.
- Mini bites: Make smaller balls for party appetizers or snacks. They bake faster—about 15 minutes—and are perfect for dipping.
- Stuffed pão de queijo: Wrap small cubes of ham or cooked bacon inside before baking for a meaty surprise.
I once tried a version with chopped sun-dried tomatoes and fresh basil—it brought a Mediterranean vibe that went surprisingly well with the cheesy base. The key is not to overload the dough with extras so it still puffs up nicely.
Serving & Storage Suggestions
These crispy easy Brazilian pão de queijo cheese breads are best served warm, straight from the oven when the cheese is melty and the crust is crunchy. Pair them with a strong coffee or a tangy chimichurri sauce for dipping if you want to get fancy.
They’re fantastic alongside a fresh salad or a rich stew, and make a lovely side for dishes like the crispy sheet pan Italian sausage and peppers or the creamy garlic butter Tuscan shrimp pasta.
To store, keep leftover pão de queijo in an airtight container at room temperature for up to 2 days. For longer storage, freeze them in a single layer on a baking sheet, then transfer to a freezer bag for up to 3 months.
When reheating, pop them in a 350°F (175°C) oven for 5-10 minutes to revive the crispiness. Avoid microwaving unless you’re in a pinch—it tends to make them chewy rather than crispy.
Flavors develop subtly as they cool, but nothing beats fresh from the oven. Just a little patience, and you’ll get that perfect texture back every time.
Nutritional Information & Benefits
Each serving of these Brazilian cheese breads clocks in at roughly 90-110 calories, depending on size and cheese amounts. They’re naturally gluten-free thanks to tapioca flour, making them a fun alternative for those avoiding wheat.
The cheese provides a good dose of calcium and protein, while tapioca adds carbohydrate energy without gluten. Using a blend of whole milk and oil adds richness but also contributes fats, so portion control is handy if you’re watching intake.
For those with lactose sensitivity, using lactose-free cheese and milk alternatives can make this recipe accessible without losing much flavor or texture. And because they’re bite-sized, these make a satisfying snack that feels indulgent but is easy to moderate.
From my own experience, they’re a great way to enjoy a cheesy treat without the heaviness of traditional bread, especially paired with lighter dishes or fresh veggies.
Conclusion
If you’re after a crispy easy Brazilian pão de queijo cheese bread that’s as simple to make as it is delicious, this recipe delivers every time. It’s one of those rare dishes that feels special yet approachable, perfect whether you’re impressing guests or just craving a cozy snack.
Feel free to tweak the cheese blend or add your favorite herbs to make it truly your own. I love how this bread manages to bring a little joy and comfort without fussing over complex steps or ingredients.
Give it a try, and I’d love to hear how you customize it to your taste. And if you’re a fan of cheesy, crispy bites, you might enjoy the crispy mac and cheese cups or the creamy cheesy taco pasta for your next snack or dinner idea.
Happy baking, and may your kitchen always smell like fresh, melty cheese!
FAQs
What is pão de queijo?
Pão de queijo is a traditional Brazilian cheese bread made with tapioca flour and cheese, known for its crispy exterior and chewy, cheesy inside.
Can I make pão de queijo without tapioca flour?
Unfortunately, tapioca flour is essential for the unique texture. Substituting with other flours will change the chewiness and crispness.
What cheeses work best in this recipe?
A combination of Parmesan for sharpness and mozzarella for meltiness works best. You can experiment with other cheeses but keep a balance between flavor and moisture.
Can I freeze pão de queijo?
Yes! Freeze them on a baking sheet first, then transfer to a bag. Reheat in the oven to restore crispiness.
How do I reheat pão de queijo to keep it crispy?
Reheat in a preheated oven at 350°F (175°C) for 5-10 minutes. Avoid microwaving to keep the crust crispy.
Pin This Recipe!
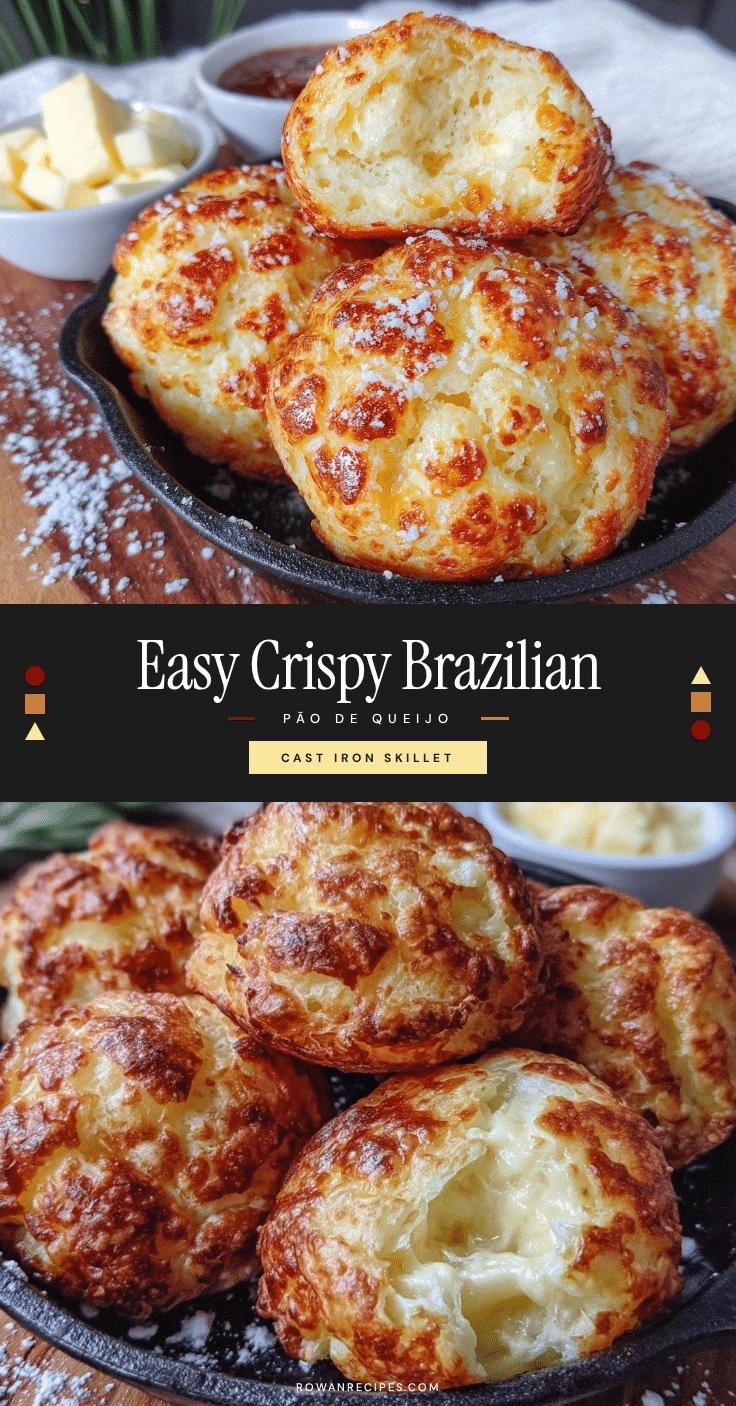
Crispy Easy Brazilian Pão de Queijo Cheese Bread

A quick and easy Brazilian cheese bread recipe with a crispy exterior and chewy, cheesy inside, perfect for any occasion and made with simple ingredients.
- Prep Time: 15 minutes
- Cook Time: 20-25 minutes
- Total Time: 35-40 minutes
- Yield: 20-24 pieces 1x
- Category: Snack / Appetizer
- Cuisine: Brazilian
Ingredients
- 2 cups (260 g) tapioca flour (tapioca starch)
- 1 cup (240 ml) whole milk
- 1/3 cup (80 ml) vegetable oil or melted butter
- 2 large eggs, room temperature
- 1 cup (100 g) shredded mozzarella cheese (low-moisture preferred)
- 1 cup (100 g) grated Parmesan cheese
- 1 teaspoon salt
- Optional: 1/2 teaspoon garlic powder or finely minced garlic
- Optional: chopped fresh herbs like parsley or oregano
Instructions
- Preheat the oven to 400°F (200°C). Line a baking sheet with parchment paper or a silicone baking mat.
- In a small saucepan, combine 1 cup whole milk and 1/3 cup vegetable oil. Heat over medium heat until gently simmering with steam and tiny bubbles around the edges, but do not boil.
- Remove the saucepan from heat and immediately stir in 2 cups tapioca flour all at once. Stir until the dough pulls away from the sides and forms a sticky, thick ball. Let cool for about 10 minutes.
- Add 2 large eggs one at a time, mixing vigorously after each addition until the dough is smooth and elastic.
- Stir in 1 cup shredded mozzarella, 1 cup grated Parmesan, and 1 teaspoon salt. Add optional garlic powder or fresh herbs if desired.
- Shape the dough into 1 1/2-inch balls using a cookie scoop or hands, spacing them about 2 inches apart on the baking sheet. Keep them round to allow puffing.
- Bake for 20-25 minutes until tops are golden and crisp and bottoms are lightly browned. They should sound hollow when tapped.
- Let cool for 5 minutes before serving. Serve warm for best flavor and texture.
Notes
Wet your hands slightly if dough is too sticky to shape. For extra crispiness, broil for 1-2 minutes at the end but watch closely to avoid burning. Use fresh grated cheese for best melting and flavor. Do not substitute tapioca flour with regular flour to maintain texture. Avoid overcrowding baking sheet to ensure crispness.
Nutrition
- Serving Size: 1 piece (approximate
- Calories: 90110
- Sugar: 1
- Sodium: 180
- Fat: 6
- Saturated Fat: 2.5
- Carbohydrates: 9
- Protein: 3
Keywords: pão de queijo, Brazilian cheese bread, tapioca flour, gluten-free bread, cheesy snack, easy bread recipe