I crushed the cookie crust three times before realizing I was using the wrong kind of Oreos for this Creamy No-Bake Oreo Cheesecake Delight. Honestly, I didn’t even like cheesecake much at first—too dense, too heavy, and all that baking felt like a chore. But then I stumbled on this no-bake version, and I swear, it changed the game. The first time I made it, the filling was too runny, and the crust barely held together. It was a mess, but somehow, that imperfect first try became my favorite version. I love that this cheesecake is rich and creamy without the fuss of an oven or a springform pan. The cool, velvety texture with chunks of Oreo scattered throughout is like a sweet little surprise in every bite.
What really won me over was how easy it is to whip up, even on a busy weeknight when I’m juggling dinner and life. The smell of crushed Oreos and cream cheese mixing together instantly lifts my mood, and the chill time gives me a little breather. I’m not even exaggerating when I say this recipe is the dessert equivalent of a cozy hug. It’s perfect for when you want something indulgent but don’t want to spend hours slaving away in the kitchen.
After a few tweaks, this cheesecake recipe stuck around in my regular rotation, especially for parties—because who doesn’t want a dessert that looks fancy but takes almost no effort? Plus, it’s one of those dishes that always gets people talking and asking for seconds, which is a quiet little victory in itself.
Why You’ll Love This Recipe
This Creamy No-Bake Oreo Cheesecake Delight isn’t just another cheesecake recipe; it’s the one that’s saved me from many dessert disasters. I’ve tested it over and over, refining the balance between creaminess and crunch, and trust me, it’s worth every minute.
- Quick & Easy: Comes together in about 20 minutes, with chilling time aside—great for last-minute gatherings or guilt-free indulgence after a long day.
- Simple Ingredients: No need for fancy cheeses or rare items; the ingredients are pantry staples you probably already have.
- Perfect for Parties: This cheesecake makes a knockout centerpiece for celebrations, potlucks, or casual weekend treats.
- Crowd-Pleaser: Kids and adults alike always ask what’s in it, and it’s fun watching everyone’s faces light up when they taste it.
- Unbelievably Delicious: The creamy texture combined with Oreo chunks creates a perfect balance of smooth and crunchy, sweet and slightly bitter.
What sets this recipe apart is the way the cream cheese is whipped with a touch of vanilla and sugar to get that pillowy texture, without any baking anxiety. I’ve swapped in store-bought whipped topping for an easier fix, but making your own whipped cream adds a lovely homemade touch. Also, instead of a plain Oreo crust, I toss in a bit of melted butter and a pinch of salt to make it just right. Honestly, it’s comfort food redefined—simple, decadent, and totally satisfying.
What Ingredients You Will Need
This recipe uses straightforward, wholesome ingredients to deliver bold flavor and a luscious texture without any fuss. Most of these items are pantry staples, and you can find them at any grocery store without hunting down specialty brands.
- For the crust:
- 24 Oreo cookies (regular or double-stuffed) – crushed finely (I prefer Nabisco for that classic Oreo crunch)
- 6 tablespoons unsalted butter, melted (adds richness and helps the crust hold)
- Pinch of salt (balances sweetness)
- For the cheesecake filling:
- 16 ounces (450 g) cream cheese, softened (full fat for best creaminess)
- 1 cup (240 ml) heavy whipping cream, chilled (or use store-bought whipped topping for convenience)
- ¾ cup (90 g) powdered sugar (adjust to taste)
- 1 teaspoon pure vanilla extract (for depth of flavor)
- 10 Oreo cookies, roughly chopped (for mixing into the filling)
Substitution tips: If you want a lighter version, swap heavy cream for Greek yogurt, but expect a slight tang. For a gluten-free crust, use gluten-free chocolate sandwich cookies. I’ve also tried dairy-free cream cheese and coconut cream for a vegan spin, and it worked surprisingly well, though texture changes a bit.
Equipment Needed
- 9-inch (23 cm) springform pan or a pie dish (I use a springform for easier slicing, but a regular pie dish works fine too)
- Mixing bowls (one large for filling, one medium for crust mix)
- Electric hand mixer or stand mixer (helps whip the filling to the perfect fluffy consistency)
- Food processor or plastic bag with rolling pin (for crushing Oreos evenly)
- Rubber spatula (for folding in chopped Oreos gently)
- Measuring cups and spoons
For those without a food processor, placing Oreos in a sealed plastic bag and crushing with a rolling pin works just as well—just takes a bit more elbow grease. I once tried using a blender, but it pulverized the cookies too finely, making the crust less textured. Also, keeping the cream cheese at room temperature is key to avoid lumps, so a little patience upfront saves trouble later.
Preparation Method
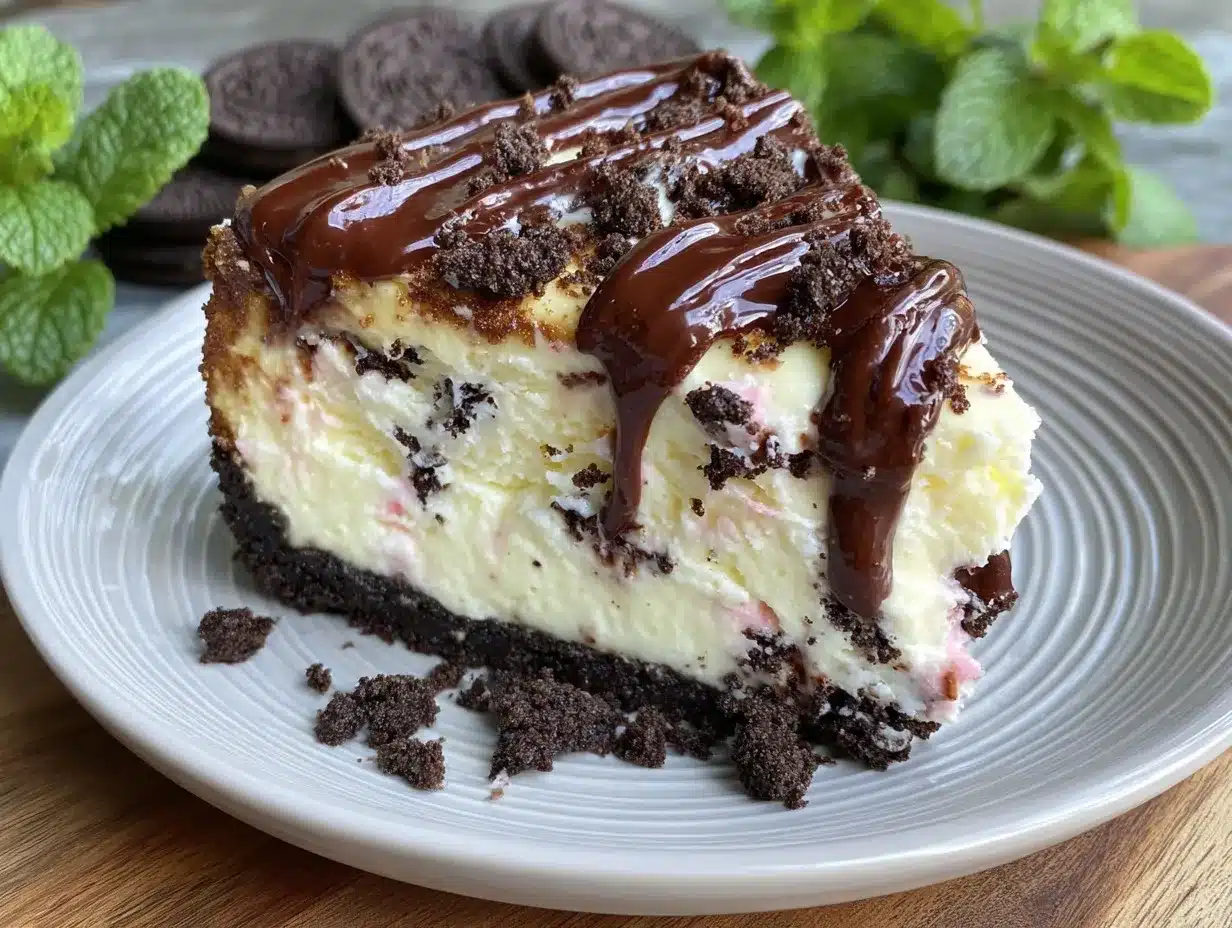
- Prepare the crust: Start by crushing 24 Oreo cookies into fine crumbs using a food processor or by hand in a sealed bag. Transfer crumbs to a bowl, add 6 tablespoons of melted unsalted butter and a pinch of salt. Mix well until the crumbs are evenly coated and hold together when pressed. Press this mixture firmly into the bottom of your 9-inch springform pan, creating an even layer. Chill in the fridge while you prepare the filling. (About 10 minutes)
- Make the cheesecake filling: In a large mixing bowl, beat 16 ounces of softened cream cheese with an electric mixer until smooth and creamy, about 2-3 minutes. Add ¾ cup powdered sugar and 1 teaspoon vanilla extract, continuing to mix until fully combined.
- Whip the cream: In a separate chilled bowl, whip 1 cup cold heavy whipping cream until stiff peaks form (approximately 3-4 minutes). If using store-bought whipped topping, fold it in gently in the next step.
- Combine filling and cream: Gently fold the whipped cream into the cream cheese mixture using a rubber spatula, taking care not to deflate the airiness. This step is crucial for that creamy, fluffy texture.
- Add Oreo chunks: Roughly chop 10 Oreos and fold them into the filling mixture, distributing them evenly but leaving some bigger chunks for texture.
- Assemble the cheesecake: Spoon the filling over the chilled crust in the springform pan. Smooth the top with a spatula. For a pretty finish, sprinkle a few extra Oreo crumbs or small pieces on top.
- Chill: Cover with plastic wrap and refrigerate for at least 4 hours, preferably overnight. This helps the cheesecake to set firmly and the flavors to meld.
- Serve: Once set, carefully remove the springform pan sides and slice with a sharp knife warmed under hot water for clean cuts.
If you notice the filling seems too soft before chilling, don’t panic—just give it more time in the fridge. Avoid stirring it too much after folding in the cream; otherwise, the texture can become dense. When pressing the crust, a flat-bottomed glass helps achieve an even layer without breaking the crust.
Cooking Tips & Techniques
Whipping the cream cheese and cream separately before combining is where the magic happens. It might be tempting to mix everything at once, but trust me, that fluffy texture depends on gentle folding. Using room temperature cream cheese is a must—cold cream cheese leads to lumps and uneven mixing.
Crushing the Oreos to the right size is another trick: too fine, and the crust feels like powder; too chunky, and it won’t hold together well. I’ve learned to pulse them a few times in the food processor to get a mix of textures. When folding in the chopped Oreos into the filling, do it slowly to keep the airiness intact.
Timing matters for chilling. While you can technically eat it after two hours, letting it set overnight gives the best sliceable texture. If you’re in a hurry, a quick chill in the freezer for 1-2 hours works, but keep an eye so it doesn’t freeze solid.
One mistake I made early on was using salted butter—turns out, unsalted butter balances the sweetness better, especially since Oreos already have salt. Also, I recommend using a springform pan because it makes removing the cheesecake so much easier, but if you only have a pie dish, it’s not a dealbreaker.
Variations & Adaptations
This cheesecake is pretty flexible, so feel free to tweak it based on your mood or dietary needs.
- Mint Oreo Cheesecake: Swap regular Oreos with Mint Oreos for a refreshing twist. Add a few drops of peppermint extract to the filling for extra zing.
- Peanut Butter Oreo: Mix in ¼ cup creamy peanut butter with the cream cheese before folding in the whipped cream. It’s an indulgent combo that’s surprisingly balanced.
- Vegan Adaptation: Use dairy-free cream cheese and coconut whipped cream, plus vegan Oreos (which most brands are). Chill longer to ensure proper setting.
- Chocolate Ganache Topping: For a fancier finish, drizzle melted dark chocolate ganache over the top just before serving.
- Seasonal Fruit Addition: During summer, top with fresh raspberries or strawberries for a pop of color and tartness that cuts through the richness.
Personally, I once made a batch with crushed pretzels in the crust for a salty crunch that was a hit at a family get-together. It’s fun to experiment and add your signature touch.
Serving & Storage Suggestions
Serve this cheesecake chilled, straight from the fridge, with a clean, sharp knife for neat slices. It pairs beautifully with a cup of rich coffee or a glass of cold milk—both bring out the creamy sweetness perfectly.
For parties, I recommend plating with a few extra Oreo crumbs or a dollop of whipped cream on the side for presentation. It’s also lovely alongside a fresh fruit salad or a light, refreshing sorbet.
Store leftovers covered tightly in the refrigerator for up to 3-4 days. The flavors actually deepen after a day or two, making it even better. If you need to freeze it, wrap the cheesecake tightly in plastic wrap and foil, then thaw overnight in the fridge before serving.
Reheating isn’t necessary since it’s best enjoyed cold, but you can let slices sit at room temperature for 10–15 minutes to soften slightly if preferred.
Nutritional Information & Benefits
One slice (based on 12 servings) of this Creamy No-Bake Oreo Cheesecake Delight contains approximately:
| Calories | 320 kcal |
|---|---|
| Fat | 24 g |
| Carbohydrates | 25 g |
| Protein | 4 g |
| Sugar | 18 g |
The cream cheese provides a good amount of calcium and protein, while the Oreos contribute to the indulgent flavor. While this dessert is a treat and best enjoyed in moderation, it’s free from artificial preservatives and uses real ingredients you can pronounce. For those watching gluten or dairy, options like gluten-free cookies or dairy-free substitutes make this recipe accessible with a few tweaks.
Conclusion
This Creamy No-Bake Oreo Cheesecake Delight is a dessert that’s stuck with me through kitchen mishaps and last-minute party saves. It’s simple enough for beginners, yet impressive enough to share with friends and family. You can easily customize it to suit your tastes, making it your go-to no-bake cheesecake recipe.
I love how it feels like a little celebration in every bite, without the stress of baking or complicated steps. If you try it, I’d be curious to hear how you make it your own—feel free to share your twists or tips in the comments. Here’s to more sweet moments made easy and delicious!
Frequently Asked Questions
- Can I make this cheesecake gluten-free?
Yes, just use gluten-free chocolate sandwich cookies for the crust and filling. Most gluten-free cookies work well as a substitute. - How long does the cheesecake need to chill?
At least 4 hours in the refrigerator, but overnight chilling is best for a firm, sliceable texture. - Can I prepare this dessert a day ahead?
Absolutely! In fact, it tastes better after sitting overnight as the flavors meld beautifully. - What can I use instead of heavy whipping cream?
You can use store-bought whipped topping or try whipped coconut cream for a dairy-free version. - How do I prevent the crust from getting soggy?
Make sure to press the crust firmly and chill it before adding the filling. Avoid letting the cheesecake sit out at room temperature for too long.
For a savory dinner that pairs nicely after a slice of this cheesecake, you might enjoy the easy crispy sheet pan honey mustard chicken or the creamy cheesy taco pasta. Both dishes are straightforward and comforting, just like this dessert!
Pin This Recipe!
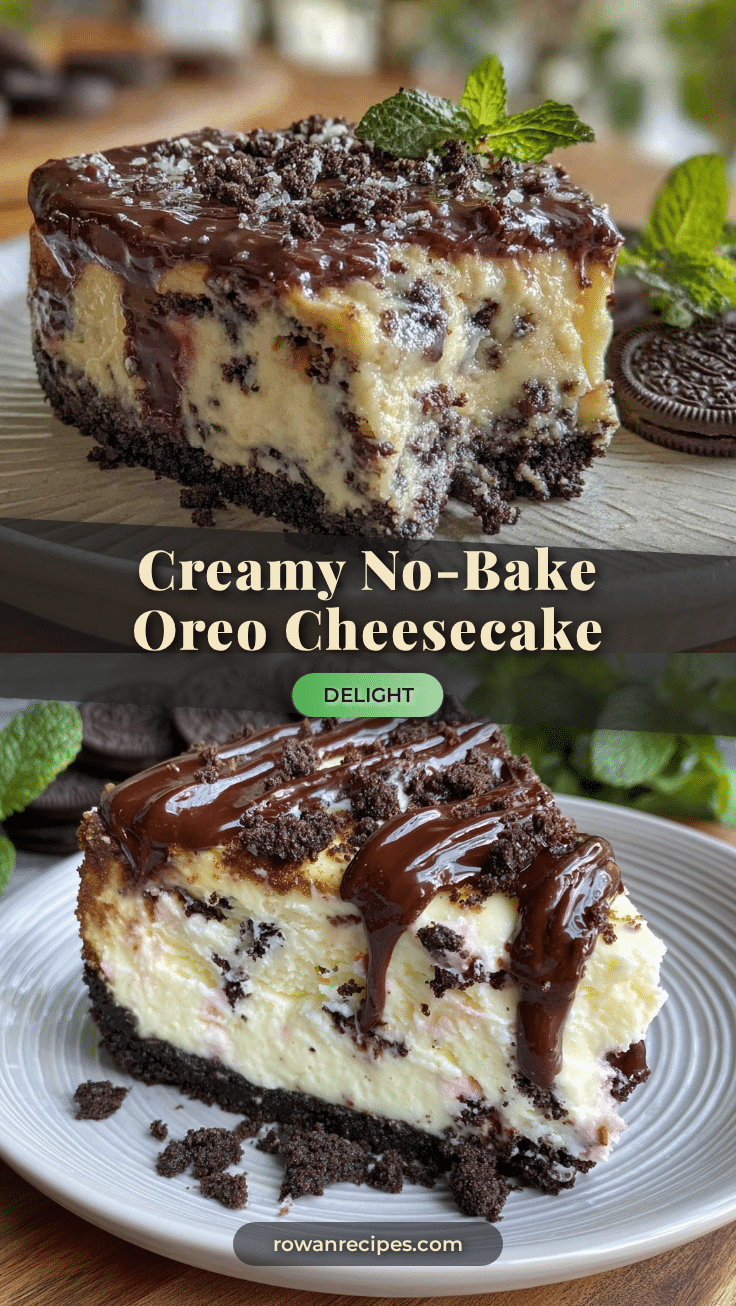
Creamy No-Bake Oreo Cheesecake Delight

A rich and creamy no-bake Oreo cheesecake that’s easy to make and perfect for parties, featuring a crunchy Oreo crust and fluffy filling with Oreo chunks.
- Prep Time: 20 minutes
- Cook Time: 0 minutes
- Total Time: 4 hours 20 minutes
- Yield: 12 servings 1x
- Category: Dessert
- Cuisine: American
Ingredients
- 24 Oreo cookies (regular or double-stuffed) – crushed finely
- 6 tablespoons unsalted butter, melted
- Pinch of salt
- 16 ounces (450 g) cream cheese, softened
- 1 cup (240 ml) heavy whipping cream, chilled (or store-bought whipped topping)
- ¾ cup (90 g) powdered sugar
- 1 teaspoon pure vanilla extract
- 10 Oreo cookies, roughly chopped
Instructions
- Prepare the crust: Crush 24 Oreo cookies into fine crumbs using a food processor or sealed bag. Transfer crumbs to a bowl, add 6 tablespoons melted unsalted butter and a pinch of salt. Mix well until crumbs hold together when pressed. Press mixture firmly into bottom of 9-inch springform pan to create an even layer. Chill in fridge for about 10 minutes.
- Make the cheesecake filling: Beat 16 ounces softened cream cheese with an electric mixer until smooth and creamy, about 2-3 minutes. Add ¾ cup powdered sugar and 1 teaspoon vanilla extract, mix until combined.
- Whip the cream: In a separate chilled bowl, whip 1 cup cold heavy whipping cream until stiff peaks form, about 3-4 minutes. If using store-bought whipped topping, fold it in gently in the next step.
- Combine filling and cream: Gently fold whipped cream into cream cheese mixture using a rubber spatula, taking care not to deflate the airiness.
- Add Oreo chunks: Fold in roughly chopped 10 Oreos evenly into the filling, leaving some bigger chunks for texture.
- Assemble the cheesecake: Spoon filling over chilled crust in springform pan and smooth the top. Optionally sprinkle extra Oreo crumbs on top.
- Chill: Cover with plastic wrap and refrigerate for at least 4 hours, preferably overnight to set firmly and meld flavors.
- Serve: Remove springform pan sides carefully and slice with a sharp knife warmed under hot water for clean cuts.
Notes
Use room temperature cream cheese to avoid lumps. Crush Oreos to a mix of fine and chunky for best crust texture. Chill cheesecake overnight for best sliceable texture. Press crust firmly to avoid sogginess. For gluten-free, use gluten-free cookies. For dairy-free/vegan, use dairy-free cream cheese and coconut whipped cream with vegan Oreos.
Nutrition
- Serving Size: 1 slice (1/12th of c
- Calories: 320
- Sugar: 18
- Fat: 24
- Carbohydrates: 25
- Protein: 4
Keywords: no-bake cheesecake, Oreo cheesecake, easy dessert, party dessert, creamy cheesecake, no bake, Oreo crust