I did not trust peanut butter cookies with a chocolate kiss on top to be anything more than a gimmick. Honestly, the idea sounded like a mistake until my friend pulled a tray out of her oven one chilly December evening, and the smell hit me—warm, nutty, with just a whisper of sweet chocolate that felt oddly comforting. She called them Peanut Butter Blossoms, and I figured, what the heck, I’d give it a shot. I was stubborn, sure, thinking it would be another cookie trend that tasted like a mess of sugar and disappointment.
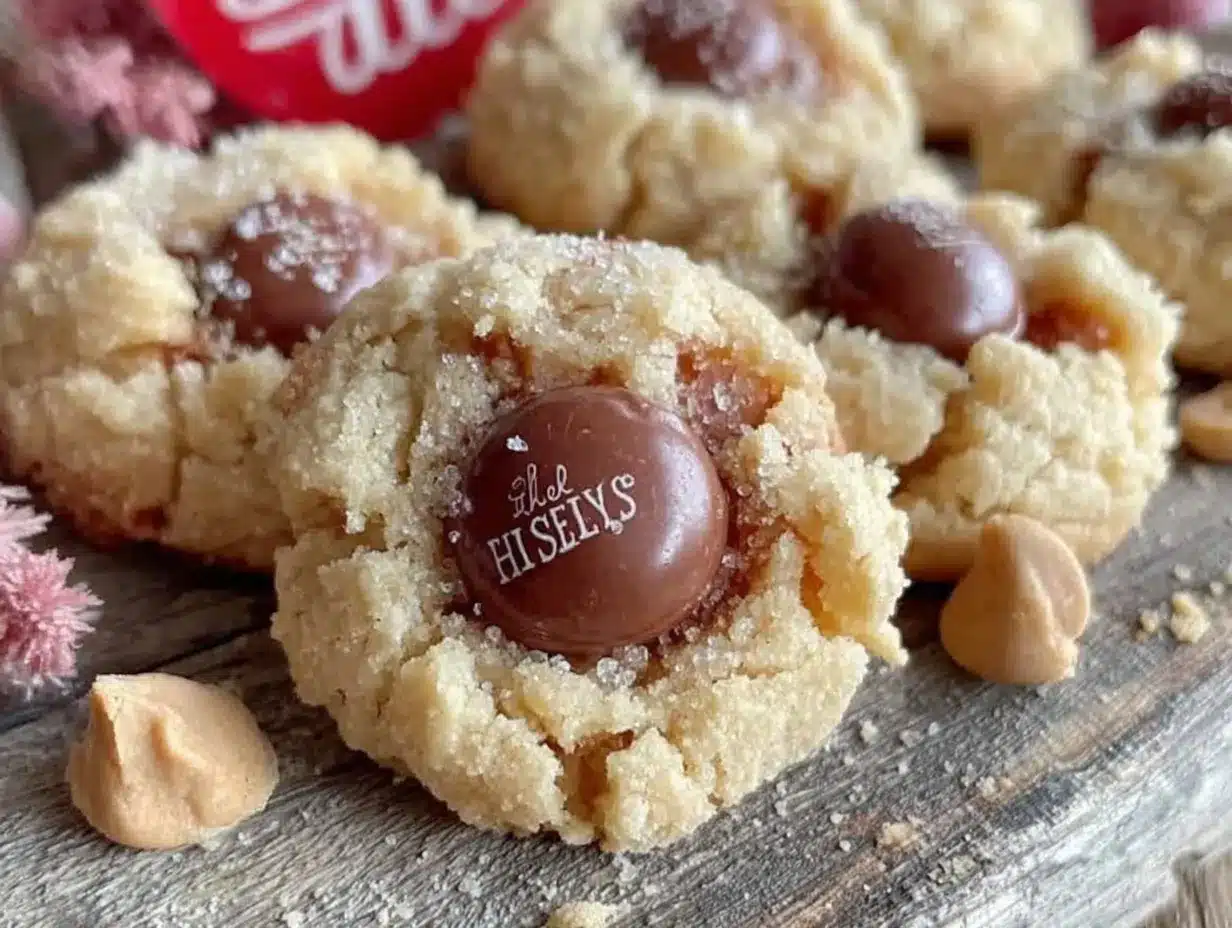
But after that first bite, with the crisp sugar coating giving way to a tender peanut butter center crowned by that melty Hershey Kiss, I had to admit—this cozy peanut butter blossoms recipe was something special. It wasn’t just a cookie; it was a little moment of quiet joy on a plate. The texture was spot on—not too soft, not too crunchy—and the chocolate added just the right touch without overwhelming the peanut butter’s rich flavor.
Now, I keep this recipe bookmarked for the colder months, the kind of thing that makes you want to curl up with a blanket and a cup of tea. It’s simple, unpretentious, and somehow the chocolate kisses make it feel festive without trying too hard. I guess the quiet realization was that sometimes, a classic deserves a second chance—and these cookies? They’ve earned a permanent spot in my baking rotation.
Why You’ll Love This Recipe
After testing and tweaking this cozy peanut butter blossoms recipe more times than I can count, I’m confident it’s one you’ll want to bake again and again. Here’s why it stands out:
- Quick & Easy: You can whip up these cookies in about 25 minutes, perfect for those last-minute sweet cravings or holiday cookie swaps.
- Simple Ingredients: No need for fancy or hard-to-find items; most of these ingredients are pantry staples you probably already have on hand.
- Perfect for Cozy Occasions: Whether it’s a winter evening, a casual get-together, or a festive celebration, these cookies fit right in.
- Crowd-Pleaser: I’ve seen these disappear fast at bake sales and family gatherings—kids and adults alike can’t resist them.
- Unbelievably Delicious: The contrast of the sugary crust, soft peanut butter base, and the melty Hershey Kiss on top makes for a texture and flavor combo that’s downright addictive.
This isn’t just another peanut butter cookie recipe. The secret to its charm lies in the delicate balance of the dough’s tenderness and the sugar coating, coupled with the classic Hershey’s Kiss that melts slightly but keeps its shape. I personally prefer using creamy peanut butter for the smoothest texture, but chunky works if you want a bit more bite.
It’s not just a cookie; it’s a little celebration in every bite. Trust me, after trying a batch, you’ll find yourself reaching for this recipe whenever you want that cozy kitchen feeling without the fuss.
Ingredients You Will Need
This peanut butter blossoms recipe uses straightforward, wholesome ingredients that come together to create those iconic cookies with minimal fuss. Here’s what you’ll gather before starting:
- Peanut Butter: 1 cup (250 g), creamy preferred for smooth texture
- Sugar: 1 cup (200 g) granulated, plus extra for rolling
- Brown Sugar: 1/2 cup (100 g), packed, adds moisture and depth
- Butter: 1/2 cup (115 g), unsalted and softened (room temperature is key)
- Egg: 1 large, room temperature
- Vanilla Extract: 1 teaspoon, for warmth and aroma
- Baking Soda: 1 teaspoon, helps with the perfect rise
- All-Purpose Flour: 1 1/2 cups (190 g), sifted for lightness
- Salt: 1/4 teaspoon, balances the sweetness
- Hershey Kisses: About 24, unwrapped (milk chocolate classic, but feel free to try dark or special editions for a twist)
All of these ingredients are pretty standard and easy to find in most grocery stores. I usually recommend sticking to a trusted brand like Skippy or Jif for the peanut butter to get that perfect creamy consistency. If you want to make it a bit healthier, swapping regular sugar for coconut sugar can work, though it changes the flavor slightly.
For a seasonal variation, you could roll the dough balls in colored sugar sprinkles instead of plain granulated sugar to add a festive touch—perfect for holidays or parties.
Equipment Needed
Making these cozy peanut butter blossoms is straightforward, and you won’t need fancy tools to get it done. Here’s what helps:
- Mixing Bowls: One large for combining wet and dry ingredients.
- Electric Mixer: Hand or stand mixer speeds up creaming the butter and sugars, but a sturdy whisk and elbow grease works too.
- Baking Sheet: A rimmed cookie sheet; I prefer a heavy-duty aluminum one for even baking.
- Parchment Paper or Silicone Baking Mat: Prevents sticking and makes cleanup easy.
- Measuring Cups and Spoons: Accurate measurements matter for baking success.
- Cooling Rack: To let cookies cool without sogginess.
If you don’t have an electric mixer, no worries—just mix a bit longer by hand. For rolling dough balls, a small cookie scoop can help keep sizes uniform, but rolling with your hands works just fine, too. Keeping your baking sheet cool between batches avoids melting the chocolate too soon, which is a little trick I picked up after a few batches went sideways.
Preparation Method
- Preheat your oven to 375°F (190°C). Line your baking sheets with parchment paper or silicone mats for easy cleanup and to prevent sticking.
- Cream the butter, peanut butter, granulated sugar, and brown sugar together. Use an electric mixer on medium speed for about 2-3 minutes until the mixture is light and fluffy. This step is key for that tender crumb.
- Add the egg and vanilla extract. Beat until combined, scraping down the bowl as needed.
- In a separate bowl, whisk together the flour, baking soda, and salt. Slowly add this dry mix to the wet mix, stirring on low speed or folding in with a spatula until just combined. Avoid overmixing to keep the cookies soft.
- Roll the dough into 1-inch (2.5 cm) balls. Roll each ball in granulated sugar until fully coated—that outer sugar layer gives the cookies their signature crackled look.
- Place the sugar-coated dough balls about 2 inches (5 cm) apart on the prepared baking sheets. This spacing prevents them from merging.
- Bake for 8-10 minutes. The edges should be set but the centers still soft. Don’t wait for them to brown; they continue cooking on the sheet.
- Immediately press a Hershey Kiss into the center of each cookie. The heat will slightly melt the chocolate and make it stick perfectly. If the cookies cool too much, the kiss won’t adhere well.
- Allow the cookies to cool on the baking sheet for 5 minutes before transferring to a wire rack. This step prevents breaking or squishing the chocolate.
One thing I learned the hard way: don’t skip chilling the dough if your kitchen is warm—or your cookies can spread too thin. A quick 15-minute chill in the fridge can save you from flat, crispy cookies when you want soft and chewy.
Cooking Tips & Techniques
Getting these peanut butter blossoms just right takes a little attention to detail, but nothing too tricky. Here are some tips that helped me nail the perfect batch:
- Don’t overbake. These cookies will look slightly underdone when you pull them out, but that’s how you get that tender texture. They firm up as they cool.
- Use room-temperature ingredients. It makes mixing easier and helps the dough come together smoothly.
- Roll the dough balls evenly. Consistent size ensures even baking so you don’t end up with some burnt edges and some doughy centers.
- Press the Hershey Kiss in right after baking. This warm touch helps the chocolate adhere without breaking.
- If you want that classic crackle, coat generously with sugar. The sugar creates a delicate crust that cracks as the cookie spreads.
I remember the first time I skipped the sugar roll and was disappointed with how dull and dense the cookies turned out. Lesson learned: that sugar coating is not just decoration; it’s fundamental.
Also, multitasking by prepping the dough while the oven preheats can save you a few minutes. And if you want to speed things up even more for weeknight baking, try the easy sheet pan chicken recipe I love—it pairs well for a cozy dinner followed by these sweet treats.
Variations & Adaptations
While this classic recipe is hard to beat, I’ve played around with a few twists that you might enjoy:
- Gluten-Free: Swap the all-purpose flour for a 1:1 gluten-free baking blend. The texture stays great, and it’s safe for those with sensitivities.
- Chocolate Lover’s Twist: Use dark chocolate or even mini peanut butter cups instead of Hershey Kisses for a richer, more indulgent flavor.
- Crunchy Peanut Butter: For added texture, substitute creamy peanut butter with crunchy. It adds a nice nutty bite inside.
- Festive Sugar Coating: Roll dough balls in colored sanding sugar or cinnamon sugar to match holidays or parties.
- Vegan Adaptation: Use dairy-free butter and replace the egg with a flax egg (1 tablespoon ground flaxseed + 3 tablespoons water, mixed and rested 5 minutes).
One of my favorite experiments was adding a pinch of cinnamon to the dough—it gave the cookies a subtle warmth that paired beautifully with the peanut butter and chocolate. If you’re curious about more cozy dinner ideas to complement your baking, you might want to try the creamy garlic butter Tuscan shrimp pasta recipe next time.
Serving & Storage Suggestions
These peanut butter blossoms are best enjoyed at room temperature or slightly warm so the Hershey Kiss is still soft but not melty.
- Serving: Arrange them on a festive platter or stack them in a jar for gifting. They pair wonderfully with a glass of cold milk or a hot cup of coffee or tea.
- Storage: Store in an airtight container at room temperature for up to 5 days. If you want to keep them longer, freeze baked cookies without the Hershey Kisses for up to 3 months, then add fresh kisses after thawing.
- Reheating: Warm in a microwave for 10-15 seconds to soften the chocolate and refresh the cookie’s softness.
Interestingly, these cookies seem to taste even better the next day as the flavors meld. Just don’t expect them to last long around here!
Nutritional Information & Benefits
Each peanut butter blossom cookie contains approximately:
| Calories | 120-140 kcal |
|---|---|
| Protein | 3g |
| Fat | 7-8g (mostly from peanut butter) |
| Carbohydrates | 15-18g |
| Fiber | 1-2g |
Peanut butter adds a dose of healthy fats and protein, making these cookies a bit more satisfying than your average sweet treat. Just be mindful of portion sizes, especially if you’re watching sugar intake. This recipe is naturally gluten-containing due to wheat flour but can be easily adapted for gluten-free diets.
From a wellness perspective, I appreciate how these cookies balance indulgence with simple ingredients—there’s comfort in knowing what’s in your food. For an extra protein boost, pairing these cookies with a glass of milk or a nut milk alternative works nicely.
Conclusion
This cozy peanut butter blossoms recipe with Hershey Kisses is a sweet little tradition I never saw coming but now treasure. It’s simple enough to make any day feel special, and the nostalgic charm makes it a hit with anyone who tries it. What I love most is how easy it is to customize—whether you want classic, gluten-free, or vegan, these cookies adapt beautifully.
Give them a try and make them your own. Share how you tweak the recipe or which variation became your favorite—I’m always curious about how others bake these little delights. Baking this recipe has become one of my go-to ways to add a touch of coziness to cold days or festive gatherings, and I hope it brings you the same quiet joy.
Happy baking, and may your kitchen be filled with warm smells and sweet moments!
Frequently Asked Questions
Can I use natural peanut butter instead of creamy?
You can, but natural peanut butter tends to have more oil separation, which can affect the dough consistency. If using natural, stir well before measuring and consider chilling the dough a bit longer.
Why do the Hershey Kisses sometimes sink into the cookies?
Press the kisses into the cookies right after baking, when the cookies are hot and soft. If you wait too long, the cookies harden and the kisses won’t stick properly.
Can I make the dough ahead of time?
Yes! You can refrigerate the dough for up to 24 hours before baking. This can even improve flavor and prevent excessive spreading.
What’s the best way to store leftover cookies?
Store them in an airtight container at room temperature for up to 5 days. For longer storage, freeze the baked cookies (without the kisses) and add fresh kisses after thawing.
Are there any good alternatives to Hershey Kisses?
Absolutely. Mini peanut butter cups, chocolate chips pressed into the dough, or even white chocolate pieces work well as substitutes depending on your flavor preference.
Pin This Recipe!
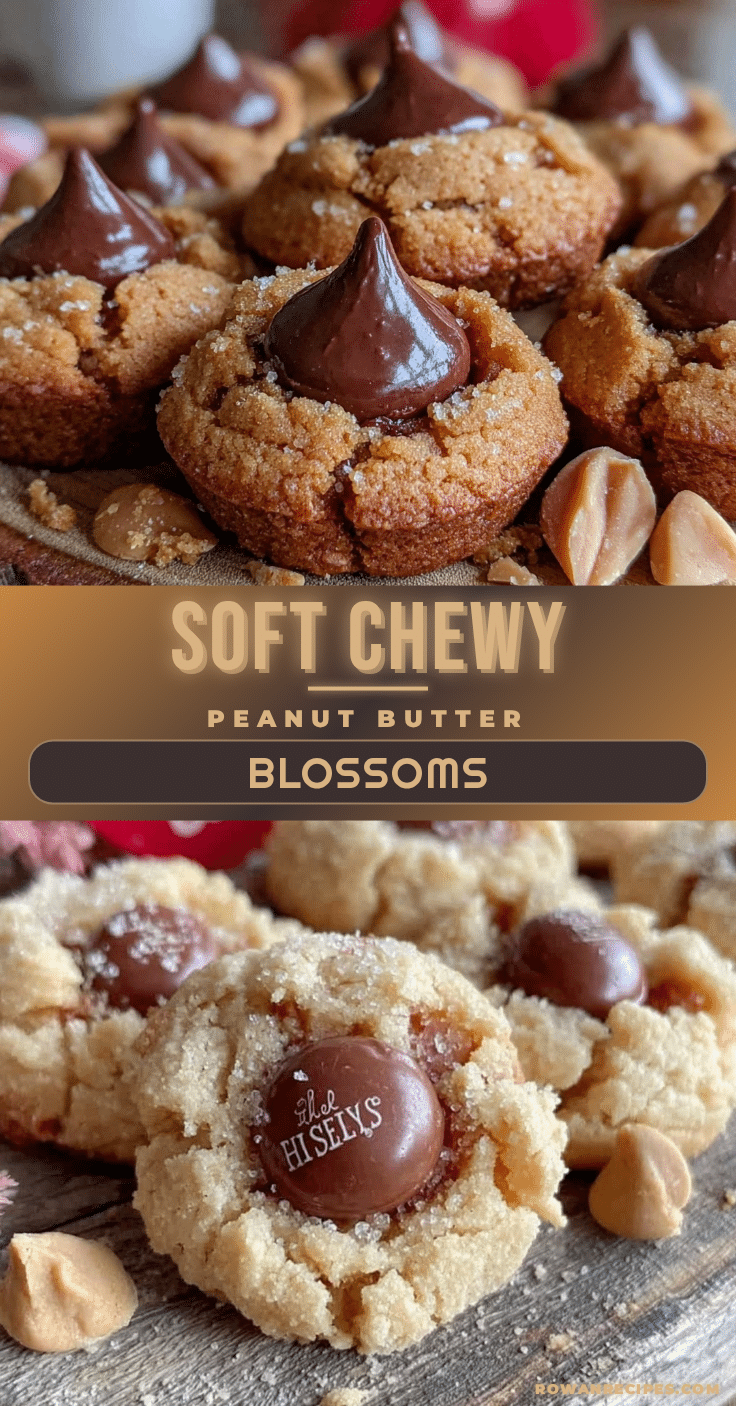
Cozy Peanut Butter Blossoms Recipe Easy Homemade Hershey Kisses Cookies

A classic peanut butter cookie topped with a melty Hershey Kiss, offering a perfect balance of tender dough and sugary crust for a cozy, festive treat.
- Prep Time: 10 minutes
- Cook Time: 10 minutes
- Total Time: 20 minutes
- Yield: 24 cookies 1x
- Category: Dessert
- Cuisine: American
Ingredients
- 1 cup (250 g) creamy peanut butter
- 1 cup (200 g) granulated sugar, plus extra for rolling
- 1/2 cup (100 g) packed brown sugar
- 1/2 cup (115 g) unsalted butter, softened (room temperature)
- 1 large egg, room temperature
- 1 teaspoon vanilla extract
- 1 teaspoon baking soda
- 1 1/2 cups (190 g) all-purpose flour, sifted
- 1/4 teaspoon salt
- About 24 Hershey Kisses, unwrapped (milk chocolate classic)
Instructions
- Preheat your oven to 375°F (190°C). Line baking sheets with parchment paper or silicone mats.
- Cream the butter, peanut butter, granulated sugar, and brown sugar together using an electric mixer on medium speed for 2-3 minutes until light and fluffy.
- Add the egg and vanilla extract; beat until combined, scraping down the bowl as needed.
- In a separate bowl, whisk together the flour, baking soda, and salt. Slowly add the dry mix to the wet mix, stirring on low speed or folding in with a spatula until just combined. Avoid overmixing.
- Roll the dough into 1-inch (2.5 cm) balls and roll each ball in granulated sugar until fully coated.
- Place the sugar-coated dough balls about 2 inches (5 cm) apart on the prepared baking sheets.
- Bake for 8-10 minutes until edges are set but centers are still soft. Do not wait for browning.
- Immediately press a Hershey Kiss into the center of each cookie while still hot.
- Allow cookies to cool on the baking sheet for 5 minutes before transferring to a wire rack.
Notes
Do not overbake; cookies should look slightly underdone when removed. Use room-temperature ingredients for best results. Roll dough balls evenly for uniform baking. Press Hershey Kisses immediately after baking to ensure they stick. Chill dough for 15 minutes if kitchen is warm to prevent spreading.
Nutrition
- Serving Size: 1 cookie
- Calories: 130
- Sugar: 12
- Sodium: 100
- Fat: 7.5
- Saturated Fat: 2
- Carbohydrates: 16.5
- Fiber: 1.5
- Protein: 3
Keywords: peanut butter blossoms, peanut butter cookies, Hershey Kisses cookies, holiday cookies, easy cookie recipe, festive cookies, classic cookies