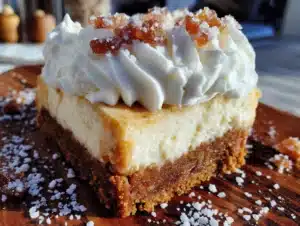
I had this whole thing against gingerbread. Honestly, for years. Every December, I’d watch friends get all misty-eyed over gingerbread cookies and gingerbread houses, and I just didn’t get it. The texture was always off to me — either rock hard or strangely soft in a way that felt like a compromise. I’d smile and nod when someone handed me a gingerbread man, then discreetly set it aside. It wasn’t their fault. It was mine, I guess, for being so stubborn about it.
Then last winter, on a particularly gray Tuesday afternoon, I found myself in my kitchen with a serious craving for something cozy but also a little bit fancy. I had a block of cream cheese that needed using up, and a jar of molasses that had been sitting in my pantry since a baking spree two years prior. I wasn’t trying to convert myself. I was just playing around. I made a simple cheesecake base, and on a whim, I stirred a heavy dose of ginger, cinnamon, and cloves into a buttery crust. The plan was to just have a little square for myself, you know, as a treat.
But then my neighbor, Carol, knocked on my door looking for a cup of sugar. She saw the pan cooling on the counter and asked what it was. Before I could even explain, she’d already cut herself a piece. And then another. “This is the best thing you’ve ever made,” she said, with her mouth half-full. I just stood there, holding her bag of sugar, completely caught off guard. That was the crack. If Carol, a woman who famously only eats vanilla ice cream for dessert, was this into it, maybe I had been wrong about gingerbread all along.
Why You’ll Love This Recipe
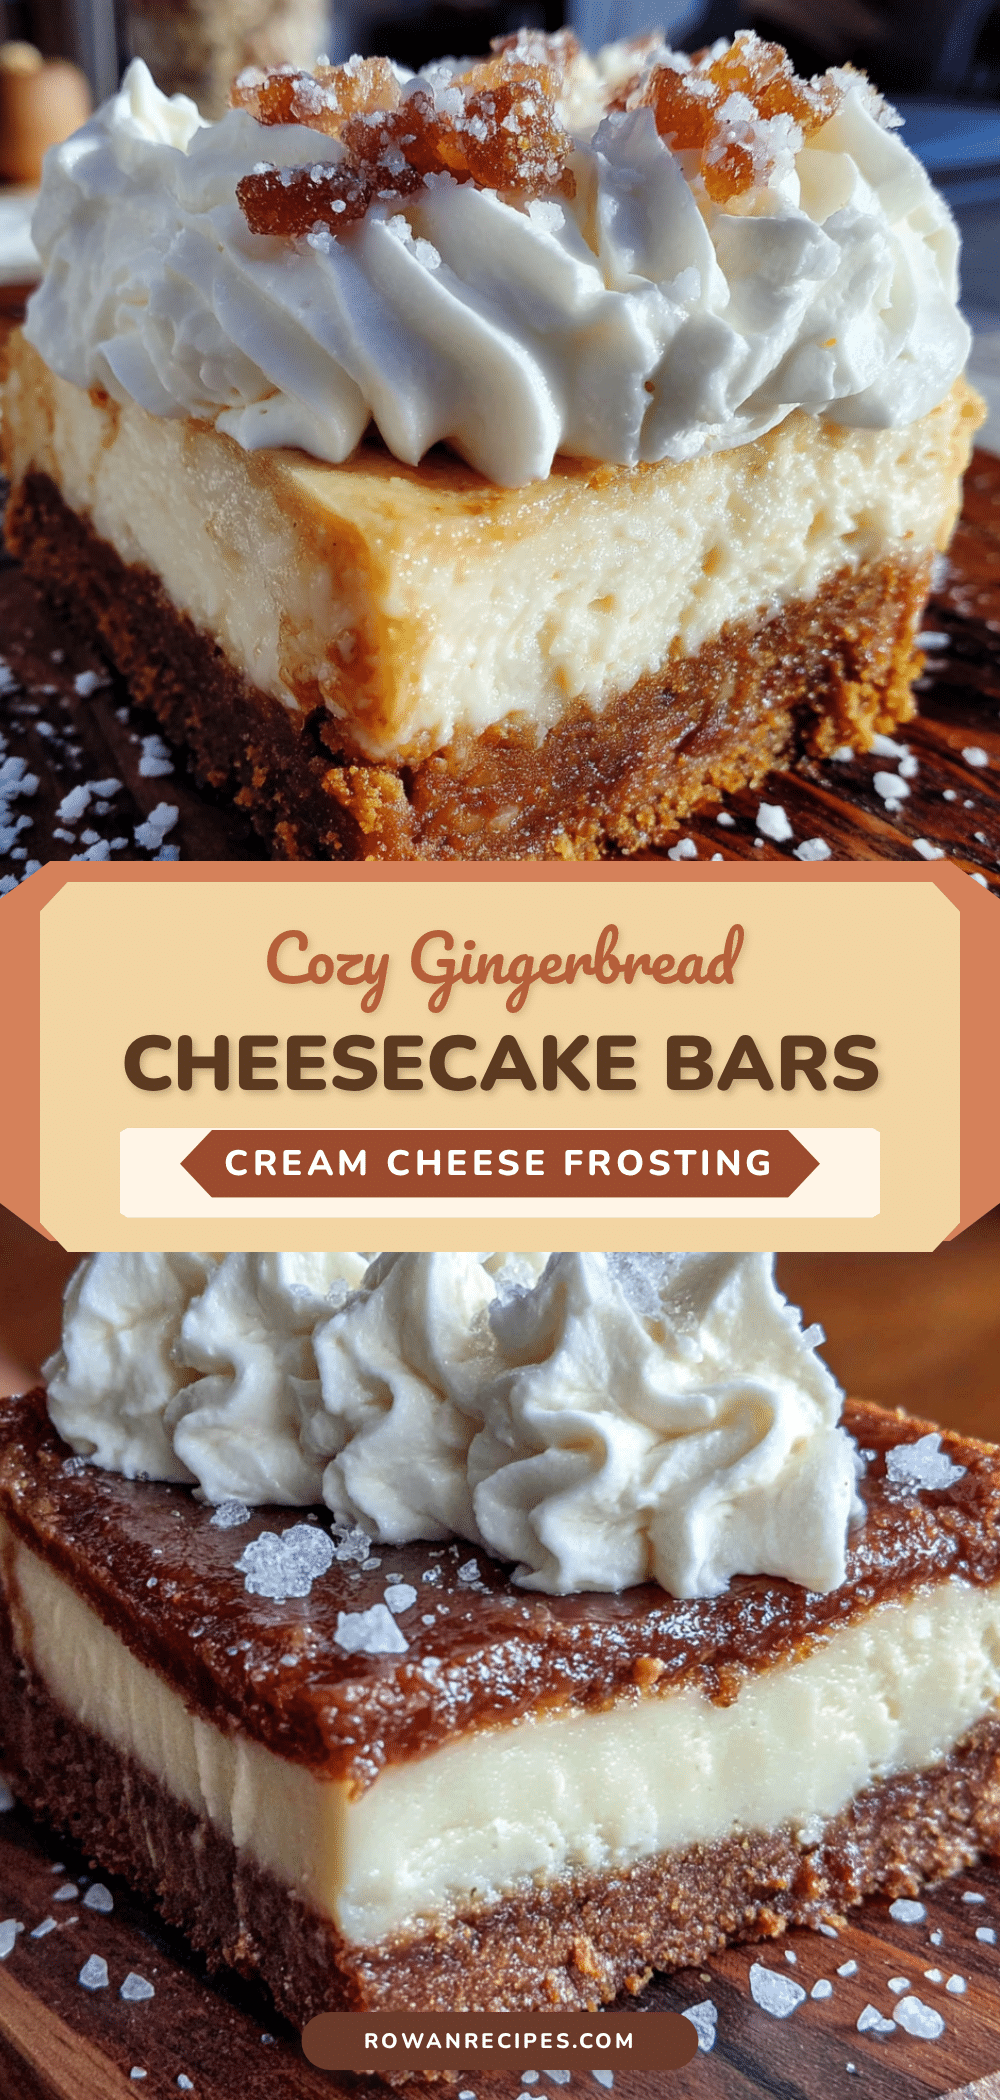
These Cozy Gingerbread Cheesecake Bars are the kind of dessert that makes you stop what you’re doing and just… enjoy the moment. They’re not too sweet, not too heavy, and they have that perfect balance of tangy cream cheese and warm, spicy gingerbread. Honestly, I make them for every holiday gathering now, and they disappear faster than the cookies.
- Quick & Easy: No water bath, no complicated techniques. These bars come together in about 30 minutes of active prep time, making them perfect for busy holiday weeks.
- Simple Ingredients: You probably have most of these in your pantry already. No need to hunt down obscure spices or special extracts.
- Perfect for the Holidays: Whether it’s a Christmas party, a Thanksgiving potluck, or just a cozy night in, these bars fit right in. They’re festive without being fussy.
- Crowd-Pleaser: I’ve served these to kids, grandparents, and everyone in between. Even the gingerbread skeptics (like my former self) come back for seconds.
- Unbelievably Delicious: The texture is what gets you. A buttery, spiced crust, a silky smooth cheesecake layer, and a tangy cream cheese frosting on top. It’s comfort food, perfected.
What makes this recipe different from the rest is the crust. Most gingerbread cheesecake bars use a standard graham cracker crust with a little spice thrown in. Not here. I use a brown butter gingerbread crust that adds a nutty, deep flavor you just can’t get any other way. It’s a small extra step, but it makes all the difference. Trust me on this one. It’s the kind of dessert that makes you close your eyes after the first bite. It’s cozy, it’s festive, and it’s exactly what this season should taste like.
What Ingredients You Will Need
This recipe uses simple, wholesome ingredients to deliver that bold, festive flavor. Most of these are pantry staples, especially if you do a bit of holiday baking. Here’s what you’ll need to gather.
For the Gingerbread Crust
- 1 ½ cups (180g) graham cracker crumbs (about 12 full sheets, crushed finely)
- ¼ cup (50g) granulated sugar
- 1 teaspoon ground ginger
- 1 teaspoon ground cinnamon
- ½ teaspoon ground cloves
- ¼ teaspoon salt
- 6 tablespoons (85g) unsalted butter, melted and browned (this is the secret to the deep flavor)
For the Cheesecake Filling
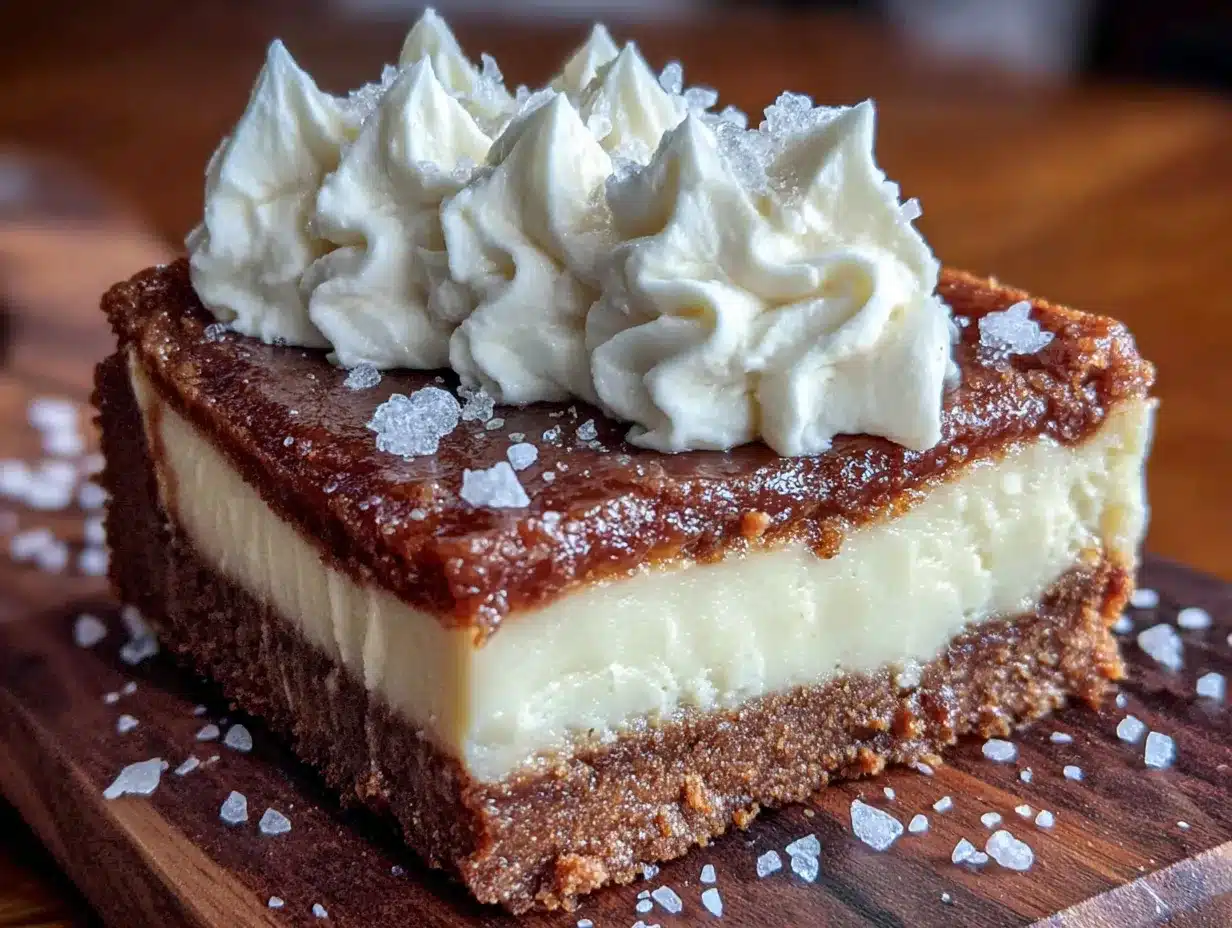
- 16 ounces (452g) cream cheese, softened (full-fat works best for texture)
- ½ cup (100g) granulated sugar
- 2 large eggs, room temperature
- 1 teaspoon vanilla extract
- ¼ cup (60ml) molasses (not blackstrap — use regular or mild molasses)
- 1 teaspoon ground ginger
- 1 teaspoon ground cinnamon
- ¼ teaspoon ground nutmeg
- ¼ teaspoon salt
For the Cream Cheese Frosting
- 4 ounces (113g) cream cheese, softened
- ¼ cup (56g) unsalted butter, softened
- 1 ½ cups (180g) powdered sugar
- ½ teaspoon vanilla extract
- 1-2 tablespoons (15-30ml) heavy cream or milk (to thin, if needed)
Ingredient Tips
I recommend using a block-style cream cheese like Philadelphia for the best, creamiest texture. Avoid the spreadable tubs — they have too much water and can make your cheesecake layer runny. For the molasses, Grandma’s Original or Brer Rabbit Mild works perfectly. The brown butter is non-negotiable here; it adds a toasty, almost caramel-like flavor that makes the crust sing. If you’re in a pinch, you can use regular melted butter, but you’ll lose some of that magic.
Equipment Needed
You don’t need a ton of fancy equipment for these bars, which is part of their charm. Here’s what I use.
- 9×9-inch baking pan (an 8×8 will also work, but the bars will be a bit thicker)
- Parchment paper (for easy lifting and clean-up)
- Mixing bowls (one large, one medium)
- Electric hand mixer or stand mixer (a whisk and some elbow grease works too, but a mixer makes the cheesecake smoother)
- Saucepan (for browning the butter)
- Measuring cups and spoons
- Spatula
- Sharp knife (for clean cuts)
If you don’t have a 9×9 pan, a 9×13 will work — just watch the baking time, as it will be shorter. I’ve also used a disposable aluminum pan for potlucks, and it works great. For the brown butter, a light-colored saucepan is best so you can see the color change. I learned that one the hard way after burning a batch in a dark non-stick pan. It smelled like a campfire, and not in a good way.
Preparation Method
Alright, let’s get baking. I’ll walk you through this step by step. Take your time, and don’t rush the cooling stages — that’s where the magic happens.
Step 1: Prep the Pan and Brown the Butter
Preheat your oven to 350°F (175°C). Line your 9×9-inch baking pan with parchment paper, leaving some overhang on two opposite sides. This will be your “handle” to lift the bars out later. In a small saucepan over medium heat, melt the 6 tablespoons of butter. Swirl the pan occasionally. It will start to foam and then turn golden brown. You’ll see little brown specks forming at the bottom — that’s the milk solids toasting. Once it smells nutty and is a deep amber color (about 3-4 minutes), remove it from the heat immediately and pour it into a heatproof bowl to stop the cooking. Don’t walk away from it; it goes from brown to burnt very quickly.
Step 2: Make the Crust
In a medium bowl, combine the graham cracker crumbs, sugar, ginger, cinnamon, cloves, and salt. Pour the warm brown butter over the mixture and stir with a fork until everything is evenly moistened. It should look like wet sand. Press the mixture firmly into the bottom of your prepared pan. I use the bottom of a measuring cup to really pack it down. Bake the crust for 10 minutes, then set it aside to cool while you make the filling. Don’t skip this pre-bake — it keeps the crust from getting soggy.
Step 3: Make the Cheesecake Filling
In a large bowl, beat the softened cream cheese with an electric mixer on medium speed until smooth and creamy, about 2 minutes. Add the sugar and beat until combined, scraping down the sides of the bowl as needed. Add the eggs one at a time, beating on low speed after each addition just until incorporated. Over-mixing at this stage can incorporate too much air and cause cracks. Add the vanilla, molasses, ginger, cinnamon, nutmeg, and salt. Mix on low until everything is smooth and uniform. The batter will be thick and smell incredible — like Christmas in a bowl.
Step 4: Assemble and Bake
Pour the cheesecake filling over the pre-baked crust. Use a spatula to spread it evenly to the edges. Give the pan a gentle tap on the counter to release any air bubbles. Bake at 350°F (175°C) for 30-35 minutes, or until the edges are set and the center is just slightly jiggly. It will look a bit puffed and the top might have a few tiny cracks — that’s totally normal. The center will firm up as it cools. Remove from the oven and let it cool completely on a wire rack. Then, transfer the pan to the refrigerator and chill for at least 4 hours, or overnight. This is crucial for clean slices.
Step 5: Make the Frosting
Once the bars are fully chilled, make the frosting. In a medium bowl, beat the softened cream cheese and butter together until smooth. Gradually add the powdered sugar, beating on low speed to avoid a sugar cloud. Add the vanilla and 1 tablespoon of heavy cream. Beat on medium-high until light and fluffy, about 2 minutes. If it’s too thick, add another tablespoon of cream. If it’s too thin, add a little more powdered sugar.
Step 6: Frost and Slice
Spread the frosting evenly over the chilled cheesecake layer. Use an offset spatula for a smooth finish, or make swirls for a rustic look. Lift the bars out of the pan using the parchment overhang. Use a sharp knife to slice into squares. For the cleanest cuts, wipe the knife clean between each slice. I run mine under hot water and dry it off before each cut.
Cooking Tips & Techniques
I’ve made these bars more times than I can count, and I’ve definitely had my share of mishaps. Here are the lessons I’ve learned so you don’t have to.
- Room temperature ingredients are not optional. Cold cream cheese will give you a lumpy filling. Cold eggs can seize the batter. Set everything out on the counter for at least 30 minutes before you start. I’ve tried the “microwave to soften” trick, and it always ends with melted cream cheese. Just be patient.
- Don’t over-bake the cheesecake. That slight jiggle in the center is your friend. If you wait until the whole thing is firm, it will be over-baked and dry. The residual heat will finish the cooking process as it cools.
- Chill time is non-negotiable. I know it’s hard to wait, but cutting into warm cheesecake bars is like cutting into mud — it will be a mess. Four hours minimum, but overnight is best. The flavors also meld together beautifully overnight.
- Browning butter is a game-changer. It adds a depth of flavor that regular butter just can’t match. If you’ve never done it, don’t be intimidated. Just watch it closely. The moment it smells nutty and looks like melted caramel, you’re done.
- Use a light-colored pan for the crust. I once used a dark non-stick pan and the crust burned on the bottom before it was even done baking. A shiny metal pan gives you more control.
Variations & Adaptations
One of the best things about this recipe is how flexible it is. Here are a few ways I’ve played around with it.
- Gluten-Free Version: Use gluten-free graham crackers or crushed gluten-free ginger snaps for the crust. The filling is naturally gluten-free, so you’re just swapping out the base.
- Vegan Adaptation: Use a vegan cream cheese (like Miyoko’s or Violife) and a plant-based butter. For the eggs, use a flax egg (1 tablespoon ground flaxseed + 3 tablespoons water per egg, let sit for 5 minutes). The texture will be slightly softer, but still delicious.
- Spice It Up: Add a pinch of black pepper or cardamom to the crust and filling for a more complex, warming flavor. I tried this last Christmas and it was a huge hit.
- Pumpkin Spice Twist: Swap the molasses for pumpkin puree and add a teaspoon of pumpkin pie spice. It gives you a pumpkin cheesecake bar with that same cozy vibe.
- No-Bake Version: For a no-bake option, skip the eggs and use a stabilized cream cheese filling (mix 1 tablespoon cornstarch with the sugar before adding). Press the crust in and chill, but don’t bake it. The texture will be more like a mousse, but it’s perfect for hot summer days.
Serving & Storage Suggestions
These bars are best served cold, straight from the fridge. The texture is firm and creamy, and the frosting stays perfectly set. I like to let them sit at room temperature for about 5 minutes before serving — it takes the chill off without making them goopy.
For presentation, I dust the tops with a little extra cinnamon or a pinch of nutmeg. A few candied ginger pieces on top add a nice pop of color and a chewy texture. They pair beautifully with a hot cup of coffee, a spiced chai latte, or a glass of cold milk. If you’re feeling extra festive, serve them alongside a scoop of vanilla bean ice cream.
To store, keep the bars in an airtight container in the refrigerator for up to 5 days. They actually get better on day two and three as the flavors continue to meld. You can also freeze them for up to 3 months. To freeze, wrap individual bars tightly in plastic wrap, then place them in a freezer-safe bag. Thaw in the refrigerator overnight before serving. I’ve pulled these out for last-minute guests more times than I can count, and no one has ever guessed they were frozen.
Nutritional Information & Benefits
Let’s be real — these are a treat, not a health food. But there are a few bright spots worth noting. Here’s the estimated nutritional breakdown per bar (based on 16 servings).
- Calories: ~310
- Fat: 20g
- Carbohydrates: 32g
- Protein: 5g
- Sugar: 24g
The molasses is a nice touch — it’s a good source of iron, calcium, and magnesium. The ginger and cinnamon are both known for their anti-inflammatory properties. So, you know, it’s not all bad. The cream cheese adds a little protein and calcium, too. But honestly, I make these because they make me happy, and sometimes that’s the best nutrition you can get.
If you’re watching your sugar intake, you can reduce the sugar in the filling by a quarter cup without affecting the texture too much. For a lower-fat option, use reduced-fat cream cheese, but know the texture will be slightly less creamy.
Conclusion
So there you have it — my little conversion story in a pan. These Cozy Gingerbread Cheesecake Bars took a gingerbread skeptic and turned her into a full-on believer. They’re everything I never knew I wanted in a holiday dessert: easy, impressive, and genuinely delicious. The crust is buttery and spiced, the filling is silky and tangy, and that cream cheese frosting on top? Pure bliss.
I hope you give them a try, even if you think you don’t like gingerbread. Maybe you’ll surprise yourself like I did. And if you do make them, I’d love to hear about it. Leave a comment below and let me know how they turned out. Did you add your own twist? Did you catch someone sneaking a piece before dinner? Share your stories — they’re my favorite part of this whole thing. Happy baking, friends. You’ve got this.
Frequently Asked Questions
Can I use a different pan size?
Yes, you can. An 8×8 pan will work, but your bars will be thicker and may need an extra 5-7 minutes of baking time. A 9×13 pan will give you thinner bars and a shorter baking time, around 20-25 minutes. Just keep an eye on the center jiggle.
Why did my cheesecake crack?
Don’t worry, it happens to the best of us. Cracks usually form from over-mixing the batter (too much air) or over-baking. The frosting covers up any cracks beautifully, so no one will ever know. For next time, mix on low speed and pull the bars out when the center is still slightly jiggly.
Can I use blackstrap molasses?
I wouldn’t recommend it. Blackstrap molasses is very bitter and strong. It will overpower the delicate cheesecake flavor. Stick with regular or mild molasses for the best balance of sweetness and spice.
How far in advance can I make these?
You can make them up to 3 days ahead and keep them in the refrigerator. The flavors actually get better as they sit. You can also freeze the unfrosted bars for up to 3 months and add the frosting after thawing.
Can I skip the brown butter?
You can, but I really hope you don’t. The brown butter adds a nutty, toasty depth that makes the crust next-level. If you’re short on time, regular melted butter will work, but you’ll be missing out on that extra layer of flavor. It’s worth the extra 4 minutes, I promise.
Pin This Recipe!
Cozy Gingerbread Cheesecake Bars: Easy Holiday Dessert
These Cozy Gingerbread Cheesecake Bars are the kind of dessert that makes you stop what you’re doing and just enjoy the moment. They’re not too sweet, not too heavy, and they have that perfect balance of tangy cream cheese and warm, spicy gingerbread.
- Prep Time: 30 minutes
- Cook Time: 35 minutes
- Total Time: 4 hours 35 minutes (includes chilling)
- Yield: 16 servings 1x
- Category: Dessert
- Cuisine: American
Ingredients
- 1 ½ cups (180g) graham cracker crumbs (about 12 full sheets, crushed finely)
- ¼ cup (50g) granulated sugar
- 1 teaspoon ground ginger
- 1 teaspoon ground cinnamon
- ½ teaspoon ground cloves
- ¼ teaspoon salt
- 6 tablespoons (85g) unsalted butter, melted and browned
- 16 ounces (452g) cream cheese, softened
- ½ cup (100g) granulated sugar
- 2 large eggs, room temperature
- 1 teaspoon vanilla extract
- ¼ cup (60ml) molasses (not blackstrap — use regular or mild molasses)
- 1 teaspoon ground ginger
- 1 teaspoon ground cinnamon
- ¼ teaspoon ground nutmeg
- ¼ teaspoon salt
- 4 ounces (113g) cream cheese, softened
- ¼ cup (56g) unsalted butter, softened
- 1 ½ cups (180g) powdered sugar
- ½ teaspoon vanilla extract
- 1–2 tablespoons (15-30ml) heavy cream or milk
Instructions
- Preheat your oven to 350°F (175°C). Line your 9×9-inch baking pan with parchment paper, leaving some overhang on two opposite sides.
- In a small saucepan over medium heat, melt the 6 tablespoons of butter. Swirl the pan occasionally until it turns golden brown and smells nutty (about 3-4 minutes). Remove from heat immediately and pour into a heatproof bowl.
- In a medium bowl, combine the graham cracker crumbs, sugar, ginger, cinnamon, cloves, and salt. Pour the warm brown butter over the mixture and stir until evenly moistened. Press firmly into the bottom of the prepared pan.
- Bake the crust for 10 minutes, then set aside to cool.
- In a large bowl, beat the softened cream cheese with an electric mixer on medium speed until smooth, about 2 minutes. Add the sugar and beat until combined.
- Add the eggs one at a time, beating on low speed after each addition just until incorporated. Add the vanilla, molasses, ginger, cinnamon, nutmeg, and salt. Mix on low until smooth.
- Pour the cheesecake filling over the pre-baked crust. Spread evenly and tap the pan gently to release air bubbles.
- Bake at 350°F (175°C) for 30-35 minutes, until edges are set and center is slightly jiggly. Cool completely on a wire rack, then refrigerate for at least 4 hours or overnight.
- For the frosting: In a medium bowl, beat softened cream cheese and butter together until smooth. Gradually add powdered sugar, then vanilla and 1 tablespoon heavy cream. Beat until light and fluffy, about 2 minutes.
- Spread frosting over chilled cheesecake layer. Lift bars out using parchment overhang, slice into squares with a sharp knife, wiping clean between cuts.
Notes
Room temperature ingredients are crucial for a smooth filling. Don’t over-bake the cheesecake; the center should be slightly jiggly. Chill time is non-negotiable for clean slices. Brown butter adds a nutty depth to the crust. Use a light-colored pan for browning butter to avoid burning.
Nutrition
- Serving Size: 1 bar
- Calories: 310
- Sugar: 24
- Sodium: 280
- Fat: 20
- Saturated Fat: 12
- Carbohydrates: 32
- Fiber: 1
- Protein: 5
Keywords: gingerbread cheesecake bars, holiday dessert, easy cheesecake bars, gingerbread dessert, cream cheese bars