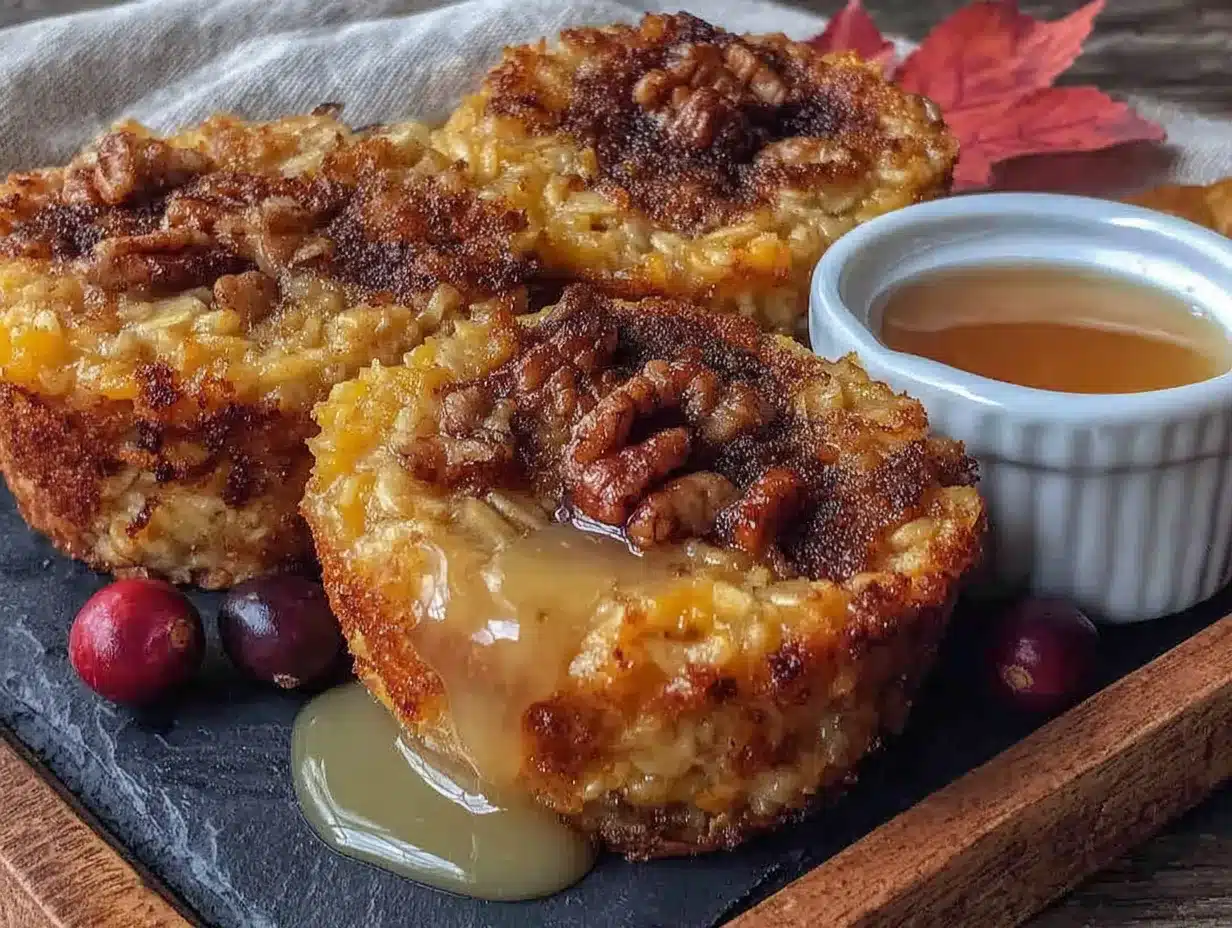
The Sunday night before my first week of grad school, I had a fridge full of canned pumpkin left over from a pie I never got around to making and a bag of oats I bought on a whim. No plan, no recipe, just a quiet panic about the chaos of early mornings ahead. I started tossing things into a bowl—oats, pumpkin, a splash of maple syrup, cinnamon because it felt right—and what came out of the muffin tin the next morning was something I wasn’t expecting. Not a muffin, not oatmeal, but these perfect little handheld cups that tasted like fall and made my 6 a.m. self actually look forward to breakfast.
I think the reason these stuck with me isn’t just that they’re good (they are, honestly, really good). It’s that they solved a problem I didn’t know how to fix: how to eat something warm and homemade when you barely have time to breathe. These baked pumpkin oatmeal cups became my secret weapon for surviving packed semesters, and later, for feeding a family that moves faster than I do. They’re the kind of recipe that feels like you cheated the system—because how can something this simple taste this good?
Let me show you how to make them.
Why You’ll Love This Recipe
I’ve tested this recipe more times than I can count, tweaking the oat-to-pumpkin ratio, playing with sweeteners, and even burning a batch or two (the smoke alarm is a very honest critic). What I landed on is a breakfast that actually works for real life.
- Quick & Easy: From bowl to oven in under 10 minutes. Mix, scoop, bake—done.
- Simple Ingredients: You probably have most of these in your pantry right now. No weird health food store trips required.
- Perfect for Meal Prep: Make a batch on Sunday, grab one every morning. They keep beautifully in the fridge and freeze like a dream.
- Crowd-Pleaser: My kids devour these, my husband packs them for work, and even my picky neighbor asked for the recipe.
- Unbelievably Delicious: The texture is soft and tender, with a slightly crisp edge and that warm pumpkin-spice flavor that feels like a hug in food form.
What makes these different from every other oatmeal cup recipe out there? It’s the balance. Not too sweet, not too dense, and they actually hold their shape without falling apart. I spent weeks testing different liquid ratios and baking times to get that perfect, bakery-style texture that works whether you eat them warm or cold. This isn’t just another breakfast recipe—it’s the one that makes you wonder why you ever settled for a granola bar.
What Ingredients You Will Need
This recipe relies on wholesome, everyday ingredients that come together to create something surprisingly special. Here’s what you’ll need and why each one matters.
- Rolled oats (2 cups / 180g): Not quick oats, not steel-cut—rolled oats give these cups the perfect chewy texture. I prefer Bob’s Red Mill for consistent results. Quick oats will make them mushy, and steel-cut won’t soften enough.
- Canned pumpkin puree (1 cup / 245g): Make sure it’s 100% pumpkin, not pumpkin pie filling. Libby’s is my go-to because it’s consistently thick and not watery. If you’re feeling ambitious, homemade pumpkin puree works too—just drain it well.
- Milk (1 cup / 240ml): Any milk works here. I use whole milk for richness, but almond milk, oat milk, or even buttermilk are great options. If using buttermilk, the cups come out extra tender.
- Eggs (2 large): They bind everything together and add structure. Room temperature eggs incorporate more evenly, but cold ones work in a pinch.
- Maple syrup (1/3 cup / 80ml): Pure maple syrup adds a warm, woodsy sweetness that complements the pumpkin. Honey or agave are fine substitutes, but the flavor will shift slightly.
- Coconut oil or melted butter (3 tablespoons / 42g): For moisture and that slightly crisp edge. I love using melted butter for flavor, but coconut oil keeps them dairy-free and adds a subtle richness.
- Brown sugar (2 tablespoons / 25g): Just a little for depth. Light or dark brown sugar both work—dark gives a more molasses-like flavor.
- Pumpkin pie spice (2 teaspoons): You can buy it or make your own with cinnamon, nutmeg, ginger, and cloves. I make a big batch of my own blend because I go through it so fast.
- Baking powder (1 teaspoon): Helps the cups rise slightly and stay light.
- Salt (1/2 teaspoon): Don’t skip this—it balances the sweetness and makes the pumpkin flavor pop.
- Vanilla extract (1 teaspoon): Pure vanilla, not imitation. It rounds out all the warm spices beautifully.
- Optional mix-ins: 1/2 cup chocolate chips, chopped pecans, or dried cranberries. I usually add chocolate chips because, well, it’s chocolate.
Equipment Needed
You don’t need a fancy kitchen to make these. Here’s what I use and what works as a backup.
- Muffin tin (12-cup standard size): Non-stick is nice, but any metal tin works. I’ve used both dark and light pans—dark ones brown the edges faster, so check a few minutes early.
- Muffin liners (paper or silicone): Paper liners make cleanup a breeze. Silicone liners are reusable and work great, but I find paper liners give a cleaner release.
- Large mixing bowl: Any bowl big enough to stir without splashing.
- Whisk or wooden spoon: A whisk is faster for the wet ingredients, but a spoon works fine for mixing everything together.
- Measuring cups and spoons: Accuracy matters here—too much liquid and they won’t set properly.
- Ice cream scoop or 1/3 cup measure: For evenly portioning the batter. An ice cream scoop makes the process so much faster and gives you consistent sizes.
- Cooling rack: Lets air circulate so the cups don’t get soggy on the bottom. A plate works in a pinch, but a rack is better.
Preparation Method
Let’s get baking. I’ll walk you through every step so you get perfect cups every time.
- Preheat your oven to 375°F (190°C). Line a 12-cup muffin tin with paper liners or grease the cups well with butter or cooking spray. I’ve forgotten to do this before, and let me tell you—scraping oatmeal off a muffin tin is not a fun Sunday activity.
- In a large bowl, whisk together the eggs, milk, maple syrup, melted coconut oil (or butter), brown sugar, and vanilla extract. Whisk until everything is smooth and the brown sugar has mostly dissolved. This takes about 30 seconds. The mixture should look like a thin, golden-brown liquid.
- Add the pumpkin puree and whisk again. Make sure it’s fully incorporated—no white streaks of egg or clumps of pumpkin. The mixture will turn a beautiful deep orange color.
- In a separate medium bowl, stir together the rolled oats, pumpkin pie spice, baking powder, and salt. Give it a good mix so the spices are evenly distributed. If you’re adding any mix-ins like chocolate chips or nuts, stir them into the dry ingredients now—this prevents them from sinking to the bottom of the cups.
- Pour the dry ingredients into the wet ingredients and stir until just combined. Don’t overmix! A few streaks of flour are fine; overmixing will make the cups dense and tough. The batter will look thick and scoopable, like a chunky muffin batter.
- Let the batter rest for 5 minutes. This is a little trick I learned after making these a dozen times. Letting the oats absorb some liquid before baking gives the cups a better texture—they’re tender, not mushy. I use this time to clean up a few dishes.
- Scoop the batter evenly into the prepared muffin cups. Fill each cup almost to the top—these don’t rise much, so you want a generous portion. An ice cream scoop makes this step effortless and ensures even cups.
- Bake for 18-22 minutes, or until the tops are set and lightly golden. A toothpick inserted into the center should come out clean or with just a few moist crumbs. The edges should be slightly firm, and the center should spring back when lightly touched. My oven runs hot, so I start checking at 18 minutes.
- Let the cups cool in the pan for 5 minutes, then transfer them to a wire rack to cool completely. This step is crucial—if you try to remove them too early, they might fall apart. Patience, I know, but it’s worth it.
Cooking Tips & Techniques
After making these more times than I can count, I’ve picked up a few things that make a real difference.
Don’t skip the rest time. I know it feels like an extra step, but letting the batter sit for 5 minutes before scooping is the secret to tender, well-textured cups. The oats absorb some of the liquid, which means they bake up soft and cohesive instead of separate and crunchy.
Use a cookie scoop for even portions. I learned this after my first batch came out with some cups overflowing and others looking sad and flat. A 1/3-cup scoop gives you consistent cups that bake evenly. Plus, it’s so much faster than spooning batter.
Watch your oven closely. Every oven is different, and these cups can go from perfectly golden to overdone in a minute. Start checking at 18 minutes. The tops should be set and lightly browned, and a toothpick should come out clean. If the edges are pulling away from the liners, they’re done.
Let them cool completely before storing. I made the mistake of packing warm cups into a container once, and they turned into a steamy, soggy mess. Let them cool fully on a wire rack—about 30 minutes—before transferring to an airtight container.
Double the batch if you’re meal prepping. These freeze beautifully, so I always make a double batch. One dozen for the fridge, one dozen for the freezer. Future you will thank you when you’re running late on a Wednesday morning.
Variations & Adaptations
One of the best things about this recipe is how flexible it is. Here are some ways I’ve adapted it over the years.
Chocolate Chip Pumpkin Oatmeal Cups: This is my personal favorite. Fold in 1/2 cup of dark chocolate chips or mini chocolate chips. The chocolate melts into little pockets of sweetness that pair perfectly with the warm pumpkin spice. I’ve also tried white chocolate chips, and that’s a close second.
Vegan Version: Replace the eggs with 2 flax eggs (2 tablespoons ground flaxseed mixed with 6 tablespoons water, let sit for 5 minutes) and use a plant-based milk like oat or almond. Use coconut oil instead of butter. They come out slightly denser but still delicious.
Gluten-Free Option: Use certified gluten-free rolled oats. That’s it—no other changes needed. Just make sure your oats are labeled gluten-free if you have celiac disease or a sensitivity.
Nutty Crunch Version: Add 1/2 cup of chopped pecans or walnuts to the batter. Toast them first for extra flavor—just a few minutes in a dry pan until they smell fragrant. The crunch is a lovely contrast to the soft oatmeal.
Lower Sugar Version: Reduce the maple syrup to 1/4 cup and skip the brown sugar. Add an extra 2 tablespoons of milk to compensate. They’re less sweet but still satisfying, especially with a drizzle of honey on top before serving.
Pumpkin Apple Cups: Fold in 1/2 cup of finely diced apple (I like Honeycrisp or Granny Smith). The apple adds little bursts of juicy sweetness and a slightly different texture. This is my go-to fall variation.
Serving & Storage Suggestions
These cups are incredibly versatile when it comes to serving and storing.
Serving: Enjoy them warm or at room temperature. I love them straight out of the oven with a pat of butter melting on top, but they’re equally delicious cold from the fridge. For a special breakfast, warm one up for 15 seconds in the microwave and drizzle with a little extra maple syrup or a dollop of Greek yogurt.
Storage in the Fridge: Place cooled cups in an airtight container. They’ll stay fresh for up to 5 days. Layer them with parchment paper between stacks to prevent sticking. I usually keep a batch in the fridge for quick grab-and-go breakfasts.
Freezing: These freeze like a dream. Place cooled cups in a single layer on a baking sheet and freeze for 1 hour. Then transfer them to a freezer-safe bag or container. They’ll keep for up to 3 months. To thaw, leave one out on the counter for 30 minutes or microwave for 30-45 seconds.
Reheating: Microwave a frozen cup for 45-60 seconds, or warm them in a 350°F oven for 5-7 minutes. The oven method gives you that slightly crisp edge back, which I personally love.
Make-Ahead Tip: You can prep the dry ingredients (oats, spice, baking powder, salt) in a jar or bag and store them in the pantry. When you’re ready to bake, just add the wet ingredients. It shaves off a few minutes on busy mornings.
Nutritional Information & Benefits
These oatmeal cups are a balanced breakfast option that keeps you full without weighing you down. Here’s the estimated nutrition per cup (without mix-ins):
- Calories: 185
- Protein: 5g
- Carbohydrates: 28g
- Fiber: 4g
- Sugar: 10g
- Fat: 6g
- Iron: 10% DV
- Vitamin A: 90% DV (hello, pumpkin!)
Pumpkin is packed with vitamin A and antioxidants, while oats provide slow-burning energy to carry you through the morning. The fiber keeps your digestion happy, and the protein from eggs and milk adds staying power. If you’re watching your sugar intake, the lower-sugar version cuts it to about 6g per cup. These are naturally dairy-free if you use coconut oil and a plant-based milk, and they’re easy to make gluten-free. They’re also nut-free (unless you add nuts), which makes them school-friendly.
Conclusion
These easy baked pumpkin oatmeal cups are the kind of recipe that makes your mornings feel a little less chaotic and a lot more delicious. They’re simple enough for a beginner baker, flexible enough for endless variations, and reliable enough to become a staple in your meal prep rotation. Whether you’re feeding a family, fueling a busy work week, or just want something warm and comforting without the fuss, these cups deliver.
I’d love to hear how they turn out for you! Drop a comment below and let me know what mix-ins you tried, or tag me in your photos if you share them online. And if you’re looking for more easy breakfast ideas, don’t miss my cheesy crescent roll breakfast casserole or these crispy mini corn dog muffins for another grab-and-go option. Happy baking, friends!
Frequently Asked Questions
Can I use quick oats instead of rolled oats?
I don’t recommend it. Quick oats are more processed and will absorb liquid differently, resulting in a mushy, dense texture. Rolled oats give you that perfect chewy, tender bite. Steel-cut oats are also not a good substitute—they won’t soften enough during the short baking time.
Can I make these without eggs?
Yes! Use a flax egg (1 tablespoon ground flaxseed mixed with 3 tablespoons water per egg, let sit for 5 minutes). The texture will be slightly denser, but they’ll still hold together beautifully. I’ve tested this multiple times and it works great.
How do I know when the oatmeal cups are done?
The tops should be set and lightly golden, and a toothpick inserted into the center should come out clean or with just a few moist crumbs. The edges should be slightly firm to the touch. Start checking at 18 minutes, as ovens vary.
Can I double this recipe?
Absolutely! This recipe doubles perfectly. Just use a large bowl and a standard 12-cup muffin tin—you’ll need to bake two batches, or use two tins if you have them. The baking time stays the same.
How long do these last in the freezer?
Up to 3 months when stored in an airtight freezer bag or container. I like to freeze them in a single layer on a baking sheet first, then transfer to a bag. That way they don’t stick together. To reheat, microwave for 45-60 seconds straight from frozen.
Pin This Recipe!
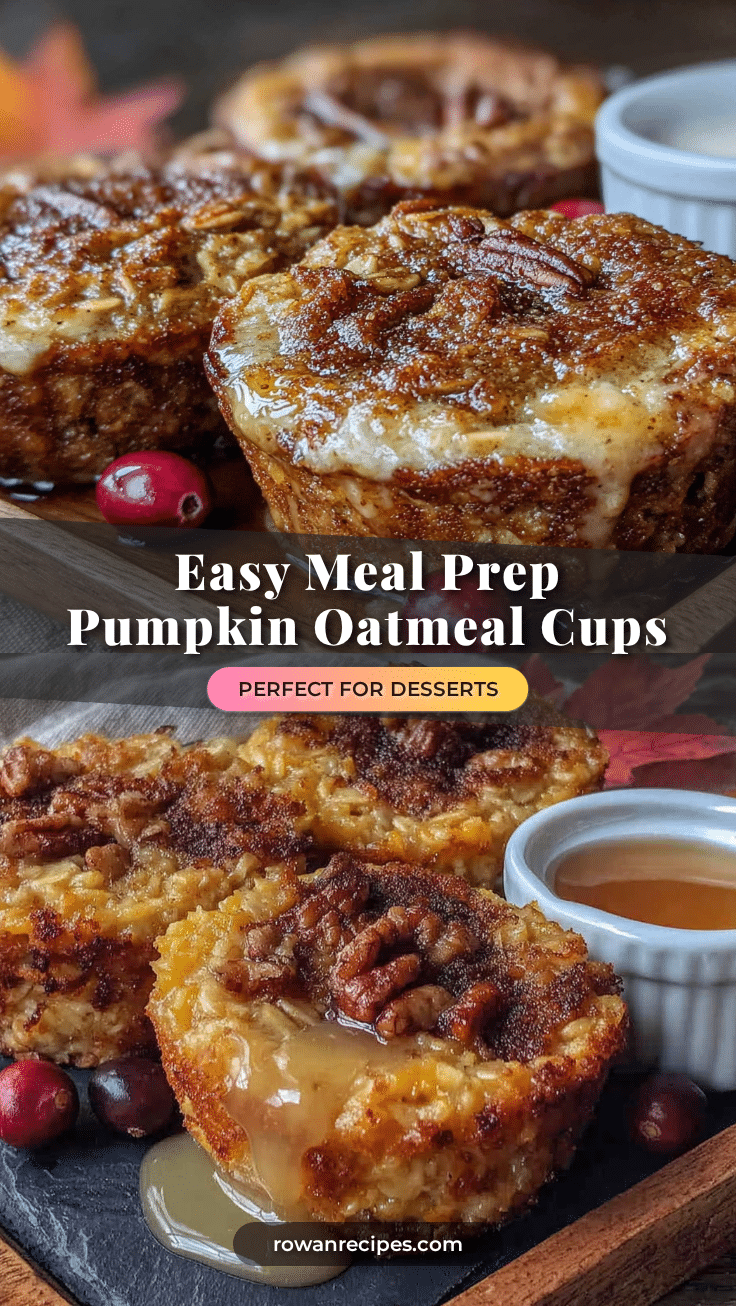
Easy Baked Pumpkin Oatmeal Cups – Best Meal Prep Breakfast

These easy baked pumpkin oatmeal cups are the perfect make-ahead breakfast. Made with simple ingredients like rolled oats, pumpkin puree, and warm spices, they’re quick to prepare, freezer-friendly, and taste like fall in every bite.
- Prep Time: 10 minutes
- Cook Time: 20 minutes
- Total Time: 30 minutes
- Yield: 12 servings 1x
- Category: Breakfast
- Cuisine: American
Ingredients
- 2 cups (180g) rolled oats
- 1 cup (245g) canned pumpkin puree (100% pumpkin, not pie filling)
- 1 cup (240ml) milk (any kind; whole milk, almond milk, oat milk, or buttermilk)
- 2 large eggs (room temperature preferred)
- 1/3 cup (80ml) pure maple syrup
- 3 tablespoons (42g) coconut oil or melted butter
- 2 tablespoons (25g) brown sugar (light or dark)
- 2 teaspoons pumpkin pie spice
- 1 teaspoon baking powder
- 1/2 teaspoon salt
- 1 teaspoon vanilla extract (pure vanilla)
- Optional mix-ins: 1/2 cup chocolate chips, chopped pecans, or dried cranberries
Instructions
- Preheat your oven to 375°F (190°C). Line a 12-cup muffin tin with paper liners or grease the cups well with butter or cooking spray.
- In a large bowl, whisk together the eggs, milk, maple syrup, melted coconut oil (or butter), brown sugar, and vanilla extract until smooth and the brown sugar has mostly dissolved, about 30 seconds.
- Add the pumpkin puree and whisk again until fully incorporated. The mixture will turn a deep orange color.
- In a separate medium bowl, stir together the rolled oats, pumpkin pie spice, baking powder, and salt. If using mix-ins (chocolate chips, nuts, etc.), stir them into the dry ingredients now.
- Pour the dry ingredients into the wet ingredients and stir until just combined. Do not overmix; a few streaks are fine. The batter will be thick and scoopable.
- Let the batter rest for 5 minutes to allow the oats to absorb some liquid.
- Scoop the batter evenly into the prepared muffin cups, filling each almost to the top. An ice cream scoop or 1/3 cup measure works well.
- Bake for 18-22 minutes, or until the tops are set and lightly golden. A toothpick inserted into the center should come out clean or with a few moist crumbs. Start checking at 18 minutes.
- Let the cups cool in the pan for 5 minutes, then transfer them to a wire rack to cool completely before storing.
Notes
Don’t skip the 5-minute rest time—it helps the oats absorb liquid for a better texture. Use a cookie scoop for even portions. Watch your oven closely; start checking at 18 minutes. Let cups cool completely before storing to avoid sogginess. Double the batch for meal prep; freeze for up to 3 months.
Nutrition
- Serving Size: 1 oatmeal cup
- Calories: 185
- Sugar: 10
- Fat: 6
- Carbohydrates: 28
- Fiber: 4
- Protein: 5
Keywords: pumpkin oatmeal cups, baked oatmeal cups, meal prep breakfast, pumpkin breakfast, healthy breakfast, easy breakfast recipe, fall breakfast, freezer-friendly breakfast