Stood at the kitchen counter, butter knife in hand, staring at a block of chocolate that had definitely seen better days. It was ninety-four degrees outside, the air conditioning was doing its best impression of a gentle sigh, and I had promised dessert for a backyard gathering that was starting in two hours. No oven. No stove. Just a fridge full of odds and ends and that sad, half-melted chocolate bar. That’s when it hit me—why fight the heat? Why not let the fridge do all the work?
This no-bake s’mores icebox cake came together in a panic, honestly. I grabbed graham crackers I’d bought for a no-bake strawberry cheesecake that never happened, a tub of heavy cream I’d impulsively purchased, and the bag of mini marshmallows my kid had been sneaking from the pantry. I figured, worst case scenario, we’d eat crackers with chocolate sauce and call it a night. But something clicked when I started layering. The crunch of the crackers, the silky chocolate cream, the little puffs of marshmallow—it was s’mores, but better. No campfire required. No smoke in your eyes. Just pure, cold, creamy nostalgia.
I brought that first wobbly cake to the table, and people went quiet. The kind of quiet that says “I’m too busy eating to talk.” And I knew I’d stumbled onto something worth keeping. This no-bake s’mores icebox cake is now my go-to summer dessert, the one I make when I want to impress without breaking a sweat. It’s the dessert that says “I tried” without actually trying that hard. And honestly? That’s exactly the kind of cooking I believe in.
Why You’ll Love This Recipe
Let me tell you why this no-bake s’mores icebox cake has earned a permanent spot in my summer rotation. I’ve tested it through three different heatwaves, two potlucks, and one very skeptical family dinner where my uncle insisted real s’mores require a fire. He asked for seconds.
- No Oven Required: When it’s too hot to cook, this cake is your answer. The fridge does all the heavy lifting while you sit in the air conditioning with a cold drink.
- Simple Ingredients: You probably have most of these in your kitchen right now. Graham crackers, chocolate, marshmallows, cream—that’s it. No fancy grocery store trips.
- Perfect for Summer Gatherings: This cake travels well, feeds a crowd, and looks like you spent hours on it. I’ve brought it to barbecues, pool parties, and even a beach picnic.
- Crowd-Pleaser: Kids love it because it tastes like camping. Adults love it because it’s sophisticated enough for a dinner party. Everyone wins.
- Make-Ahead Magic: This cake actually gets better after sitting overnight. The graham crackers soften into a cake-like texture, and the flavors meld together beautifully.
What makes this version different from other icebox cakes is the texture. Most are too mushy or too firm. I spent weeks tweaking the cream-to-cracker ratio until I got that perfect balance—soft but structured, creamy but not soupy. The chocolate layer is rich without being heavy, and the marshmallows stay fluffy instead of turning into a sticky mess. It’s s’mores, reimagined for people who want the taste without the campfire hassle.
This is the kind of dessert that makes you close your eyes after the first bite. It’s comfort food at its finest—nostalgic, satisfying, and completely stress-free.
What Ingredients You Will Need
This recipe uses simple, wholesome ingredients that come together to create something truly special. No weird extracts or hard-to-find items here. Just pantry staples that transform into magic.
For the Chocolate Cream Layer
- 2 cups heavy cream (cold—this is crucial for whipping properly)
- 1/2 cup powdered sugar (adds sweetness without grittiness)
- 1 teaspoon vanilla extract (pure, not imitation, for the best flavor)
- 1/2 cup unsweetened cocoa powder (I prefer Ghirardelli for its deep, rich taste)
- Pinch of salt (trust me on this—it makes the chocolate pop)
For the Layers
- 1 box (14.4 ounces) graham crackers (Honey Maid works great; you’ll need about 2 full sleeves)
- 2 cups mini marshmallows (plus extra for topping if you’re feeling generous)
- 1 cup semi-sweet chocolate chips (for the ganache drizzle—optional but highly recommended)
Ingredient Notes
The heavy cream is non-negotiable here. I’ve tried this with whipped topping from a tub, and it just doesn’t have the same structure. You need real cream that whips up stiff and holds its shape between those cracker layers. For the cocoa powder, I’ve found that Dutch-process gives a smoother, more mellow chocolate flavor, but regular unsweetened works perfectly fine too.
When it comes to graham crackers, don’t bother with the fancy brands. The classic Honey Maid ones absorb moisture exactly right—not too fast, not too slow. If you’re gluten-free, there are excellent gluten-free graham crackers available now that work beautifully in this recipe.
For the marshmallows, go with the mini ones. They distribute more evenly through the layers and soften at the same rate as everything else. Big marshmallows create weird pockets of goo that throw off the texture.
One tip I learned the hard way: make sure your cream is really cold. Like, straight-from-the-fridge cold. If it’s even slightly warm, it won’t whip properly, and your cake will end up flat and sad. I’ve made that mistake exactly once, and trust me, you don’t want to repeat it.
Equipment Needed
- 9×13-inch baking dish (glass or ceramic works best—metal can react with the chocolate)
- Electric mixer (stand mixer or hand mixer—both work; I use my trusty KitchenAid)
- Large mixing bowl (metal or glass; plastic can retain grease)
- Spatula (silicone is best for scraping every last bit of chocolate cream)
- Measuring cups and spoons
- Plastic wrap or foil (for covering the cake while it chills)
- Small saucepan or microwave-safe bowl (if making the ganache drizzle)
If you don’t have an electric mixer, you can absolutely whip the cream by hand with a whisk. It’ll take about 8-10 minutes of vigorous whisking, but it’s a great arm workout. I’ve done it when my mixer was on the fritz, and it worked fine—just make sure your cream is extra cold to speed things up.
For the baking dish, any shape works, but a 9×13 gives you nice, even layers. If you want a taller cake, use an 8×8 dish and double the layers. Just adjust your chilling time accordingly.
Preparation Method
- Make the chocolate cream: In your large mixing bowl, combine the cold heavy cream, powdered sugar, vanilla extract, cocoa powder, and salt. Start mixing on low speed so the cocoa doesn’t fly everywhere (learned that one the messy way). Gradually increase to medium-high speed and whip until stiff peaks form. This takes about 3-4 minutes with a mixer. You’ll know it’s ready when you lift the beaters and the cream holds its shape without drooping.
- Prepare your pan: Lightly grease the bottom of your 9×13 dish with a tiny bit of butter or cooking spray. This helps the first layer of crackers stay put instead of sliding around.
- First layer: Arrange a single layer of graham crackers in the bottom of the dish. You’ll need to break some crackers to fit—don’t stress about perfection. I usually do about 8 whole crackers, plus broken pieces to fill gaps. The crackers should cover the bottom completely with minimal overlap.
- Spread the cream: Spoon about one-third of the chocolate cream over the crackers and spread it evenly with your spatula. Don’t press too hard—you don’t want to push the crackers around. Just gentle, sweeping motions.
- Add marshmallows: Sprinkle about one-third of your mini marshmallows over the cream layer. Press them in gently so they stick.
- Repeat layers: Add another layer of graham crackers, another third of the chocolate cream, and another third of marshmallows. Repeat one more time so you have three complete layers. Your top layer should be chocolate cream with marshmallows scattered on top.
- Make the ganache (optional): In a small saucepan or microwave-safe bowl, heat the chocolate chips with 1/4 cup of heavy cream. Microwave in 30-second bursts, stirring between each, until smooth and glossy. Let it cool for 5 minutes, then drizzle over the top of the cake.
- Chill: Cover the dish with plastic wrap and refrigerate for at least 6 hours, but overnight is best. The crackers need time to soften and absorb the cream. I’ve made the mistake of rushing this step, and the cake was too crunchy. Patience pays off here.
- Serve: Cut into squares and serve cold. The cake should be firm enough to hold its shape but soft enough to melt in your mouth. If it’s too firm straight from the fridge, let it sit at room temperature for 10 minutes before serving.
One thing I always tell people: don’t skip the salt in the cream. It sounds weird, but it balances the sweetness and makes the chocolate taste deeper. I forgot it once, and the cake was good but flat. The salt wakes everything up.
Cooking Tips & Techniques
Let me share some hard-earned wisdom from my many attempts at perfecting this no-bake s’mores icebox cake. Because yes, I’ve made every mistake you can imagine.
Don’t overwhip the cream. I know it’s tempting to keep going until it’s super stiff, but if you go too far, you’ll end up with butter. Stop when the cream holds soft peaks that flop over slightly. The cocoa powder will firm it up more as you fold it in.
Let the cake rest properly. This is the hardest lesson I learned. The first time I made this, I was so excited that I cut into it after only 4 hours. The crackers were still crunchy in the middle, and the layers slid apart when I tried to serve it. Give it the full overnight chill. The texture transforms completely—the crackers become tender and cake-like, and everything holds together beautifully.
Press the crackers gently. When you add each new layer, press down lightly with your palm to make sure everything is compact. This prevents air pockets and gives you clean slices later. But don’t smash them—you want the layers to remain distinct.
Use a sharp knife for cutting. Run your knife under hot water, dry it off, then slice. The heat helps cut through the cream cleanly. Wipe the knife between cuts for the prettiest presentation.
I once tried to speed things up by using the freezer instead of the fridge. Big mistake. The edges froze while the middle stayed soft, and the texture was all wrong. The fridge is your friend here. Slow and steady wins this race.
Variations & Adaptations
This recipe is incredibly forgiving, and I’ve played around with it more times than I can count. Here are some of my favorite variations:
S’mores Icebox Cake with Peanut Butter: Add 1/2 cup of creamy peanut butter to the chocolate cream before whipping. It gives the cake a Reese’s cup vibe that’s absolutely irresistible. I made this for a potluck, and someone asked for the recipe before they even finished their first bite.
Vegan No-Bake S’mores Cake: Use coconut cream (chilled overnight, then whipped) instead of heavy cream. Use vegan graham crackers and dairy-free chocolate. The texture is slightly different—a bit lighter—but it’s still delicious. I tested this for a friend with dairy allergies, and she said it was better than the original.
S’mores Icebox Cake with Berries: Add a layer of fresh raspberries or sliced strawberries between the cream layers. The tartness cuts through the sweetness beautifully. This is my go-to summer version when berries are in season.
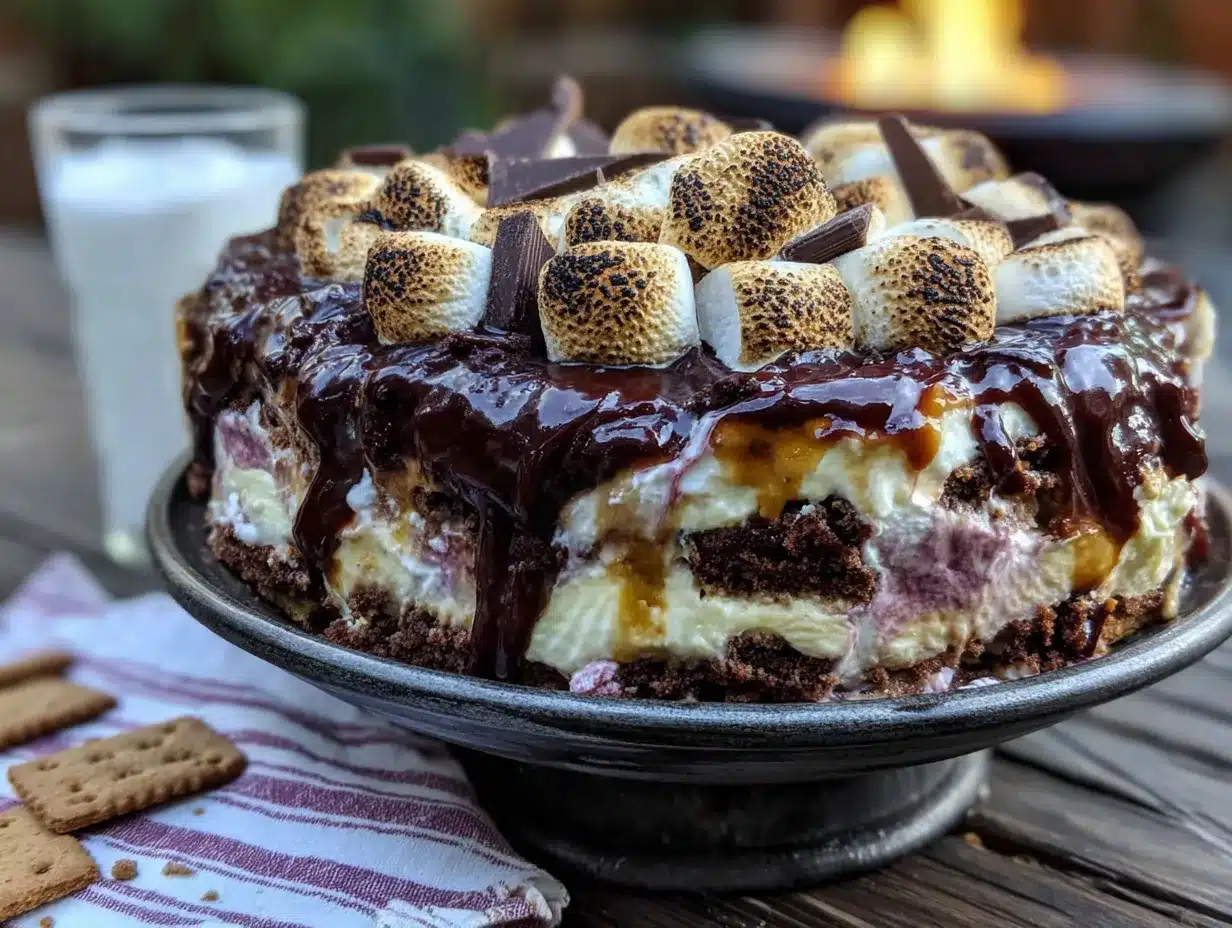
Toasted Marshmallow Top: If you have a kitchen torch, toast the marshmallows on top before serving. It gives you that campfire flavor without actually building a fire. Just be careful not to burn them—I’ve definitely torched a few in my enthusiasm.
Gluten-Free Option: Use gluten-free graham crackers or even gluten-free digestive biscuits. I’ve tried both, and they work perfectly. Just make sure your chocolate and marshmallows are also certified gluten-free if needed.
My personal favorite variation is the one with a drizzle of salted caramel sauce between the layers. It adds a salty-sweet complexity that takes the cake to another level. I discovered this accidentally when I was out of regular chocolate chips and used caramel chips instead. Happy accident!
Serving & Storage Suggestions
This no-bake s’mores icebox cake is best served cold, straight from the fridge. I like to let it sit at room temperature for about 10 minutes before cutting—it softens just enough to make slicing easy without losing its structure.
For presentation, I dust the top with a little cocoa powder and add a few extra mini marshmallows. Sometimes I’ll drizzle warm chocolate sauce over each slice right before serving. It looks fancy but takes zero effort.
This cake pairs beautifully with a cold glass of milk (obviously), but I also love it with a strong cup of coffee or a cold brew. The bitterness of the coffee balances the sweetness perfectly. For a grown-up version, serve it with a shot of bourbon or a dark rum old fashioned.
Storage: Cover the dish tightly with plastic wrap or transfer slices to an airtight container. The cake will keep in the refrigerator for up to 5 days. The texture actually improves after day one—the flavors meld together, and the crackers become even more tender.
Freezing: You can freeze this cake for up to 3 months. Wrap the entire dish in plastic wrap, then foil, and freeze. To serve, thaw in the refrigerator overnight. Don’t thaw at room temperature—it gets too soft and loses its structure.
One thing to note: the marshmallows on top will lose their fluffiness after a couple of days. If you’re making this ahead for a party, I recommend adding the top layer of marshmallows just before serving. The ones inside the layers will stay perfect.
Nutritional Information & Benefits
Let’s be real—this is a dessert, not a health food. But I believe in enjoying treats in moderation, and this one has some surprising benefits.
Per serving (based on 12 servings): Approximately 380 calories, 22g fat, 45g carbohydrates, 4g protein, 28g sugar. These values are estimates and will vary based on your specific ingredients.
The heavy cream provides calcium and vitamin D, while the cocoa powder is rich in antioxidants called flavonoids. Dark chocolate has been linked to heart health benefits, though we’re using it in moderation here. The graham crackers offer some fiber and complex carbohydrates for sustained energy.
If you’re watching your sugar intake, you can reduce the powdered sugar in the cream or use a sugar substitute. I’ve tried it with monk fruit sweetener, and while the texture is slightly different, it still tastes great.
This recipe is naturally vegetarian and can be made gluten-free and vegan with simple substitutions. It contains dairy and gluten in its standard form, so be mindful of allergies when serving guests.
I’m not a nutritionist, just someone who believes that food should be enjoyed. This cake is a treat, and that’s okay. Life is short—eat the s’mores cake.
Conclusion
This no-bake s’mores icebox cake is everything I want in a summer dessert: easy, impressive, and completely delicious. It’s the recipe I turn to when I want to make something special without turning on the oven. It’s the dessert that makes people think you tried way harder than you actually did.
I love that this cake brings back childhood memories of campfires and summer nights, but in a way that fits into adult life. No mosquitoes, no smoke-smelling clothes, no burned marshmallows. Just pure, creamy, chocolatey goodness that comes together in minutes and tastes like you spent hours on it.
I encourage you to make this your own. Add your favorite toppings, try different crackers, experiment with flavors. That’s the beauty of no-bake desserts—they’re forgiving and flexible. And if you come up with a variation you love, please share it. I’m always looking for new ideas.
So go ahead, give this no-bake s’mores icebox cake a try. Your summer self will thank you. And if you make it, drop a comment below and let me know how it turned out. Did you add anything? Change anything? I’d love to hear about your version. Happy no-baking!
Frequently Asked Questions
Can I use whipped topping instead of heavy cream?
You can, but the texture won’t be the same. Whipped topping is lighter and doesn’t set up as firmly. The cake will be softer and harder to slice cleanly. If you’re in a pinch, go ahead, but real cream gives you that perfect, sliceable texture.
How long does this cake need to chill?
At least 6 hours, but overnight is best. The graham crackers need time to absorb the cream and soften into that cake-like texture. If you cut it too early, the crackers will still be crunchy in the middle.
Can I make this ahead of time for a party?
Absolutely! This is actually a perfect make-ahead dessert. It keeps beautifully in the fridge for up to 5 days. Just add any fresh toppings (like extra marshmallows or chocolate drizzle) right before serving.
My cream won’t whip properly. What went wrong?
Most likely, your cream wasn’t cold enough. Heavy cream needs to be very cold to whip properly. Also, make sure your bowl and beaters are clean and free of any grease. Even a tiny bit of oil can prevent cream from whipping.
Can I use dark chocolate instead of cocoa powder?
You can, but it changes the texture. If you want a darker chocolate flavor, use Dutch-process cocoa powder. If you really want to use melted chocolate, let it cool completely before folding it into the whipped cream, or it will deflate the mixture.
Pin This Recipe!
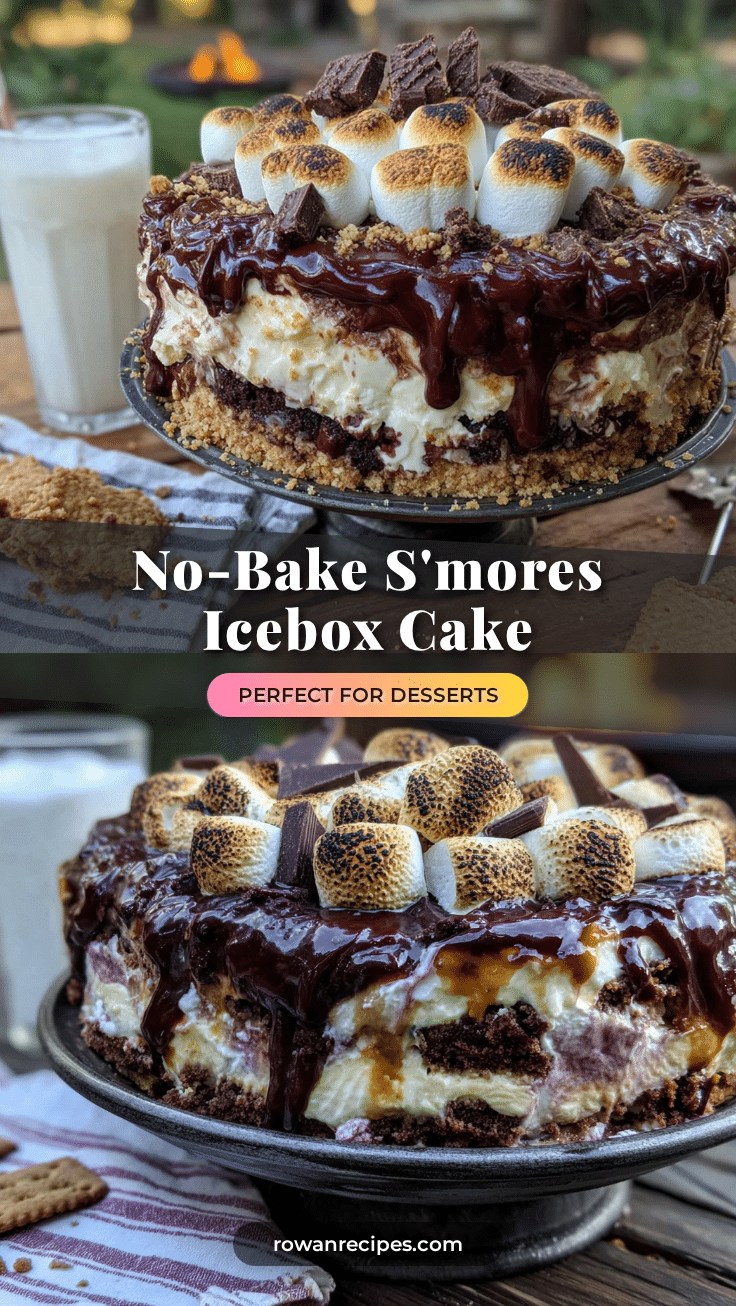
No-Bake S’mores Icebox Cake: Best Easy Summer Dessert
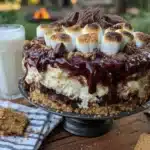
A no-bake s’mores icebox cake that layers graham crackers, chocolate cream, and marshmallows for a cool, creamy summer dessert. Perfect for hot days when you want to impress without turning on the oven.
- Prep Time: 20 minutes
- Cook Time: 0 minutes
- Total Time: 6 hours 20 minutes (includes chilling time)
- Yield: 12 servings 1x
- Category: Dessert
- Cuisine: American
Ingredients
- 2 cups heavy cream (cold)
- 1/2 cup powdered sugar
- 1 teaspoon vanilla extract (pure)
- 1/2 cup unsweetened cocoa powder
- Pinch of salt
- 1 box (14.4 ounces) graham crackers (about 2 full sleeves)
- 2 cups mini marshmallows (plus extra for topping)
- 1 cup semi-sweet chocolate chips (for ganache drizzle, optional)
- 1/4 cup heavy cream (for ganache drizzle, optional)
Instructions
- Make the chocolate cream: In a large mixing bowl, combine cold heavy cream, powdered sugar, vanilla extract, cocoa powder, and salt. Start mixing on low speed, then gradually increase to medium-high speed and whip until stiff peaks form, about 3-4 minutes.
- Prepare your pan: Lightly grease the bottom of a 9×13-inch baking dish with butter or cooking spray.
- First layer: Arrange a single layer of graham crackers in the bottom of the dish, breaking some to fit as needed. Cover the bottom completely with minimal overlap.
- Spread the cream: Spoon about one-third of the chocolate cream over the crackers and spread evenly with a spatula using gentle motions.
- Add marshmallows: Sprinkle about one-third of the mini marshmallows over the cream layer and press them in gently.
- Repeat layers: Add another layer of graham crackers, another third of chocolate cream, and another third of marshmallows. Repeat one more time for three complete layers. The top layer should be chocolate cream with marshmallows scattered on top.
- Make the ganache (optional): In a small saucepan or microwave-safe bowl, heat chocolate chips with 1/4 cup heavy cream. Microwave in 30-second bursts, stirring between each, until smooth and glossy. Let cool for 5 minutes, then drizzle over the top of the cake.
- Chill: Cover the dish with plastic wrap and refrigerate for at least 6 hours, but overnight is best.
- Serve: Cut into squares and serve cold. If too firm, let sit at room temperature for 10 minutes before serving.
Notes
Don’t overwhip the cream—stop when soft peaks form. Let the cake chill overnight for best texture. Press crackers gently to avoid air pockets. Use a sharp knife run under hot water for clean slices. The cake keeps in the refrigerator for up to 5 days and can be frozen for up to 3 months.
Nutrition
- Serving Size: 1 square (1/12 of ca
- Calories: 380
- Sugar: 28
- Sodium: 180
- Fat: 22
- Saturated Fat: 13
- Carbohydrates: 45
- Fiber: 3
- Protein: 4
Keywords: no-bake s'mores icebox cake, easy summer dessert, no oven dessert, s'mores cake, icebox cake, graham cracker dessert, chocolate marshmallow cake