I ruined banana bread for three straight years before I figured out what I was doing wrong. Not ruined as in “it was just okay” — I mean dry, crumbly, dense bricks that my family would politely nibble at before quietly pushing their plates aside. The kind of banana bread that makes you question why anyone bothers baking it in the first place. I’d follow recipes to the letter, use the ripest bananas I could find, and still end up with something that felt more like a science experiment gone wrong than actual comfort food. It got to the point where I’d avoid looking at my overripe bananas because I knew they’d trigger another failed attempt.
Then one rainy Saturday morning, I ran out of my usual yogurt (which most recipes swear by for moisture) and had to improvise. I grabbed sour cream instead, threw in an extra egg because it felt right, and decided to bake it at a slightly lower temperature than normal. The loaf came out golden, perfectly domed, and when I sliced into it — that steam hit my face and I just knew. It was tender, practically melting on the tongue, with walnuts adding that perfect little crunch in every bite. My husband ate three slices before the thing had even cooled down properly.
That accidental batch taught me something important: moist banana bread isn’t about following rules. It’s about understanding what actually keeps baked goods tender. The fat content, the moisture from your bananas, the way you handle the batter — all of it matters more than any fancy technique. I’ve made this recipe at least forty times since that rainy morning, tweaking little things here and there, and it never fails. Not once. It’s the kind of banana bread that makes people close their eyes after the first bite, and honestly, that never gets old.
Why You’ll Love This Recipe
This isn’t just another banana bread recipe floating around the internet. I’ve tested this version dozens of times in my own kitchen, adjusting ratios and temperatures until every single loaf comes out consistently moist, tender, and packed with flavor. Here’s what makes it stand out:
- Incredibly Moist Without Being Dense : The combination of sour cream and melted butter creates a texture that stays soft for days. No dry crumb here.
- Simple Pantry Ingredients : You probably have everything you need already. No weird specialty flours or hard-to-find extracts.
- Perfect for Overripe Bananas : Finally, a use for those spotty bananas sitting on your counter. The darker, the better.
- Walnuts Add the Perfect Crunch : They toast up inside the loaf and provide that textural contrast that makes every bite interesting.
- Foolproof Method : I’ve included every little trick I’ve learned the hard way so you don’t have to make the same mistakes I did.
- Freezes Beautifully : Make two loaves and stash one for later. It thaws perfectly and tastes just as fresh.
This recipe works because it respects the science behind baking while keeping things approachable. The sour cream adds acidity that tenderizes the gluten, the melted butter distributes fat evenly throughout the batter, and the extra egg gives structure without making things rubbery. It’s the kind of banana bread that makes you wonder why you ever struggled with it in the first place.
What Ingredients You Will Need
Let me walk you through exactly what goes into this loaf and why each ingredient matters. Most of these are pantry staples, but a few specific choices make all the difference.
For the Banana Bread Batter:
- 3 ripe bananas, mashed (about 1 ½ cups) — The riper the better. You want them heavily spotted, almost black. Greenish bananas won’t give you enough sweetness or moisture. I let mine sit on the counter until they’re practically begging to be used.
- ½ cup unsalted butter, melted and slightly cooled — Melted butter distributes more evenly than creamed butter, giving you a more tender crumb. I use unsalted so I can control the salt level myself.
- ¾ cup granulated sugar — Regular white sugar works perfectly here. It dissolves easily into the melted butter and helps create that golden crust.
- 2 large eggs, room temperature — Cold eggs will seize up your melted butter. Let them sit out for 20 minutes or pop them in warm water for 5 minutes.
- 1 teaspoon vanilla extract — Pure vanilla makes a difference here. The artificial stuff has a chemical aftertaste that doesn’t play well with banana.
- ½ cup sour cream (full fat preferred) — This is my secret weapon. The acidity tenderizes the gluten and keeps the bread incredibly moist. Greek yogurt works in a pinch but won’t give you quite the same richness.
- 1 ½ cups all-purpose flour — Spoon and level your flour. Scooping directly from the bag packs it down and you’ll end up with dry bread.
- 1 teaspoon baking soda — This is your leavening agent. Make sure it’s fresh — test it by dropping a bit into vinegar; if it fizzes vigorously, you’re good.
- ½ teaspoon salt — Salt enhances the banana flavor and balances the sweetness. Don’t skip it.
- ½ teaspoon cinnamon (optional but highly recommended) — Adds warmth without overpowering the banana. I never skip this.
For the Walnut Addition:
- ¾ cup walnut halves, roughly chopped — Toast them first if you have time. Spread them on a baking sheet at 350°F for 5-7 minutes until fragrant. It brings out their nutty flavor and keeps them crunchier inside the bread.
Ingredient Tips from My Kitchen: I’ve tried this recipe with different fats over the years. Coconut oil works but gives a subtle coconut flavor that not everyone loves. Vegetable oil makes the bread moist but a bit greasy. Stick with butter for the best flavor and texture. For the sour cream, I prefer Daisy or Breakstone’s — they’re thick and don’t have any weird additives. If you’re dairy-free, full-fat coconut cream mixed with a teaspoon of lemon juice can work as a substitute, but the texture will be slightly different.
One thing I learned the hard way: don’t over-mash your bananas. Leave a few small chunks. They’ll melt into the bread as it bakes and create little pockets of concentrated banana flavor. Smooth puree gives you uniform flavor, but those little lumps? That’s where the magic happens.
Equipment Needed
You don’t need a fancy kitchen to make this banana bread. Here’s what you’ll actually use:
- 9×5-inch loaf pan — Standard size works perfectly. Glass, metal, or ceramic all work, but metal gives you the best browning. If you’re using dark non-stick, reduce your oven temperature by 25°F to prevent over-browning.
- Large mixing bowl — Any bowl big enough to hold your batter without splashing.
- Medium bowl — For mixing dry ingredients separately.
- Whisk — For combining wet ingredients smoothly.
- Rubber spatula — For folding everything together without over-mixing.
- Parchment paper — Lining your pan makes removal effortless. I cut a strip long enough to hang over both long sides as handles.
- Cooling rack — Essential for even cooling. Setting a hot loaf directly on a counter traps steam and makes the bottom soggy.
- Potato masher or fork — For mashing bananas. I prefer a potato masher because it leaves those perfect little chunks.
- Measuring cups and spoons — Accurate measurements matter in baking. I use dry measuring cups for flour and sugar, liquid measuring cups for sour cream.
If you don’t have a loaf pan, you can bake this in an 8×8 square pan and reduce the time by about 10 minutes. I’ve also made muffins with this batter — just fill lined muffin tins ¾ full and bake for 18-22 minutes. The muffins are perfect for freezing and grabbing on busy mornings.
Preparation Method
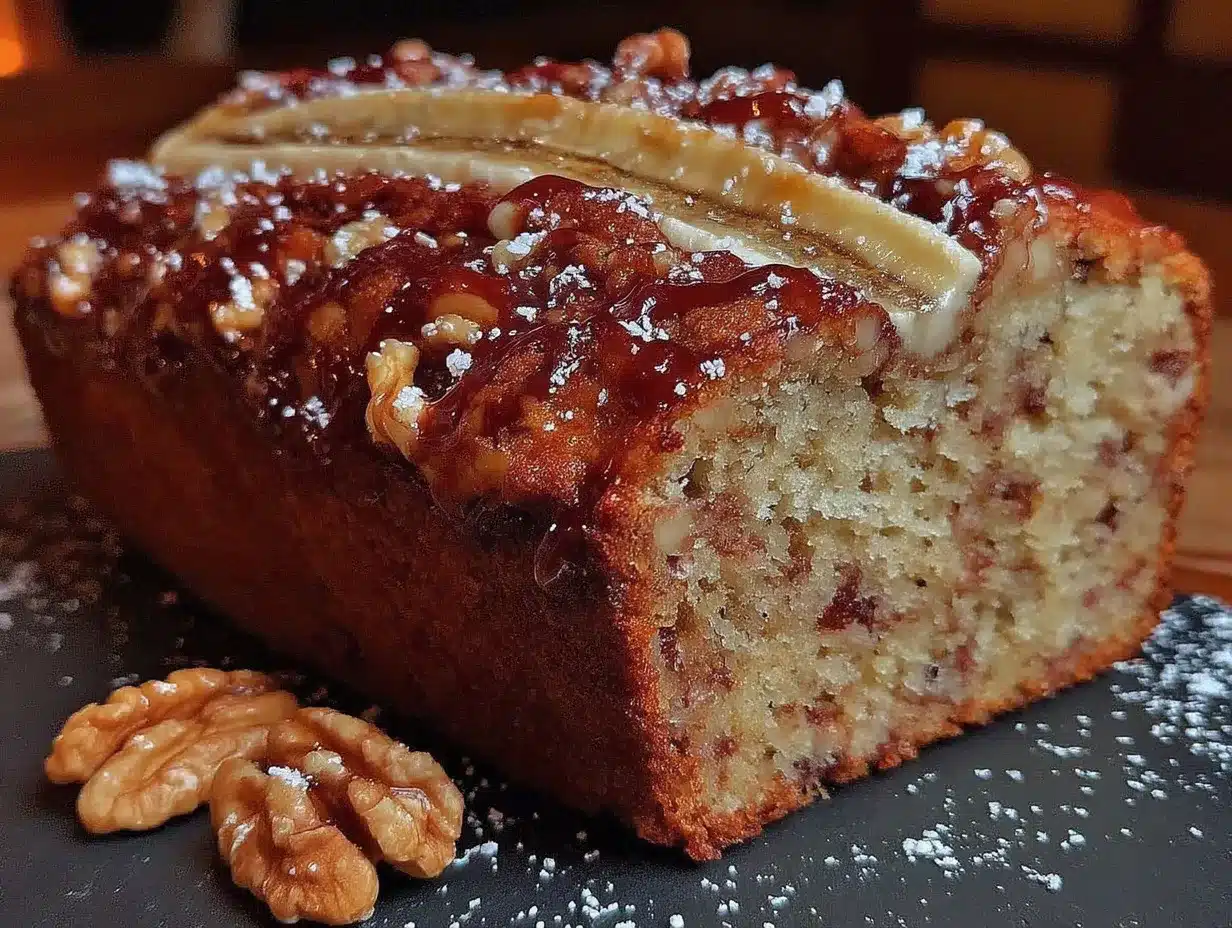
Let me walk you through this step by step. I’ve included every little detail I wish someone had told me years ago.
- Preheat your oven to 350°F (175°C). Position the rack in the middle of the oven. Grease your 9×5-inch loaf pan with butter or cooking spray, then line it with parchment paper, leaving overhang on the long sides. This makes lifting the finished bread out so much easier.
- Mash your bananas. In a large bowl, mash those overripe bananas with a potato masher or fork. Leave some small chunks — about pea-sized. You want about 1 ½ cups total. Set them aside for a moment.
- Melt your butter. In a small saucepan or microwave-safe bowl, melt ½ cup unsalted butter. Let it cool for 5 minutes. You don’t want it hot enough to cook the eggs when you add them, but warm enough to stay liquid.
- Combine wet ingredients. Add the melted butter, ¾ cup sugar, 2 eggs, 1 teaspoon vanilla, and ½ cup sour cream to your mashed bananas. Whisk everything together until smooth and well combined. The mixture should look pale and slightly glossy. This takes about 30 seconds of whisking.
- Mix dry ingredients separately. In a medium bowl, whisk together 1 ½ cups flour, 1 teaspoon baking soda, ½ teaspoon salt, and ½ teaspoon cinnamon. Whisking aerates the flour and distributes the leavening evenly. No lumps allowed.
- Fold dry into wet. Pour the dry ingredients over the wet mixture. Using a rubber spatula, fold gently — cut through the center, scrape the bottom, turn the bowl, repeat. Stop as soon as you no longer see streaks of flour. Over-mixing develops gluten and makes your bread tough. A few small lumps are totally fine.
- Fold in the walnuts. Sprinkle your chopped walnuts over the batter and fold 3-4 times to distribute them evenly. Don’t overwork the batter here.
- Pour into prepared pan. Scrape the batter into your lined loaf pan and spread it evenly with the spatula. Give the pan a gentle tap on the counter to release any air bubbles.
- Bake for 55-65 minutes. Place the pan in the preheated oven. Bake until a toothpick inserted into the center comes out clean or with just a few moist crumbs. The top should be golden brown and cracked beautifully. Start checking at 55 minutes — every oven runs differently.
- Cool properly. Let the bread cool in the pan on a wire rack for 15 minutes. Then use the parchment overhang to lift it out and transfer it directly to the rack. Let it cool completely before slicing — at least 1 hour. I know it’s tempting to cut into it warm, but it needs that time to set. Warm banana bread slices tend to crumble and fall apart.
Sensory Cues to Watch For: When the batter is ready, it should look thick but scoopable, like a very thick milkshake. During baking, your kitchen will fill with the most incredible toasty banana aroma around the 40-minute mark. The top should develop a deep golden-brown crack — that’s the signature of properly baked banana bread. If the top is browning too quickly before the center is done, tent loosely with foil for the last 15 minutes.
My Personal Efficiency Tip: While the butter melts, get your bananas mashed and your dry ingredients whisked. By the time the butter has cooled slightly, you’re ready to combine everything. The whole mixing process takes about 10 minutes from start to finish. This is a great recipe to make while your morning coffee brews.
Cooking Tips & Techniques
After all those failed loaves, I’ve collected some hard-won wisdom that’ll save you from the same frustration.
Don’t Over-mix the Batter. This is the number one mistake I made for years. Once flour hits liquid, gluten starts developing. Mix until just combined — about 12-15 folds with your spatula. A few streaks of flour are okay. They’ll disappear as you fold in the walnuts. Over-mixed banana bread is tough and dense, and no amount of extra sour cream can fix it.
Temperature Matters More Than You Think. Room temperature eggs and sour cream make a huge difference. Cold ingredients will make your melted butter clump up, leaving you with uneven fat distribution. I set my eggs and sour cream on the counter 30 minutes before I start baking. If I forget, I place the eggs in a bowl of warm water for 5 minutes and microwave the sour cream for 10 seconds.
Let the Bananas Get Really Ugly. I’m talking black skins, soft spots, almost fermenting. Those are the bananas you want. They’re at peak sweetness and moisture content. If your bananas aren’t ripe enough, you can speed things up by roasting them in their skins at 300°F for 15-20 minutes until they’re soft and the skins have darkened. Let them cool before mashing.
The Toothpick Test Can Lie. A clean toothpick means the bread is done, but if you’re using a dark pan or glass, the center might still be underdone even if the toothpick comes out clean. I also press gently on the top — it should spring back slowly. If it leaves an indent, it needs more time.
Let It Cool Completely. I know, I know. But slicing warm banana bread is like trying to cut warm butter with a spoon. The steam inside needs to redistribute and the structure needs to set. I’ve ruined more than a few loaves by cutting too early. Trust the process.
Variations & Adaptations
This recipe is wonderfully forgiving and adapts to all kinds of dietary needs and flavor preferences. Here are some variations I’ve tried and loved:
Chocolate Chip Banana Bread: Swap the walnuts for ¾ cup semi-sweet chocolate chips. The chocolate melts into little pools throughout the bread and pairs beautifully with the banana. My kids prefer this version and honestly, so do I sometimes.
Gluten-Free Version: Use a 1:1 gluten-free flour blend (I like Bob’s Red Mill or King Arthur’s). Add 1 teaspoon of xanthan gum if your blend doesn’t already include it. The texture will be slightly more delicate, so handle the batter gently and let the bread cool completely before slicing.
Vegan Adaptation: Replace the eggs with two flax eggs (2 tablespoons ground flaxseed mixed with 6 tablespoons water, let sit for 5 minutes). Use melted coconut oil instead of butter and full-fat coconut cream instead of sour cream. The bread will be a bit denser but still deliciously moist.
Spiced Banana Bread: Add ½ teaspoon nutmeg, ¼ teaspoon cloves, and ¼ teaspoon allspice along with the cinnamon. This gives the bread a warm, holiday-like flavor that’s perfect for fall mornings.
Nut-Free Option: Skip the walnuts entirely or replace them with ¾ cup dried cranberries, raisins, or chopped dates. The bread will still be moist and flavorful — the nuts are more about texture than flavor.
I once made a version with caramelized bananas — I cooked sliced bananas in a pan with butter and brown sugar until they were golden and jammy, then folded them into the batter. It was absurdly good but also absurdly sweet. Save that one for special occasions.
Serving & Storage Suggestions
This banana bread is wonderful in so many ways. Here’s how to make the most of it:
Serving Temperature: Room temperature is ideal. The flavors are more pronounced and the texture is at its peak. If you want to warm individual slices, pop them in the toaster or microwave for 10-15 seconds. A warm slice with a pat of butter melting into it? Absolute perfection.
Presentation Ideas: Slice the bread into thick (1-inch) slices and arrange them on a wooden board. Sprinkle a few extra toasted walnuts on top for visual appeal. For brunch, serve alongside fresh fruit and a drizzle of honey. It also makes an incredible base for French toast — dip thick slices in an egg mixture and pan-fry until golden.
What to Serve With It: A cup of strong black coffee or chai tea is my go-to pairing. For a more indulgent treat, spread a slice with cream cheese frosting or honey butter. Fresh berries on the side add brightness and balance the richness.
Storage Instructions: Wrap the cooled loaf tightly in plastic wrap, then in aluminum foil. Store at room temperature for up to 4 days. The sour cream keeps it moist longer than traditional banana bread. Do not refrigerate — it will dry out the bread and make it stale faster.
Freezing Instructions: This bread freezes beautifully. Wrap the whole loaf or individual slices in plastic wrap, then in foil, and place in a freezer bag. Freeze for up to 3 months. To thaw, leave at room temperature for 2-3 hours or microwave individual slices for 30 seconds. The flavor actually improves after freezing — the flavors meld together somehow.
How Flavors Develop: Day one is good. Day two is better. The banana flavor deepens and the texture becomes even more tender as the bread sits. If you can resist eating it all immediately, wrap it up and save it for the next day. You’ll thank me.
Nutritional Information & Benefits
Here’s the approximate nutritional breakdown for one slice (based on 10 slices per loaf):
- Calories: 285
- Total Fat: 14g
- Saturated Fat: 6g
- Cholesterol: 55mg
- Sodium: 210mg
- Total Carbohydrates: 36g
- Dietary Fiber: 2g
- Sugars: 18g
- Protein: 5g
Health Benefits: Bananas are packed with potassium, which supports heart health and muscle function. Walnuts provide omega-3 fatty acids and antioxidants that are great for brain health. The sour cream adds calcium and protein, while the eggs contribute high-quality protein and vitamins. This isn’t health food by any means, but it’s a treat that offers more nutritional value than your average cake.
Dietary Considerations: This recipe contains gluten, dairy, eggs, and tree nuts (walnuts). For a nut-free version, simply omit the walnuts. For a dairy-free version, use melted coconut oil, coconut cream, and a dairy-free butter substitute. For a gluten-free version, use a 1:1 gluten-free flour blend as mentioned above.
I personally love that this bread feels indulgent but isn’t loaded with refined sugar or processed ingredients. It’s the kind of treat you can feel good about serving to your family or enjoying with your afternoon coffee.
Conclusion
This banana bread recipe has become a staple in my kitchen for good reason. It’s reliable, forgiving, and produces consistently amazing results every single time. The sour cream keeps it impossibly moist, the walnuts add that perfect crunch, and the whole thing comes together in about 10 minutes of active work. It’s the kind of recipe that makes you look like a baking pro even on your most tired days.
I’d love for you to try this and make it your own. Maybe you’ll add chocolate chips instead of walnuts, or throw in some dried cranberries for tartness. Maybe you’ll double the cinnamon because that’s how you roll. That’s the beauty of a good base recipe — it invites creativity. If you’re looking for more cozy, comforting recipes, you might enjoy my cozy pecan pie bars or these ultra-gooey Levain-style cookies for another sweet treat.
Leave a comment below and let me know how yours turned out. Did you make any substitutions? Did your family devour it as fast as mine does? I genuinely love hearing about your baking adventures. Happy baking, friends — may your bananas always be spotty and your loaves always be moist.
Frequently Asked Questions
Can I use frozen bananas for this recipe?
Absolutely! Frozen bananas actually work great. Thaw them completely, then drain off any excess liquid before mashing. The freezing process breaks down the cell walls and makes them even sweeter and more flavorful. Just don’t use the liquid that separates during thawing — it can make your batter too wet.
Why did my banana bread sink in the middle?
This usually happens for one of three reasons: the batter was over-mixed (developing too much gluten), the oven temperature was too low (causing the bread to rise then collapse), or the bread was under-baked. Make sure your oven is properly preheated to 350°F and check doneness with a toothpick before pulling it out.
Can I reduce the sugar in this recipe?
You can reduce it to ½ cup without major issues, but the texture will be slightly less tender and the crust won’t brown as nicely. Sugar does more than sweeten — it helps with moisture retention and browning. If you reduce sugar, consider adding an extra tablespoon of sour cream to compensate.
How do I know when my bananas are ripe enough?
Look for yellow skins covered in brown spots — the more spots, the better. The banana should feel soft when gently squeezed, almost like a ripe avocado. If the skin has turned mostly black, that’s even better. Green or barely yellow bananas won’t give you enough sweetness or moisture.
Can I make this recipe into muffins instead?
Yes! This batter makes about 12-14 standard muffins. Fill lined muffin tins ¾ full and bake at 350°F for 18-22 minutes, or until a toothpick comes out clean. Muffins bake faster than a loaf, so start checking at 18 minutes. They’re perfect for freezing and grabbing on busy mornings.
Pin This Recipe!
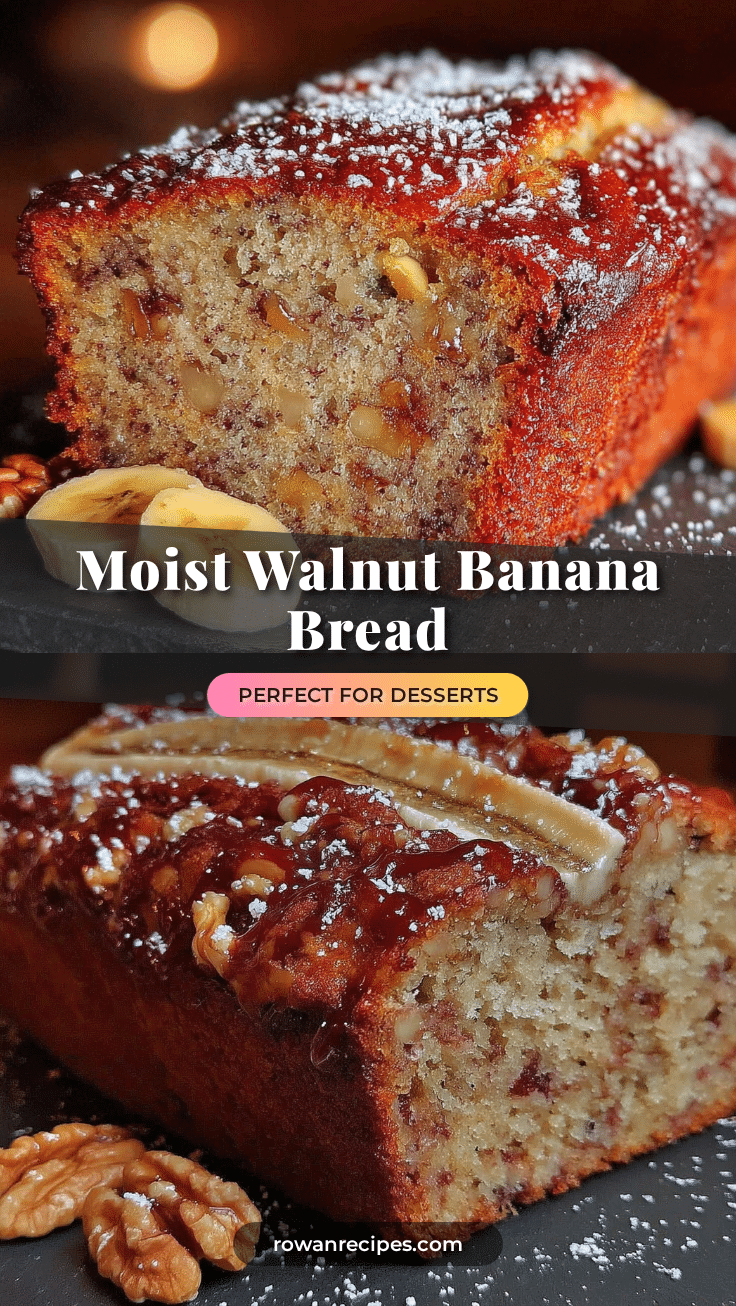
Moist Classic Banana Bread with Walnuts: Best Easy Recipe
This foolproof banana bread uses sour cream and melted butter for an incredibly moist, tender crumb, with walnuts adding the perfect crunch. It’s a simple, reliable recipe that comes together in minutes and stays soft for days.
- Prep Time: 10 minutes
- Cook Time: 55-65 minutes
- Total Time: 1 hour 15 minutes
- Yield: 10 servings 1x
- Category: Dessert
- Cuisine: American
Ingredients
- 3 ripe bananas, mashed (about 1 ½ cups)
- ½ cup unsalted butter, melted and slightly cooled
- ¾ cup granulated sugar
- 2 large eggs, room temperature
- 1 teaspoon vanilla extract
- ½ cup sour cream (full fat preferred)
- 1 ½ cups all-purpose flour
- 1 teaspoon baking soda
- ½ teaspoon salt
- ½ teaspoon cinnamon (optional but highly recommended)
- ¾ cup walnut halves, roughly chopped
Instructions
- Preheat your oven to 350°F (175°C). Position the rack in the middle of the oven. Grease your 9×5-inch loaf pan with butter or cooking spray, then line it with parchment paper, leaving overhang on the long sides.
- In a large bowl, mash the overripe bananas with a potato masher or fork, leaving some small chunks (about pea-sized). You should have about 1 ½ cups total. Set aside.
- In a small saucepan or microwave-safe bowl, melt ½ cup unsalted butter. Let it cool for 5 minutes.
- Add the melted butter, ¾ cup sugar, 2 eggs, 1 teaspoon vanilla, and ½ cup sour cream to the mashed bananas. Whisk until smooth and well combined, about 30 seconds.
- In a medium bowl, whisk together 1 ½ cups flour, 1 teaspoon baking soda, ½ teaspoon salt, and ½ teaspoon cinnamon.
- Pour the dry ingredients over the wet mixture. Using a rubber spatula, fold gently until just combined—about 12-15 folds. A few small lumps are fine.
- Sprinkle the chopped walnuts over the batter and fold 3-4 times to distribute evenly.
- Scrape the batter into the prepared loaf pan and spread evenly. Give the pan a gentle tap on the counter to release air bubbles.
- Bake for 55-65 minutes, until a toothpick inserted into the center comes out clean or with a few moist crumbs. The top should be golden brown and cracked.
- Let the bread cool in the pan on a wire rack for 15 minutes. Then use the parchment overhang to lift it out and transfer it directly to the rack. Cool completely before slicing (at least 1 hour).
Notes
Don’t over-mix the batter; mix until just combined. Use very ripe bananas (heavily spotted or black). Room temperature ingredients are important. Let the bread cool completely before slicing to prevent crumbling. The bread stays moist for up to 4 days at room temperature when wrapped tightly. Freezes well for up to 3 months.
Nutrition
- Serving Size: 1 slice
- Calories: 285
- Sugar: 18
- Sodium: 210
- Fat: 14
- Saturated Fat: 6
- Carbohydrates: 36
- Fiber: 2
- Protein: 5
Keywords: banana bread, moist banana bread, walnut banana bread, easy banana bread, classic banana bread