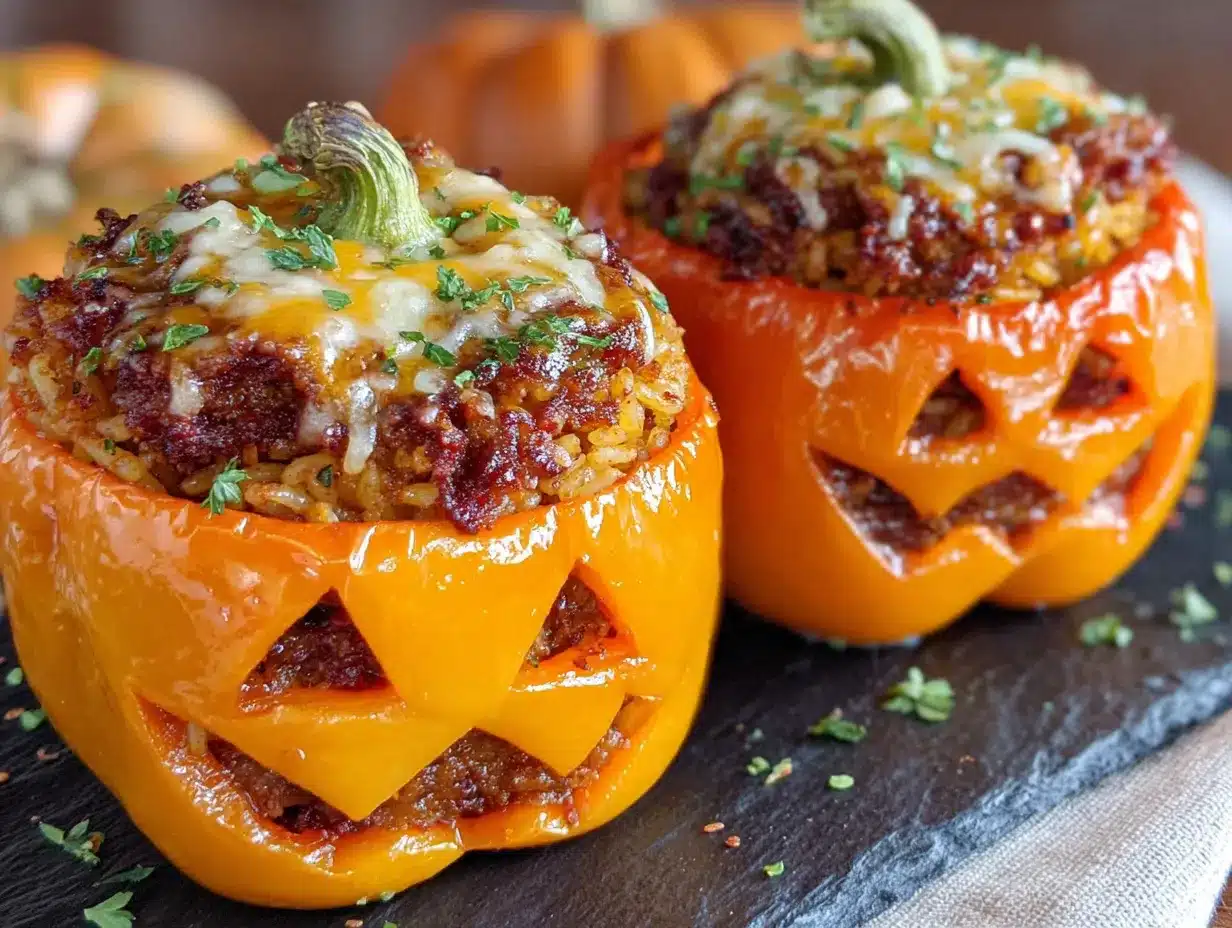
My nephew took one look at the plate, squinted, and said, “Are they smiling at me before I eat them?” I honestly hadn’t thought about it that way. I just wanted something fun for Halloween that didn’t involve a bucket of candy or a store-bought costume. He picked one up, examined the little face carved into the orange bell pepper, and took a bite. Then another. And then he asked if he could have two. That’s when I knew this wasn’t just a silly dinner idea—it was a keeper. These Spooky Jack-O-Lantern Stuffed Bell Peppers are exactly what you need when you want the holiday spirit without the sugar crash.
The thing is, Halloween dinner is always a weird in-between meal. You want it to be festive, but you also want something that actually fills everyone up before the sugar rush hits. These little guys do both. They look like mini jack-o-lanterns sitting on the plate, but they’re hearty enough to be the main event. The filling is a savory mix of seasoned ground beef, rice, and melty cheese, all tucked inside a bright orange bell pepper that’s been carved with a spooky (or silly) face. It’s the kind of meal that makes kids giggle and adults secretly happy they don’t have to eat another slice of pizza.
I’ll be honest—I didn’t nail this on the first try. The first batch came out looking more like sad, squished pumpkins than anything spooky. But after a few tweaks, I figured out the trick to getting those faces to hold their shape and the peppers to stay bright and tender without turning into mush. This version is the one that finally got the stamp of approval from the toughest critic I know: a six-year-old who usually only eats mac and cheese.
Why You’ll Love This Recipe
Let me tell you why these Spooky Jack-O-Lantern Stuffed Bell Peppers are about to become your new Halloween tradition. I’ve tested this recipe more times than I care to admit, and every single batch got better. Here’s what makes them special:
- Fun and Festive: The carved faces make dinner feel like a party. Kids actually get excited to eat their vegetables when they look like this.
- Easy to Make: You don’t need any special skills or tools. A paring knife and a steady hand are all it takes to carve those little faces.
- Family-Approved: The savory filling is a crowd-pleaser. Even picky eaters will go for seconds.
- Customizable: Swap the ground beef for turkey, chicken, or a plant-based option. The peppers are just the vessel for whatever filling you love.
- Perfect for Halloween Dinner: It’s a complete meal in one dish. No need for sides unless you want them.
What really sets this recipe apart is the technique. Instead of just cutting the top off and stuffing the pepper, you carve a face into the side. It sounds tricky, but I’ll walk you through it step by step. The peppers hold their shape beautifully, and the filling stays warm and gooey. It’s the kind of dinner that makes you feel like a kitchen wizard, even if you’re just following along.
What Ingredients You Will Need
This recipe relies on simple, everyday ingredients to create something that looks far more complicated than it actually is. Most of these are pantry staples, so you probably already have everything on hand. Let’s break it down.
- 4 large orange bell peppers: Orange peppers work best because they look the most like pumpkins. Look for peppers that are squat and round rather than tall and narrow. They should sit flat on their own without wobbling.
- 1 pound ground beef (85/15): I prefer 85/15 because it has enough fat to keep the filling moist without being greasy. You can use ground turkey or chicken if you prefer a leaner option.
- 1 cup cooked white rice: Leftover rice works great here. You can also use brown rice, quinoa, or even cauliflower rice for a low-carb version.
- 1 small yellow onion, diced: About 1/2 cup. Onion adds sweetness and depth to the filling.
- 2 cloves garlic, minced: Fresh garlic is best, but jarred minced garlic works in a pinch.
- 1 can (15 ounces) diced tomatoes, drained: I like using fire-roasted diced tomatoes for extra flavor. Drain them well so the filling isn’t too watery.
- 1 cup shredded cheddar cheese: Sharp cheddar adds a nice tang. You can also use Monterey Jack, mozzarella, or a Mexican blend.
- 1 teaspoon chili powder: This gives the filling a mild warmth. Adjust to your taste.
- 1/2 teaspoon cumin: Adds a smoky, earthy note that pairs perfectly with the peppers.
- 1/2 teaspoon smoked paprika: Optional, but it adds a subtle smokiness that makes the filling taste like it’s been cooking all day.
- Salt and black pepper to taste: Don’t skip the salt—it brings all the flavors together.
- 2 tablespoons olive oil: For sautéing the onion and garlic.
- 1/4 cup tomato sauce or salsa: This adds moisture and a little acidity to the filling. I prefer salsa for extra flavor, but plain tomato sauce works too.
For the faces, you’ll want a small sharp knife. A paring knife is perfect. You can carve any expression you like—scary, silly, or somewhere in between. Just make sure the eyes and mouth are large enough to let steam escape during baking. I learned that the hard way when my first batch ended up with exploded pepper faces.
Equipment Needed
You don’t need a fancy kitchen to pull this off. Here’s what you’ll need:
- Large skillet or frying pan: For cooking the filling. A 12-inch skillet works well.
- Paring knife: The most important tool for carving the faces. A small, sharp knife gives you control.
- Cutting board: For prepping the peppers and onions.
- Baking dish: A 9×13-inch dish works perfectly. You want something that holds the peppers snugly so they don’t tip over.
- Mixing bowl: For combining the filling ingredients.
- Aluminum foil: For covering the dish during the first part of baking.
- Measuring cups and spoons: For accuracy, though you can eyebit the spices if you’re comfortable.
- Wooden spoon or spatula: For stirring the filling.
If you don’t have a paring knife, a small serrated knife can work, but it’s harder to make clean cuts. I’ve also used a pumpkin carving tool from a Halloween kit—it actually works surprisingly well for the small faces. Just make sure it’s clean and food-safe.
Preparation Method
Let’s get cooking. This recipe comes together in about 45 minutes, and most of that is hands-off baking time.
- Preheat your oven to 375°F (190°C). While it’s heating, bring a large pot of water to a boil. You’ll use it to blanch the peppers, which softens them just enough for carving.
- Prepare the peppers. Wash the bell peppers and pat them dry. Using your paring knife, cut a small circle around the stem on the top of each pepper. Remove the stem and set it aside. Scoop out the seeds and membranes from inside the pepper. Be gentle—you want the pepper to stay intact.
- Blanch the peppers. Carefully lower the peppers into the boiling water. Let them cook for 3 to 4 minutes. This softens them slightly so you can carve without the pepper cracking. Remove them with tongs and let them cool on a cutting board. Don’t skip this step—I once tried carving raw peppers and ended up with jagged, uneven faces.
- Carve the faces. Once the peppers are cool enough to handle, use your paring knife to cut small triangles for eyes and a mouth. You can also carve a nose if you want. Make the openings about 1/2 inch wide. If they’re too small, the filling won’t show through. Too big, and the pepper might fall apart. I like to carve a classic jack-o-lantern face: two triangular eyes and a jagged smile. Get creative—no two peppers have to look the same.
- Cook the filling. Heat the olive oil in a large skillet over medium heat. Add the diced onion and cook for 3 to 4 minutes until it’s soft and translucent. Add the minced garlic and cook for another 30 seconds until fragrant. Add the ground beef and break it apart with a wooden spoon. Cook until the beef is browned, about 6 to 8 minutes. Drain any excess fat if needed.
- Season the filling. Stir in the chili powder, cumin, smoked paprika, salt, and black pepper. Cook for 1 minute until the spices are fragrant. Add the drained diced tomatoes and tomato sauce (or salsa). Stir everything together and let it simmer for 2 minutes. Remove the skillet from the heat.
- Combine the filling. In a large mixing bowl, combine the cooked beef mixture with the cooked rice and half of the shredded cheese. Stir until everything is evenly distributed. Taste and adjust the seasoning if needed. The filling should be flavorful and slightly moist.
- Stuff the peppers. Carefully spoon the filling into each carved pepper. Pack it in gently but firmly. Don’t overstuff, or the pepper might split during baking. Leave a little room at the top for the cheese.
- Bake the peppers. Place the stuffed peppers in a 9×13-inch baking dish. If they wobble, you can cut a thin slice off the bottom to make them sit flat. Cover the dish with aluminum foil and bake for 20 minutes. This steams the peppers and ensures they’re tender all the way through.
- Add the cheese and finish baking. After 20 minutes, remove the foil. Sprinkle the remaining shredded cheese over the tops of the peppers. Return the dish to the oven, uncovered, and bake for another 10 to 15 minutes. The cheese should be melted and bubbly, and the peppers should be tender but still holding their shape.
- Rest and serve. Let the peppers rest for 5 minutes before serving. This helps the filling set and makes them easier to handle. Transfer each pepper to a plate, face-side up, so everyone can see the jack-o-lantern grin.
The peppers will be bright orange and slightly wrinkled, just like a real pumpkin after a long night on the porch. The cheese will be golden and gooey, and the filling will be warm and savory. It’s a Halloween dinner that actually looks like Halloween.
Cooking Tips & Techniques
I’ve made these peppers more times than I can count, and I’ve learned a few tricks along the way. Here’s what I wish I’d known from the start.
Choose the right peppers. Not all bell peppers are created equal. Look for ones that are squat and round, with a flat bottom. Tall, narrow peppers are harder to carve and tend to tip over in the baking dish. If your peppers are wobbly, slice a thin piece off the bottom to create a flat surface. Just don’t cut into the cavity.
Don’t skip the blanching step. I know it’s an extra step, but it makes a huge difference. Raw peppers are stiff and brittle. If you try to carve them, the skin will crack and tear. Blanching softens the pepper just enough that the knife glides through cleanly. It also starts the cooking process, so the peppers finish baking at the same time as the filling.
Carve with confidence. If you’re nervous about carving, start with simple shapes. Triangles for eyes and a crescent for a mouth are classic and easy. You can always make the openings larger, but you can’t undo a cut. I like to sketch the face lightly with a toothpick before I start cutting. It gives me a roadmap.
Watch the filling moisture. If the filling is too wet, it can make the peppers soggy. Drain the diced tomatoes well, and don’t add extra liquid unless the mixture seems dry. The rice will absorb some moisture as it bakes, but you want the filling to be moist, not swimming in liquid.
Cover for tenderness. The foil cover during the first 20 minutes of baking is crucial. It traps steam, which helps the peppers cook through without drying out. If you skip this step, the tops of the peppers can become tough and leathery while the insides are still crunchy.
One time, I forgot to cover the dish and ended up with peppers that were chewy on top and undercooked inside. It was a sad dinner. Learn from my mistake—foil is your friend.
Variations & Adaptations
This recipe is incredibly flexible. Here are a few ways to change it up based on what you have in your kitchen or who you’re feeding.
Vegetarian Version: Swap the ground beef for a plant-based crumble or cooked lentils. I’ve used both, and they work beautifully. Lentils add a nice earthy flavor that pairs well with the spices. If using plant-based crumbles, cook them the same way you would the beef.
Low-Carb Option: Replace the rice with cauliflower rice. Cook it first to remove excess moisture, then stir it into the filling. You won’t miss the rice at all—the cheese and spices do all the heavy lifting.
Spicy Kick: Add a diced jalapeño to the onion and garlic mixture, or stir in a teaspoon of cayenne pepper with the other spices. You can also use pepper jack cheese instead of cheddar for an extra layer of heat.
Different Grains: Quinoa, farro, or even cooked couscous work well in place of rice. Each grain brings a slightly different texture. Quinoa adds a subtle nuttiness, while farro gives the filling a chewy bite.
Cheese Variations: Try using a Mexican blend, Monterey Jack, or even crumbled feta on top. Feta adds a salty tang that contrasts nicely with the sweet peppers. I once used smoked gouda, and it was incredible—the smoky flavor matched the paprika perfectly.
I’ve also made these with ground chicken and added a handful of chopped spinach to the filling. It was a great way to sneak in some greens without anyone noticing. The spinach wilts down and disappears into the savory mix.
Serving & Storage Suggestions
These Spooky Jack-O-Lantern Stuffed Bell Peppers are a complete meal on their own, but they pair beautifully with a few simple sides. Serve them hot, face-side up, so everyone can admire the carved expressions.
For a full Halloween spread, I like to serve these with a side of roasted broccoli or a simple green salad. The freshness of the greens balances the richness of the filling. You can also serve them with a dollop of sour cream or a drizzle of hot sauce for extra flavor.
If you’re hosting a Halloween party, these peppers are perfect for a buffet. They’re sturdy enough to hold up on a platter, and they look fantastic next to a bowl of creamy cheesy taco pasta or some crispy mini corn dog muffins. The combination of savory and fun is unbeatable.
Storage: Leftover peppers can be stored in an airtight container in the refrigerator for up to 4 days. The flavors actually meld together overnight, so they taste even better the next day. To reheat, place them in a 350°F oven for 10 to 15 minutes, or microwave them for 2 to 3 minutes. The microwave is faster, but the oven keeps the peppers from getting soggy.
Freezing: These peppers freeze beautifully. Let them cool completely, then wrap each one individually in plastic wrap and place them in a freezer bag. They’ll keep for up to 3 months. To reheat from frozen, thaw in the refrigerator overnight, then bake at 350°F for 20 minutes. You can also reheat them directly from frozen—just add 10 minutes to the baking time.
One thing I love about this recipe is that the peppers hold up well to reheating. They don’t turn into mush like some stuffed vegetables do. The blanching and baking process keeps the peppers firm but tender, even after a few days in the fridge.
Nutritional Information & Benefits
These stuffed peppers are surprisingly nutritious for how indulgent they feel. Here’s a rough estimate per serving (one pepper):
- Calories: Approximately 420
- Protein: 28 grams
- Fat: 22 grams
- Carbohydrates: 28 grams
- Fiber: 5 grams
- Sugar: 8 grams
Bell peppers are an excellent source of vitamin C—one pepper provides more than 100% of your daily needs. They’re also rich in vitamin A, which is great for eye health. The lean ground beef provides iron and B vitamins, while the cheese adds calcium and protein. If you use brown rice, you’ll get extra fiber and magnesium.
This recipe is naturally gluten-free, making it a great option for anyone with gluten sensitivities. Just double-check that your spices and tomato products are certified gluten-free if that’s a concern. You can also make it dairy-free by using a plant-based cheese alternative or omitting the cheese entirely.
I’m not a nutritionist, but I like knowing that my Halloween dinner isn’t a total sugar bomb. These peppers give you the festive feeling without the regret.
Conclusion
These Spooky Jack-O-Lantern Stuffed Bell Peppers are the kind of recipe that makes you look forward to dinner. They’re fun, festive, and actually delicious. The carved faces turn an ordinary meal into something special, and the savory filling is the kind of comfort food that warms you from the inside out.
I love that this recipe lets you be creative. You can carve scary faces, silly faces, or even a whole family of peppers with different expressions. It’s a great way to get kids involved in the kitchen—they can help scoop out the seeds or draw the face outlines. And honestly, there’s something deeply satisfying about eating a pepper that’s smiling back at you.
If you try this recipe, I’d love to hear how it goes. Leave a comment below and tell me what faces you carved—or tag me in your photos on social media. I always get a kick out of seeing your creations. And if you’re looking for more cozy dinner ideas, check out this cozy stuffed pepper soup for a deconstructed version of this dish. Happy Halloween, and happy cooking!
Frequently Asked Questions
Can I use red or yellow bell peppers instead of orange?
Absolutely. Red and yellow peppers work just as well, but they won’t look like pumpkins. The flavor will be slightly different—red peppers are sweeter, while yellow peppers are milder. If you want the full jack-o-lantern effect, stick with orange. But honestly, any color works for a spooky dinner.
How do I keep the peppers from tipping over in the baking dish?
If your peppers wobble, slice a thin piece off the bottom to create a flat surface. Just be careful not to cut into the cavity. You can also place them in a muffin tin—the cups hold the peppers upright and prevent tipping. A 12-cup muffin tin works perfectly for 4 to 6 peppers.
Can I make these ahead of time?
Yes! You can assemble the peppers up to 24 hours in advance. Stuff them, place them in the baking dish, and cover with foil. Store them in the refrigerator until you’re ready to bake. You may need to add 5 to 10 minutes to the baking time since they’ll be cold from the fridge.
What can I use instead of rice?
Quinoa, couscous, farro, or cauliflower rice all work well. You can also use cooked lentils or even small pasta like orzo. Just make sure whatever you use is cooked and cooled before mixing it into the filling. The ratio stays the same—about 1 cup of cooked grain or alternative.
Can I freeze the stuffed peppers before baking?
Yes, but it’s better to freeze them after baking. If you freeze them raw, the peppers can become watery when thawed. Bake them first, let them cool, then freeze individually. When you’re ready to eat, thaw in the fridge and reheat in the oven. They’ll taste just as good as fresh.
Pin This Recipe!
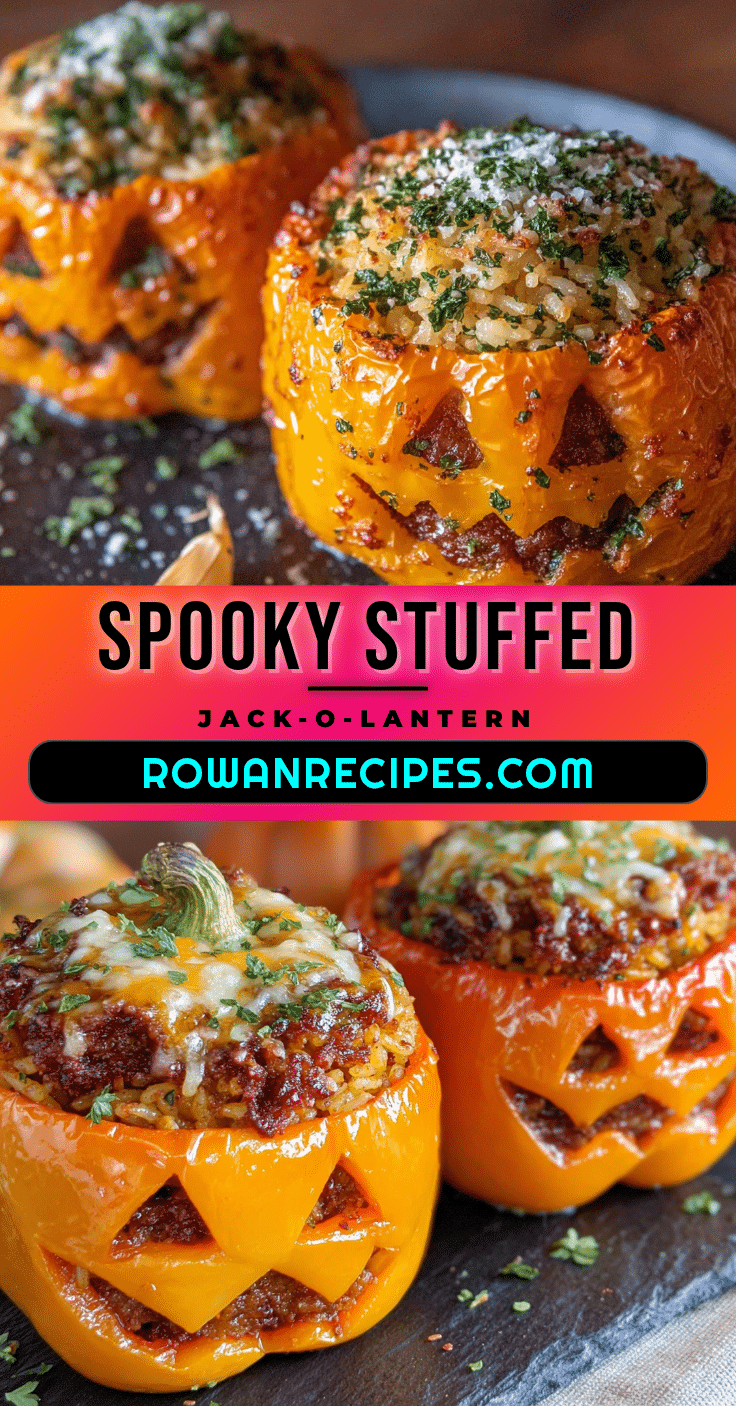
Spooky Jack-O-Lantern Stuffed Bell Peppers: Easy Halloween Dinner
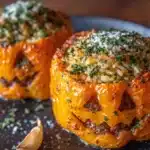
These Spooky Jack-O-Lantern Stuffed Bell Peppers are a fun and festive Halloween dinner that kids and adults will love. Savory ground beef, rice, and cheese are stuffed into orange bell peppers carved with jack-o-lantern faces, then baked to perfection.
- Prep Time: 15 minutes
- Cook Time: 30 minutes
- Total Time: 45 minutes
- Yield: 4 servings 1x
- Category: Main Course
- Cuisine: American
Ingredients
- 4 large orange bell peppers
- 1 pound ground beef (85/15)
- 1 cup cooked white rice
- 1 small yellow onion, diced
- 2 cloves garlic, minced
- 1 can (15 ounces) diced tomatoes, drained
- 1 cup shredded cheddar cheese
- 1 teaspoon chili powder
- 1/2 teaspoon cumin
- 1/2 teaspoon smoked paprika
- Salt and black pepper to taste
- 2 tablespoons olive oil
- 1/4 cup tomato sauce or salsa
Instructions
- Preheat your oven to 375°F (190°C). Bring a large pot of water to a boil.
- Wash the bell peppers and pat them dry. Cut a small circle around the stem on the top of each pepper, remove the stem, and scoop out the seeds and membranes.
- Blanch the peppers in boiling water for 3 to 4 minutes. Remove with tongs and let cool on a cutting board.
- Once cool enough to handle, use a paring knife to carve small triangles for eyes and a mouth (about 1/2 inch wide).
- Heat olive oil in a large skillet over medium heat. Add diced onion and cook for 3 to 4 minutes until soft. Add minced garlic and cook for 30 seconds.
- Add ground beef and cook until browned, about 6 to 8 minutes. Drain excess fat if needed.
- Stir in chili powder, cumin, smoked paprika, salt, and black pepper. Cook for 1 minute. Add drained diced tomatoes and tomato sauce (or salsa). Simmer for 2 minutes, then remove from heat.
- In a large mixing bowl, combine the beef mixture with cooked rice and half of the shredded cheese. Stir until evenly distributed.
- Spoon the filling into each carved pepper, packing gently but firmly. Leave a little room at the top for cheese.
- Place stuffed peppers in a 9×13-inch baking dish. Cover with aluminum foil and bake for 20 minutes.
- Remove foil, sprinkle remaining cheese over the tops, and bake uncovered for another 10 to 15 minutes until cheese is melted and bubbly.
- Let rest for 5 minutes before serving. Serve face-side up.
Notes
Choose squat, round orange bell peppers for the best pumpkin look. Don’t skip blanching—it softens the peppers for easier carving. If peppers wobble, slice a thin piece off the bottom to create a flat surface. For a vegetarian version, swap ground beef for plant-based crumble or cooked lentils. Leftovers can be stored in the refrigerator for up to 4 days or frozen for up to 3 months.
Nutrition
- Serving Size: 1 stuffed pepper
- Calories: 420
- Sugar: 8
- Fat: 22
- Carbohydrates: 28
- Fiber: 5
- Protein: 28
Keywords: Halloween dinner, stuffed bell peppers, jack-o-lantern peppers, ground beef, rice, cheddar cheese, festive dinner