The first Saturday of October, around five in the evening, and the only thing I wanted was something that tasted like the whole season had been crammed into a single bite. Not a pie—too much ceremony. Not a plain apple crisp—too simple. I wanted layers. Something creamy, something tart, something salty, and something that crunched just right. So I stood in my kitchen, staring at a bag of Honeycrisp apples I’d picked up at the orchard that morning, and I started pulling things out of the fridge without a real plan. Cream cheese, butter, brown sugar, a bag of soft caramels I’d stashed for emergencies. And then I saw the flaky sea salt sitting on the counter, and it just clicked.
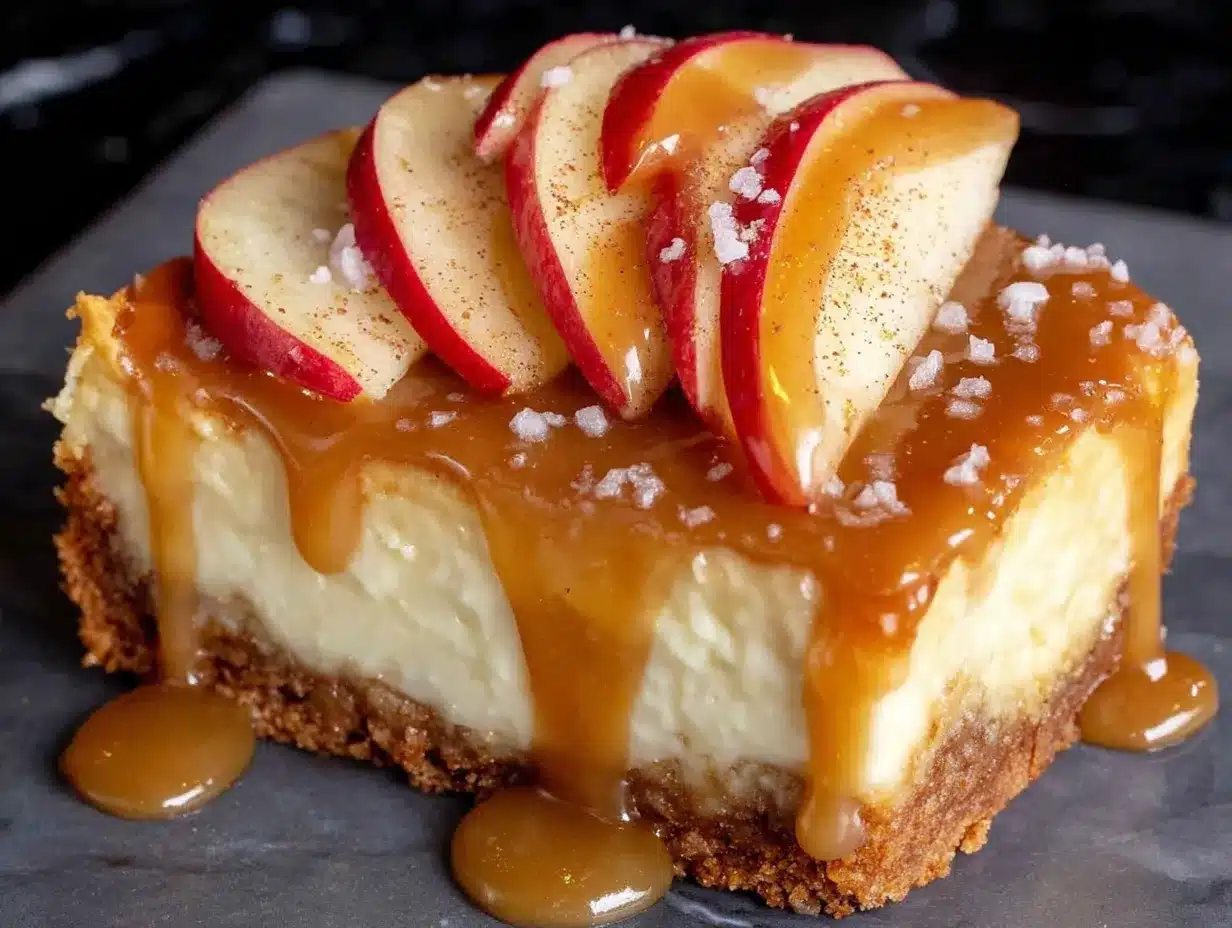
That’s how these Creamy Salted Caramel Apple Cheesecake Bars were born. Not from a family recipe passed down through generations, but from a quiet, slightly messy Sunday evening where I just let myself play. I wanted the buttery, shortbread-like crust you get from a good bar cookie. I wanted the smooth, tangy richness of cheesecake without the hassle of a water bath. And I wanted apples that didn’t turn into mush—apples that held their shape and offered a little resistance when you bit into them. The caramel came last, drizzled on top with a generous pinch of salt, and honestly, I knew I’d stumbled onto something worth sharing.
These bars have become my go-to for fall gatherings, but they’re just as good on a random Tuesday with a cup of coffee. They’re forgiving, they’re beautiful, and they taste like you spent hours in the kitchen when really, the whole thing comes together in under an hour. No water bath, no complicated steps, no stress. Just a really good dessert that makes people close their eyes when they take the first bite. And honestly, that’s the kind of recipe I want to keep around.
Why You’ll Love This Recipe
I’ve tested this recipe more times than I care to admit. I’ve tried different apples, different crusts, different ways of layering the caramel. And every time, I come back to this version. It’s the one that works. Here’s why you’ll feel the same way.
- No Water Bath Needed : Traditional cheesecake can be fussy. These bars bake up perfectly creamy without you having to wrestle with a pan of hot water. It’s a game-changer for weeknight baking.
- Simple, Pantry-Friendly Ingredients : You probably have most of this already. Butter, flour, sugar, cream cheese, eggs. The only “special” thing is a bag of soft caramels, and those are easy to find this time of year.
- Perfect for Fall Gatherings : Whether it’s a Thanksgiving dessert table or a casual Friendsgiving, these bars travel well, slice cleanly, and look impressive without any fancy piping or decorating.
- Balanced Flavors : The tangy cheesecake, sweet apples, rich caramel, and flaky salt create a flavor profile that hits every note. It’s not just sweet—it’s complex and deeply satisfying.
- Crowd-Pleaser : I’ve brought these to parties where people asked for the recipe before they even finished their first bar. Kids love them, adults love them, and they disappear fast.
What makes this recipe different from the dozens of other apple cheesecake bars out there? It’s the texture. The crust stays crisp even after a day in the fridge. The cheesecake layer is dense but silky, not airy or mousse-like. And the apples—I use a mix of Granny Smith and Honeycrisp—provide just enough tartness to cut through the richness. Plus, the salted caramel isn’t an afterthought. It’s woven into the bars and drizzled on top, so every bite gets a little hit of that buttery, salty-sweet magic.
What Ingredients You Will Need
This recipe uses simple, wholesome ingredients that come together to create something truly special. You don’t need anything exotic, but quality matters here. Let’s break it down.
For the Crust
- 1 ½ cups all-purpose flour (190g) — Spoon and level it for the best texture. Too much flour makes the crust dry.
- ½ cup granulated sugar (100g) — Adds just enough sweetness to balance the tangy cheesecake.
- ½ cup unsalted butter, cold and cubed (113g, 1 stick) — I use Kerrygold for its rich flavor. Keep it cold so the crust stays flaky.
- ¼ teaspoon salt — A little salt in the crust helps balance the sweetness of the filling.
For the Cheesecake Layer
- 16 oz cream cheese, softened to room temperature (two 8-oz blocks) — Full-fat is non-negotiable here. Low-fat cream cheese won’t set up properly and will taste thin.
- ½ cup granulated sugar (100g)
- 2 large eggs, room temperature — Cold eggs can make the filling lumpy. Let them sit on the counter for 30 minutes before you start.
- 1 teaspoon vanilla extract — Pure vanilla, not imitation. It makes a difference in the final flavor.
- 2 tablespoons all-purpose flour (16g) — This helps stabilize the cheesecake and prevents cracking.
For the Apple Layer
- 2 medium apples, peeled, cored, and diced into ½-inch pieces (about 2 cups) — I use one Granny Smith and one Honeycrisp. The Granny Smith holds its shape and adds tartness; the Honeycrisp brings natural sweetness.
- 2 tablespoons granulated sugar (25g)
- 1 teaspoon ground cinnamon
- ¼ teaspoon ground nutmeg (freshly grated if you have it)
- 1 tablespoon all-purpose flour (8g) — This thickens the juices so the apples don’t make the cheesecake layer soggy.
For the Salted Caramel
- 11 oz soft caramel candies, unwrapped (about 30-35 pieces, like Kraft Caramels) — I’ve tried making caramel from scratch, and honestly, the store-bought soft caramels work perfectly here and save a ton of time.
- ¼ cup heavy cream (60ml)
- 1 teaspoon flaky sea salt (like Maldon) — Plus more for sprinkling on top. Don’t skip this. It’s what takes these bars from good to unforgettable.
Equipment Needed
You don’t need a professional bakery setup to make these bars, but a few key tools will make your life easier.
- 9×13-inch baking pan — This is the sweet spot for these bars. You can use an 8×8, but the layers will be much thicker and you’ll need to increase the baking time by 10-15 minutes.
- Parchment paper — Line your pan with a sling (two overlapping sheets) so you can lift the whole block of bars out cleanly. This is non-negotiable for clean slices.
- Electric hand mixer or stand mixer — You can mix the cheesecake filling by hand if you’re patient, but a mixer makes it silky smooth in seconds.
- Medium saucepan — For melting the caramel. Use a heavy-bottomed pan to prevent scorching.
- Sharp chef’s knife — For dicing the apples evenly. Consistent size means even cooking.
- Mixing bowls — You’ll need a few. One for the crust, one for the cheesecake, one for the apples.
- Pastry cutter or fork — For cutting the butter into the flour for the crust. You can also use your fingertips, just work quickly so the butter stays cold.
If you don’t have a pastry cutter, don’t stress. I’ve used two forks in a pinch, and it works fine. Just don’t overwork the dough or the crust will be tough.
Preparation Method
Let’s get baking. I’ll walk you through every step so you feel confident, even if this is your first time making cheesecake bars.
Step 1: Preheat and Prep
Preheat your oven to 350°F (175°C). Line a 9×13-inch baking pan with parchment paper, leaving a 2-inch overhang on the long sides. This creates a sling that lets you lift the bars out after they’re chilled.
Step 2: Make the Crust
In a medium bowl, whisk together the flour, sugar, and salt. Add the cold, cubed butter. Use a pastry cutter or your fingertips to work the butter into the flour until the mixture resembles coarse meal with some pea-sized butter pieces still visible. Don’t overmix—those little butter pockets create a flaky texture. Press the mixture evenly into the bottom of the prepared pan. Bake for 15-18 minutes, until the edges are just starting to turn golden. Set aside to cool slightly while you make the filling.
Step 3: Prepare the Apple Filling
In a medium bowl, toss the diced apples with the sugar, cinnamon, nutmeg, and flour. Make sure every piece is coated. Set aside while you make the cheesecake layer. The apples will start releasing their juices—that’s fine. The flour will help thicken it.
Step 4: Make the Cheesecake Layer
In a large bowl, beat the softened cream cheese and sugar together until smooth and creamy, about 2 minutes. Scrape down the sides of the bowl. Add the eggs one at a time, beating well after each addition. Mix in the vanilla extract. Finally, beat in the flour until just combined. Don’t overmix after adding the flour, or the cheesecake can become dense.
Step 5: Assemble the Bars
Pour the cheesecake mixture over the slightly cooled crust and spread it into an even layer. Spoon the apple mixture evenly over the top of the cheesecake. Don’t press the apples in—let them sit on top. Some will sink slightly during baking, and that’s perfect.
Step 6: Bake
Bake for 30-35 minutes, or until the edges are set and the center jiggles just slightly when you gently shake the pan. A toothpick inserted near the center should come out mostly clean with a few moist crumbs. If the top starts browning too quickly, tent loosely with foil for the last 10 minutes.
Step 7: Make the Salted Caramel
While the bars bake, combine the unwrapped caramels and heavy cream in a small saucepan over low heat. Stir frequently until the caramels are completely melted and the mixture is smooth. This takes about 5-7 minutes. Stir in the flaky sea salt. Remove from heat and let it cool slightly. It will thicken as it cools.
Step 8: Finish and Chill
Let the bars cool completely on a wire rack, about 1 hour. Then drizzle the salted caramel evenly over the top. Reserve a few tablespoons for serving if you want extra. Sprinkle with a little more flaky sea salt. Refrigerate for at least 3 hours, or overnight. This is crucial—the bars need to be fully chilled to slice cleanly.
Step 9: Slice and Serve
Once fully chilled, use the parchment sling to lift the entire block out of the pan. Place on a cutting board and use a sharp knife to slice into squares. Wipe the knife clean between cuts for the neatest edges. Serve cold or at room temperature.
Cooking Tips & Techniques
I’ve made these bars maybe a dozen times, and I’ve learned a few things the hard way. Here’s what I wish I’d known from the start.
Don’t skip the chilling step. I know it’s tempting to dig in while they’re still warm, but the bars need time to set. Warm cheesecake is a mess. Cold cheesecake is perfection. Trust the process.
Use room temperature ingredients. Cold cream cheese creates lumps that are nearly impossible to smooth out. Cold eggs can cause the batter to curdle. Set everything on the counter 30-45 minutes before you start. It makes a real difference.
Watch your oven. Oven temperatures vary wildly. Start checking your bars at the 25-minute mark. If the edges are pulling away from the pan and the center still has a slight wobble, they’re done. Overbaked cheesecake gets grainy and cracks.
Don’t overmix the cheesecake batter. Once you add the eggs, mix just until they’re incorporated. Overmixing incorporates too much air, which can cause the cheesecake to puff up and then collapse, leaving cracks on the surface.
Let the caramel cool slightly before drizzling. If it’s too hot, it will run right off the bars and pool at the bottom. Let it cool for 5-10 minutes until it’s thick enough to cling to the surface.
Variations & Adaptations
This recipe is flexible, and I love hearing how people make it their own. Here are a few variations I’ve tried and loved.
Gluten-Free Version: Swap the all-purpose flour in the crust and cheesecake for a 1:1 gluten-free baking flour blend. I’ve used King Arthur Measure for Measure with great results. The crust will be a bit more tender, so handle it gently.
Dairy-Free Adaptation: Use dairy-free cream cheese (like Kite Hill or Violife) and a plant-based butter stick. The texture will be slightly softer, so chill the bars for a full 4 hours before slicing. Use coconut cream instead of heavy cream in the caramel.
Different Apple Varieties: If you can’t find Honeycrisp, use Fuji or Gala for sweetness. For tartness, Granny Smith is the gold standard, but Braeburn or Pink Lady work too. Avoid Red Delicious—they turn mushy and bland when baked.
Add a Nutty Crunch: Toast ½ cup of chopped pecans or walnuts and sprinkle them over the caramel before it sets. The crunch is a lovely contrast to the creamy layers.
Spice It Up: Add ¼ teaspoon of ground ginger or cardamom to the apple mixture for a more complex flavor profile. I’ve done a version with a pinch of cloves, and it was dangerously good.
Serving & Storage Suggestions
These bars are versatile, and how you serve them can change the whole experience.
Serving Temperature: I prefer them cold straight from the fridge—the cheesecake layer is firm and the caramel is slightly chewy. But they’re also lovely at room temperature, especially if you’ve just pulled them out of the fridge for 15-20 minutes. Don’t serve them warm; the layers won’t hold together.
Presentation Ideas: Drizzle extra caramel on the plate before placing a bar on top. Add a dollop of freshly whipped cream and a light dusting of cinnamon. A few extra flakes of sea salt right before serving make them look like they came from a bakery.
What to Serve With Them: A scoop of vanilla bean ice cream is the classic choice. For a cozy fall pairing, try them with a warm mug of spiced apple cider or a chai latte. If you’re feeling indulgent, a drizzle of warm caramel sauce over the ice cream takes it over the top.
Storage Instructions: Store leftover bars in an airtight container in the refrigerator for up to 5 days. Place a sheet of parchment paper between layers to prevent sticking. The flavors actually deepen after a day or two, so day-old bars are often even better.
Freezing Instructions: These bars freeze beautifully. Freeze them on a baking sheet until solid, then wrap each bar individually in plastic wrap and place in a freezer-safe bag. They’ll keep for up to 3 months. Thaw in the refrigerator overnight before serving.
Nutritional Information & Benefits
Let’s be honest—these are a treat, not a health food. But knowing what’s in them helps you enjoy them mindfully.
Estimated per bar (based on 16 servings): Calories: 385 | Fat: 22g | Carbohydrates: 44g | Fiber: 1g | Sugar: 32g | Protein: 6g | Sodium: 310mg
Health Highlights: Apples are a good source of fiber and vitamin C, and the cinnamon in the filling has anti-inflammatory properties. The cream cheese provides some calcium and protein. The flaky sea salt adds trace minerals, though honestly, we’re using it for the flavor.
Dietary Notes: This recipe contains gluten, dairy, and eggs. For a gluten-free version, see the variations section. For a dairy-free version, use plant-based substitutes as noted above. These bars are not suitable for a vegan diet as written.
My Take: I believe in balance. These bars are a decadent dessert meant for special occasions or when you just need a little comfort. I don’t stress about the numbers. I focus on using quality ingredients and enjoying every single bite. Life’s too short for mediocre desserts.
Conclusion
These Creamy Salted Caramel Apple Cheesecake Bars are the kind of dessert that makes you look forward to fall all year long. They’ve got the buttery crunch of a shortbread crust, the silky richness of cheesecake, the tender sweetness of baked apples, and that irresistible salty-sweet caramel finish. Every layer works together, and every bite feels like a little celebration.
What I love most about this recipe is how approachable it is. You don’t need to be a pastry chef to pull it off. You just need a little patience, a few good ingredients, and the willingness to let the bars chill before you dive in (I know, it’s the hardest part). Whether you’re bringing them to a holiday dinner, a potluck, or just making them for yourself on a quiet Sunday afternoon, they deliver every single time.
I’d love to hear how yours turn out. Did you try a variation? Add a different spice? Make them gluten-free? Drop a comment below and let me know. And if you loved them as much as I do, share this recipe with a friend who needs a little fall sweetness in their life. Happy baking!
Frequently Asked Questions
Can I use homemade caramel instead of store-bought caramels?
Absolutely. If you prefer to make your own salted caramel sauce, use about 1 cup of your favorite recipe. Just make sure it’s thick enough to cling to the bars—a thin sauce will run right off. Let it cool to room temperature before drizzling.
Why did my cheesecake layer crack?
Cracking usually happens from overbaking or overmixing. Bake just until the edges are set and the center has a slight jiggle. Overmixing the batter incorporates too much air, which can cause the cheesecake to rise and then fall, creating cracks. Also, let the bars cool gradually on the counter before refrigerating—a sudden temperature change can cause cracking.
Can I make these bars ahead of time?
Yes, and I actually recommend it. These bars taste even better after a day or two in the fridge. The flavors meld together, and the texture becomes perfectly creamy. Make them up to 2 days in advance, keep them covered in the fridge, and add the caramel drizzle just before serving for the prettiest presentation.
My crust turned out soggy. What went wrong?
A soggy crust usually means the apples released too much juice during baking, or the crust wasn’t pre-baked long enough. Make sure you pre-bake the crust until it’s lightly golden (15-18 minutes). Also, toss the apples with flour to help thicken their juices. If your apples are especially juicy, you can sauté them for 3-4 minutes before adding them to the bars to cook off some of the liquid.
How do I get clean, neat slices?
Patience is key. The bars must be fully chilled—at least 3 hours, preferably overnight. Use a sharp knife and wipe it clean with a damp paper towel between each cut. For the neatest edges, run the knife under hot water and dry it off before slicing. This helps the knife glide through the cheesecake without dragging.
Pin This Recipe!
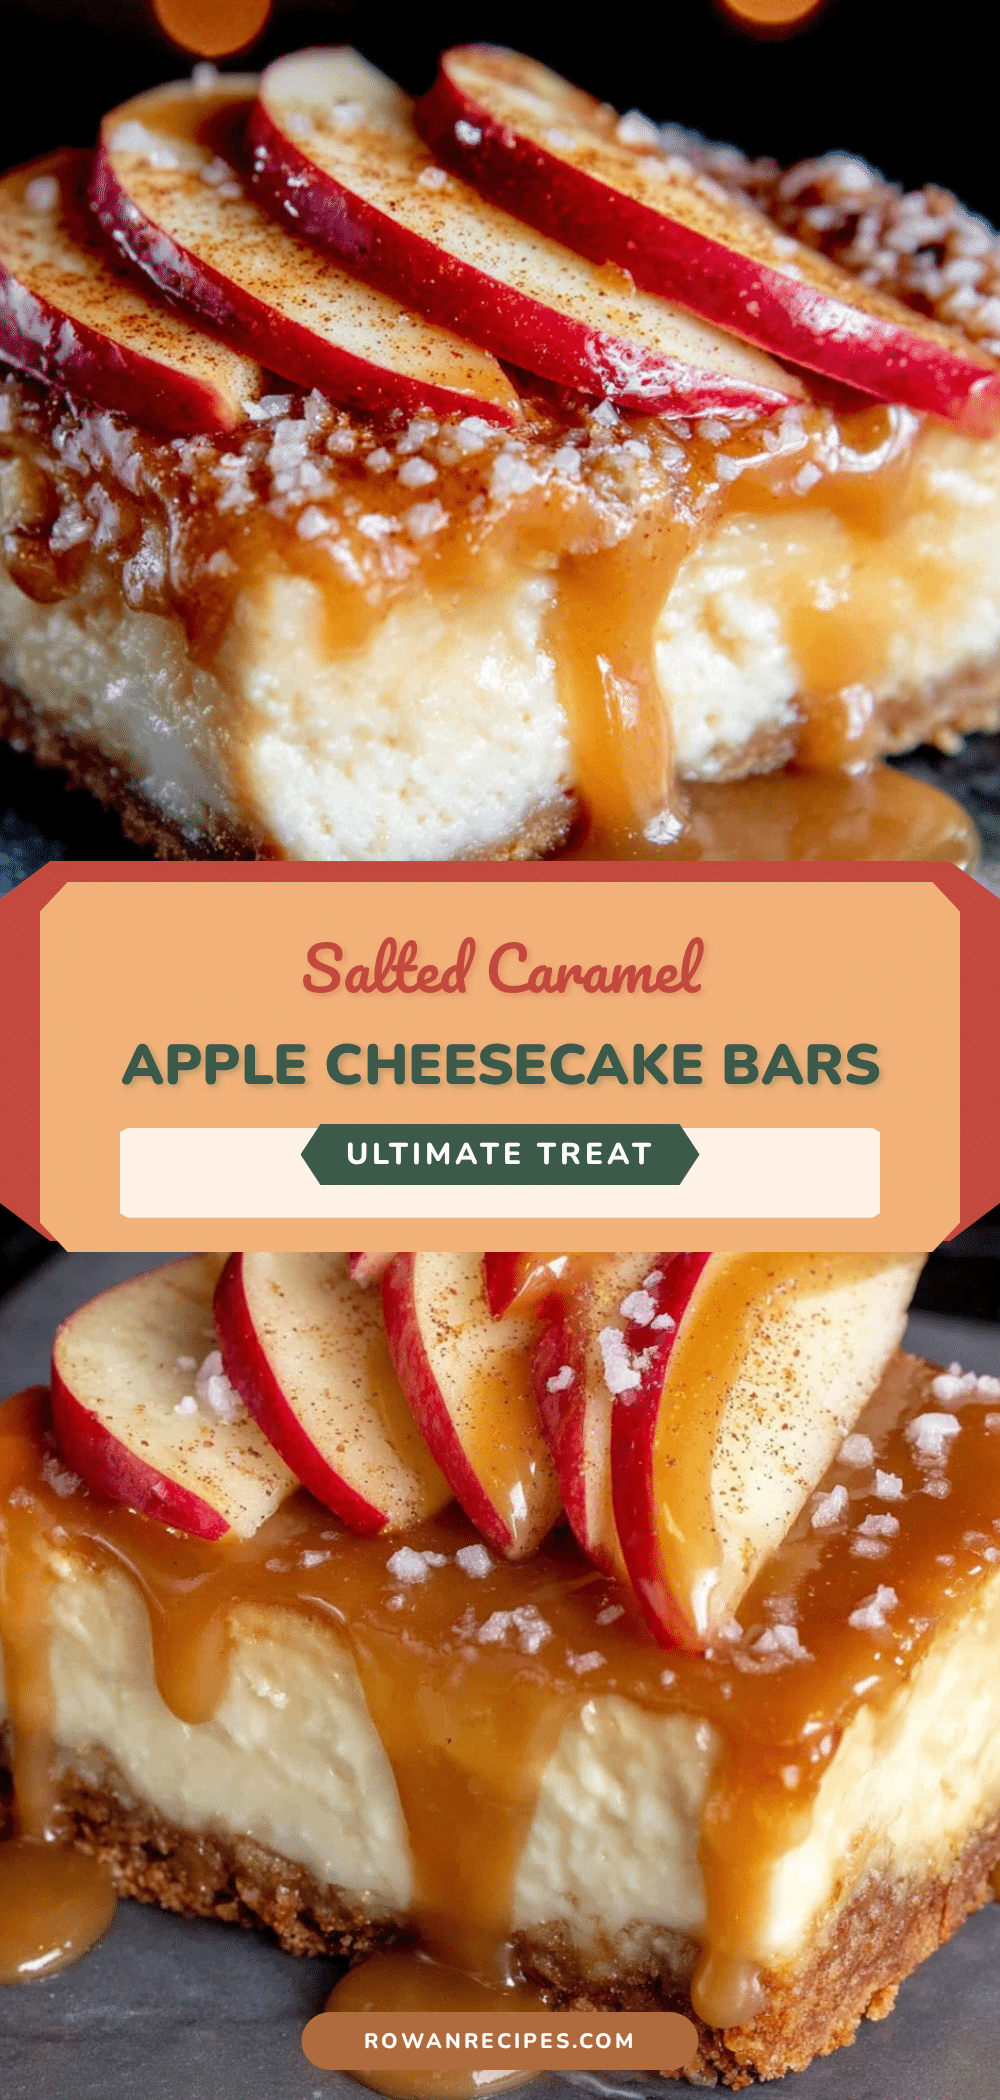
Creamy Salted Caramel Apple Cheesecake Bars – Easy Fall Dessert
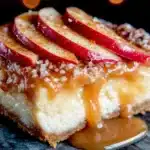
These Creamy Salted Caramel Apple Cheesecake Bars feature a buttery shortbread crust, a silky cheesecake layer, tender spiced apples, and a rich salted caramel drizzle. They’re an easy, no-water-bath dessert perfect for fall gatherings.
- Prep Time: 20 minutes
- Cook Time: 35 minutes
- Total Time: 4 hours 55 minutes (includes chilling)
- Yield: 16 servings 1x
- Category: Dessert
- Cuisine: American
Ingredients
- 1 ½ cups all-purpose flour (190g)
- ½ cup granulated sugar (100g)
- ½ cup unsalted butter, cold and cubed (113g, 1 stick)
- ¼ teaspoon salt
- 16 oz cream cheese, softened to room temperature (two 8-oz blocks)
- ½ cup granulated sugar (100g)
- 2 large eggs, room temperature
- 1 teaspoon vanilla extract
- 2 tablespoons all-purpose flour (16g)
- 2 medium apples, peeled, cored, and diced into ½-inch pieces (about 2 cups)
- 2 tablespoons granulated sugar (25g)
- 1 teaspoon ground cinnamon
- ¼ teaspoon ground nutmeg
- 1 tablespoon all-purpose flour (8g)
- 11 oz soft caramel candies, unwrapped (about 30–35 pieces)
- ¼ cup heavy cream (60ml)
- 1 teaspoon flaky sea salt
Instructions
- Preheat oven to 350°F (175°C). Line a 9×13-inch baking pan with parchment paper, leaving a 2-inch overhang on the long sides.
- In a medium bowl, whisk together flour, sugar, and salt. Add cold cubed butter. Use a pastry cutter or fingertips to work butter into flour until mixture resembles coarse meal with some pea-sized butter pieces. Press evenly into prepared pan. Bake for 15-18 minutes until edges are just golden. Set aside to cool slightly.
- In a medium bowl, toss diced apples with sugar, cinnamon, nutmeg, and flour until coated. Set aside.
- In a large bowl, beat softened cream cheese and sugar until smooth and creamy, about 2 minutes. Add eggs one at a time, beating well after each. Mix in vanilla extract. Beat in flour until just combined.
- Pour cheesecake mixture over slightly cooled crust and spread evenly. Spoon apple mixture evenly over the top. Do not press apples in.
- Bake for 30-35 minutes, until edges are set and center jiggles slightly. If top browns too quickly, tent loosely with foil for last 10 minutes.
- While bars bake, combine unwrapped caramels and heavy cream in a small saucepan over low heat. Stir frequently until melted and smooth, about 5-7 minutes. Stir in flaky sea salt. Remove from heat and let cool slightly.
- Let bars cool completely on a wire rack, about 1 hour. Drizzle salted caramel evenly over top. Reserve a few tablespoons for serving if desired. Sprinkle with more flaky sea salt. Refrigerate for at least 3 hours, or overnight.
- Once fully chilled, use parchment sling to lift entire block out of pan. Place on cutting board and slice into squares with a sharp knife, wiping knife clean between cuts.
Notes
Don’t skip the chilling step—bars need to be fully chilled to slice cleanly. Use room temperature ingredients for best texture. Watch your oven; start checking at 25 minutes. Let caramel cool slightly before drizzling so it clings to the bars.
Nutrition
- Serving Size: 1 bar
- Calories: 385
- Sugar: 32
- Sodium: 310
- Fat: 22
- Saturated Fat: 13
- Carbohydrates: 44
- Fiber: 1
- Protein: 6
Keywords: apple cheesecake bars, salted caramel, fall dessert, cheesecake bars, apple dessert, easy dessert