My sister handed me a crumpled napkin with a sticky, flattened square on it and said, “You have to try this. I know you hate no-bake desserts.” She wasn’t wrong. I had a history with no-bake things—granola bars that crumbled into dust, energy balls that tasted like sawdust, and “fudge” that was really just melted chocolate chips pretending to be something more. I took the napkin anyway, mostly to be polite, and bit into the thing.
It was chewy. Not in a bad way—in that perfect, just-soft-enough way where the oats are still oats but they’ve surrendered to the peanut butter. And the chocolate layer on top? It had that snap. You know the one. The kind that tells you this isn’t some half-hearted drizzle situation. This was a real chocolate topping, thick enough to matter.
I asked her for the recipe three times before she finally texted it to me. I made it that same afternoon. And then I made it again the next week. And honestly? I’ve been making it ever since. These easy no-bake peanut butter chocolate oat bars have become my emergency dessert, my afternoon pick-me-up, and the thing I bring to every gathering where I want to look like I tried without actually trying.
They’re not fancy. They’re not complicated. But they’re the kind of bar that makes you close the refrigerator door, take another bite, and open it again for one more piece.
Why You’ll Love This Recipe
I’ve tested a lot of no-bake bar recipes over the years. Some turned out too dry. Some fell apart. Some were so sweet they made my teeth hurt. These bars are the result of all those experiments—the version that actually works every single time.
- No Oven Required : No baking, no waiting for the oven to preheat, no standing over a hot stove. Just a bowl, a spatula, and a refrigerator.
- Simple Ingredients : You probably have everything in your pantry right now. Oats, peanut butter, chocolate chips, butter, brown sugar, vanilla, and salt. That’s it.
- Perfect for Meal Prep : Make a batch on Sunday and grab one whenever you need a quick snack or a sweet hit during the week.
- Crowd-Pleaser : I’ve brought these to potlucks, office parties, and family gatherings. They disappear fast. Kids love them. Adults love them. Nobody asks if they’re healthy—they just ask for the recipe.
- Unbelievably Satisfying : The combination of creamy peanut butter, rich chocolate, and chewy oats hits that perfect sweet-salty- crunchy spot that store-bought granola bars can only dream of.
What makes these different from every other no-bake bar recipe out there? It’s the ratio. I spent weeks tweaking the amount of peanut butter to oats, the type of chocolate for the topping, and the chilling time. This version has the ideal balance—firm enough to hold its shape, soft enough to bite into without cracking a tooth, and just sweet enough without being cloying. It’s not another recipe. It’s the one I keep coming back to.
What Ingredients You Will Need
This recipe uses simple, pantry-friendly ingredients to create something that tastes far more complicated than it is. Here’s what you’ll need and why each one matters.
For the Oat Base
- Rolled oats, 2 cups (180g) — Use old-fashioned rolled oats, not instant or quick-cooking. They provide the right chewy texture. Quick oats will turn mushy. (I prefer Bob’s Red Mill for consistent texture.)
- Creamy peanut butter, 1 cup (240g) — Natural peanut butter works, but you’ll need to stir it well and it may make the bars slightly softer. I use Skippy or Jif for the most reliable results. Do not use homemade or very oily natural peanut butter unless you’re prepared for a greasier bar.
- Unsalted butter, ¼ cup (56g) — Adds richness and helps the base hold together. Salted butter can be used if you reduce the added salt slightly.
- Brown sugar, packed, ½ cup (100g) — Light or dark both work. Dark brown sugar adds a deeper molasses flavor. Don’t use granulated sugar—the moisture in brown sugar is essential for the texture.
- Honey or maple syrup, ¼ cup (60ml) — Honey gives a classic flavor. Maple syrup works for a vegan option and adds a subtle, woodsy sweetness.
- Vanilla extract, 1 teaspoon — Pure vanilla extract is best. Imitation works in a pinch.
- Salt, ¼ teaspoon — A tiny pinch balances the sweetness and makes the peanut butter pop.
For the Chocolate Topping
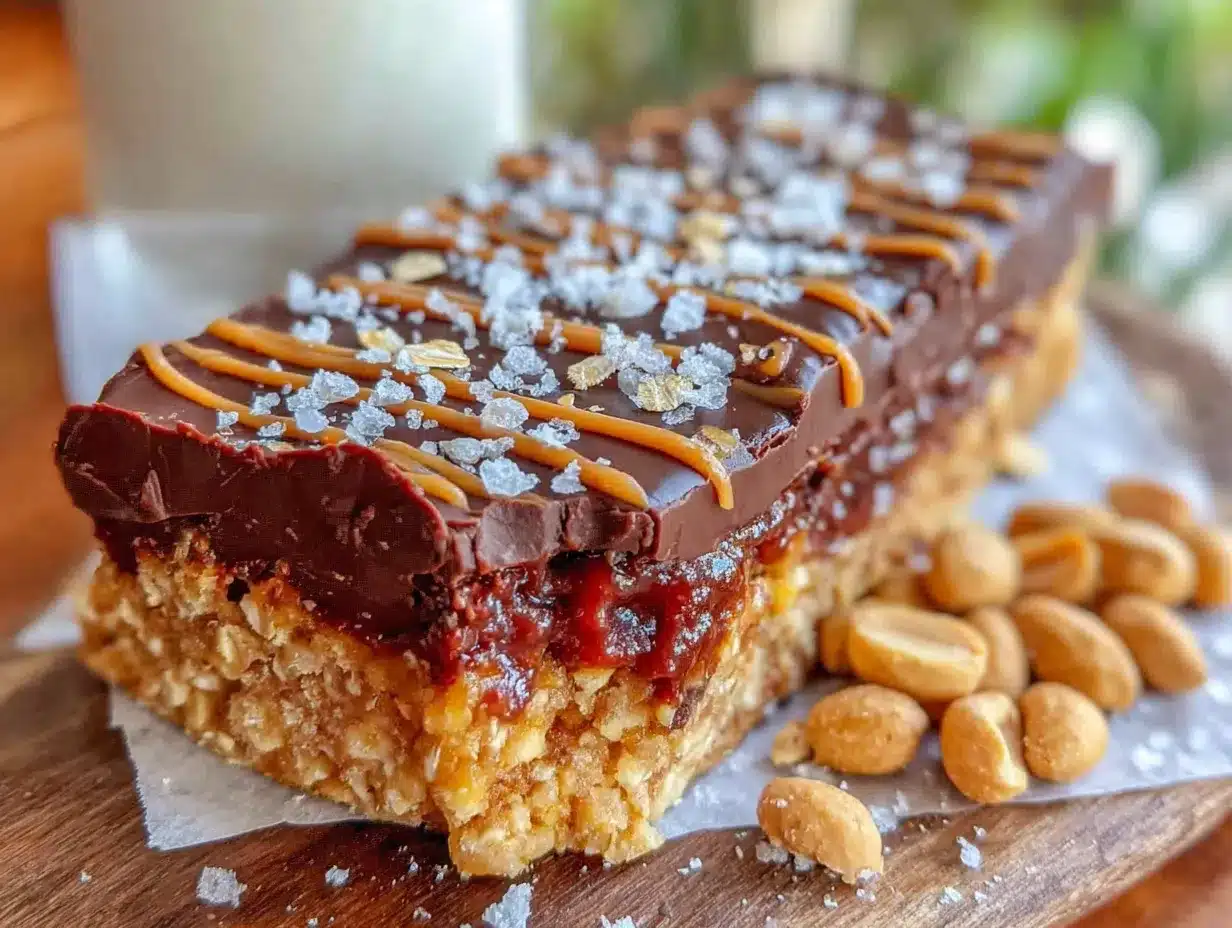
- Semi-sweet chocolate chips, 1 cup (175g) — I use Ghirardelli 60% cacao chips for a rich, not-too-sweet topping. Milk chocolate will make it sweeter; dark chocolate (70%+) will be more intense.
- Coconut oil or vegetable oil, 1 tablespoon (15ml) — This helps the chocolate set with a smooth, shiny finish. Coconut oil adds a subtle flavor; vegetable oil is neutral.
Substitution Notes: For a gluten-free version, use certified gluten-free rolled oats. For a vegan version, use maple syrup instead of honey and a vegan butter substitute. If you don’t have brown sugar, you can use coconut sugar, though the texture will be slightly grainier.
Equipment Needed
You don’t need much for this recipe, which is part of the appeal. Here’s what I use:
- 8×8-inch baking pan — A square pan gives the perfect thickness. A 9×9 works too, but the bars will be slightly thinner. Line it with parchment paper for easy removal.
- Parchment paper — Do not skip this. It makes lifting the bars out of the pan so much easier. Leave an overhang on two sides.
- Medium saucepan — For melting the peanut butter mixture. A heavy-bottomed pan works best to prevent scorching.
- Mixing bowl — For combining the oats and the peanut butter mixture.
- Spatula or wooden spoon — For stirring. A silicone spatula makes scraping the pan easy.
- Small microwave-safe bowl — For melting the chocolate topping. You can also use a double boiler if you prefer.
- Refrigerator — The bars need at least 2 hours to set. Overnight is even better.
If you don’t have an 8×8 pan, you can use a loaf pan for thicker bars or a 9×13 for thinner ones—just adjust the chilling time. And if you don’t have parchment paper, aluminum foil works, but spray it well with nonstick spray.
Preparation Method
This comes together in about 15 minutes of active work. The hardest part is waiting for them to chill.
- Line your pan. Cut a piece of parchment paper to fit the bottom and sides of your 8×8 pan, leaving a 2-inch overhang on two opposite sides. This will be your handle to lift the bars out later. Set the pan aside.
- Combine the wet ingredients. In a medium saucepan over low heat, combine the peanut butter, butter, brown sugar, and honey. Stir constantly with a spatula or wooden spoon until everything is melted and smooth. This takes about 3–4 minutes. The mixture should look glossy and smell like warm peanut butter cookies. Do not let it boil—if you see bubbles, remove it from the heat immediately.
- Add vanilla and salt. Remove the saucepan from the heat. Stir in the vanilla extract and salt. The mixture will bubble slightly—that’s normal. Stir until combined.
- Mix in the oats. Pour the warm peanut butter mixture over the rolled oats in a large mixing bowl. Stir until every oat is coated. The mixture will be thick and sticky. Keep stirring—it takes a minute for the oats to fully absorb the liquid. You want no dry spots.
- Press into the pan. Transfer the oat mixture to your prepared pan. Use a spatula or your hands (lightly greased with a little oil) to press it down firmly and evenly. This is important—if you don’t press hard enough, the bars will crumble. Press until the surface is flat and compact. I use the bottom of a measuring cup to really get it even.
- Make the chocolate topping. In a small microwave-safe bowl, combine the chocolate chips and coconut oil. Microwave in 30-second intervals, stirring between each, until smooth and fully melted. This usually takes about 1–2 minutes total. Be careful not to overheat—chocolate burns easily. Alternatively, use a double boiler if you’re nervous about microwaving chocolate.
- Spread the chocolate. Pour the melted chocolate over the pressed oat layer. Use a spatula to spread it evenly to the edges. Tilt the pan slightly if needed. The chocolate layer should be about ¼-inch thick.
- Chill. Place the pan in the refrigerator, uncovered, for at least 2 hours. For best results, chill for 3–4 hours or overnight. The bars need to be fully firm before you cut them.
- Cut and serve. Once fully chilled, lift the bars out of the pan using the parchment overhang. Place on a cutting board. Use a sharp knife to cut into squares or rectangles. For clean cuts, wipe the knife clean between each slice. I usually cut 16 bars (4×4 grid), but you can make them bigger or smaller.
Sensory Cue: When you press the oat mixture, it should feel dense and slightly tacky but not wet. The chocolate should snap when you bite into it—if it’s too soft, it needs more chilling time.
Cooking Tips & Techniques
I learned most of these through trial and error. Here’s what I wish someone had told me the first time I made these.
- Don’t rush the pressing step. This is the most common mistake. If you don’t press the oat mixture firmly enough, the bars will fall apart when you cut them. Use the bottom of a glass or a measuring cup to really compact it. You want it dense.
- Use room temperature peanut butter. Cold peanut butter is harder to mix. If your peanut butter has been in the fridge, let it sit out for 30 minutes before starting.
- Let the chocolate cool slightly before spreading. If you pour boiling-hot chocolate over the oat layer, it can melt the butter in the base and make everything greasy. Let it sit for 2 minutes after melting.
- Chill overnight for the best texture. Two hours works in a pinch, but overnight chilling gives the bars a firmer, cleaner bite. The flavors also meld together.
- Cut with a hot knife. Run your knife under hot water, dry it, and then slice. The heat helps the chocolate cut cleanly without cracking.
- Store in the refrigerator. These bars soften at room temperature. Keep them chilled for the best texture.
I once forgot to press the mixture firmly enough and ended up with a pan of oat crumbles. They still tasted good, but they were impossible to eat without a fork. Learn from my mistake—press hard.
Variations & Adaptations
This recipe is forgiving. Here are some ways to make it your own.
- Crunchy Peanut Butter Version: Use crunchy peanut butter instead of creamy for little bits of peanut in every bite. The texture is fantastic.
- Add Mix-Ins: Before pressing the oat mixture into the pan, fold in ¼ cup of mini chocolate chips, chopped peanuts, shredded coconut, or dried cranberries. I love adding chopped dark chocolate chunks for extra chocolate pockets.
- Vegan & Dairy-Free: Use maple syrup instead of honey, a vegan butter substitute (like Earth Balance), and dairy-free chocolate chips. The bars will be slightly softer but just as delicious.
- Lower Sugar Option: Reduce the brown sugar to ¼ cup and use a sugar-free chocolate chip for the topping. The bars will be less sweet but still satisfying.
- Flavor Twists: Add ½ teaspoon of cinnamon to the oat mixture for warmth, or a pinch of sea salt flakes on top of the chocolate before it sets for a salted chocolate effect. I’ve also added a teaspoon of instant espresso powder to the chocolate topping—it doesn’t taste like coffee, but it deepens the chocolate flavor.
- Peanut-Free: Substitute almond butter, cashew butter, or sunflower seed butter for the peanut butter. Sunflower seed butter will turn the bars slightly green due to a natural reaction with the baking soda—don’t worry, it’s safe and tastes fine.
My personal favorite variation? I add a tablespoon of chia seeds to the oat mixture for extra fiber and a little crunch. It’s barely noticeable, but it makes me feel slightly better about eating three bars in one sitting.
Serving & Storage Suggestions
These bars are best served cold, straight from the refrigerator. The chocolate is snappy, the oat base is chewy, and everything holds together perfectly.
Serving Ideas:
- Serve as an after-school snack with a glass of cold milk.
- Pack one in a lunchbox for a sweet treat that won’t get soggy.
- Cut into smaller squares and arrange on a platter for parties or potlucks.
- Crumble one over vanilla ice cream for a quick dessert sundae.
Storage:
- Refrigerator: Store in an airtight container for up to 1 week. Layer bars between sheets of parchment paper so the chocolate doesn’t stick.
- Freezer: These bars freeze beautifully. Wrap individually in plastic wrap, then place in a freezer-safe bag or container. Freeze for up to 3 months. Thaw in the refrigerator for 30 minutes before eating—or eat them frozen for a cold, crunchy treat.
Reheating: Don’t. They’re meant to be eaten cold. If you want a warm version, you can microwave one bar for 10–15 seconds, but the chocolate will get soft and messy. I prefer them straight from the fridge.
The flavors actually develop over time. Day-old bars taste more cohesive, with the peanut butter and chocolate melding together. They rarely last that long in my house, though.
Nutritional Information & Benefits
These bars are a treat, not a health food. But they’re made with real ingredients, and that counts for something.
Estimated per bar (based on 16 bars):
- Calories: 220
- Fat: 13g
- Saturated Fat: 5g
- Carbohydrates: 24g
- Fiber: 3g
- Sugar: 14g
- Protein: 6g
Health Highlights:
- Oats provide soluble fiber, which supports heart health and keeps you full longer.
- Peanut butter offers protein and healthy monounsaturated fats.
- Dark chocolate (if you use 60% or higher) contains antioxidants.
Dietary Notes: This recipe can be made gluten-free (with certified oats), vegan (with maple syrup and dairy-free substitutes), and is naturally egg-free. It contains peanuts and dairy (unless modified).
Are they the healthiest thing you’ll eat today? No. But they’re made from scratch, with ingredients you can pronounce, and they’re far better for you than anything in a wrapper from the store.
Conclusion
These easy no-bake peanut butter chocolate oat bars have become my go-to for a reason. They’re simple enough to make on a busy Tuesday, impressive enough to bring to a holiday party, and satisfying enough to cure any sweet tooth without turning on the oven. The combination of chewy oats, creamy peanut butter, and rich chocolate is timeless—and this version gets it right.
I love that this recipe doesn’t ask for anything fancy. No obscure ingredients, no complicated techniques, no special equipment. Just good, honest ingredients and a little patience while they chill. That’s the kind of recipe I want in my back pocket.
Try them once, and I think you’ll understand why I make these bars on repeat. They’re the kind of recipe that becomes a habit—the one you make without thinking, the one you reach for when you need something sweet and comforting. If you make them, let me know how they turn out. Leave a comment below, share a photo, or tell me about your favorite variation. I’m always looking for new ideas.
Go ahead. Make a batch. Your future self will thank you.
Frequently Asked Questions
Can I use quick oats instead of rolled oats?
I don’t recommend it. Quick oats absorb liquid differently and will make the bars mushy and dense. Rolled oats give the right chewy texture. Stick with old-fashioned rolled oats for the best results.
Why did my bars fall apart when I cut them?
This usually happens for one of two reasons: you didn’t press the oat mixture firmly enough into the pan, or you didn’t chill them long enough. Make sure you press the mixture down very firmly and chill for at least 3 hours—overnight is even better. A hot knife also helps with clean cuts.
Can I use natural peanut butter?
Yes, but with caveats. Natural peanut butter that separates (oil on top) needs to be stirred very well before measuring. It can also make the bars slightly softer and more prone to crumbling. If you use natural peanut butter, I recommend adding an extra tablespoon of oats to absorb the extra oil.
How long do these bars last?
Stored in an airtight container in the refrigerator, they stay fresh for up to 1 week. They also freeze beautifully for up to 3 months. I like to keep a stash in the freezer for emergencies.
Can I double this recipe?
Absolutely. Double all the ingredients and use a 9×13-inch pan. The chilling time may need to increase by 30–60 minutes since the larger pan is thicker. Cut into 24–32 bars depending on your preferred size.
Pin This Recipe!
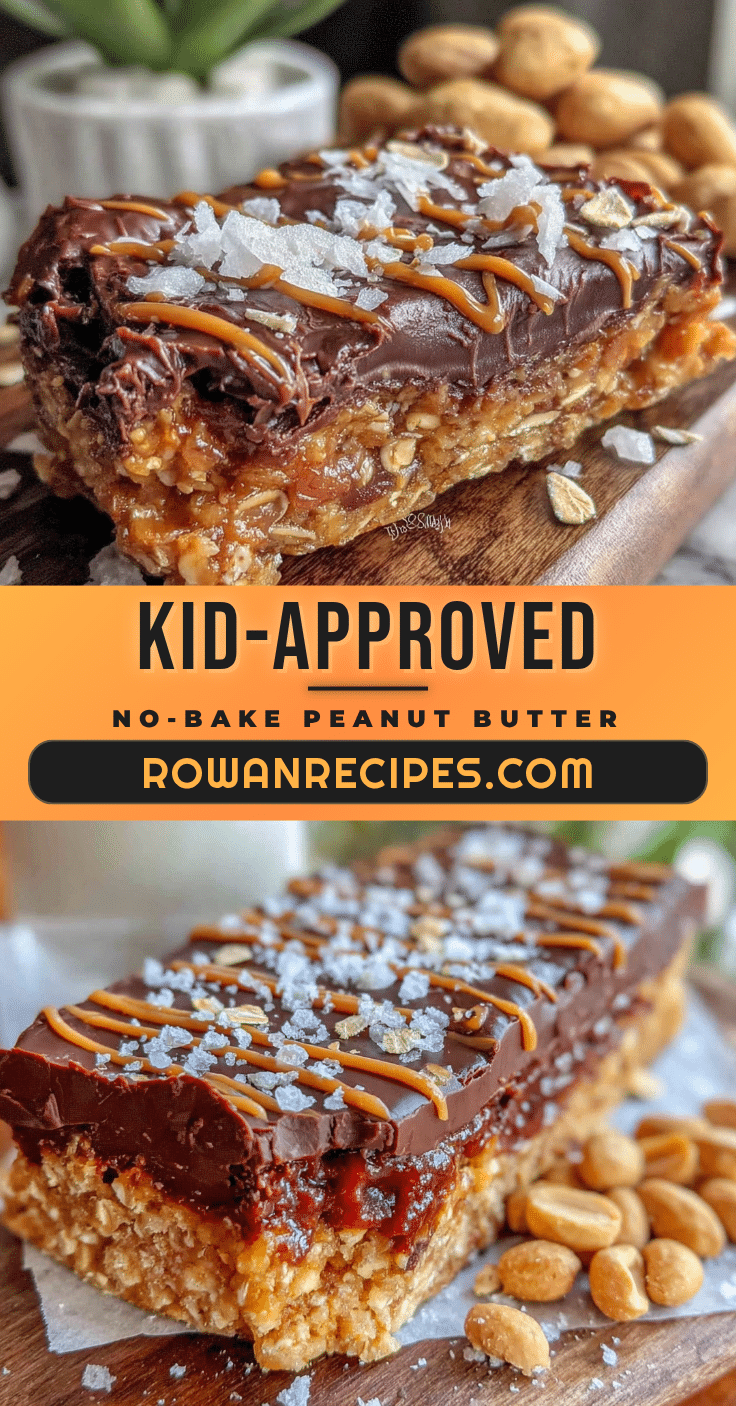
Easy No-Bake Peanut Butter Chocolate Oat Bars
These easy no-bake peanut butter chocolate oat bars are the perfect emergency dessert, afternoon pick-me-up, and crowd-pleaser. Made with simple pantry ingredients, they’re chewy, rich, and incredibly satisfying without turning on the oven.
- Prep Time: 15 minutes
- Cook Time: 0 minutes
- Total Time: 2 hours 15 minutes (includes chilling)
- Yield: 16 bars 1x
- Category: Dessert
- Cuisine: American
Ingredients
- 2 cups (180g) rolled oats (old-fashioned)
- 1 cup (240g) creamy peanut butter (e.g., Skippy or Jif)
- ¼ cup (56g) unsalted butter
- ½ cup (100g) packed brown sugar (light or dark)
- ¼ cup (60ml) honey or maple syrup
- 1 teaspoon vanilla extract
- ¼ teaspoon salt
- 1 cup (175g) semi-sweet chocolate chips (e.g., Ghirardelli 60% cacao)
- 1 tablespoon (15ml) coconut oil or vegetable oil
Instructions
- Line an 8×8-inch baking pan with parchment paper, leaving a 2-inch overhang on two opposite sides. Set aside.
- In a medium saucepan over low heat, combine peanut butter, butter, brown sugar, and honey. Stir constantly until melted and smooth, about 3–4 minutes. Do not let it boil.
- Remove from heat. Stir in vanilla extract and salt until combined.
- Pour the warm peanut butter mixture over the rolled oats in a large mixing bowl. Stir until every oat is coated and no dry spots remain.
- Transfer the oat mixture to the prepared pan. Press down firmly and evenly using a spatula or the bottom of a measuring cup to compact it.
- In a small microwave-safe bowl, combine chocolate chips and coconut oil. Microwave in 30-second intervals, stirring between each, until smooth and fully melted (about 1–2 minutes total).
- Pour the melted chocolate over the pressed oat layer. Spread evenly to the edges with a spatula.
- Refrigerate the pan, uncovered, for at least 2 hours, or preferably 3–4 hours or overnight, until fully firm.
- Lift the bars out of the pan using the parchment overhang. Place on a cutting board and cut into squares or rectangles with a sharp knife. For clean cuts, wipe the knife clean between slices.
Notes
Press the oat mixture firmly to prevent crumbling. Chill overnight for the best texture. Use a hot knife for clean cuts. Store in the refrigerator for up to 1 week or freeze for up to 3 months.
Nutrition
- Serving Size: 1 bar
- Calories: 220
- Sugar: 14
- Sodium: 95
- Fat: 13
- Saturated Fat: 5
- Carbohydrates: 24
- Fiber: 3
- Protein: 6
Keywords: no-bake, peanut butter, chocolate, oat bars, easy dessert, no oven, snack, potluck, gluten-free option, vegan option